Let There Be Light!
Nelson Moyer returns with another summary of his layout design and build. This time out, he presents some great info on layout lighting. Here’s Nelson with his update. Click on any image here to review a larger size.
Part of growing older is visual impairment, and at seventy-four “my eyes grow dim, I cannot see.” Even with my specs. Layout lighting is important to me because I need see in order to lay and wire track, add scenery, structures and details, and to be able to read car numbers if I’m going to operate. It would also be nice to see all the numerical data and chalk marks on my freight cars, since I went to great pains to put them there. The question was, how would I light the layout?
Once again, I turned to the model railroad literature for answers and inspiration. This time, I was researching lighting methods. To my chagrin, there were as many opinions about lighting as there were model railroaders. How was I going to decide between incandescent bulbs, fluorescent tubes, compact fluorescent bulbs, and LEDs? How many would I need? What color temperature should I choose? How would I wire it all together and control it?
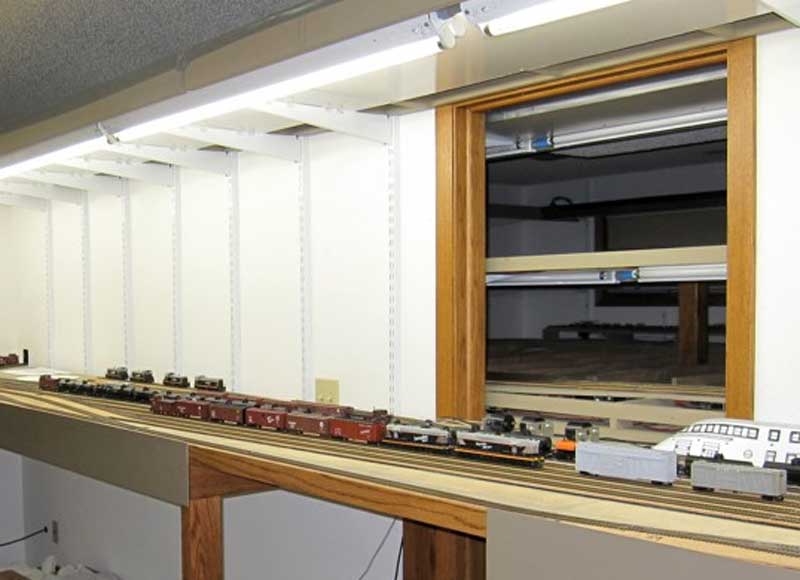
My preferences started to take shape when I decided to use track lighting with LED bulbs for the Chicago staging yard. This large yard runs across the wide basement window of the family room, and esthetics dictated that I could not build a lighting grid and valance over that part of the layout.

The lighting for the 18-foot Chicago staging yard is provided by seven PAR30, 5000 K bulbs evenly spaced in two 8-foot tracks. The Portfolio line offers track lighting fixtures and accessories for both PAR20 and PAR30 LED lamps. The fixture prices are within a couple of dollars per unit, so there is no significant monetary advantage in choosing PAR20 over PAR30 lamps. The CRI is not given on the LED packaging, nor could I find it online.
The family room has two double bulb ceiling fixtures and two ceiling accent lights. I left these in place, and installed 5,000K CFL bulbs in the ceiling fixtures and PAR30 LED lamps in the accent lights above the fireplace.
I wired the track lights to one of the ceiling fixtures by fishing wire above the ceiling from the track to a ceiling outlet box, and the Burlington yard lights were fished to the other ceiling outlet box. This allowed me to control all of the family room lights, including the Chicago staging and Burlington yard lights from a single wall switch.
The most cost effective and practical means of lighting the rest of the layout seemed to be with fluorescent tubes, since they are available in various lengths from 18- to 48-inch, the lengths of most interest to me. Strip light fixtures are relatively inexpensive, and they are available is both single and double tube styles. I choose T-8 fixtures from Lithonia, available from the local Menards store at sale prices.
The next decision involved tube specifications. Artificial light has much less intensity than sunlight, so color is perceived differently. Models look darker under artificial light, and matching prototype paint chips may result in loss of visual detail. Among light specifications, color rendering index (CRI) and color temperature (K for Kelvin) are the two most important parameters affecting color perception. CRI is a measure of how accurately color is rendered, and a value above 80 is preferable, while true color values are greater than 95. Color temperature is a measure of how ‘warm’ or ‘cool’ the light is relative to sunlight, which averages around 5,000 K. While many modelers use 4,100 K lighting, and some use even lower values, I wanted to simulate the Northern sky in Iowa in early Fall, so I chose 5,000 K tubes. Another parameter of interest was light intensity or the output of tubes measured in lumens. I made a specification chart of various 5,000 K tubes to get the best combination of CRI and lumens vs. price per tube.
T-8 Fluorescent Tubes
All of the products in this table have a 5000K color temperature rating and a medium bi-pin (G-13) base.
| Brand | Model # | Watts | CRI | Length | Lumens | Price | In Use |
|---|---|---|---|---|---|---|---|
| Sylvania | 22026 | 32 | 85 | 48 | 2850 | $7.09 | |
| GE | 89069 | 32 | 86 | 48 | 2800 | $4.49 | YES |
| Phillips | 20905-6 | 32 | 98 | 48 | 1860 | $7.27 | |
| Sylvania | 22359 | 32 | 90 | 48 | 1800 | $8.99 | |
| GE | 72139 | 22 | 85 | 36 | 1900 | $7.99 | |
| GE | 10416 | 25 | 86 | 36 | 2050 | $6.59 | YES |
| Sylvania | 22193 | 17 | 85 | 24 | 1375 | $7.09 | |
| Phillips | 141234 | 17 | 85 | 24 | 1300 | $7.99 | |
| Phillips | 145557 | 17 | 85 | 24 | 1300 | $8.79 | |
| GE | 10415 | 17 | 85 | 24 | 1300 | $6.99 | |
| USHIO | 3000262 | 17 | 86 | 24 | 1400 | $1.65 | YES |
| Phillips | 392290 | 15 | 92 | 18 | 590 | $9.97 | |
| GE | 13968 | 15 | 90 | 18 | 620 | $6.99 | YES |
The last column indicates the tubes I used to light the layout. Most are sold in big box stores as GE Closet and Laundry tubes, and I ordered a case of the USHIO tubes online because the GE tubes were overpriced.
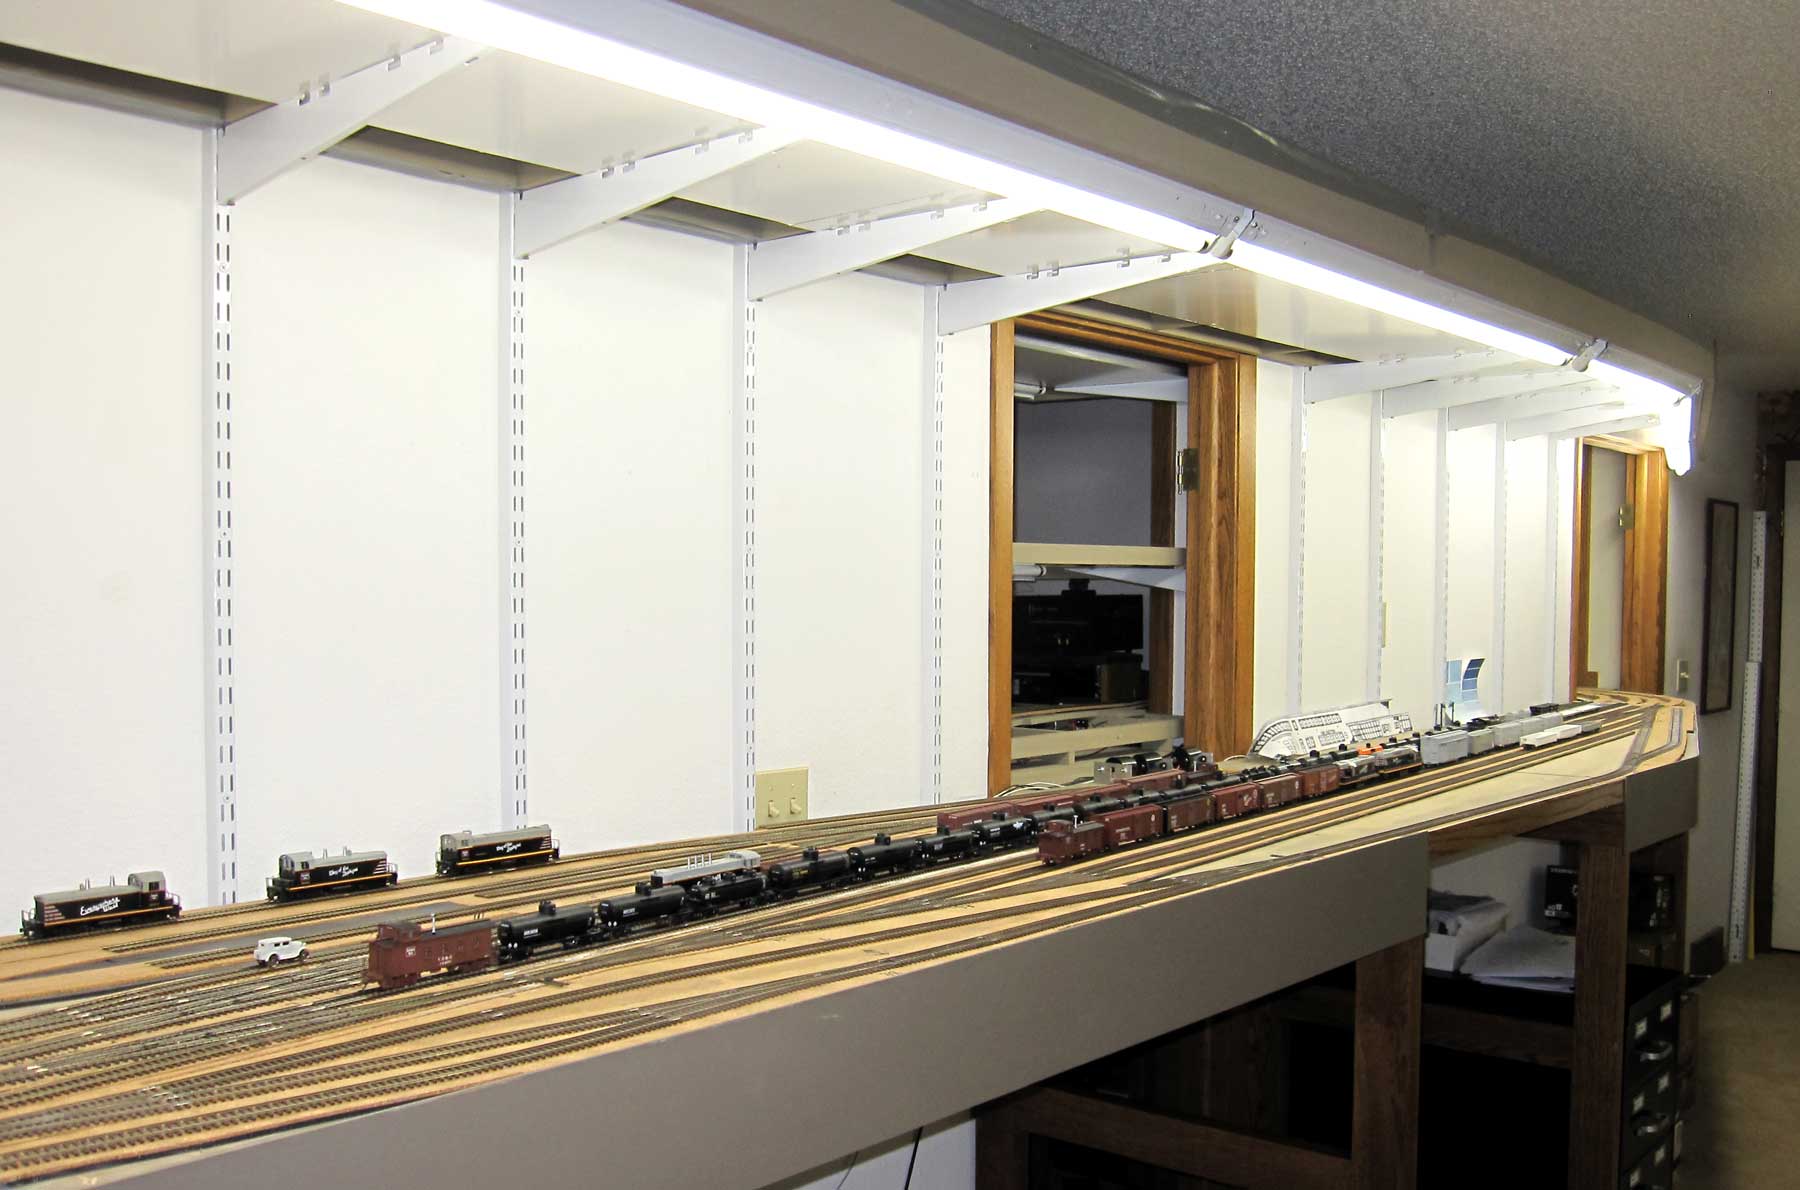
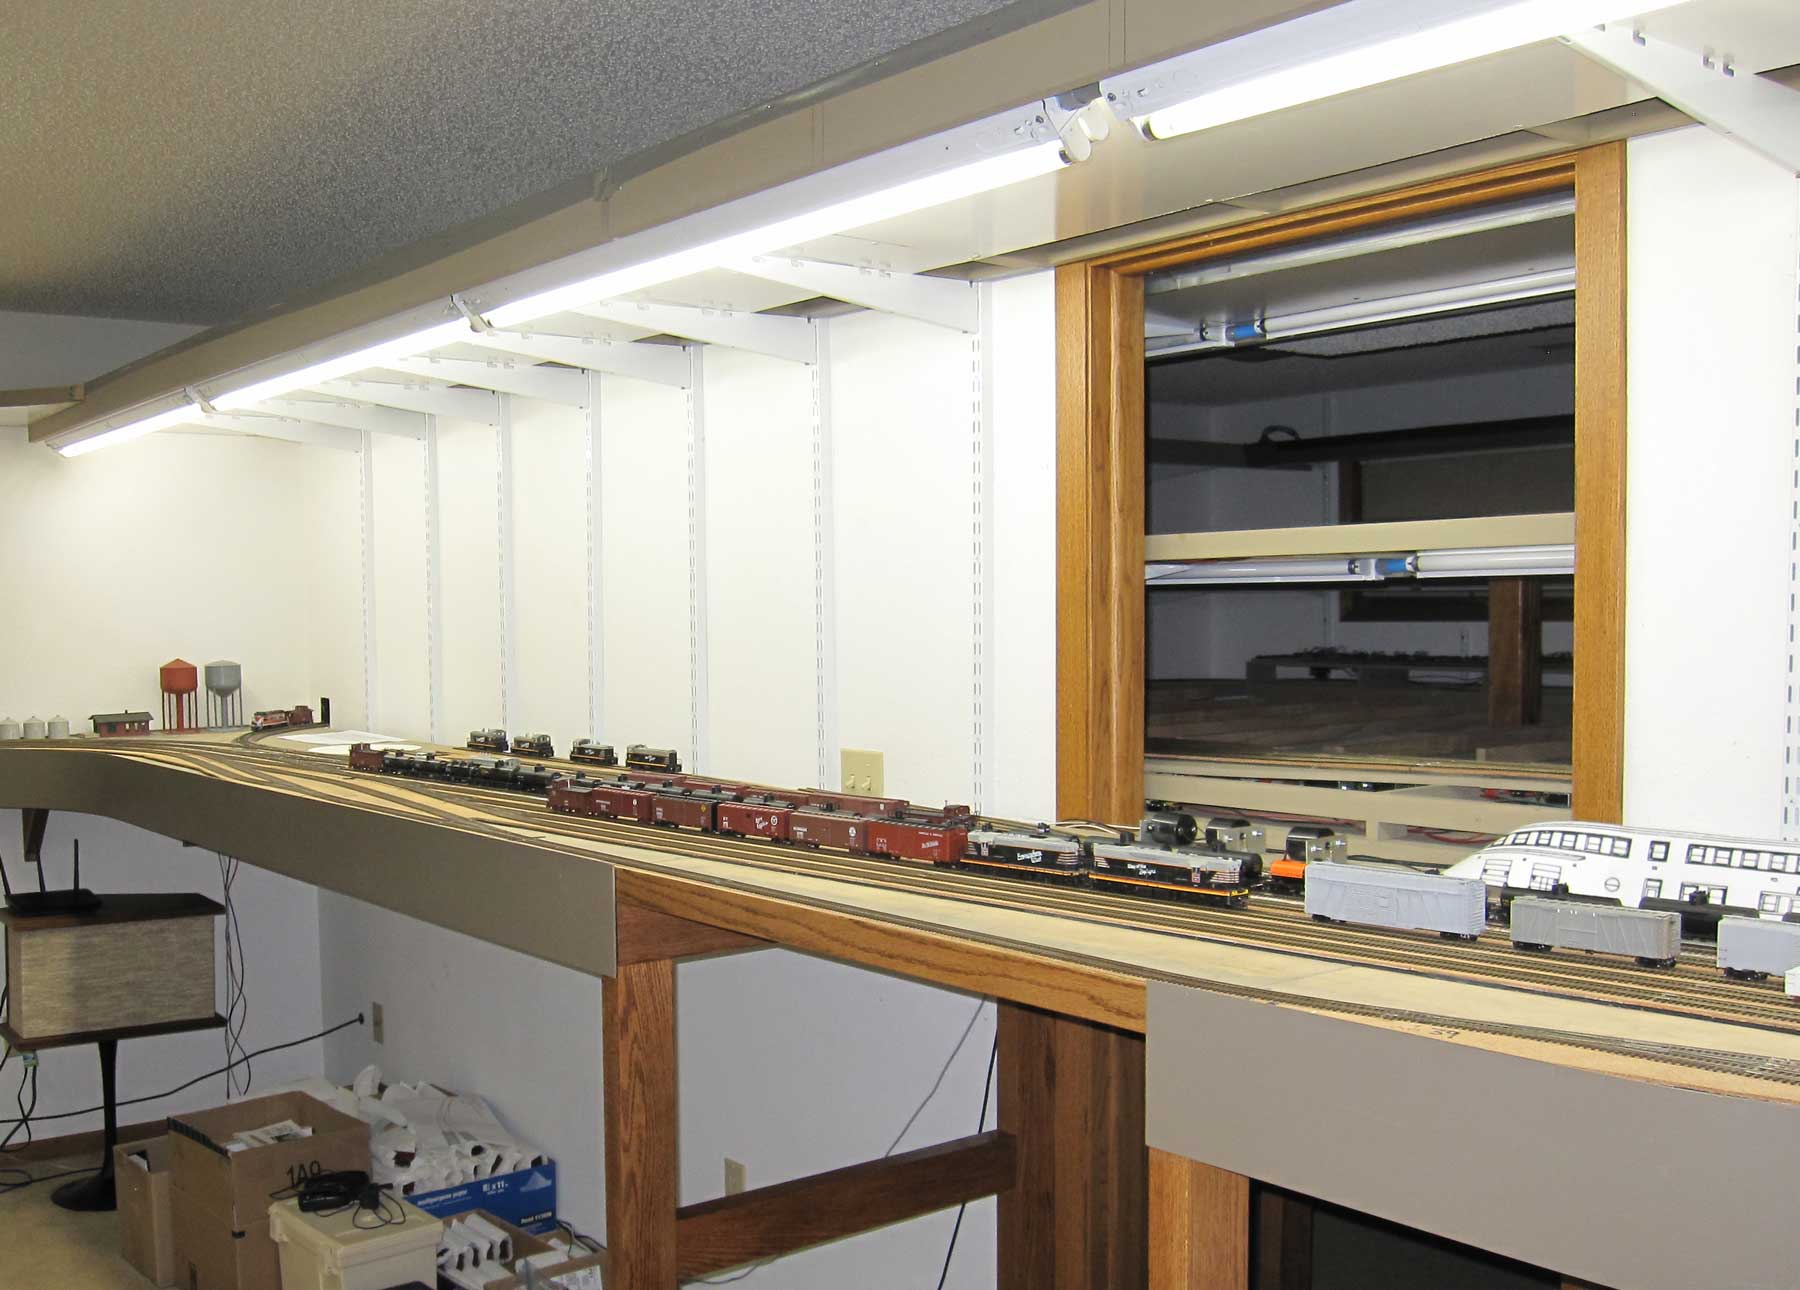
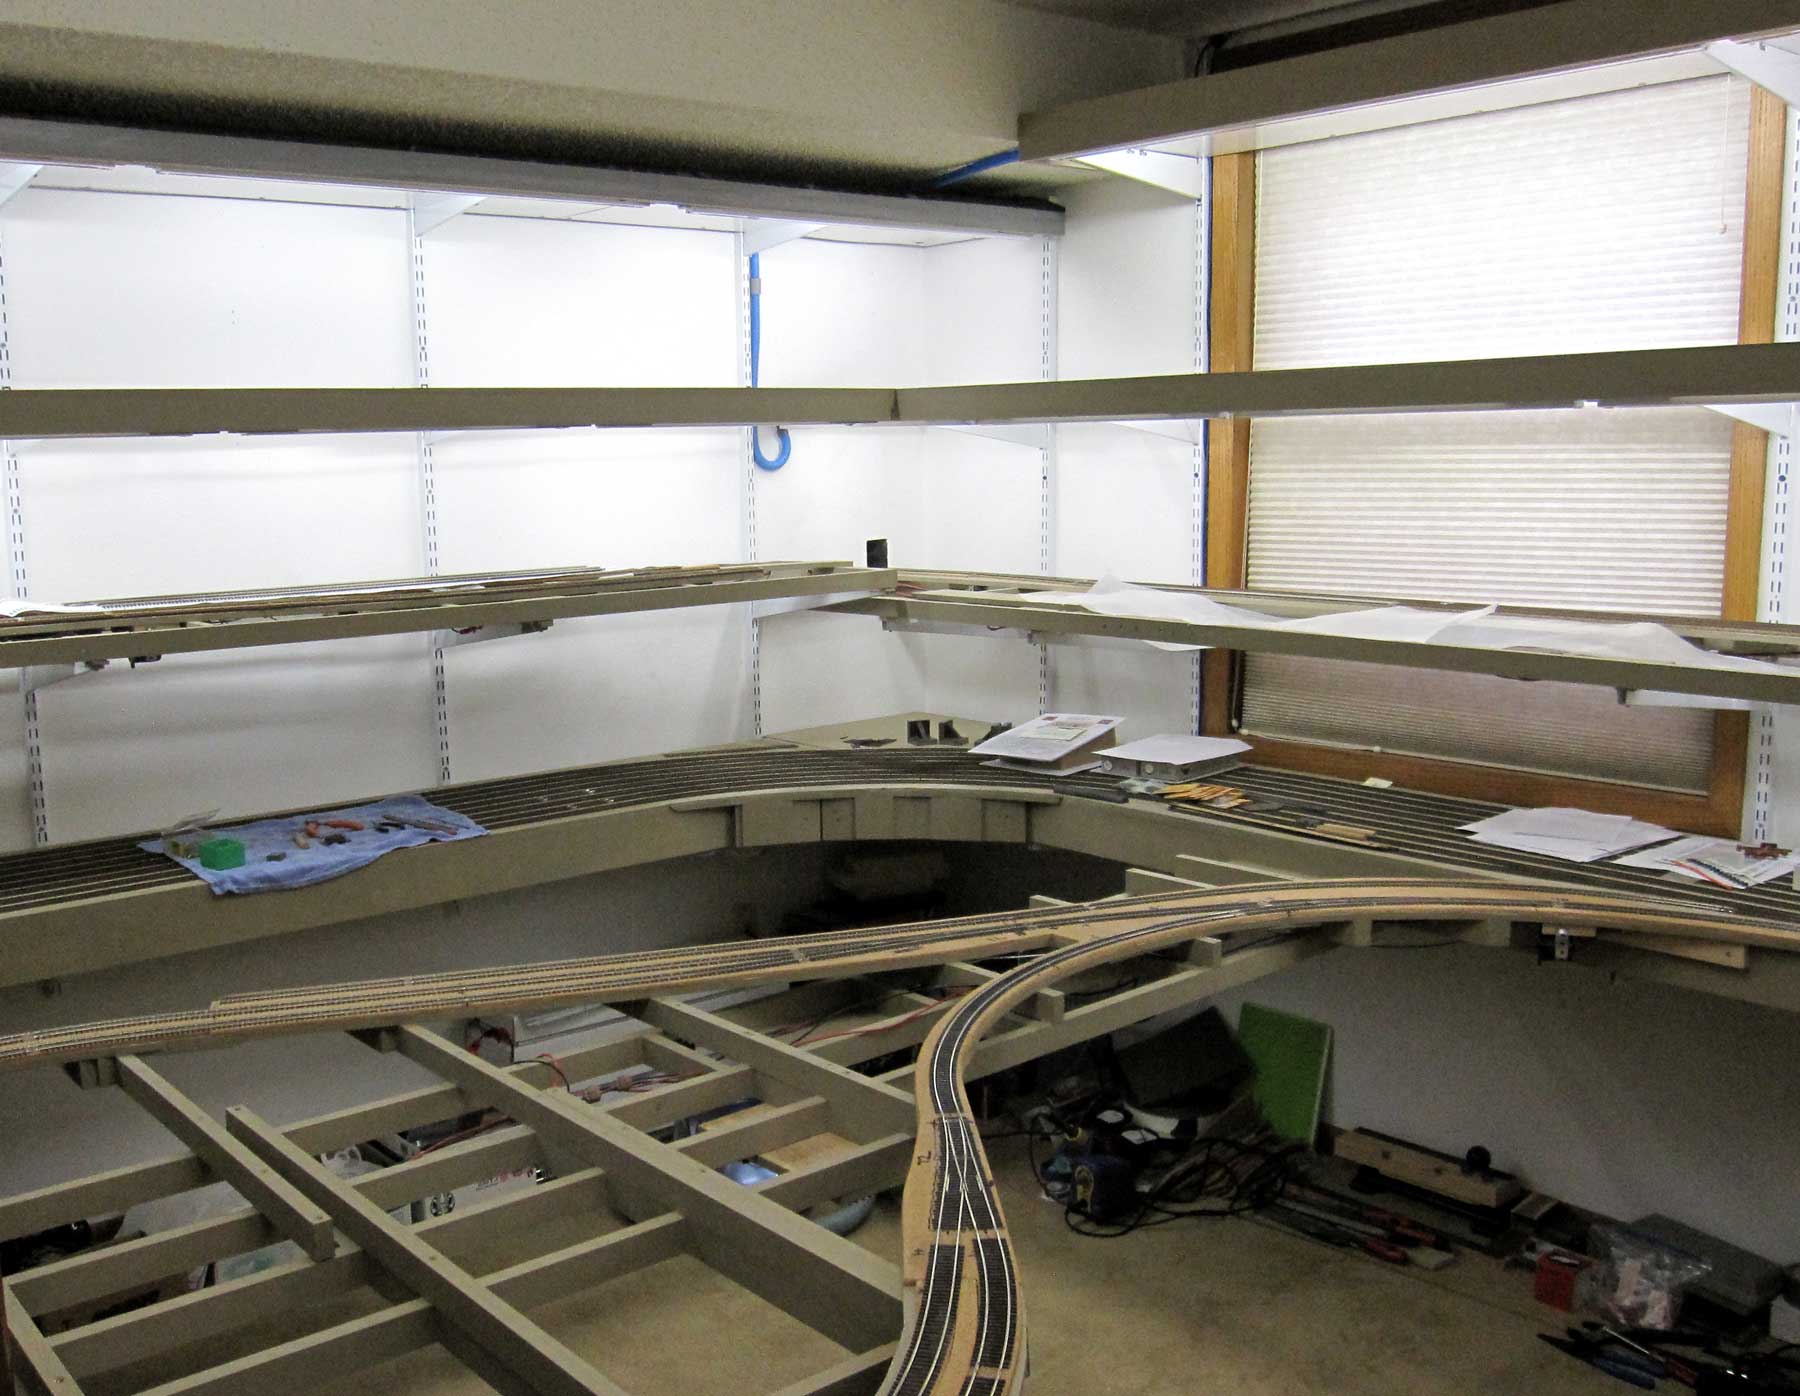
Because the distance from the light to the layout surface is 29-inches at the front and 32-inches at the back of the Burlington yard, I chose double T-8 fluorescent tube fixtures to light Burlington.
The valance is 22-feet, 8-inches long. Five 4-foot fixtures, a 2-footer, and one 18-inch fixture are required because of the shape of the layout. The arrangement of fixtures is shown below.
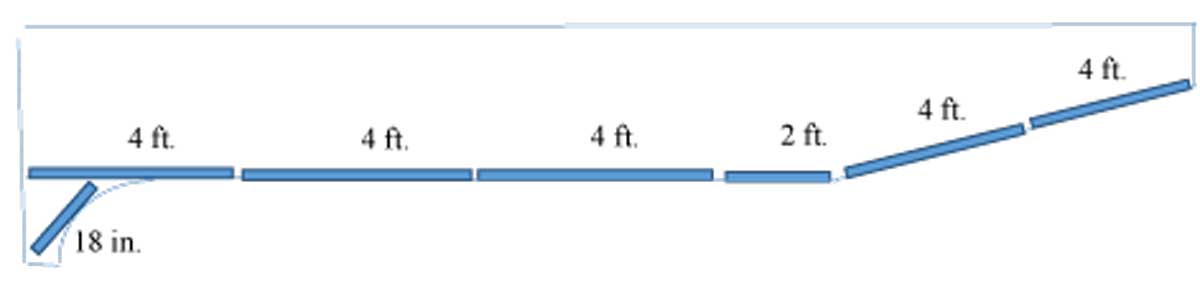
The fixtures are mounted approximately 2-inches from the ends of the valance, and the space between fixtures varies from 2- to 4-inches. I mounted each fixture on two ¾ x 1.75 x 1.75 x 2.5 inch wood triangles so the take-off angle would face toward the backdrop at 45°.
No additional lighting beyond the ceiling light in the laundry room and the vanity lights in the bathroom was deemed necessary. The incandescent bulbs in these had been switched to CFL bulbs previously.
No provision has been made for lighting the Denver yard, since ambient room light is sufficient for staging. If lights are needed, LED strings are a possibility, since staging doesn’t require the same level of light intensity as areas of the layout with scenery.
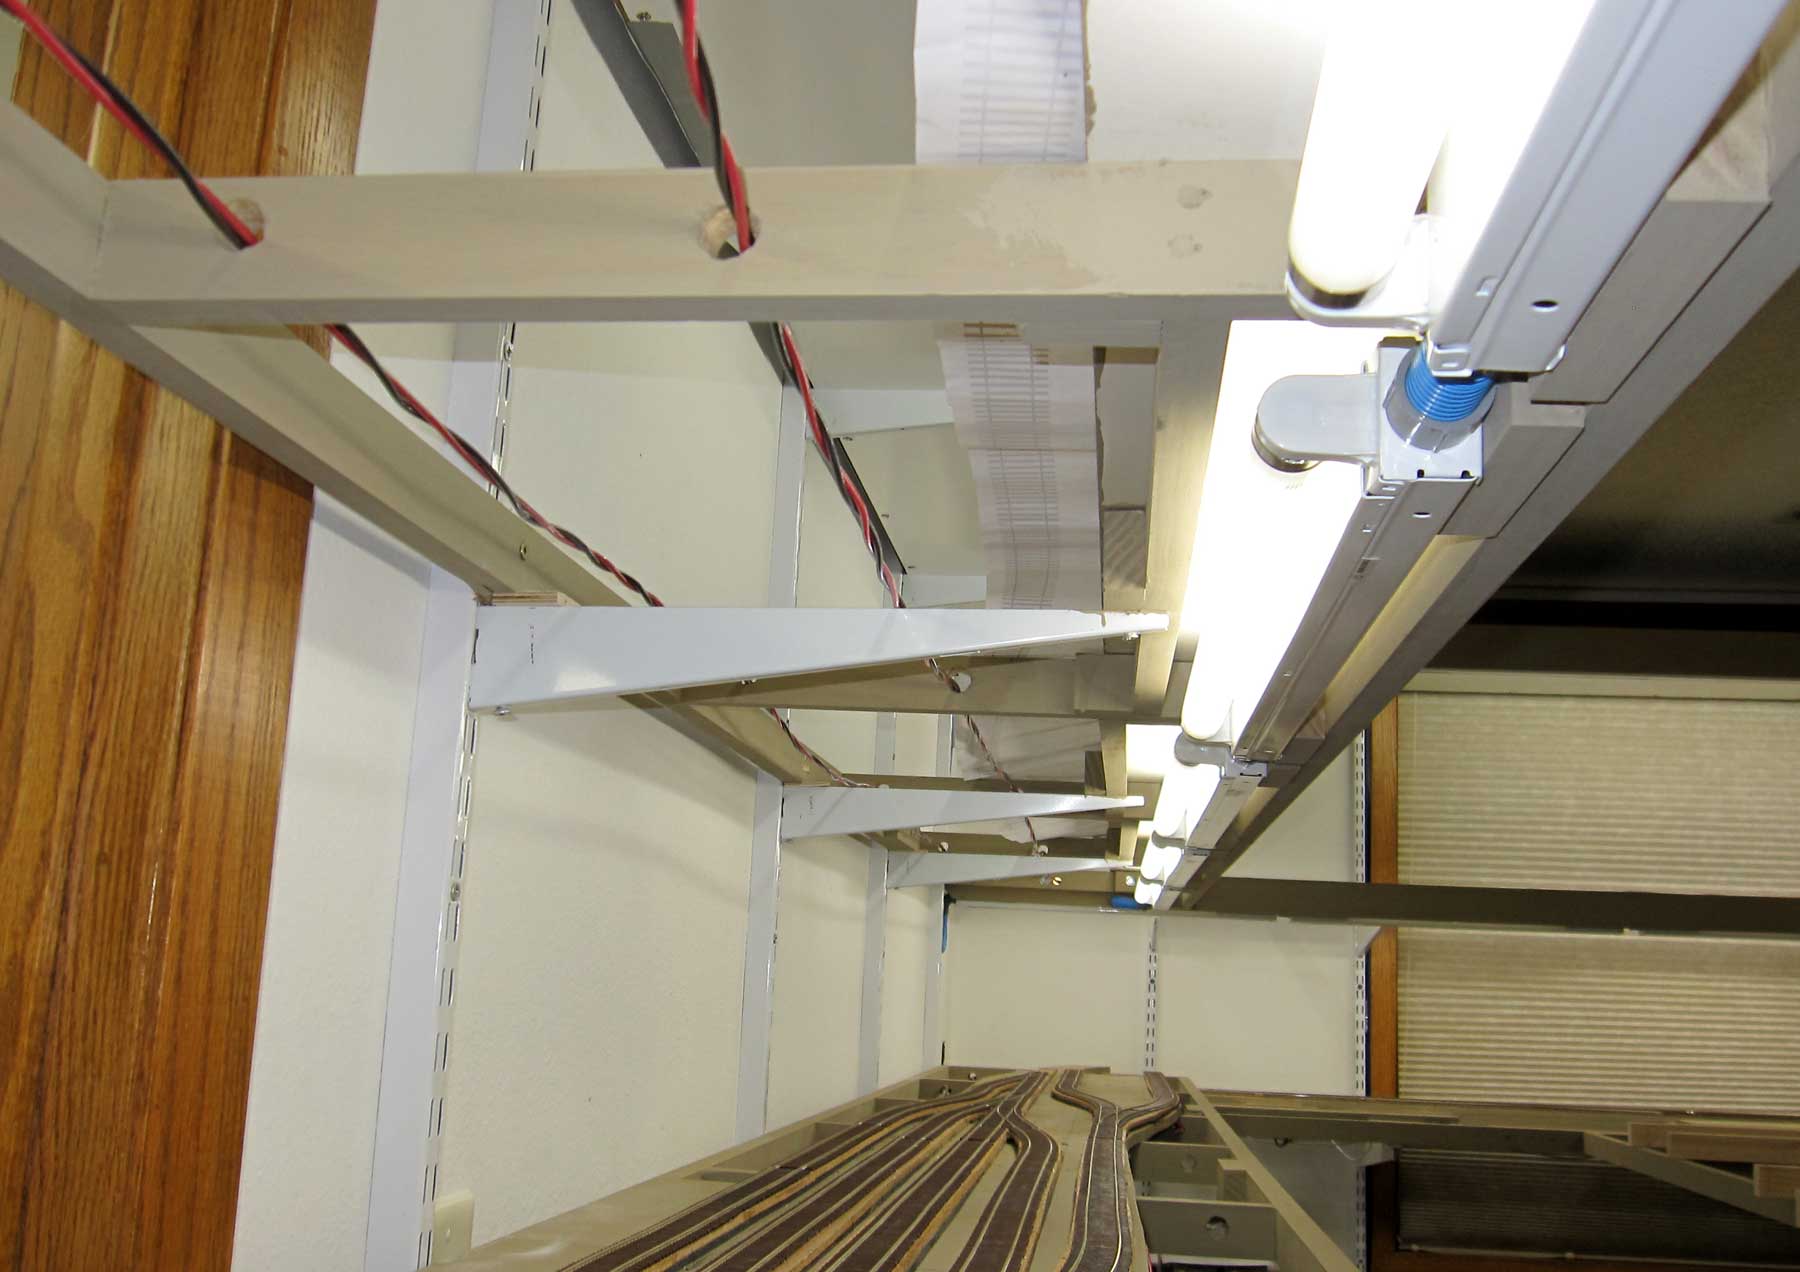
Level 1 of the branch line is lighted with strip lights mounted under the level 2 grid. The distance between lights and level 1 track on the branch line is approximately 12- to 14-inches. Single T-8 fixture housings measure 1 ¼ x 1 ¾ x 24 inches. This allowed the fixtures to fit between grid cross braces, and the fascia for level 1 could be as narrow as 4-inches

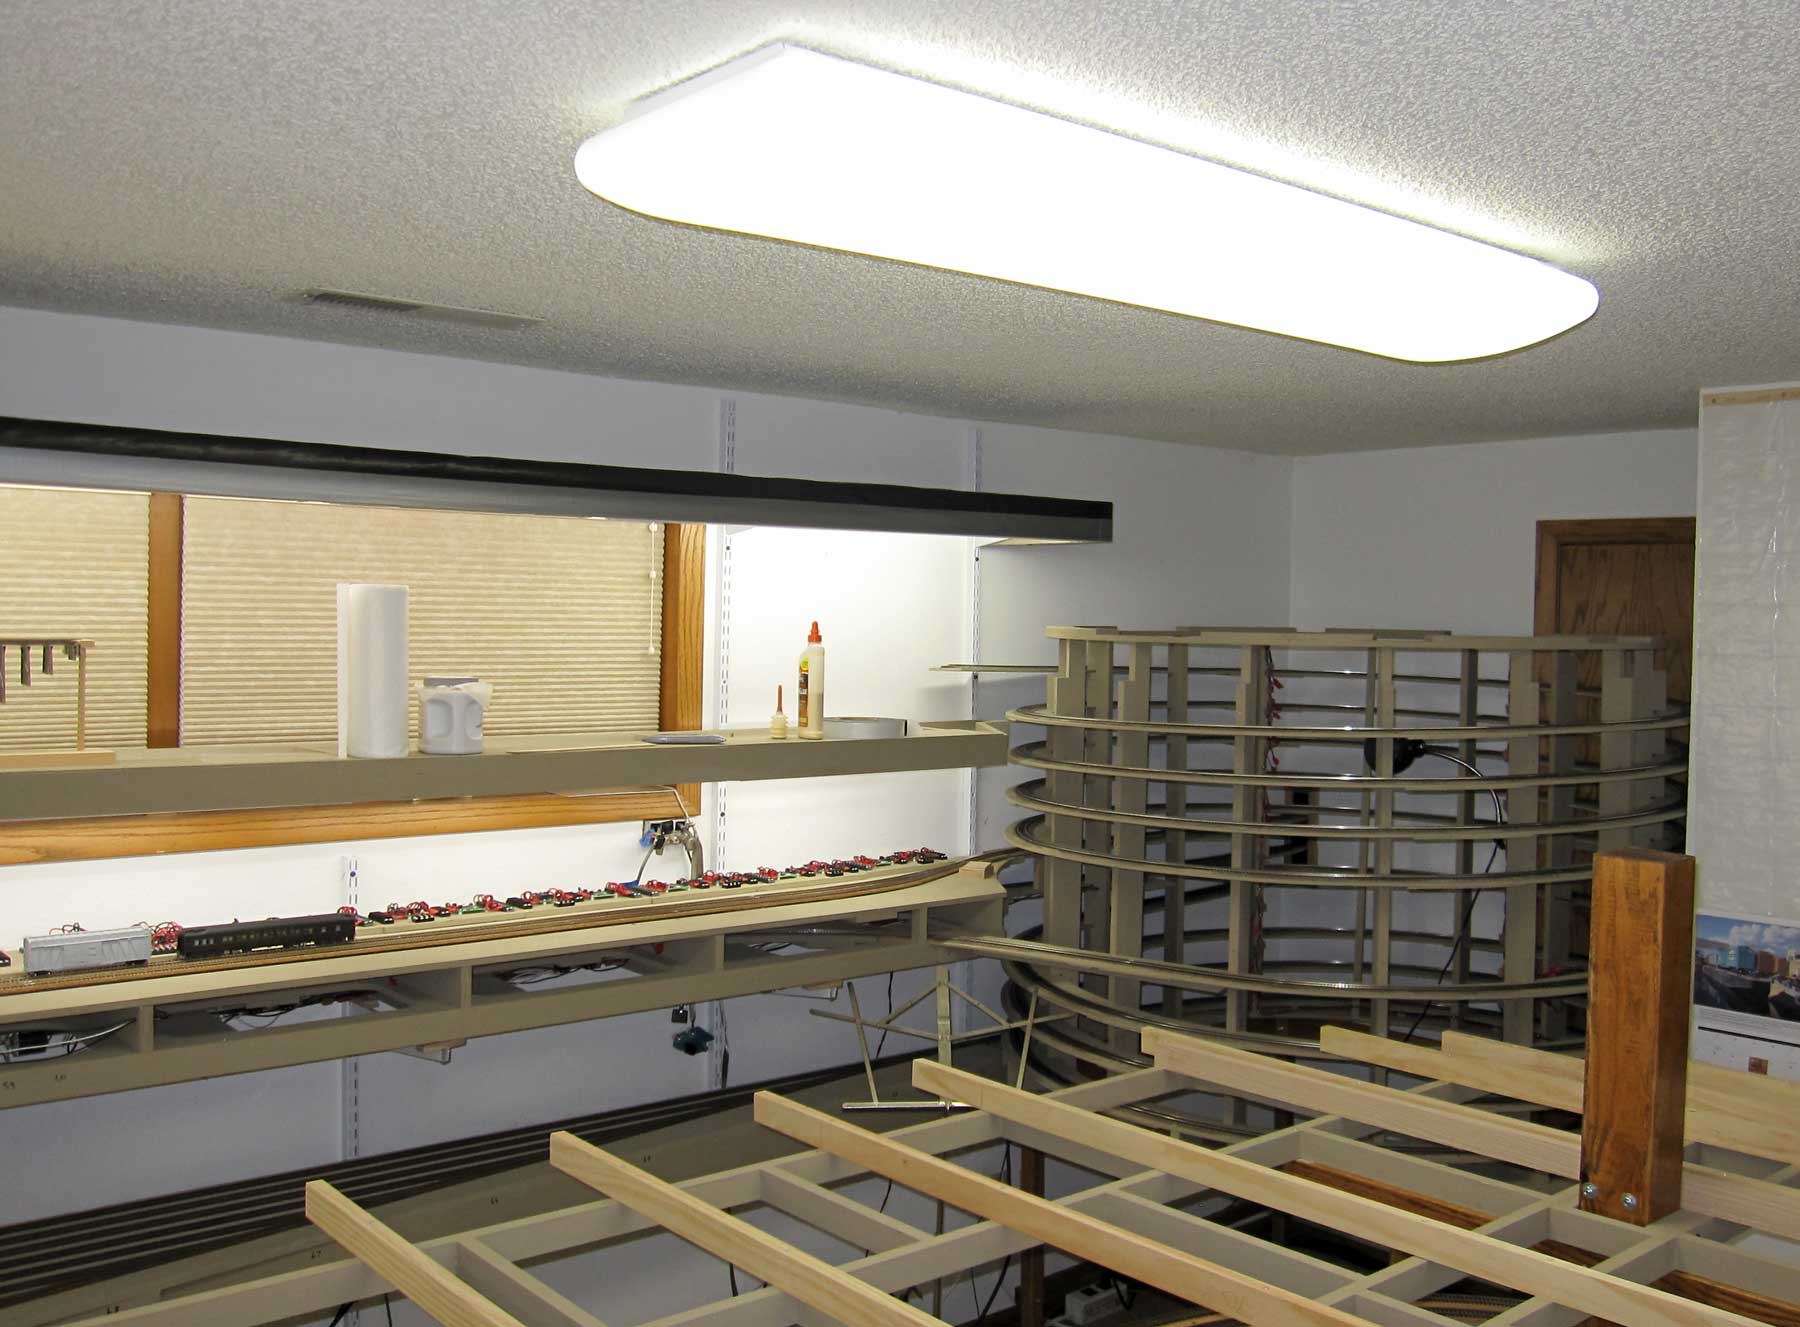
The level 1 peninsula above the Denver reverse loop will be lighted using strip lights beneath the level 2 peninsula. The top of the level peninsula is Washington, and it is lighted by the cloud light mounted on the existing ceiling light fixture. This fixture has four 4-foot, T8, 5,000 K fluorescent tubes.
T-8 tubes with a color temperature of 5000K are available in 18, 24, 36, and 48-inch lengths. The output in lumens for 18-inch tubes is 620 lumens. 24-inch tubes provide 1,400 lumens. 36-inch tubes provide 2,050 lumens, and 48-inch tubes provide 2,800 lumens. The differences in output does not result in gradations of light intensity when tubes of various lengths are placed end to end because the longer the length, the greater the output, but the linear output remains relatively constant along the length of the tubes.
Fixtures are mounted under the level 2 grids. Provision had to be made for mounting them so that the fixtures don’t extend below the fascia, while keeping the fascia as thin as possible. The fixture dimensions are 1 1/4-inches high (housing only, total height with tube is 2 5/8-inches), 1 ¾-inches wide, and 24 3/8-inches long. The minimum measured clearance of 2 3/8-inches was extended to 2 ¾-inches to insure clearance for the shelf brackets.

Spacers are 3-inch lengths of 1 x 2. The fascia extends ¼-inch above and below the front edge of the benchwork. Shelf brackets were shortened to match the cross members by sawing off the unwanted part using a metal cutting wheel in a miter saw. Lighting consists of one 18-inch, seventeen 24-inch, one 36-inch, and two 48-inch fixtures. The fixture placement is shown below. The drawings are not to scale.

Level 2 is lighted by building a valance grid following the footprint of the level 1 grids, exclusive of the peninsula. Lighting consists of two 18-inch, four 36-inch, and four 48-inch fixtures.

Washington is located on the level 2 peninsula, and it is lighted using a four 4-foot tubes in a cloud light mounted on the ceiling electrical box.
Power is calculated by the formula P = VI, where Power is Watts, V is volts, and I is amps. The total amperage for a single circuit breaker was calculated to be less than 8 A per room.
Chicago and Burlington lighting
| Fixtures | Bulbs | Number of Bulbs | Cumulative Watts | Amps |
|---|---|---|---|---|
| Ceiling Lights | 23 Watt | 4 | 92 | 0.84 |
| Accent Lights | 10 Watt | 2 | 20 | 0.18 |
| Track Lights | 15 Watt | 7 | 105 | 0.95 |
| Fluorescent Lights | 32 Watt | 8 | 256 | 2.33 |
| Fluorescent Lights | 17 Watt | 2 | 34 | 0.31 |
| Fluorescent Lights | 15 Watt | 1 | 15 | 0.14 |
| Totals | 522 | 4.75 |
Branchline lighting
| Fixtures | Bulbs | Number of Bulbs | Cumulative Watts | Amps |
|---|---|---|---|---|
| Cloud Light | 32 Watt | 4 | 128 | 1.16 |
| Level 1 | 32 Watt | 2 | 64 | 0.58 |
| Level 1 | 25 Watt | 1 | 25 | 0.23 |
| Level 1 | 17 Watt | 17 | 289 | 2.63 |
| Level 1 | 15 Watt | 1 | 15 | 0.14 |
| Level 2 | 32 Watt | 4 | 128 | 1.16 |
| Level 2 | 25 Watt | 4 | 100 | 0.91 |
| Level 2 | 15 Watt | 2 | 30 | 0.27 |
| Total | 794 | 7.08 |
The following existing light fixtures were added to the totals above.
| Fixtures | Bulbs | Number of Bulbs | Cumulative Watts | Amps |
|---|---|---|---|---|
| Hall | 23 Watts | 1 | 23 | 0.21 |
| Laundry Room | 23 Watts | 1 | 23 | 0.21 |
| Bathroom | 23 Watts | 4 | 92 | 0.84 |
| Total | 138 | 1.26 |
The total load on the breaker is 1454 Watts with a resulting 13.2 amps. The fixtures were wired together in series, then connected to 12 AWG house wiring so that the wall switch in the layout room controlled branch line lights.
The Burlington valance needs to extend above the grid as well as below the grid. The valance will be installed after the basic scenery is finished. The valance will be adjusted so that the tubes aren’t visible to operators standing in the aisles. To determine the position of the Burlington valance, I cut and marked a piece of hardboard for tests. Some of my operators are taller than I am, so I had to strike a balance between hiding the lights and keeping them from bumping their heads. The final dimension will be 6-inches below the lower edge of the grid.

The branch line valances will be slightly wider than the grids, just enough to hide the light fixtures. There are no lights under the Denver or level 1 grids, so the fascia is 5 ¾-inches high. The fascia on level two is 3 ½-inches high. The height of the branch line lighting valance will be determined after the backdrop has been installed.
Next time I’ll talk about the duckunders and liftouts.
Thank you, Nelson, for sharing your experiences with layout lighting. This is an unknown area for many model railroaders. I learned a thing or two as this post was reviewed and edited. Here are links to Nelson’s previous layout posts.
- Layout Design with Nelson Moyer – Part 1
- Overcoming Adversity – Part 2
- Roadbed and Track – Part 3
- Layout Wiring – Part 4
We will continue with more progress in upcoming blog posts.
Questions and comments can be posted below. Please follow the instructions so your comment can be posted. All comments are reviewed and approved before they appear. To subscribe to this blog, enter your info for a comment and check the last box to notify of new posts by email. Share the blog link with other model railroaders.
As stated, I looked at all of the available options for lighting, and fluorescents were the best choice for me at this time. LEDs may not be available with the color temperature and CRI I require, my track light LEDs for example. Fluorescent tubes will be phased out long before fading could become an issue, and I plan to use static grass, with very little ground foam. A local friend has lighted his layout with fluorescent tubes for over 30 years without fading or foam deterioration issue, and at 74, I probably won’t last another 30 years. As T-8 tubes are phased out and affordable LED replacements become available, I’ll consider switching to LEDs. Meanwhile, I can cover the tubes with library sleeves to filter UV if it becomes necessary to do so. As for heat, my layout is in an Iowa basement, and a little warmth in the winter is a good thing. Even in summer, the lights only raise room temperature a few degrees over three to four hours. Overall, I’m very happy with my choice of lighting.
I established the height of the valance at the North Shore Model Railroad Club by clamping up strips of Masonite, lowering them every week by a half inch until somebody said “What the #@$(* is this thing , anyway?” I knew it was too low at that point and we moved it back up an inch. Since then, we’ve had several TALL members join, and they complain about hitting their heads on it.
Now, I would make the valance from heavy cloth with a ladder chain sewn into the bottom hem. It would hang straight (assuming the top edge is secured continuously, perhaps with Velcro) and simply give when someone’s head struck it.
Very nicely done article. I use CFLs which gives me the light I need at a reasonable cost. They come in various kelvin ratings, and don’t seem to cause fading like some fluorescent tube lighting do. In the future, I may change over to LEDs as the price keeps dropping.
Why anyone would continue using fluorescent tubes to light their layout is beyond me. LED ribbon lights provide the highest quality light a modeler could want, and besides the quality and the features we need (no heat) . . . they are unbelievably cheap and easy to install.
I have always loved trains.
Thanks very much for posting this.
I feel that it will be of great interest to many people are model builders.
Thanks
Another consideration when using florescent lamps is the Ultra- violet (UV ) content of the light. This will affect the fading of scenery materials. Materials such as ground foam will also deteriorate under UV. A thin plastic tube will eliminate most of this. These are often found near the lamps or in a Google search. You will appreciate not having to replace ground foam and other painted surfaces later.
Michael