Category Archives: Scratchbuilding

Another CNJ automobile box car

I received this photo and the description below on the day of the previous RCW blog post.

Eric:
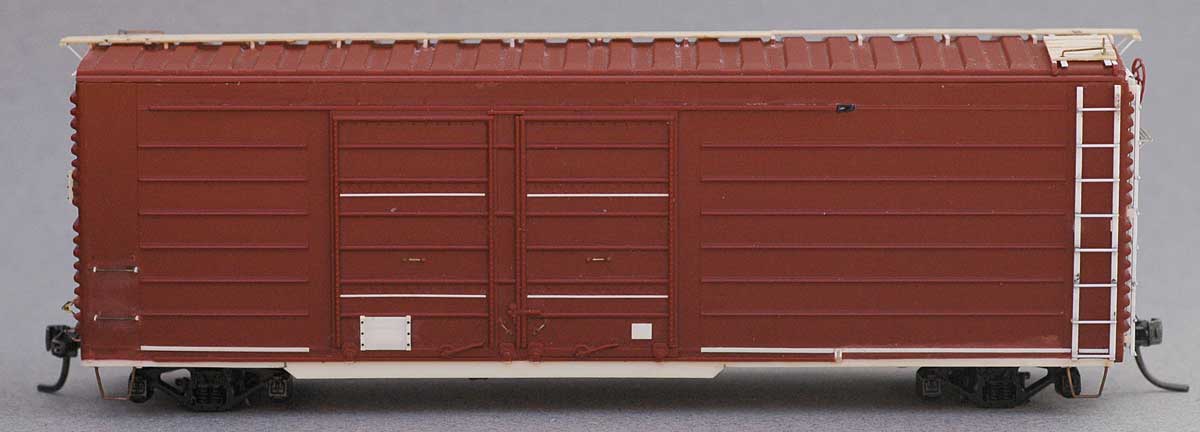
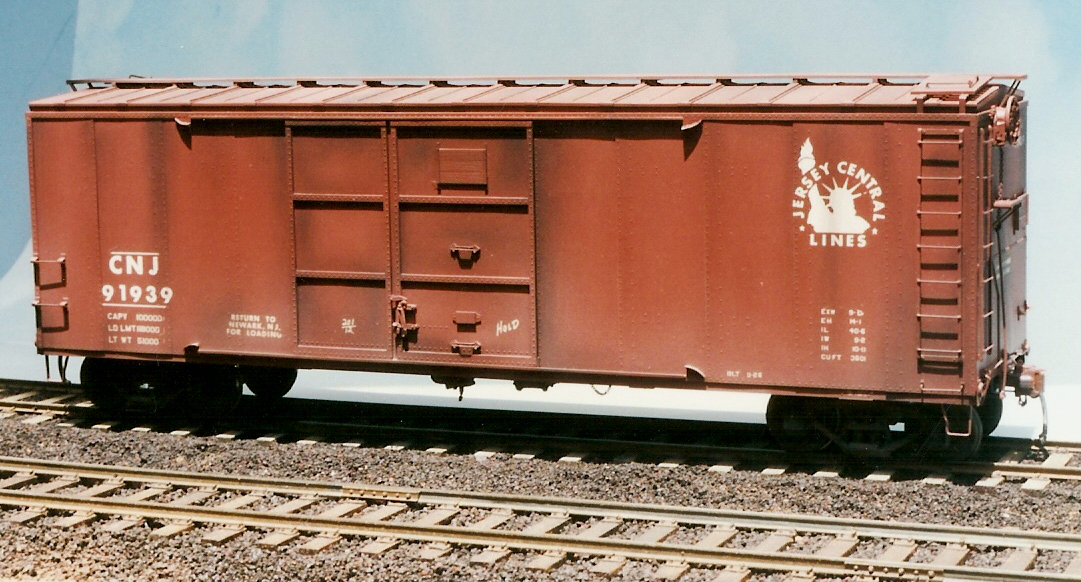
I looked at the RCW blog post and it reminded me of a model that I built in the 1970s. I used styrene as the primary material and impressed all of the rivets using an old converted sewing machine. This was one of my earliest attempts at building a 1/4″ scale freight car using styrene. The model was equipped with trucks converted to 1/4″ AAR (Proto48) standards. The lettering was from an old C-D-S dry transfer set.

Sadly this one picture is the only memory I have of the model.  

Gene Deimling


Take another close look at the model and reread Gene’s note and let it soak in. Gene shares more O scale modeling on his blog. Several of his friends also share their fine model work. You should visit and explore his blog. I suspect the O scale modeling there will inspire you to move another project forward. Many thanks to Gene Deimling for sharing his photo and notes!

Happy New Year from the Resin Car Works minions!


Subscribe to the Resin Car Works blog so you don’t miss a new model announcement. Add your email address to the Subscribe function at the bottom of the page.

Questions and comments can be posted below. Please follow the instructions so your comment can be posted. All comments are reviewed and approved before they appear. Share the blog link with other model railroaders.

A scrap-box project – Bunker C unloading rack

SP tank car heaters at Dunsmuir. Southern Pacific photo, courtesy of Tony Thompson

Pete Hall sent an interesting modeling project. Here’s his story.

Many railroads used coal as fuel for their steam engines, but the Southern Pacific did not – they used oil. Oil was plentiful in early California, and refiners were only too eager to rid themselves of the stuff at the bottom of the barrel, called Bunker C.

Continue reading A scrap-box project – Bunker C unloading rack

Building boxcar roofs

AC&F image from Westerfield Collection

Resin Car Works blog manager Eric Hansmann has been working on replacement boxcar roofs. Here are his notes.

I model the mid-1920s and have benefited from recent Accurail models of the Fowler boxcar and the 36-foot double-sheathed boxcars. Several have been added to my fleet with detail upgrades but some of the Fowler models need a metal roof to reflect the prototypes. I thought I’d build a few Murphy XLA roofs for the models.

Continue reading Building boxcar roofs

How to Determine Rung Spacing When Scratch Building Ladders


Scratchbuilt ladders upgrade a model on Bill's workbench.
Scratchbuilt ladders upgrade a model on Bill’s workbench.

Bill Welch steps in for a post on a recent technique that moved a project along. Click on any image here to review a larger size. Enjoy his story.

Because so many Steam Era House Cars were not of a standard design, or were ad hoc standard designs, the ladder rung spacing on Box, Auto, and Refrigerator cars would have varied meaning for a modeler that the commercial ladders often available to us are not exactly correct. Having become fanatical about the proper shape of Sill Steps, it was only a matter of time before I became obsessed about ladders. For models I spend a lot of time on I have been scratch-building ladders. Initially and luckily I could do this using an HO scale ruler but then I encountered a situation that required a different way to calculate the rung spacing and was wondering how to do this. I floated an email to members of my Modeling Posse and Pierre Oliver remembered a solution from his High School Drafting class and what he described worked perfectly and is ridiculously easy. Here goes.

ladder_web

First off knowing where the location of the top and bottom ladder rungs and the distance between them is necessary and often there is a feature on the side of the car that helps us determine those two spots. From there we calculate the distance between them. Draw a straight line longer than you need and mark the line with two spots that correspond to the scale distance between the top and bottom ladder rungs. At each of those two spots draw a line at the same angle so that you have two parallel lines. I use 30° because it is easy but the angle really does no matter as long as both angles are the same. Okay, say you need an 8-rung ladder: Using either a compass or a ruler mark off 8 spaces on each parallel line. All marks must be equal distances. Then with a straight edge connect each set of dots or marks and like magic you have positions for each of the other six ladder rungs.

Rung spacing calculator.

The task ended up Easy Peasey with the help of this drawing. The model isn’t quite done, but the ladders are complete and the build moves forward.

MILW_6505_web

Bill Welch