Jerry Hamsmith returns with another installment of the box car group kit build.
The group building this kit (Ed Rethwisch, Bob Hanmer, Allen DeBraal, Jerry Zeman, and myself) now turns to the car body details.
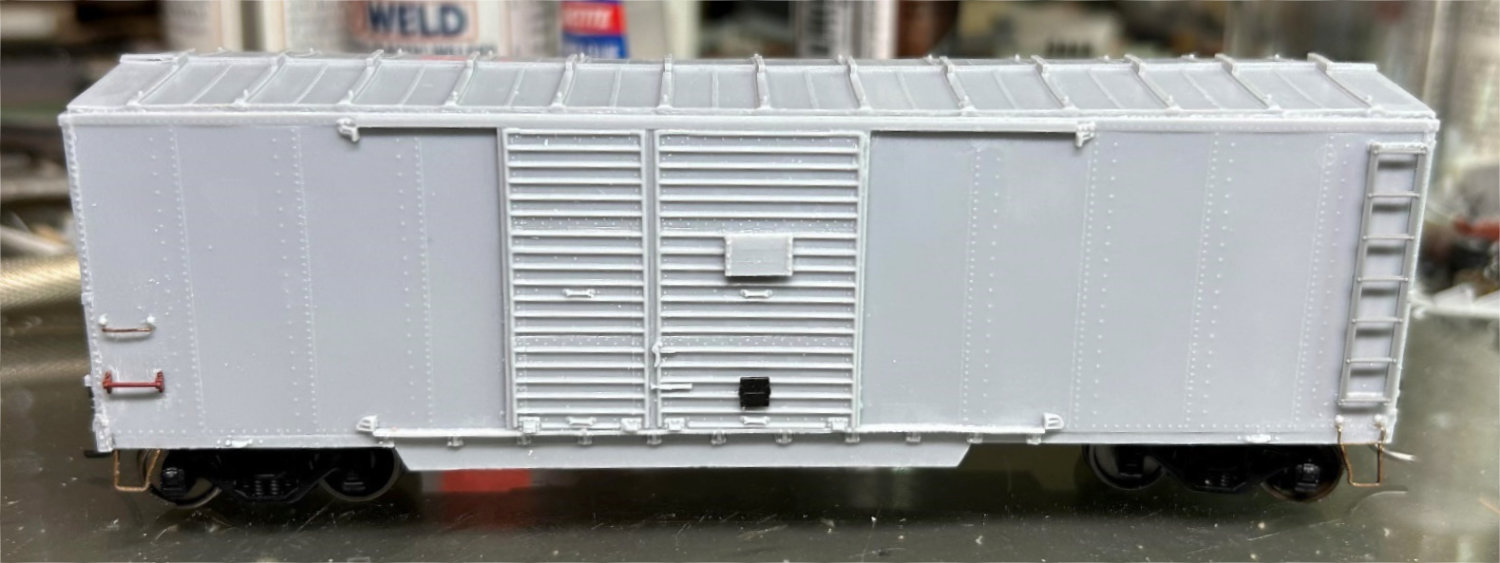
Side and end details

The first details installed on the side of the car include (see above prototype photo) the left-hand side hand grabs, one straight grab and one bracket grab, and a towing loop located above the trucks.
The model comes with the bolt heads for the upper grab molded in place and the brackets for the lower grab also molded in place. The upper grab is a fairly simple detail to add. Use a #79 bit to drill holes into the car side directly below the boltheads and the insert the provided 18-inch straight grabs. The lower grab is another story.

One option would be to remove the lower grab brackets and replace the entire grab with a Kadee bracket grab (#2251), or another brand of choice. A second option would be to drill small holes (#80 or #79) into the center of the brackets and add either an 18-inch straight grab or bend your own brass wire.

Another option would be to simply measure across the cast on brackets, cut a piece of 0.008- or 0010-inch diameter wire to length and then glue the wire onto each bracket. This also could be done with plastic rod sections.
The towing loops could be left as cast onto the car, or the material removed and 0.012-inch wire shaped and glued into holes drill into the car side sill.

Ed Rethwisch removed the cast on material for the tow loops and added 0.012-inch wire in its place. He also added the rivet detail he saw on the prototype. As an added detail, he added the rivets seen above on prototype car 19029 for the repair to the last panel on the car side.
Door details

Once those details were added to both sides of the car, we were able to move onto door details. These include the placard and route card boards, three door handles, and the side sill reinforcement. A great deal of the other potential parts (additional door handle/locking mechanisms, door tracks, door guides, and door stops) are already cast onto the car side, so this is a relatively easy process. The placard and route boards are provided in the kit parts. These are installed following the locations seen on the prototype photos. As everyone in the group models 1958 or earlier, the placard board was mounted high on the door.

As shown above, Bob Hanmer used a Yarmouth Model Works placard board, instead of the kit provided part.

Shown above, Jerry Hamsmith used the kit placard board, but a different route board. None of the group members changed the door handles.

Jerry Zeeman decided to alter the side sill reinforcement to replicate those cars with a reinforcement running from bolster-to-bolster. The photo above shows his effort after a primer coat of paint was applied.
Ladders

Lastly, the right end of the car with the ladder and the single drop grab below it were installed. The tow loop may also be modified. The two prototype photos above give a nice perspective of the ladder and grab. The kit provides Tichy ladders, which must be trimmed to length to follow the prototype.

Jerry Hamsmith trimmed the kit provided Tichy parts to create the 7-rung ladders of the prototype. All ladders for the car were modified at the same time.

Ed Rethwisch decided to use Yarmouth Model Works ladders instead and created 7-rung ladders for his model. He also created the support fasteners he saw in the prototype photos. As with the other end of CNJ 19029, Ed created the panel patch just below the ladder with styrene and Archer Products rivets. The photo also shows his efforts on the right tow loop.

Allen Debraal took a photo of his build after he completed the side details and running board for his model.

Please note there is a distinctive A- and B-end of the body casting. When addressing the A-end detail, Jerry Hamsmith took a slightly different approach to the cast-on brackets. For the upper right grab, he drilled into the center of the bracket and inserted an 18-inch wire grab. For the two lower end grabs, he shaved off much of the casting and again installed 18-inch grabs between the cast-on bracket parts. The above photo of the A end of the car shows his work attaching the end ladder, the placard board, and the pin lifter.
The same details shown here are added to the B-end of the car. However, the air brake fixtures and piping, as well as the retainer valve and pipe, are also added. it creates a very cramped area. Planning ahead so that all parts were easily attached in an efficient order was necessary. The next installment will focus on those B-end car details.
Another fine installment from Jerry and his Modeling Crew. We hope these posts inspire you to tackle a resin kit. Maybe a few modeling friends will work on a group kit build. It’s a great way to get new freight cars onto your rails.
Subscribe to the Resin Car Works blog so you don’t miss a new model announcement. Add your email address to the Subscribe function at the bottom of the page.
Questions and comments can be posted below. Please follow the instructions so your comment can be posted. All comments are reviewed and approved before they appear. Share the blog link with other model railroaders.
Great modeling gentlemen, I like the fact that you are doing your version of the build. Thanks for sharing your progress and photos
Fenton