
Frank Hodina asked if I would be interested in writing a monthly series of blog posts on planning, designing, and building my model railroad. I quickly agreed, despite the fact that my layout is still under construction, and it could be another year before it’s fully operational. Over the course of the series, I’ll describe the planning and execution of what is becoming the Burlington-Washington Subdivision of the Chicago, Burlington and Quincy Railroad.
This debut post describes how it all got started, and it covers the evolution of the dream behind the track plan. Subsequent posts will cover novel construction techniques to overcome functional realities of my house, and selection of roadbed, track, and control systems. After that, we’ll look at operational considerations and selection of motive power and rolling stock according to the trains to be modeled and the customers to be served. Eventually, we’ll examine backdrops, lighting, structures, and scenery as I get to those aspects of construction. We hope that you will find the series interesting, educational and even amusing. Sometimes things don’t go as planned!
Want to Build a Model Railroad? – The Saga Begins
My introduction to model trains occurred in 1950 when my father bought a “Stubby” diesel yard switcher from Lindsay Products, Inc., two Varney kits (a Fruit Grower’s Express reefer and an ATSF boxcar), and a stamped brass caboose kit from Mantua. The layout was a 3 x 4 ft. sheet of one-half inch plywood. We kept it under my bed when we weren’t working on it or running trains. The track was Atlas brass flextrack on fiber ties tacked to the plywood without benefit of roadbed. We had two turnouts with short spurs. I don’t remember a passing track, but then we only had one locomotive. I was seven years old. I remember watching with fascination as dad assembled the car kits, and I remember many happy hours of running our train around the track, imaging the scenery and towns that we would build one day. We never got around to ballast, scenery or structures. We moved, the layout was scrapped, and the rolling stock was packed away. I don’t remember it ever being unpacked, and there was no more HO railroading during my childhood years.
Dad put an American Flyer train set under the Christmas tree in 1956, but I wasn’t interested in toy trains at that point. The next time trains entered my life was in 1969, when my wife’s grandmother gave her dad a Tyco Santa Fe train set for Christmas. He had grown up during the Great Depression, and this was his first toy train at the age of forty-five. That train set and a circle of eighteen inch radius sectional track came into my possession in 1976, when my son was two years old. We temporarily set up the track on a scrap piece of Masonite, and it was immediately evident that my son was enjoying running the train. We decided to build a layout. I subscribed to Model Railroader and Railroad Model Craftsman and spent the next year reading everything I could get my hands on about layout planning, construction, and operation.
A 4×6 foot layout seemed like a good place to start for a first father-son adventure, and I framed a piece of half inch plywood with 1×4 in lumber and built a cantilevered control panel with shelves on either side to accommodate two power packs for dual cab control using the material published in Chapter 20 of HO Primer, by Linn Wescott. The track plan was designed for operation of two trains independently using Atlas components. I used flextrack and snap track switches on cork roadbed. My son, now three years old would put on his engineer hat and run the train around the outer loop. By now, we had several Tyco structures, but no scenery. After we moved into our first home, I added Hydrocal terrain with zip texturing. Meanwhile, I had been buying ‘one of each’ of all the Athearn blue box locomotive and freight car kits that I liked and could afford without regard for era or road name, though I tended to favor Santa Fe since we lived in Oklahoma City. I also purchased several Atlas diesels and a Bachmann Consolidation with smoke. Like many model railroaders, I soon had too many of the wrong kinds of cars. In 1982, we moved to Iowa, and the layout and most of the rolling stock was sold.
Fast forward twenty-six years, and we’re now in November 2008 as I approached retirement. I saw a newspaper advertisement about an open house at the Hawkeye Model Railroad Club (HMRC) in Coralville, IA. Since I live in Iowa City, IA, just a few miles away from the club, I decided to check it out. I was immediately impressed with the advances in the hobby while I was away, particularly DCC and sound, and I thought that this was a perfect opportunity to rekindle the flame. I still had the remnants of my former rolling stock collection, but I wanted to start fresh and build my dream layout, though at the time, I had no idea what that would entail. I grew up in Florida with a six year stint in Alaska between ages 10 to 16, so I had no direct knowledge of Midwestern railroading. Moreover, because we moved to Alaska in 1953, I missed the transition era entirely, which is probably why I chose 1953 as the year to model.
I had extremely limited model railroad experience, so I read all of the Kalmbach books on layout planning and construction, and that exercise confirmed my interest in prototype modeling (thank you Tony Koester). The question was, which prototype. Due to space limitation, I thought it would be best to model a branch line, preferably one that operated near my home in Eastern Iowa so that I could do field research. I liked the transition era because of steam, diesel, and the great variety of freight cars in operation at that time. I made a list of roads that operated in Iowa and looked at the Morning Sun and other picture books in the local libraries. The short list of roads that operated in Eastern Iowa in 1953 came down to CB&Q, CRI&P, M&StL, and MILW. I selected CB&Q because of the Zephyrs, the large number of composite gondolas and single sheathed box cars still in operation, and the paint schemes on Q motive power. Best of all, a 53 mile branch line once operated from Burlington, IA to Washington, IA, the latter only 34 miles from Iowa City. The Burlington Route Historical Society had published Burlington Bulletin No. 30 on this branch line, so much information was immediately available to start the planning process. The dream began to take shape.
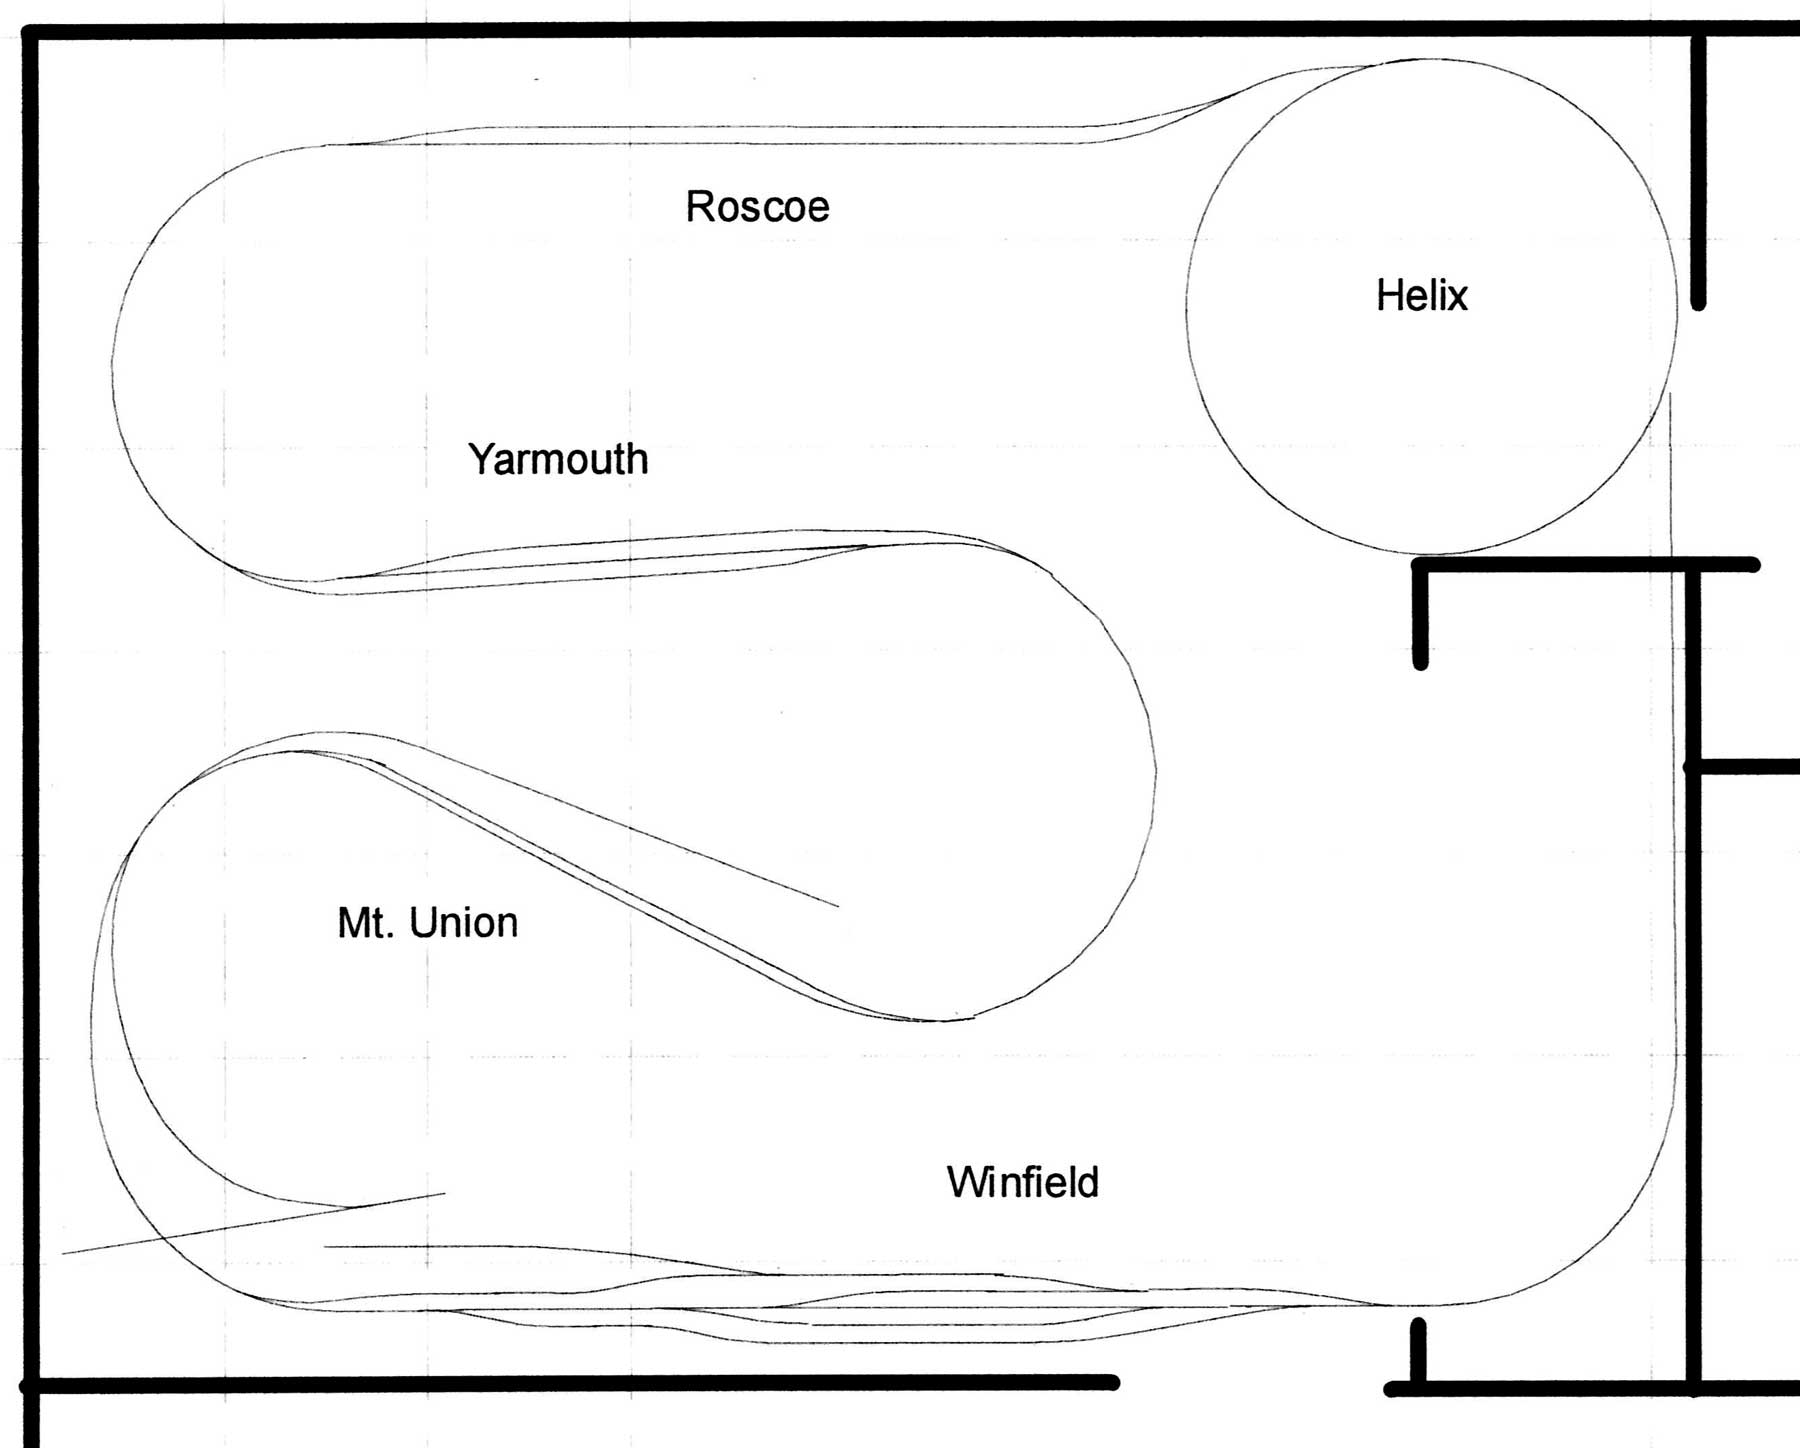

I bought 3rdPlanIt software to develop the track plan, and started to design a shelf layout for the 13 x 16 foot room that was formerly my home office. The branch line would be on two levels connected by a helix. This arrangement didn’t provide enough running distance or room for the seven towns between Burlington and Washington, so I added a peninsula to both levels. In true prototype spirit, I used the alignment chart for the track plan of each town. There would be no gratuitous spurs or passing tracks, only track that appeared on the alignment chart. The resulting plan could accommodate Roscoe, Yarmouth, Mt. Union, Winfield, Wyman, Crawfordsville, and Washington.
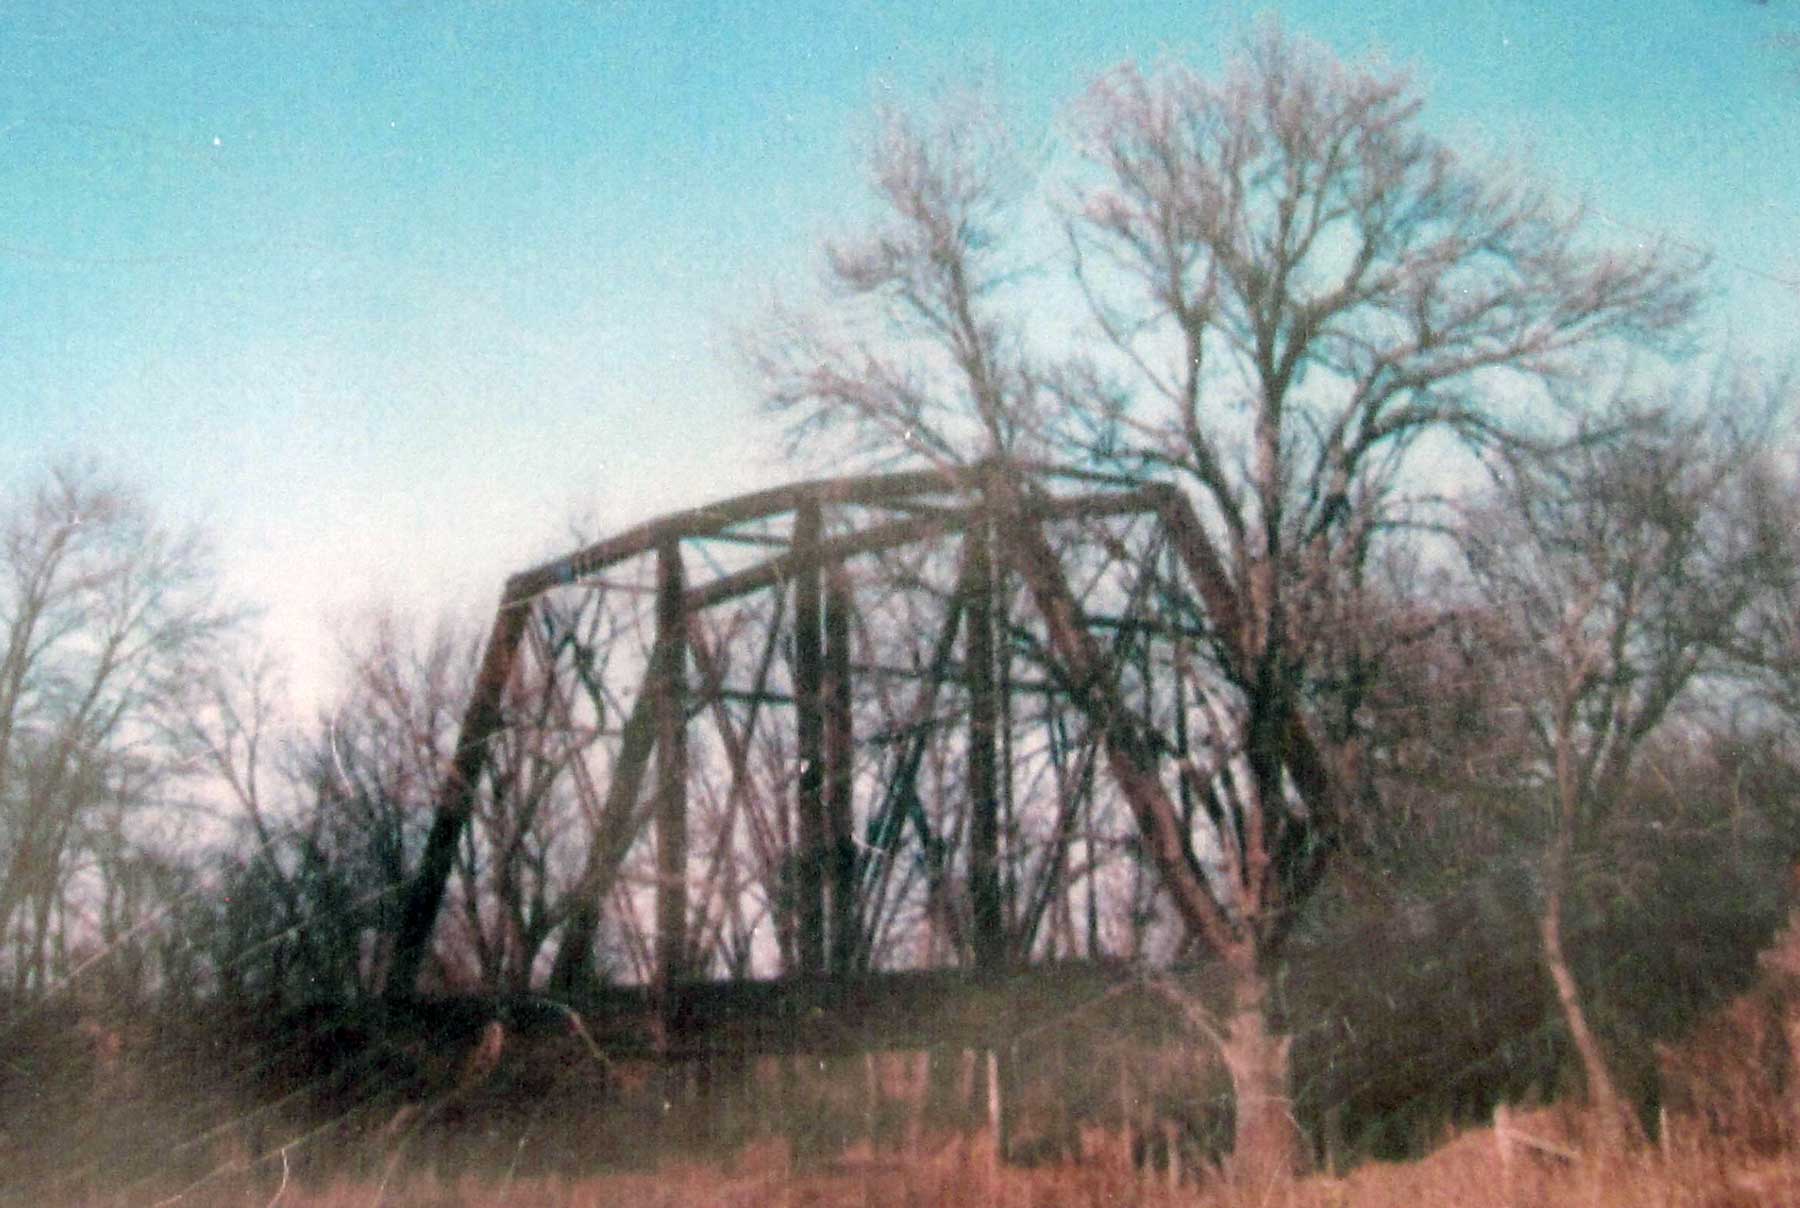
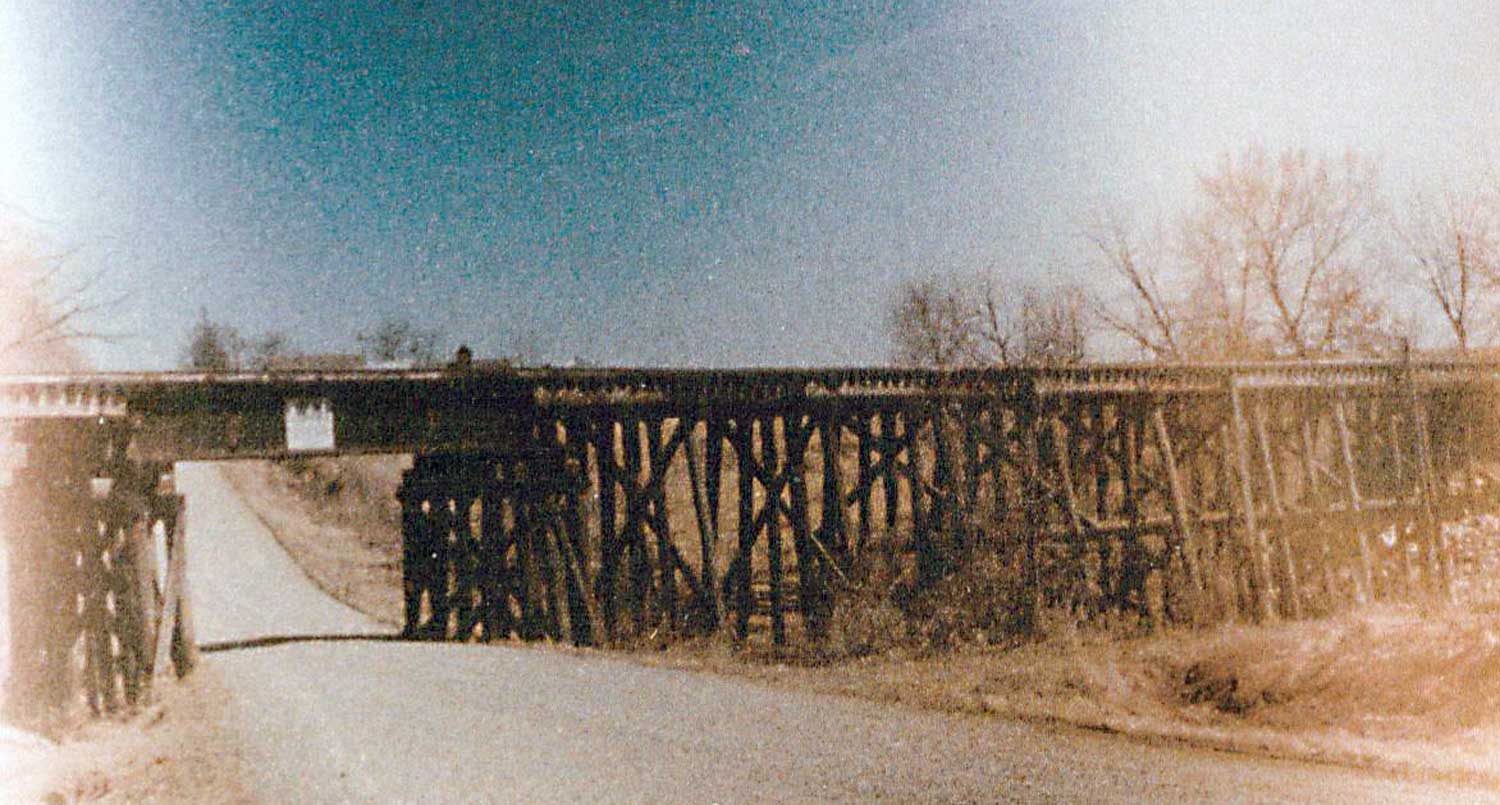
Just Northwest of Winfield were two scenic elements that I really wanted to model. The first one was the 105-foot, pin-connected through truss bridge over Crooked Creek, and the other element was the 158-foot pile trestle and deck girder bridge over Lemon Creek, approximately one mile further up the line. Both bridges were built in 1879. The decision to model these bridges forced me to omit Wyman from the track plan. Compromise is a necessity of model railroading.
At this point, I realized that I would need staging to represent the rest of the world, so I added a lower level to the plan. Even this seemed limiting, as I had made no provision to model Burlington, which was the major connection between Washington and the rest of the railroad. By appropriating a 23-foot long wall in the family room immediately adjacent to my former home office, I could make up trains in Burlington and sent turns to Washington. But how would I handle traffic into and out of Burlington? That required another staging yard to represent Chicago on the wall opposite Burlington, which met operational needs while preserving the family room for its intended purpose. As I pondered operational scenarios, even this arrangement proved limiting.

At this point, I had an epiphany. Why not call the lower staging under the branch line Denver, and run traffic from Chicago to Denver through Burlington, the only part of the main line actually modeled. This would require extending the main line through the laundry room and bathroom to the helix.
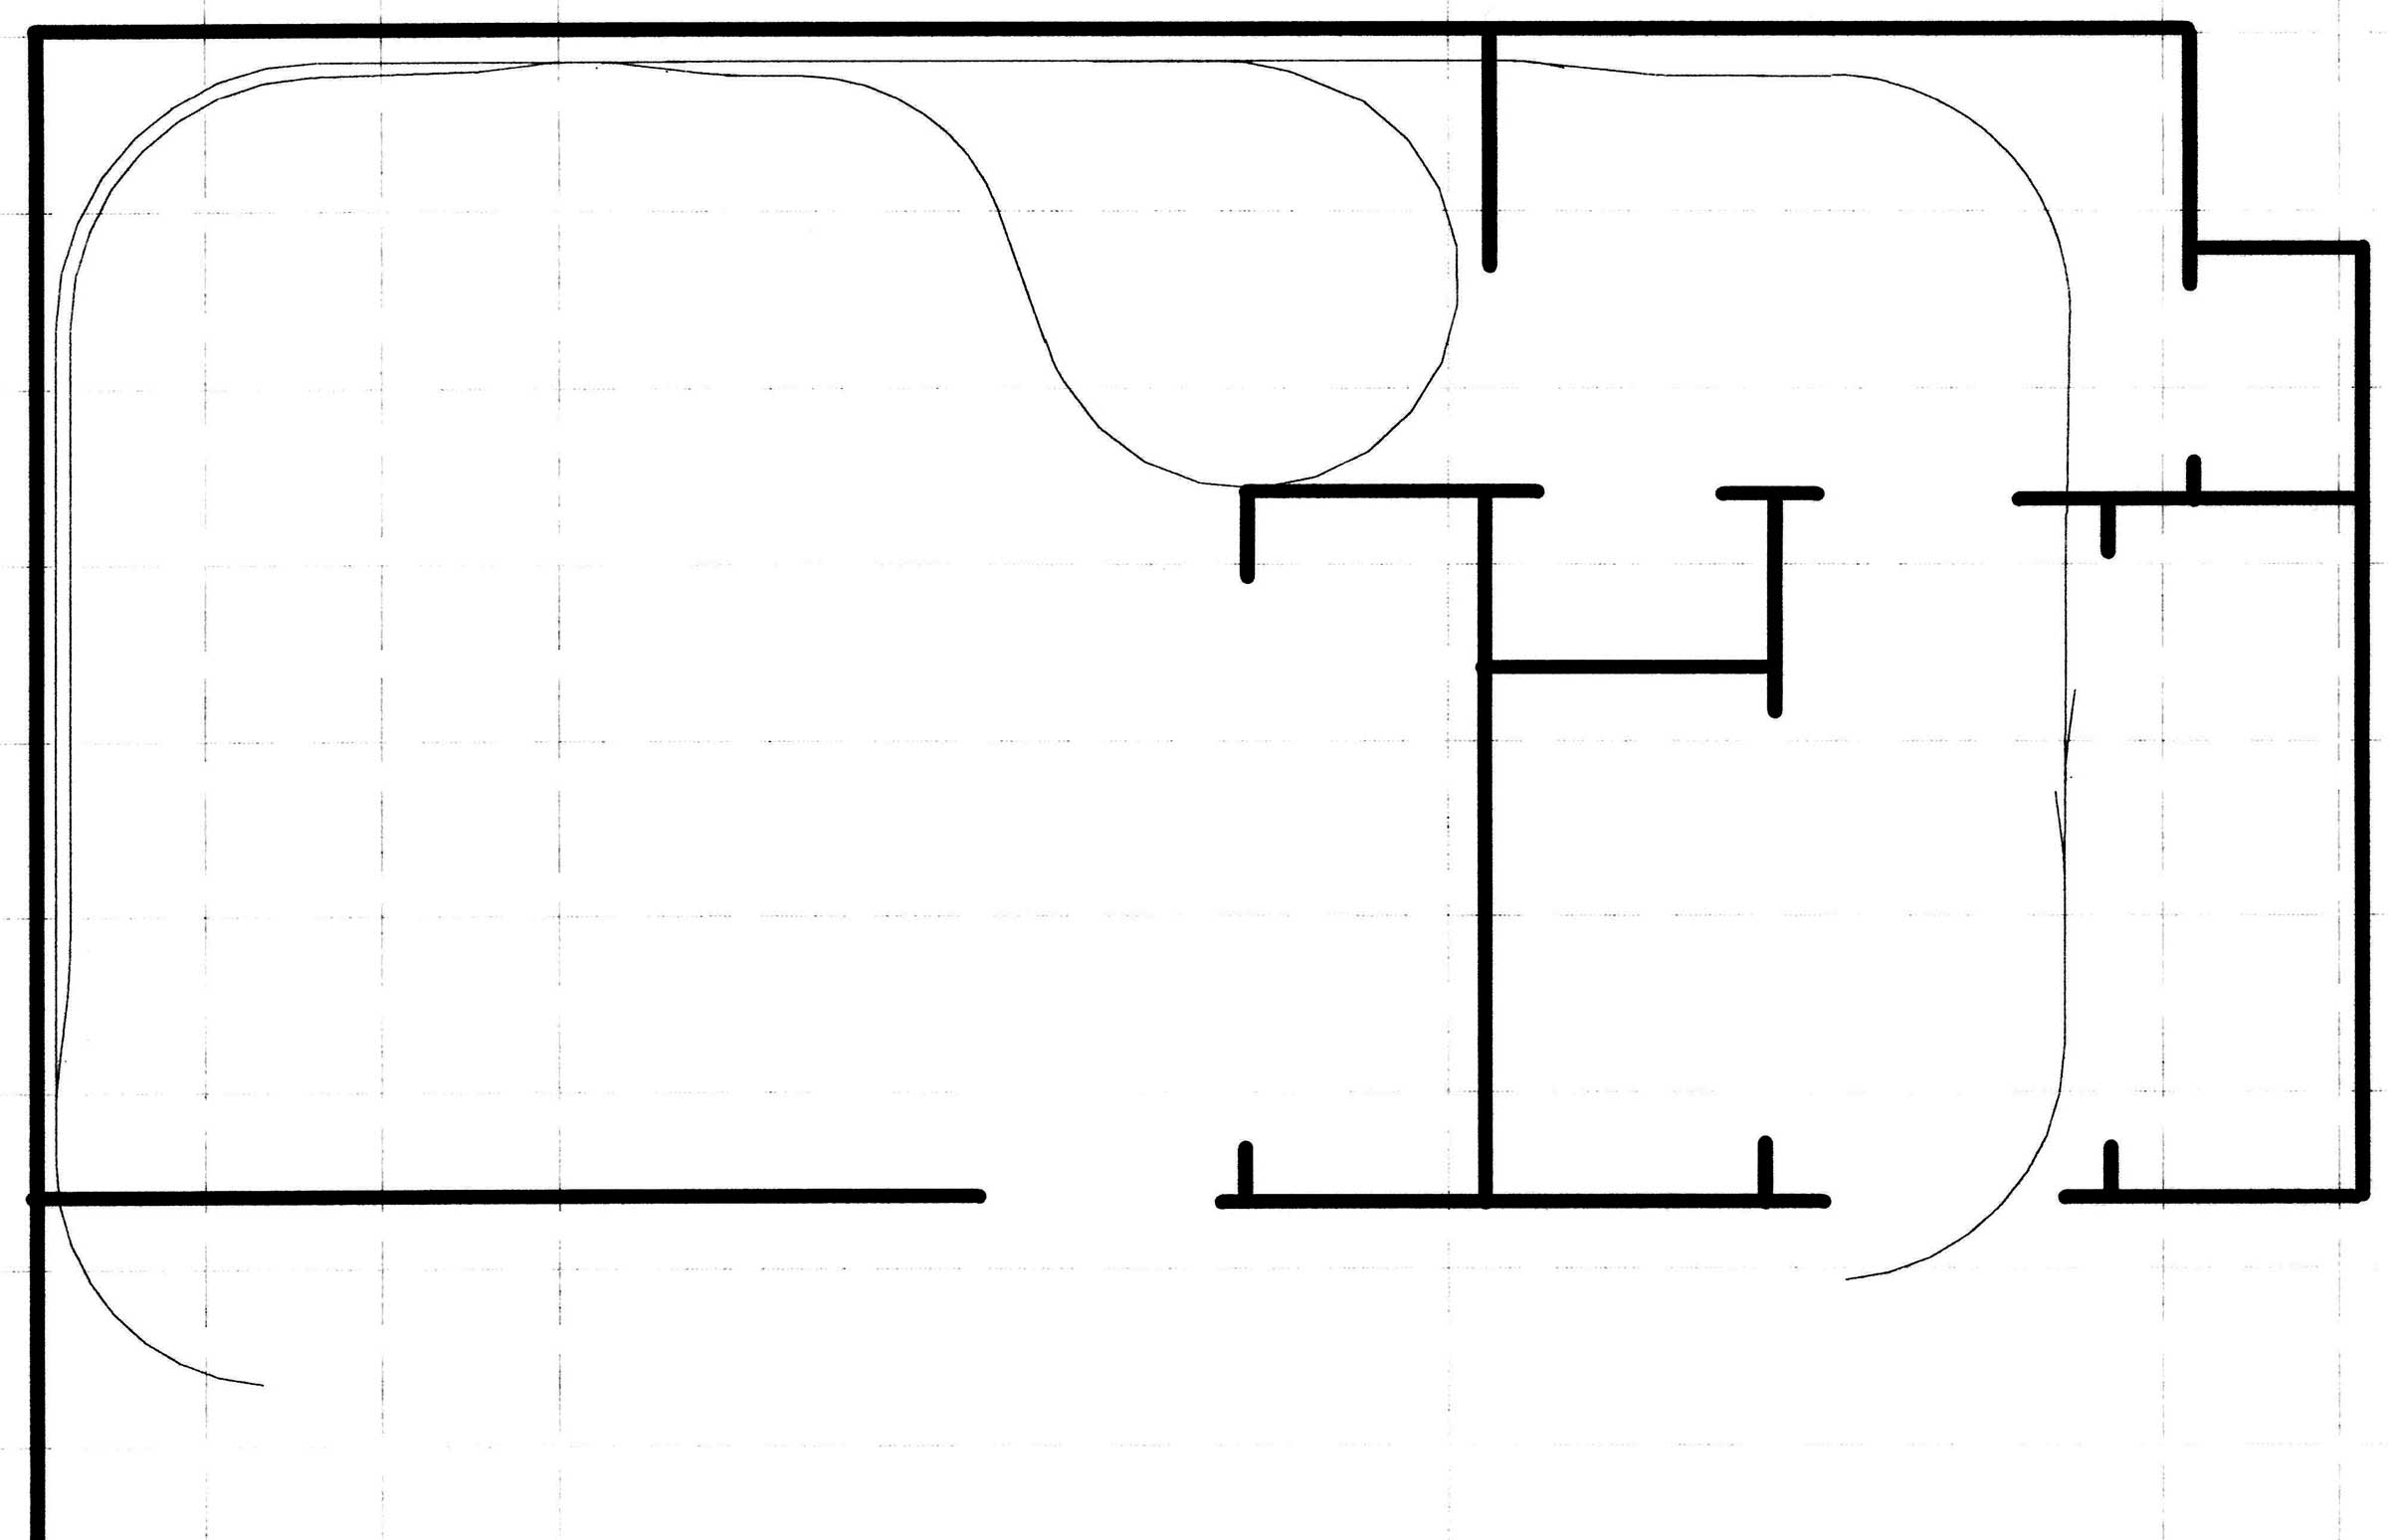
By extending track through the wall at the south end of Burlington, I could model the K Line to Hannibal and St. Louis, and by connecting these staging tracks to the Westward line out of Burlington, I could model traffic between Minneapolis-St. Paul and St. Louis, including the joint Rock Island and Burlington Route Zephyr Rocket. That was it! I had a track plan.
We will feature Nelson’s progress in upcoming blog posts. Questions and comments can be posted below. Please follow the instructions so your comment can be posted. All comments are reviewed and approved before they appear. To subscribe to this blog, enter your info for a comment and check the last box to notify of new posts by email. Share the blog link with other model railroaders.
I look forward to your series.
Carrumba! Your vision kept getting bigger and bigger. I modeled Santa Fe’s Alma branch because it was a lot smaller than my original idea of modeling Raton Pass. In May 1943, my modeling era, the daily, except Sunday, mixed train tied up at Burlingame where the branch connected the Santa Fe mainline so I don’t need any staging yards. The cars that come into Burlingame on the Emporia-Topeka local are 0-5-0ed into the class track to be switched by the Alma branch crew. In the spring and fall a lot of cattle came to the Alma branch and at some point I hope to add a small staging yard at the Emporia end but for now I am satisfied with operating the mixed trains 95/96 with a crew of three and they like it too.
Although my layout is completed there is always room for modification.
How exciting to see this blog, and I look forward to reading more. Fact is, this Chicago boy spent part of every summer of my life in Fort Madison, about 20 miles south of Burlington, and I loved visits to the yards and depot up north. My great grandfather was a boilermaker in the west Burlington shops, so I think of your layout as “my” old neighborhood. Can’t wait to see the branch line develop. Cheers! Michael
Quite an endeavor. We look forward to the numerous trials as one takes over
all this household territory.