Hello, modeler! RCW blog manager Eric Hansmann here with a post on my recently weathered Resin Car Works Louisville & Nashville gondola. Enjoy the details.
I enjoyed building and decaling this kit. It fits great in my 1926 era freight car fleet. I consider several factors before weathering a freight car. The prototypes for this number series were built in May 1925 and I model November 1926. How should this car appear after 18 months of service?
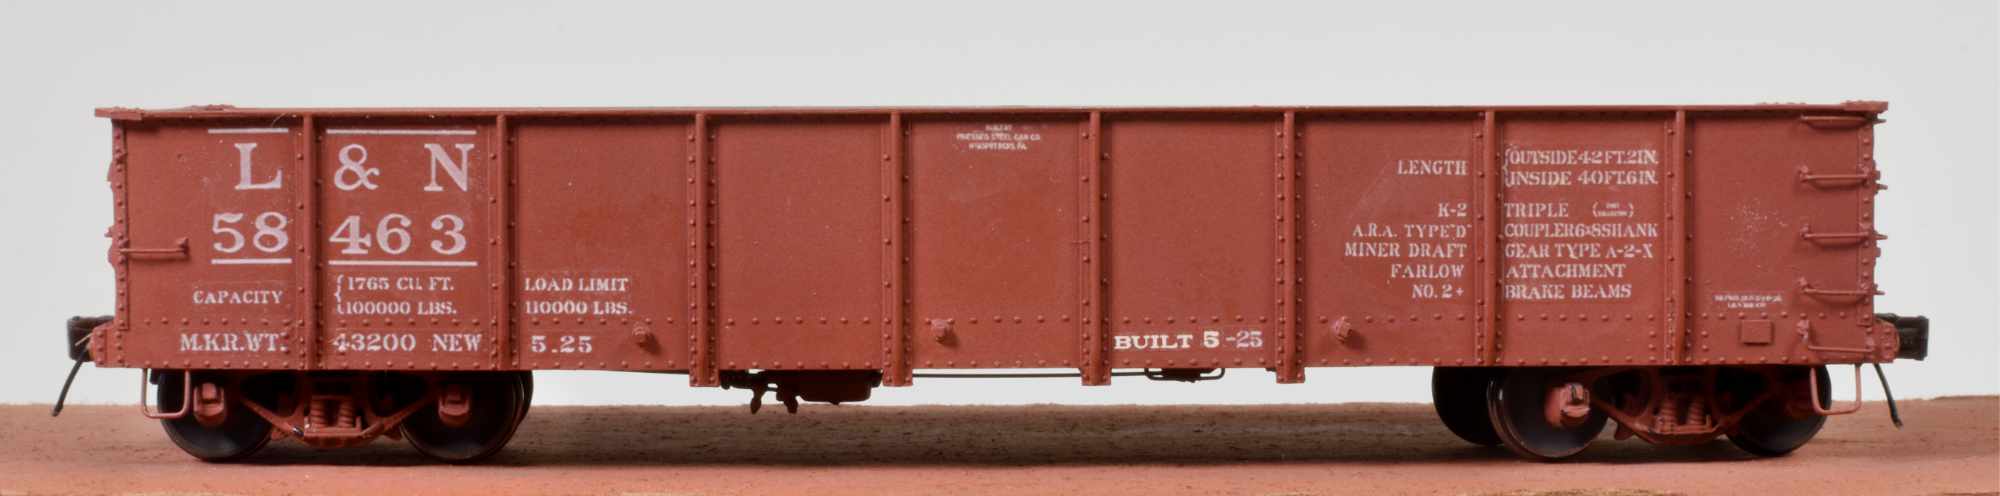
The L&N added these for coal service as they have drop doors built into the floor. But they could also be used for general service hauling. Industrial US cities were busy and dirty in the 1920s. Coal was burned in industries, steam locos, and homes. Soot was everywhere. Coal is also a dirty commodity to haul. I wanted this gondola to look well used but not abused or decrepit just 18 months into service.

I applied a pin wash of Vallejo burnt umber to the rivet strips on the side stakes. A very thin color, a small fine brush, and a steady hand are needed to apply the pin wash. The object is to apply a pinpoint application of material on the model. This has been a popular technique among military modelers.
I used a 00 brush. An article on this technique was featured in the July 2021 Running Extra section of Model Railroad Hobbyist.
I created the wash after I had used up a bottle of burnt umber. I noticed pigment remains in the bottle. I opened it up and added a couple squirts of thinner to mix the remaining pigment. I mark these bottles with a T. A couple drops were placed on a palette and I applied the wash with the brush.
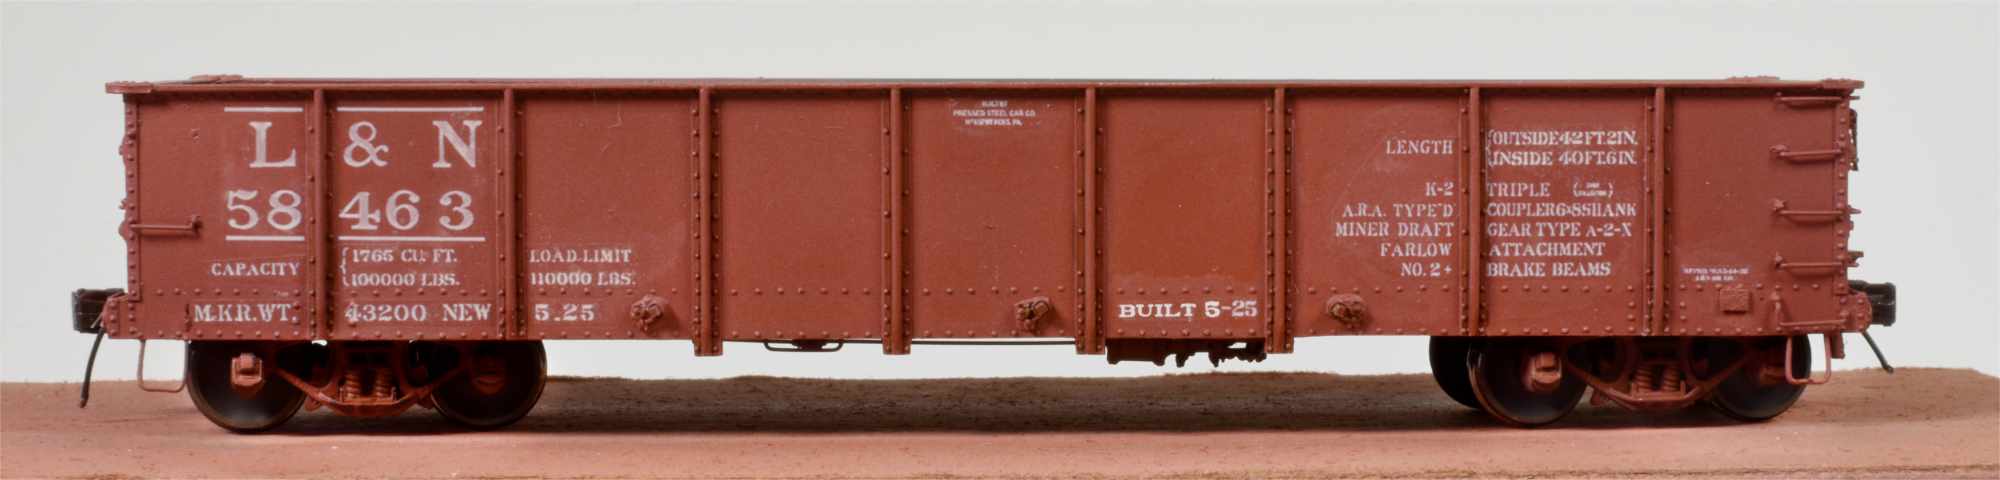
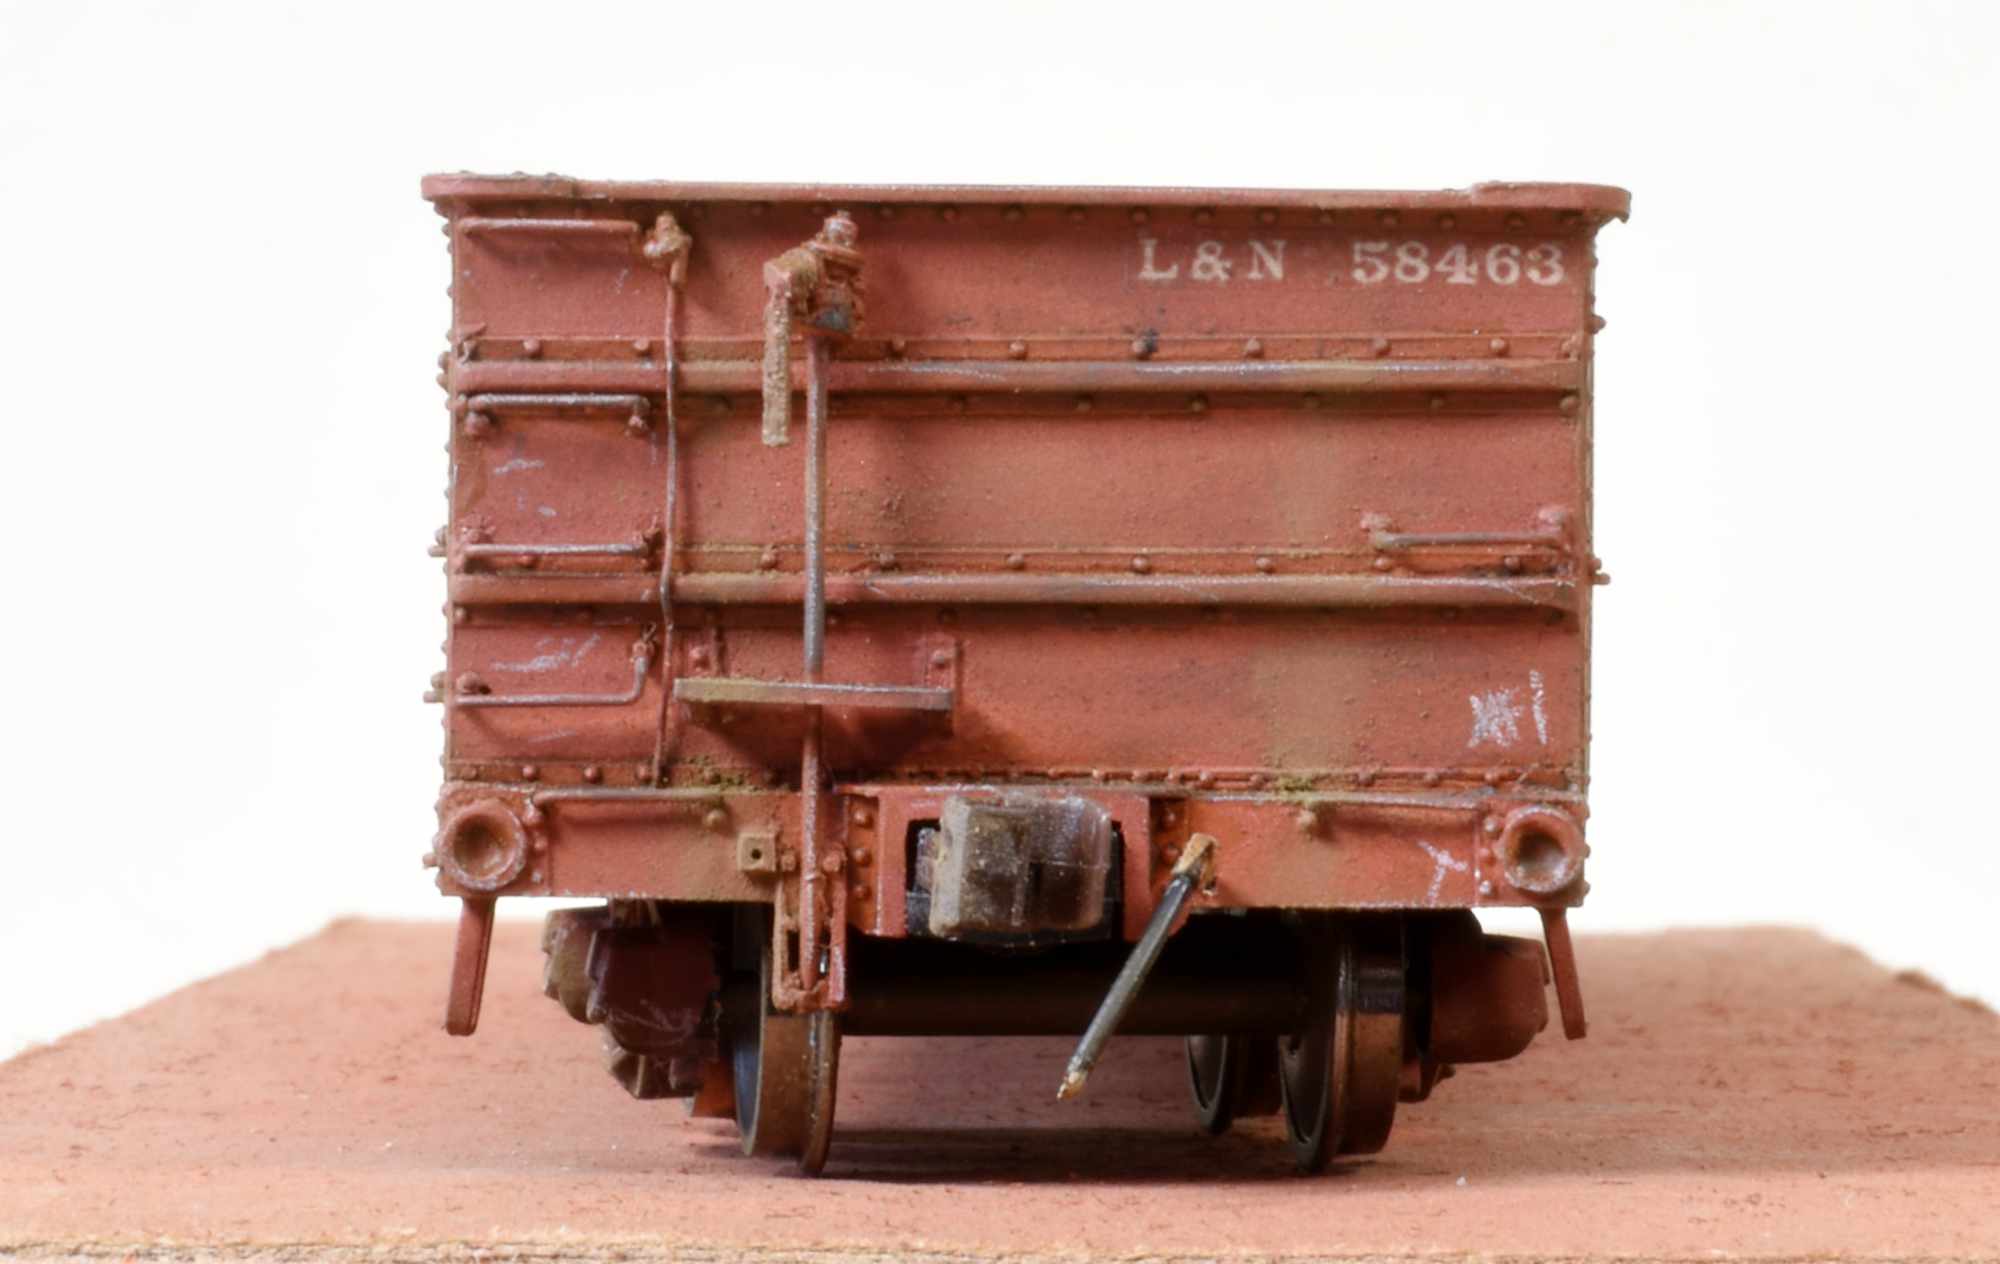
I applied the wash only to those narrow areas beside the side stakes. This is where dirt and grime collect. I snapped the above photo after one side of the car was done. Compare it with the previous car photo above. It’s a subtle change. I decided to apply another pin wash to the side stakes and I liked the results. I also applied the pin wash to the end reinforcements and end sills.

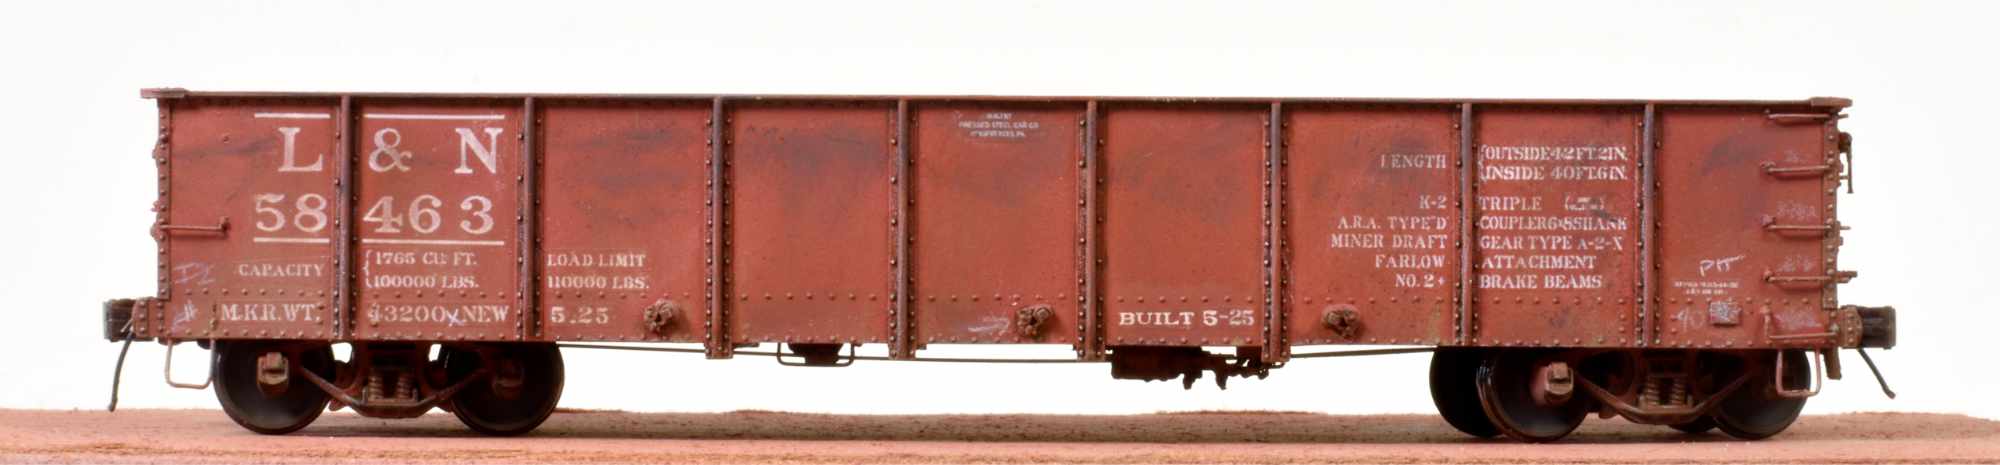
After the pin wash dried, I applied PanPastel red iron oxide extra dark (380.1) along the sill, in the panels between side stakes, and on the ends between the reinforcements. A fresh piece of foam was used to spread out the PP material. I wanted a light application of this color.
Next, I applied PP raw umber (780.5) as accumulated dust and dirt. This was applied on the end panels, parts of the side sill, and on the truck frames.
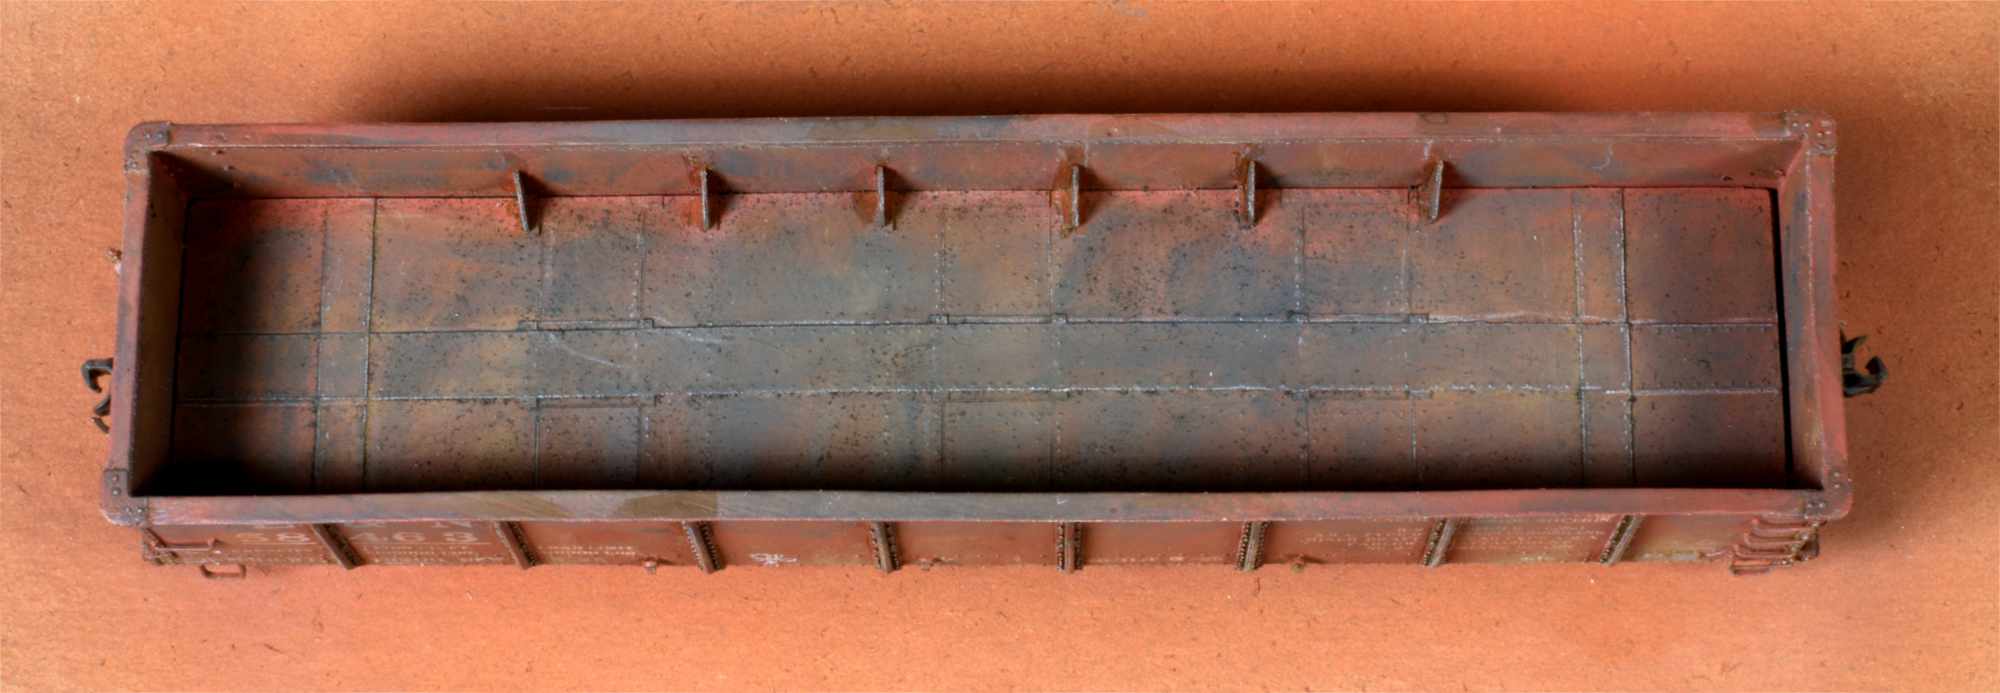
PanPastel neutral grey extra dark (820.1) was applied next. I like this color for soot and coal residue. A heavy application of the color went onto the interior floor and sides. The top chord, side panels, and ends were also hit with varying touches.
Prismacolor pencils were used to highlight rivets, edges, and truck sideframes. I mostly used a 30% warm grey color. A 10% cool grey pencil was used for to highlight a couple elements. Both pencils were used for chalk marks, with the cool grey pencil used for more recent markings. A 50% cool grey pencil was used on the small tack board beside the right grabs.
I used a micro brush to apply PanPastel neutral grey (820.5) as splash marks on the ends. I need to install the Carmer uncoupling hardware. Several completed models all need Carmers. I plan a batch installation of these details.
After I had sprayed a flat coat onto the model, I used a rattle can to spray flat brown on the interior. I use a mask made from a side of a cereal box . A rectangular opening is cut from the material that is slightly smaller than the open are of a gondola or hopper. I hold this an inch above the model to keep the rattle can spray focused on the interior. Short bursts of paint through the mask are all that is needed. Complete coverage isn’t the goal, just a change of color and appearance.
During the weathering process, I applied the red iron oxide extra dark (380.1) a little heavier to the interior floor and sides. Same with the raw umber (780.5) color. Interiors of gondolas and hoppers are typically more weathered than the exteriors as there is more contact with the loads.
The neutral grey extra dark (820.1) color was applied next. A heavy application of neutral grey extra dark (820.1) went onto the interior floor and sides.
The 30% warm grey Prismacolor pencil brings out the rivets, sheet seams and edges, and additional interior details. These would be lost in the PanPastel colors if not highlighted.
As you weather your open top freight cars, consider the length of time a car has been in service and what loads were hauled. Give a new technique a try along with the materials and methods you have used.
Questions and comments can be posted below. Please follow the instructions so your comment can be posted. All comments are reviewed and approved before they appear. To subscribe to this blog, add your email address to the function at the bottom of the right column on the main page. Share the blog link with other model railroaders.
Eric;
A great article. And yes Armour Modellers have been using pin washes for quite a while to create shadow and highlight detail. Among the best of them is a chap on YouTube (Night Shift – https://www.youtube.com/c/NightShiftScaleModels).
His work with weathering is best of breed, in my opinion. Hope you don’t mind me sharing.
Great article, thanks
Brilliant. Thank you for sharing as I am learning and have a long way to go.
OK, now I’m going to have to try the pin wash technique!
Hi Eric beautiful job on the gon. Thanks for sharing your techniques. I see no wash was used or air brush. Still a great affect.
Excellent weathering. Thanks for sharing methods to achieve.
Thanks for posting this Eric, it’s very timely for me as I’m working on some hoppers and gondolas at the moment. I’ve bookmarked this post.
Looks really nice and dirty, well done Eric and thanks for sharing your work
Fenton
Excellent Model. Thanks for sharing your technique.
Another beautiful build. Thanks for inspiring us and sharing your techniques.
The gondola looks really good Eric. Thanks for describing your weathering techniques and the materials you used. It is much appreciated.
A great looking gondola. Thanks for sharing your weathering techniques.
It looks great. Thank you.