Ryan Mendell shared a couple photos recently on a discussion list. I contacted him and asked if he could share his techniques on the Resin Car Works blog. Here are Ryan’s notes and photos.
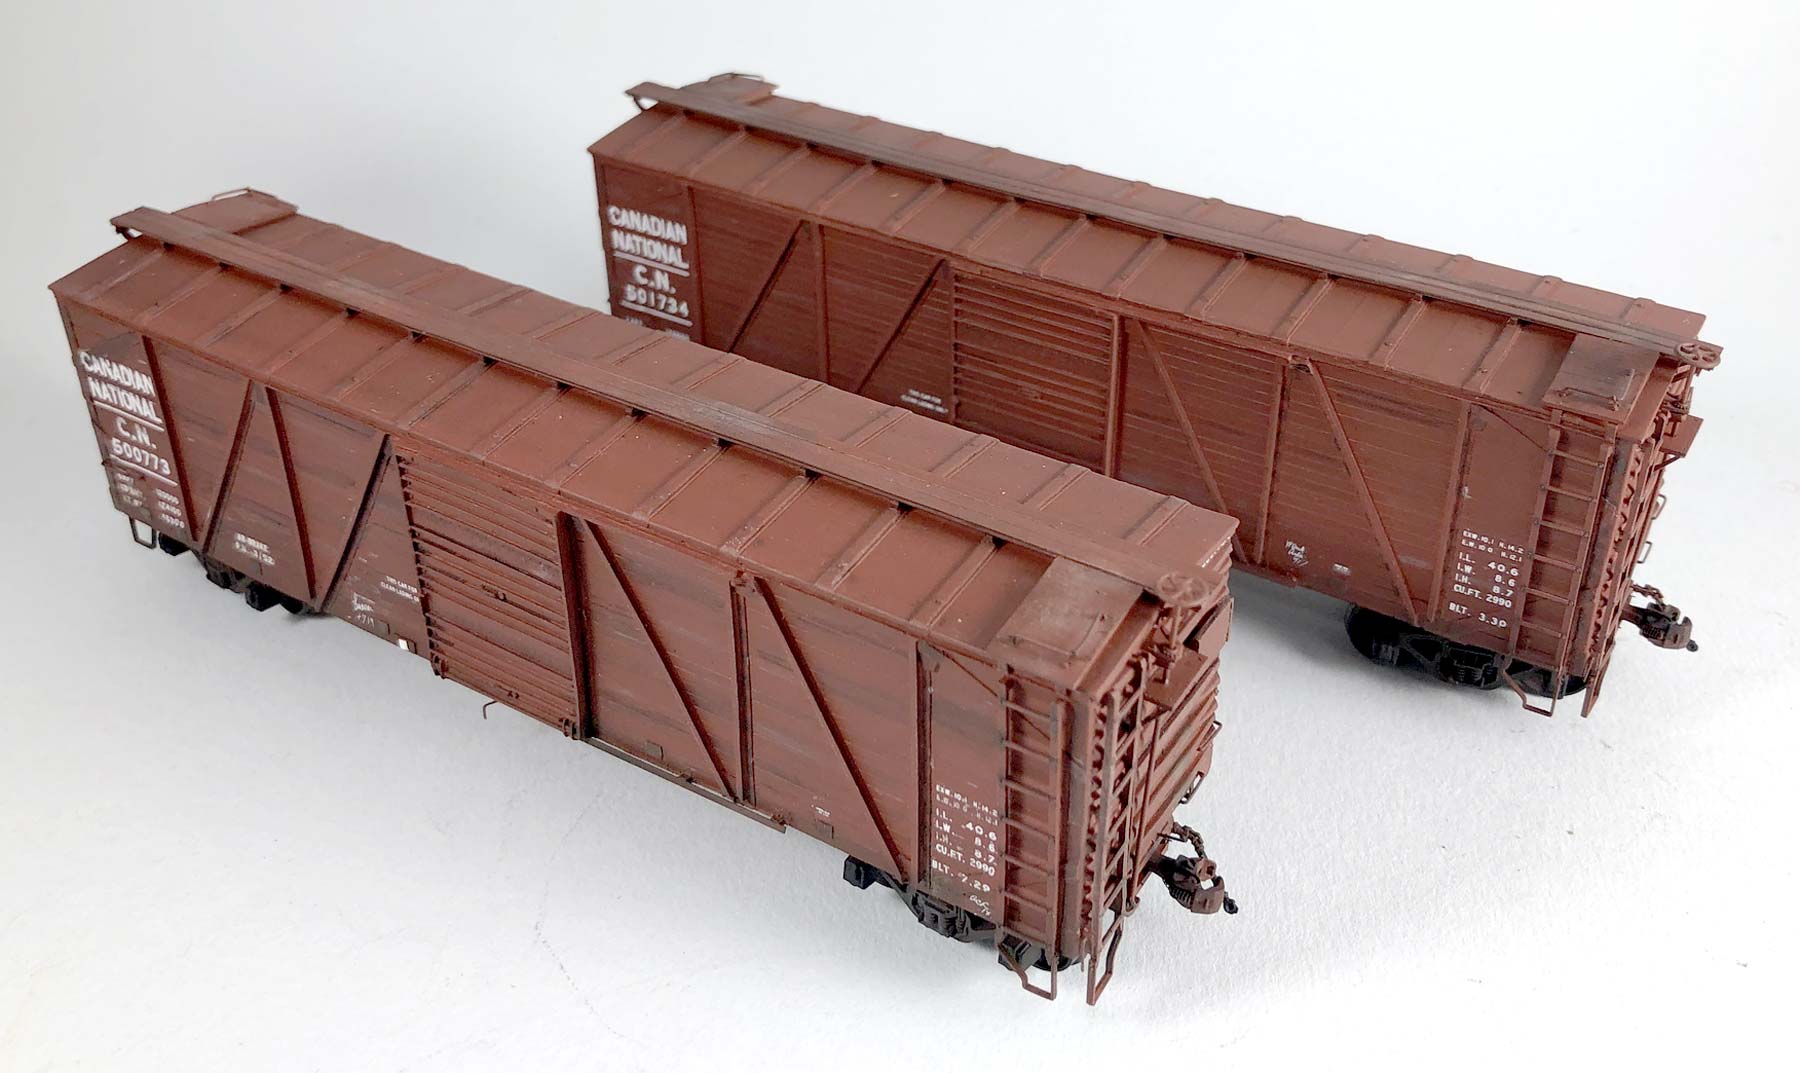
I recently completed painting and weathering two 1929 built Canadian National single-sheathed boxcars. These are HO scale resin kits once produced by Sylvan Scale Models but these are also offered by Kaslo Shops.
The boxcars were painted with True Color CN freight car brown with Black Cat decals, and Speedwitch Media chalk marks. sI started the weathering process with a coat of Tamiya XF-86 clear flat, tinted with a couple drops of Tamiya white in my airbrush paint cup. I thinned the flat coat 50% with lacquer thinner.
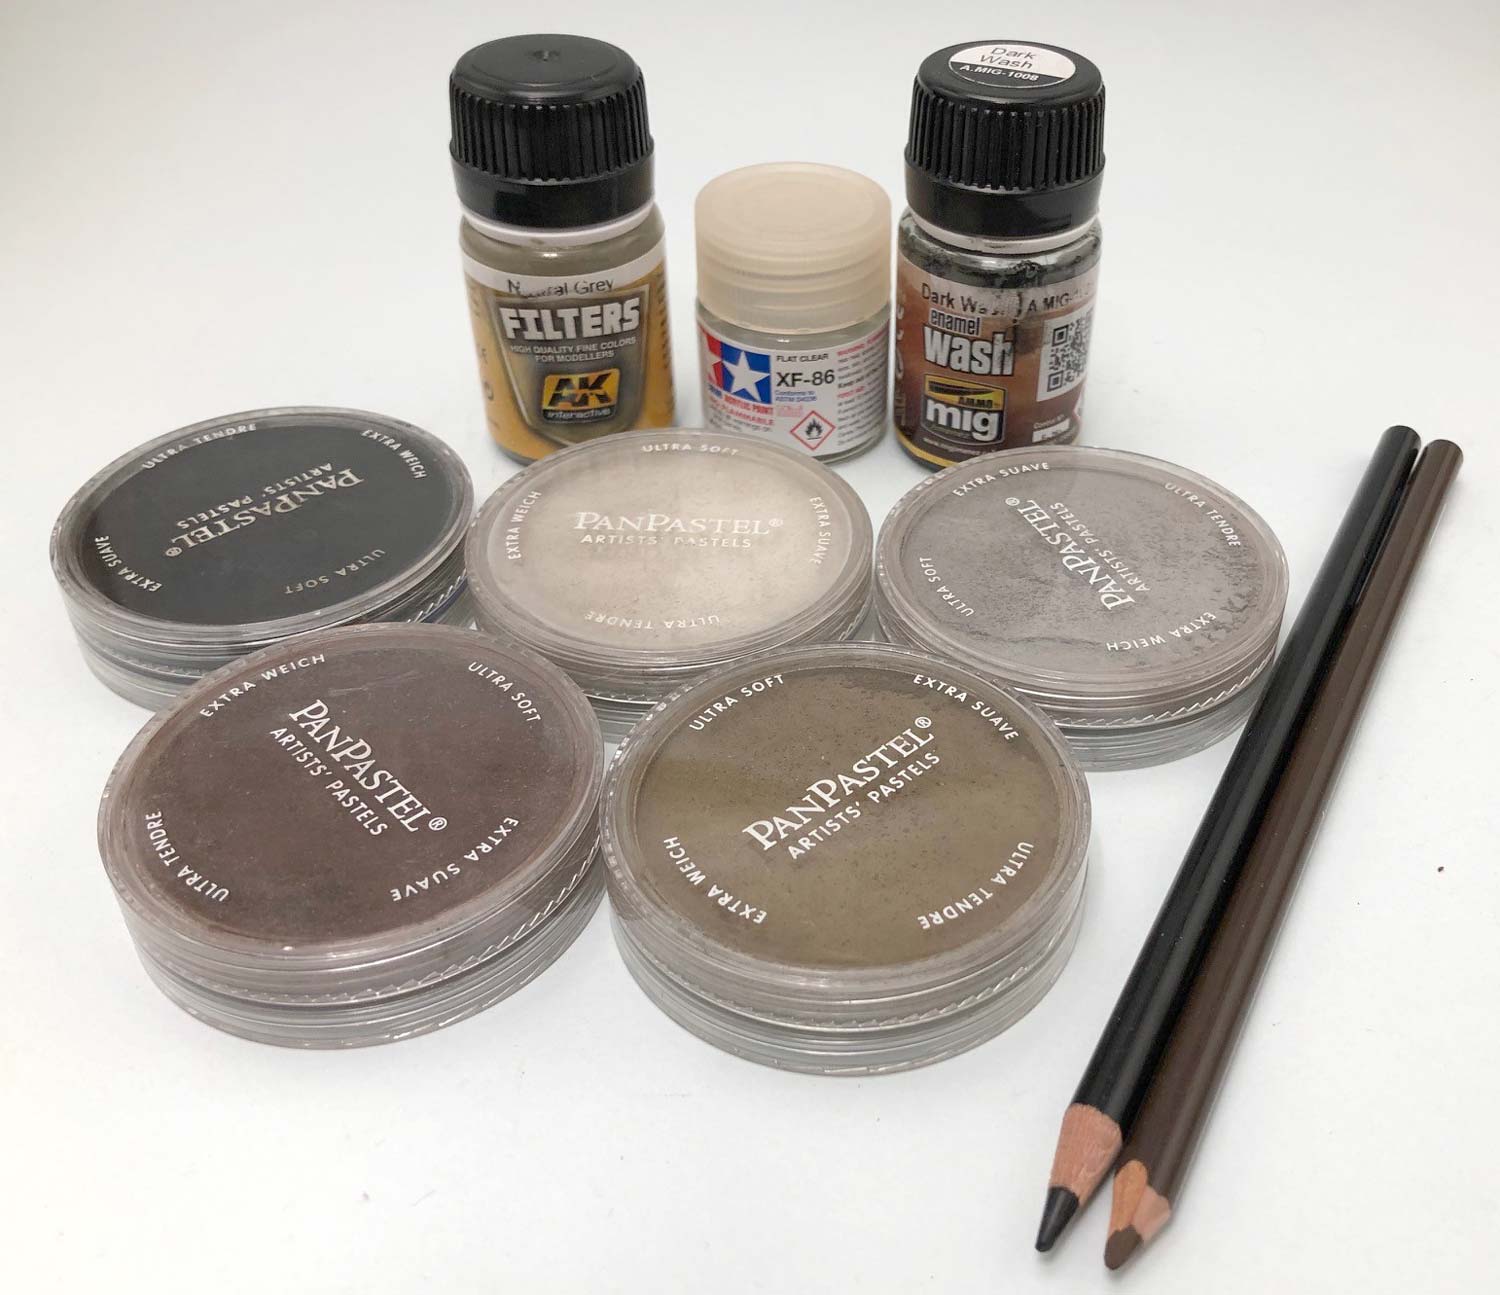
When this is dry, I follow up with a pin wash of AK Interactive dark wash. I load up a small 3/0 brush with the wash and touch each NBW and rivet one at a time. I also apply this to other separate details, such as the grain tabs, ladder styles, brake appliances and door hardware. I give the AK wash a quick shake before I start, but I don’t thoroughly mix it. I find too much mixing makes for too dark of an effect.
I applied a wash to the wood siding next, using AK Interactive neutral grey filter. I used the pin wash technique again, touching each board and allowing capillary action to draw the wash across the surface. The only difference I can see between a filter and a wash is the strength of the mix. The filters are more diluted.
Next, are the pencil crayons. There is nothing fancy here, just plain Crayola pencils I borrowed from my son’s pencil case. I used grey, brown and black. I sharpen the pencil and just randomly rub different boards. I try to use the same color on each board all the way across the car but vary the amount of coloring between each of the side posts. The key here is randomness, I try not to think about it too much. I use more of a “mad scientist approach.”
The next step is applying PanPastels to the trucks and running boards. I use a few shades of rust colors, black, and white, and apply these fairly heavy. Here are the PanPastels I used.
- 380.1 Red Iron Oxide Extra Dark
- 780.5 Raw Umber
- 780.8 Raw Umber Tint
- 800.5 Black
- 820.5 Neutral Grey
My last step is to apply a sealing coat with Tamiya XF-86 thinned with 50% lacquer thinner. This knocks down the heavy application of Pan Pastels.
The process sounds tedious but is far from it. Excluding drying time of the flat coats and washes, I spent about 30 minutes per car.
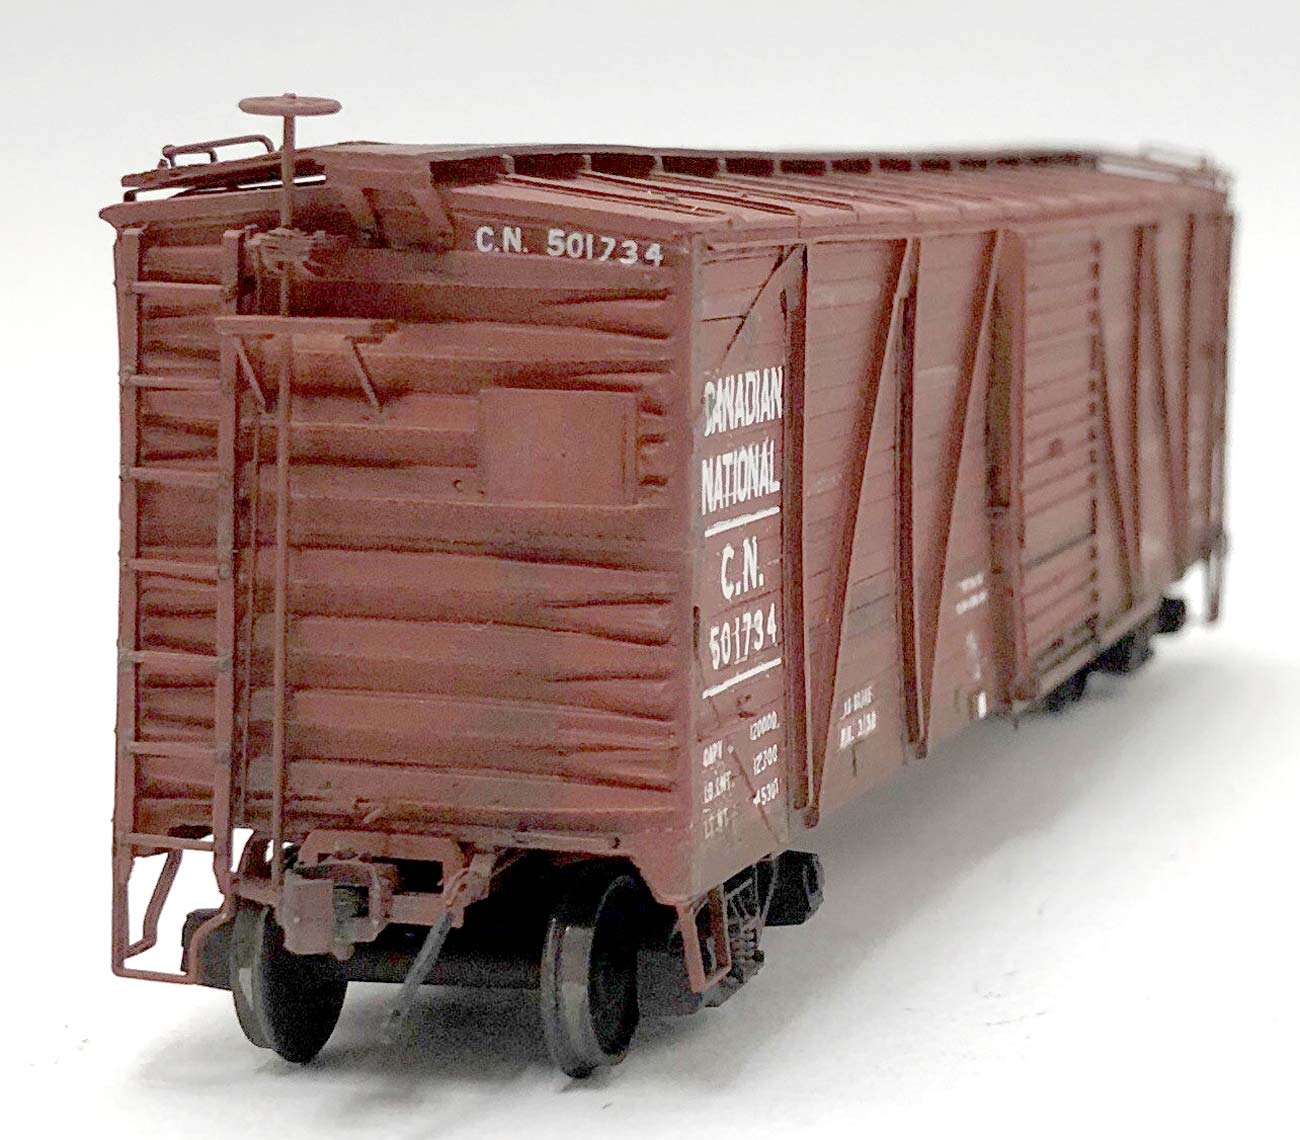
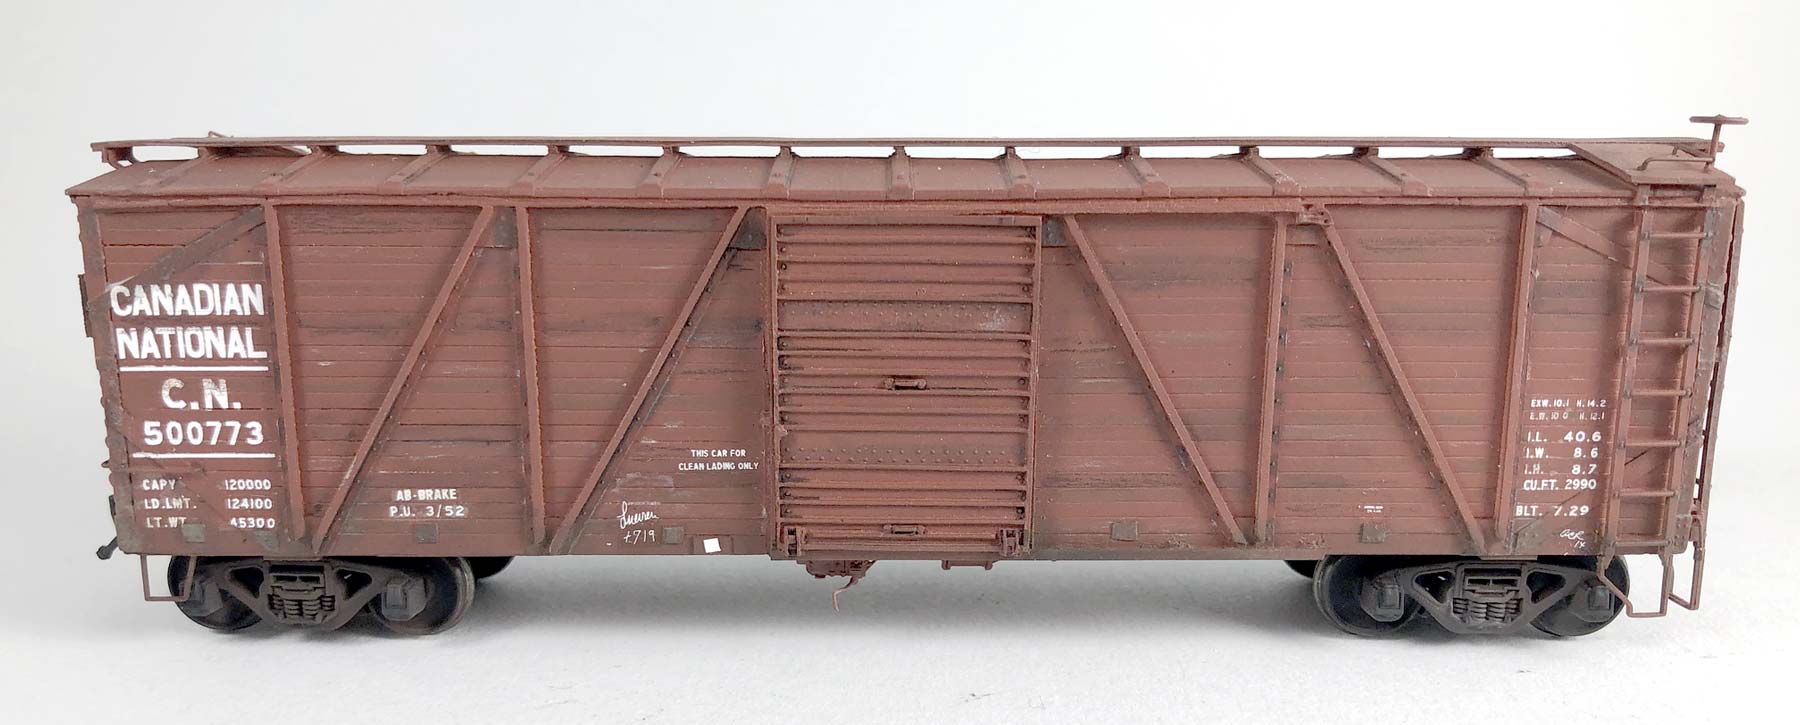
As for the boxcar builds, I upgraded pretty much all the details; the brake appliances on the underframe and B end, along with the ladders. The door tracks are made with phosphor bronze strip.
Many thanks to Ryan Mendell for sharing his weathering techniques. Ryan has started National Scale Car , a new venture producing HO scale resin kits and parts.
Questions and comments can be posted below. Please follow the instructions so your comment can be posted. All comments are reviewed and approved before they appear. To subscribe to this blog, add your email address to the function at the bottom of the right column on the main page. Share the blog link with other model railroaders.
Very nice work. Where did you obtain the phosphor bronze strip for the door tracks, and did you bend it into an L or U shape? Thanks.
Michael,
I purchased the strip from my LHS. The product is from a company called Albion Alloys. Here is link to their catalog.
http://www.albionhobbies.com/wp-content/uploads/2015/02/AA-Precision-Metals-2014-4pp.pdf
Ryan
Looks good.
Any chance of getting more detail on upgrading the door tracks? I have a 5 pack of these cars and would like to tackle them this summer.
Marty,
Basically I cut the strip to match the length of the ones in the kit. I then glued small pieces of styrene to the car side in same locations and the kit supplied standoffs. I used canopy cement to bond the strip to the styrene standoffs. To get the doors to fit, a bit of sanding on the back of the roller brackets was needed.
Ryan
An update on what is going on with Kalso Shops might also be helpful as almost everything on their website is shown as “out of stock” to the point where one wonders if they are going out of business. If that is the case we need to “lean” on Clare Gilbert to reintroduce the kits in his Sylvan line. Clare is such a great guy I’ve always enjoyed doing business with him anyway.
Do not know the tern “Pin Wash” Ryan, can you please elaborate?
Bill,
A pin wash from what I understand and practice, is loading up a small brush (I use a 3/0) with the wash and then touching each detail separately. Capillary action draws the wash around and into the details.
Ryan