George Toman submitted notes on his work building a reefer kit. Here’s his story.
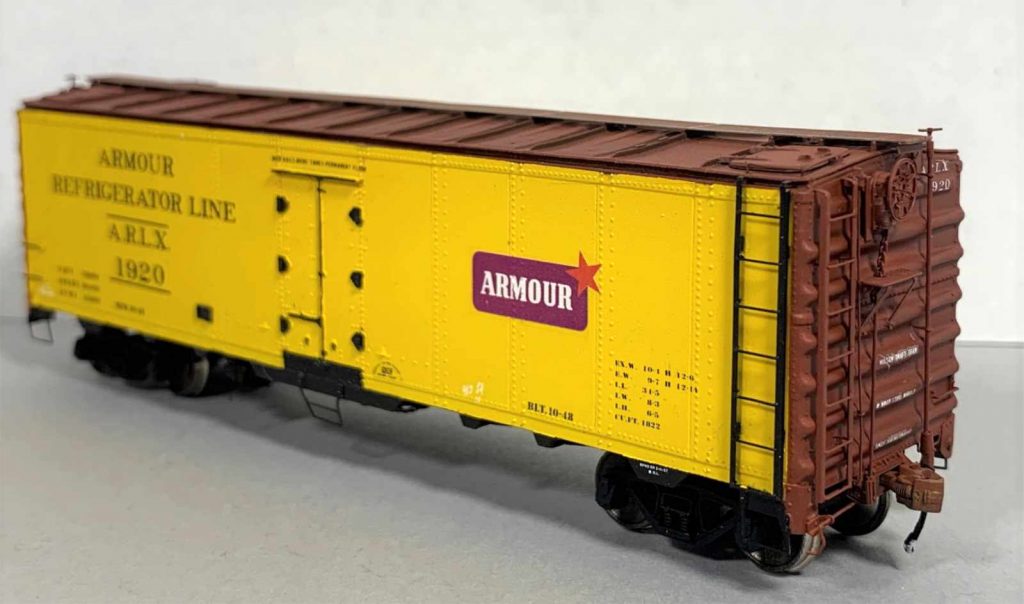
I have always liked colorful reefers seen in freight trains or reefer blocks. Fruit Growers Express, Pacific Fruit Express, Santa Fe Refrigerator Despatch, and many others have caught my eye. When Yarmouth Model Works released their attractive Armour reefer, I could not resist.
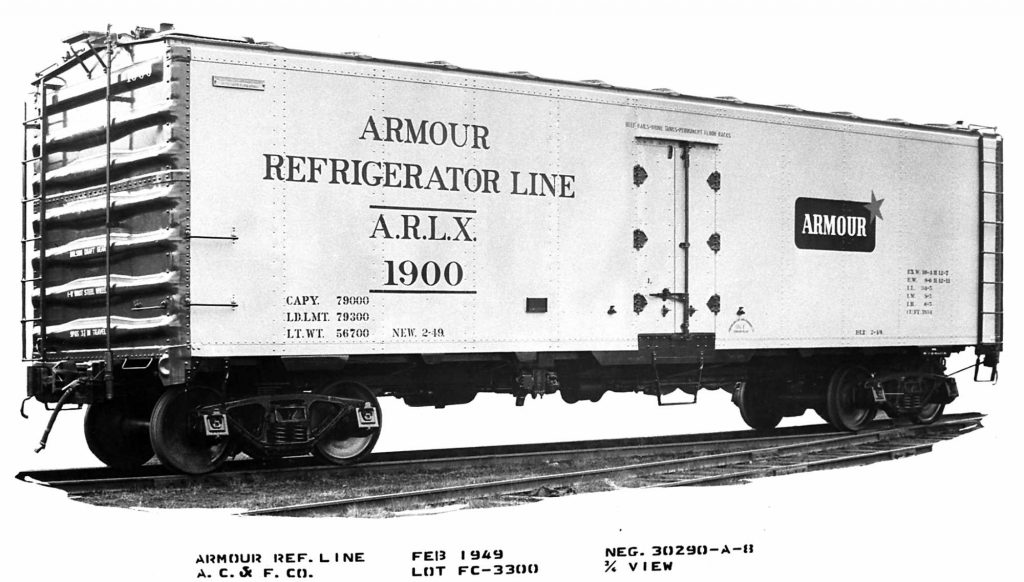
The kit is for an ARLX steel reefer built by American Car & Foundry (AC&F) ordered in 1947 and featured the unique AC&F proprietary roof design.
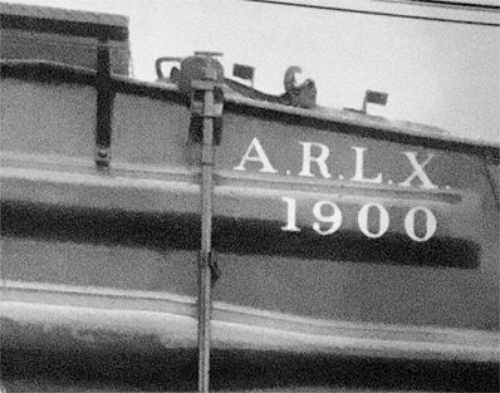
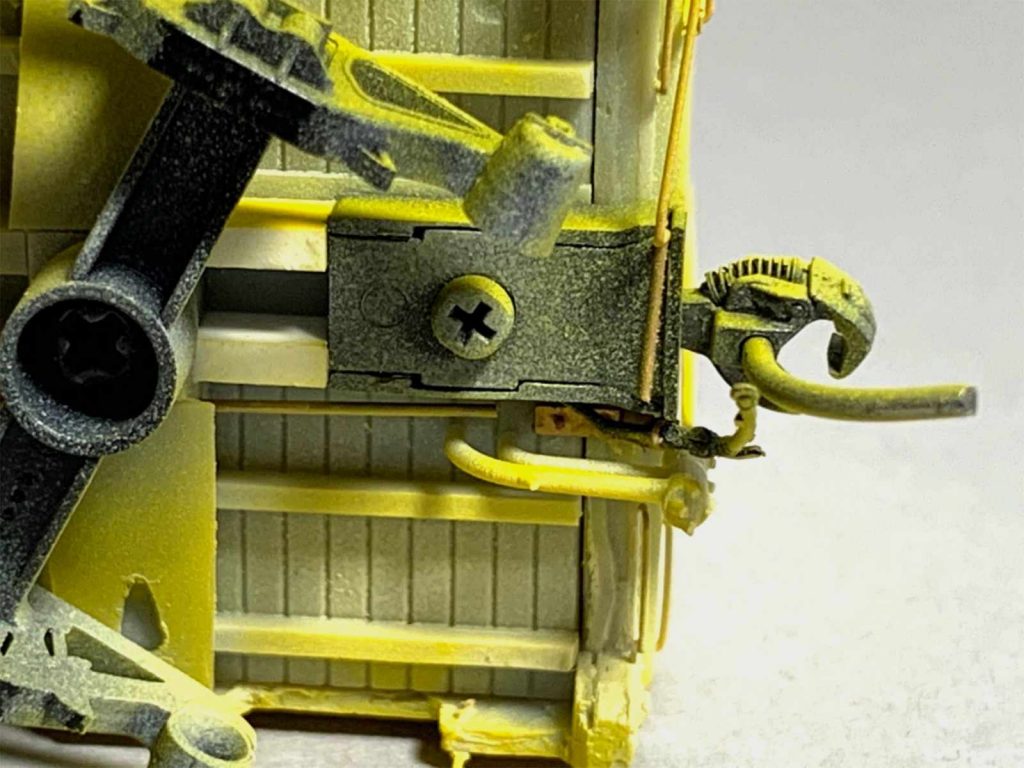
These cars used a brine system to help keep the temperatures cool. Both ends of the car had a vertical control rod and valve that was used by this system.
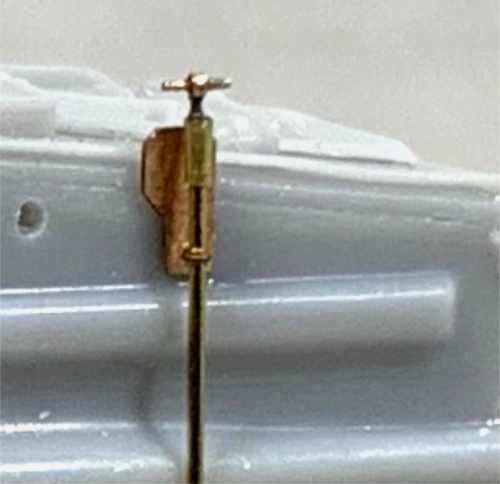
Above we see an enlarged photo of the control valve near the roof. It’s a nice featured on this Yarmouth kit. I decided to improve it. Details are deeper in this post.
I started on this resin kit by cleaning any flash off the parts. I also install temporary trucks and couplers to check the height and make adjustments. Once this is complete, I add the cross bearers and cross ties to the underframe. Holes were drilled for the addition of the brass train line.
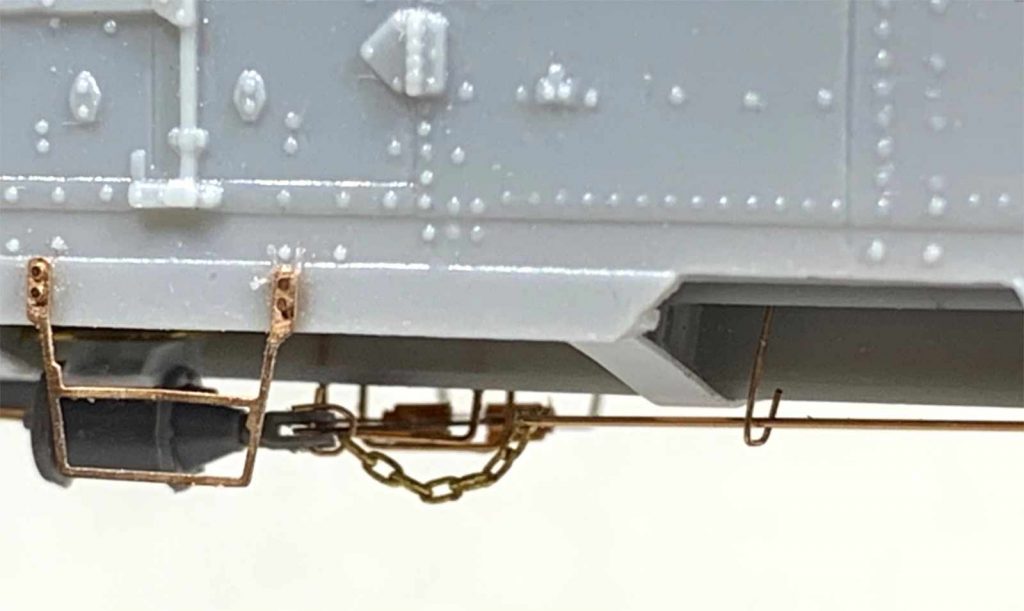
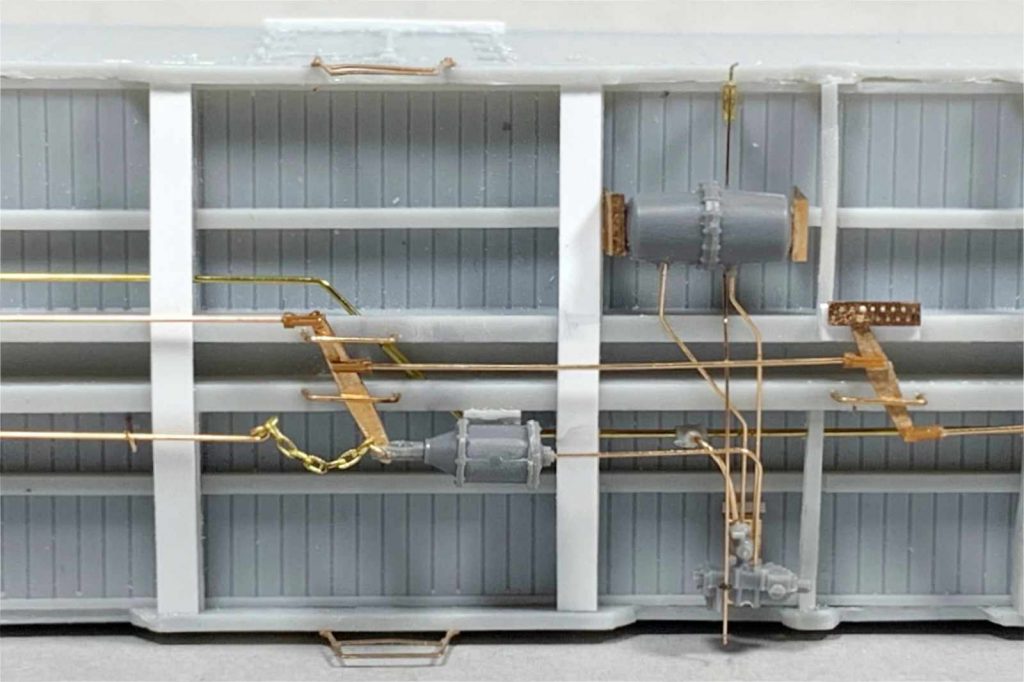
Next up was the installation of the Tichy AB brake parts. Photo etched brass brackets are included for mounting the major components. One thing I did a bit different was to make a D-shaped wire bracket for the connection of the chain connecting the brake cylinder and brake lever. I used 0.008-inch diameter wire for the bracket.
After drilling a 0.009-inch hole through the Tichy part and the brake lever, I threaded the end of the chain link onto this as seen in photo below. It makes a flexible connection for the chain and provides a nice droop.
Here’s the underframe built per instructions, but with the addition of the bleed valve rod and a Tee connection for the airline.
For the brine control valve, the instructions suggest using the supplied photo etched shield and cut off a length of wire with no additional details. I wanted mine to look more like the previous prototype detail photo that had a Tee at the top.
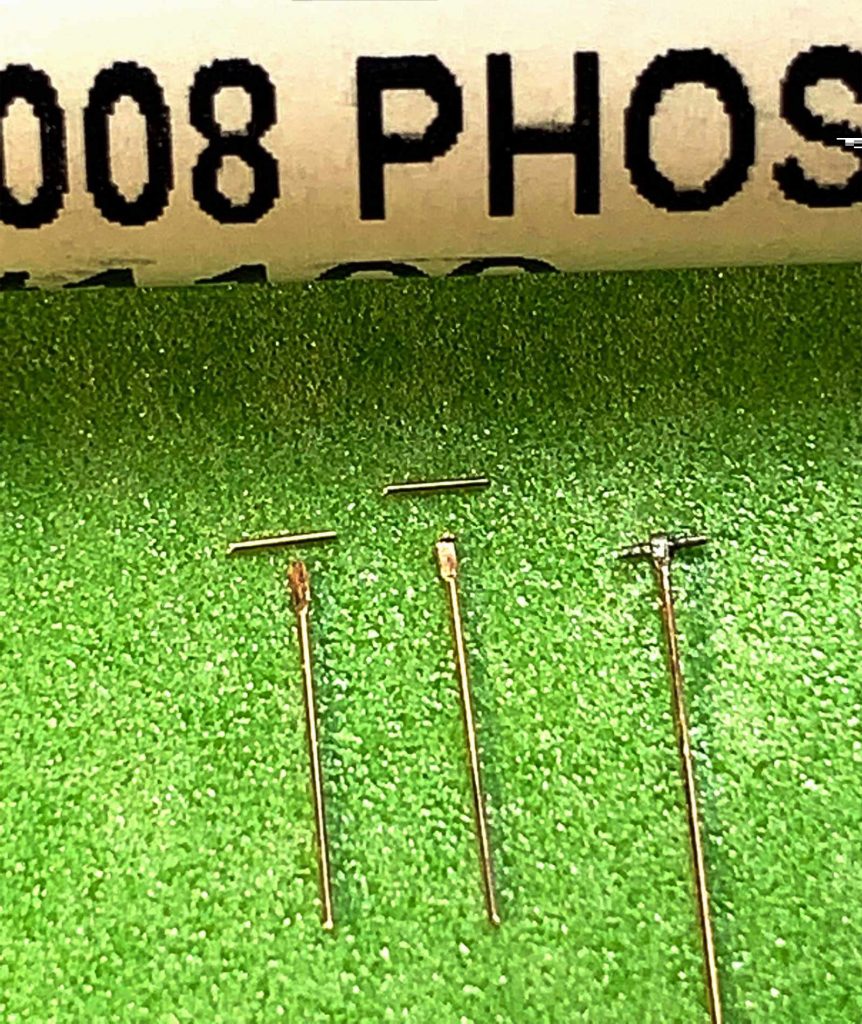
To make my version, I used a piece of Tichy 0.008-inch wire that I flattened with some short nose Xuron pliers. The photo above shows left to right the 0.008-inch wire with the top flattened, middle one a right angle bend is made halfway in the flattened area, and the far right is the flat piece bent around a piece of straight 0.008-inch wire and soldered.
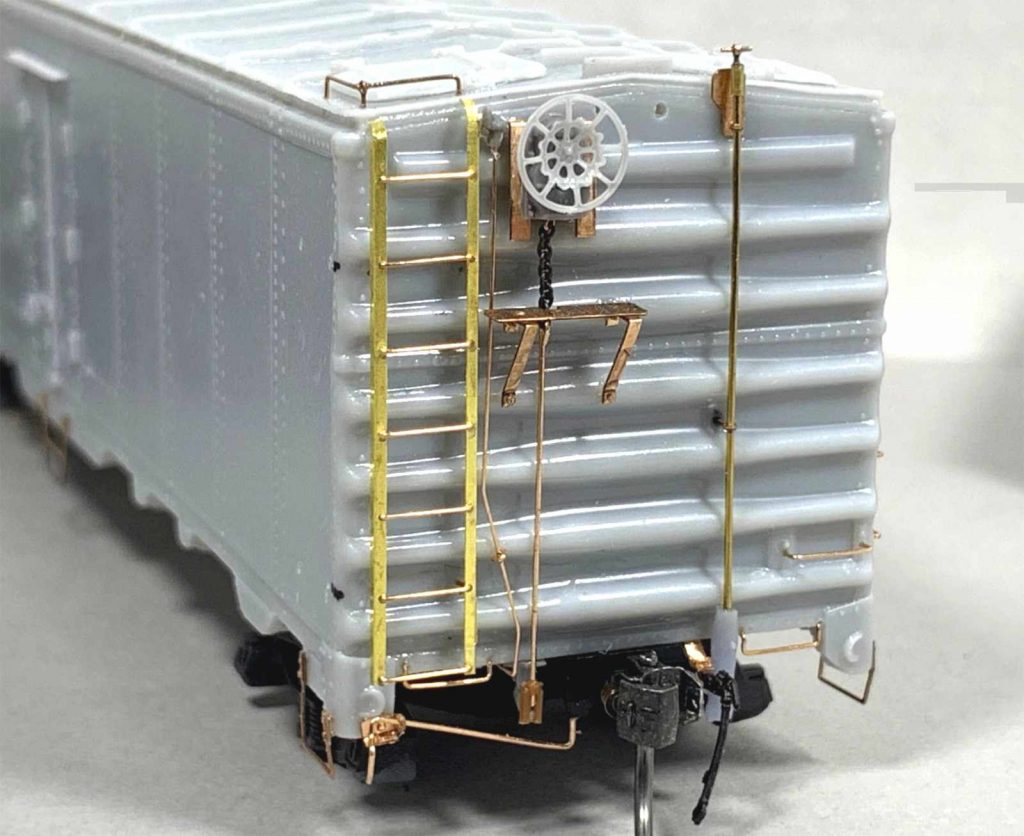
Here’s the B-end of the car with the valve installed. I used a short length of micro telescoping brass slipped over the vertical brass rod and soldered the Tee made in the previous step.
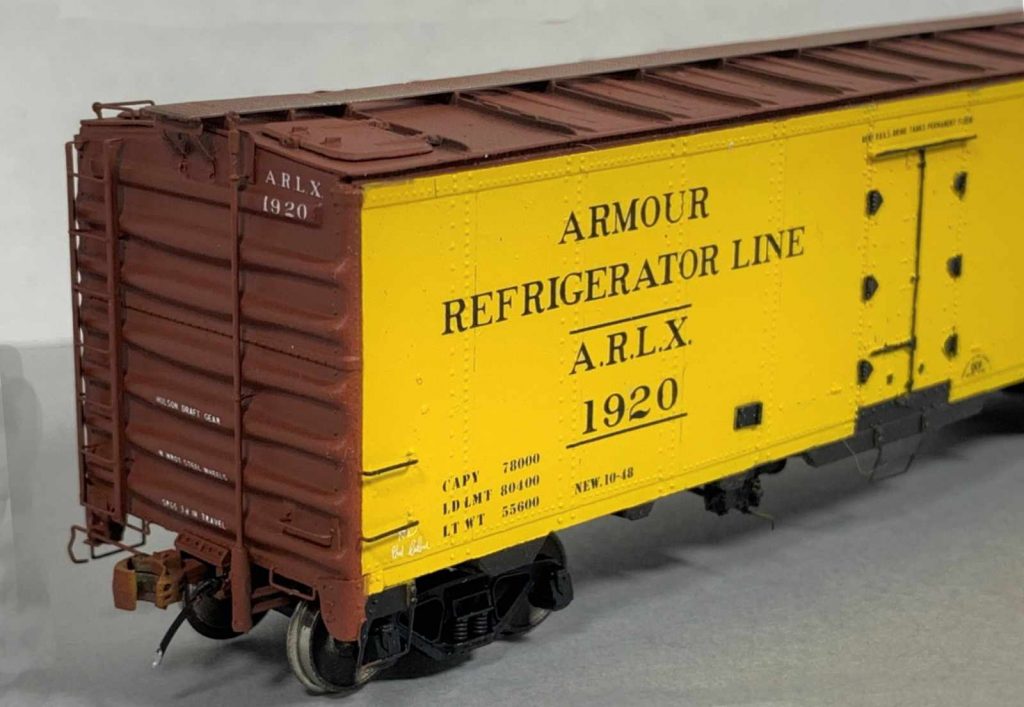
I modified the ladders by using an 8-rung version. I trimmed off the top of the stile at the hole for the 8th rung. This allowed me to cut and form the prototype rounded tops. I installed a Tangent Scale Models brake wheel and Moloco rubber air hoses.
The 3D printed bottom brine valve is seen above with the two lines going into the floor bottom.
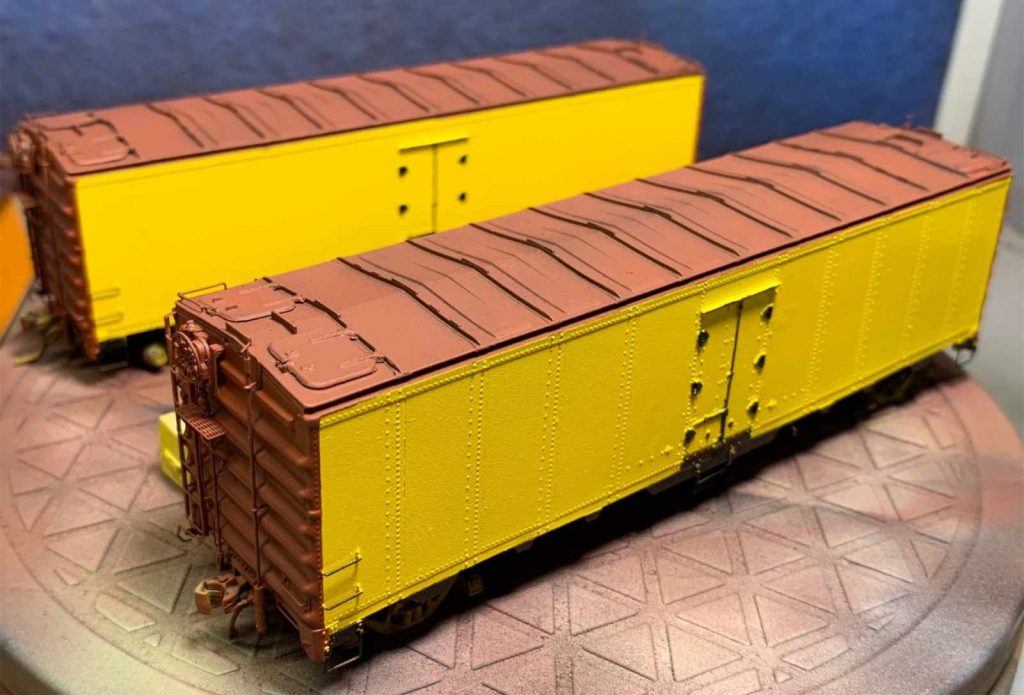
The car was cleaned and primed with Vallejo Primer. The sides were sprayed using Vallejo Mecha Brand yellow (26.701). The ends were sprayed using some old Polyscale Special Oxide Red and the underframe was painted with Vallejo Black Gray (70.862).
According to Ed Hawkins the roof was coated with black cement paint and then red anti-slip material was applied. To achieve this look, I first sprayed the roof with Vallejo Black Gray. A light coat of Polyscale Special Oxide Red was sprayed on allowing the black to show through a bit.
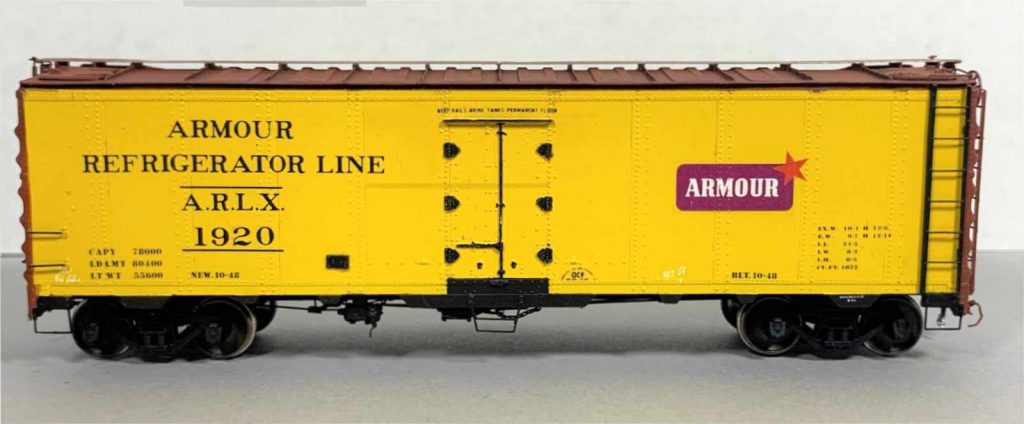
I applied a coat of Vallejo Gloss before installing the decals. The work was sealed with Vallejo Semi-Gloss, except for the roof and underframe which were left flat. I’m currently undecided on weathering.
The last details to install were the running board and side ladders. The ladders were painted separately since they are black. I gave the running board a light overspray of Special Oxide Red to finish the project.
Overall, this was a fun project to build a colorful car. – George
It’s always a delight to feature George Toman’s modeling on the blog. His Armour reefer is a real eye-opener. Thank you, George, for sharing your work with us.
Questions and comments can be posted below. Please follow the instructions so your comment can be posted. All comments are reviewed and approved before they appear. To subscribe to this blog, add your email address to the function at the bottom of the right column on the main page. Share the blog link with other model railroaders.
Excellent work! I really appreciate the detailed information you gave.
Beautiful work, George, as I have come to expect!
Nice job as usual. Any tricks to painting the door hardware besides steady hands?
Bruce
Bruce, I used a extra fine micro fiber brush to paint the door hardware. Lightly dipping the tip in the paint and dabbing off excess. A 10/0 brush also was used.
A beautifully made model
Amazing modeling as usual George, You always set the bar extremely high and love your models
Thanks for sharing your work and methods.
Fenton