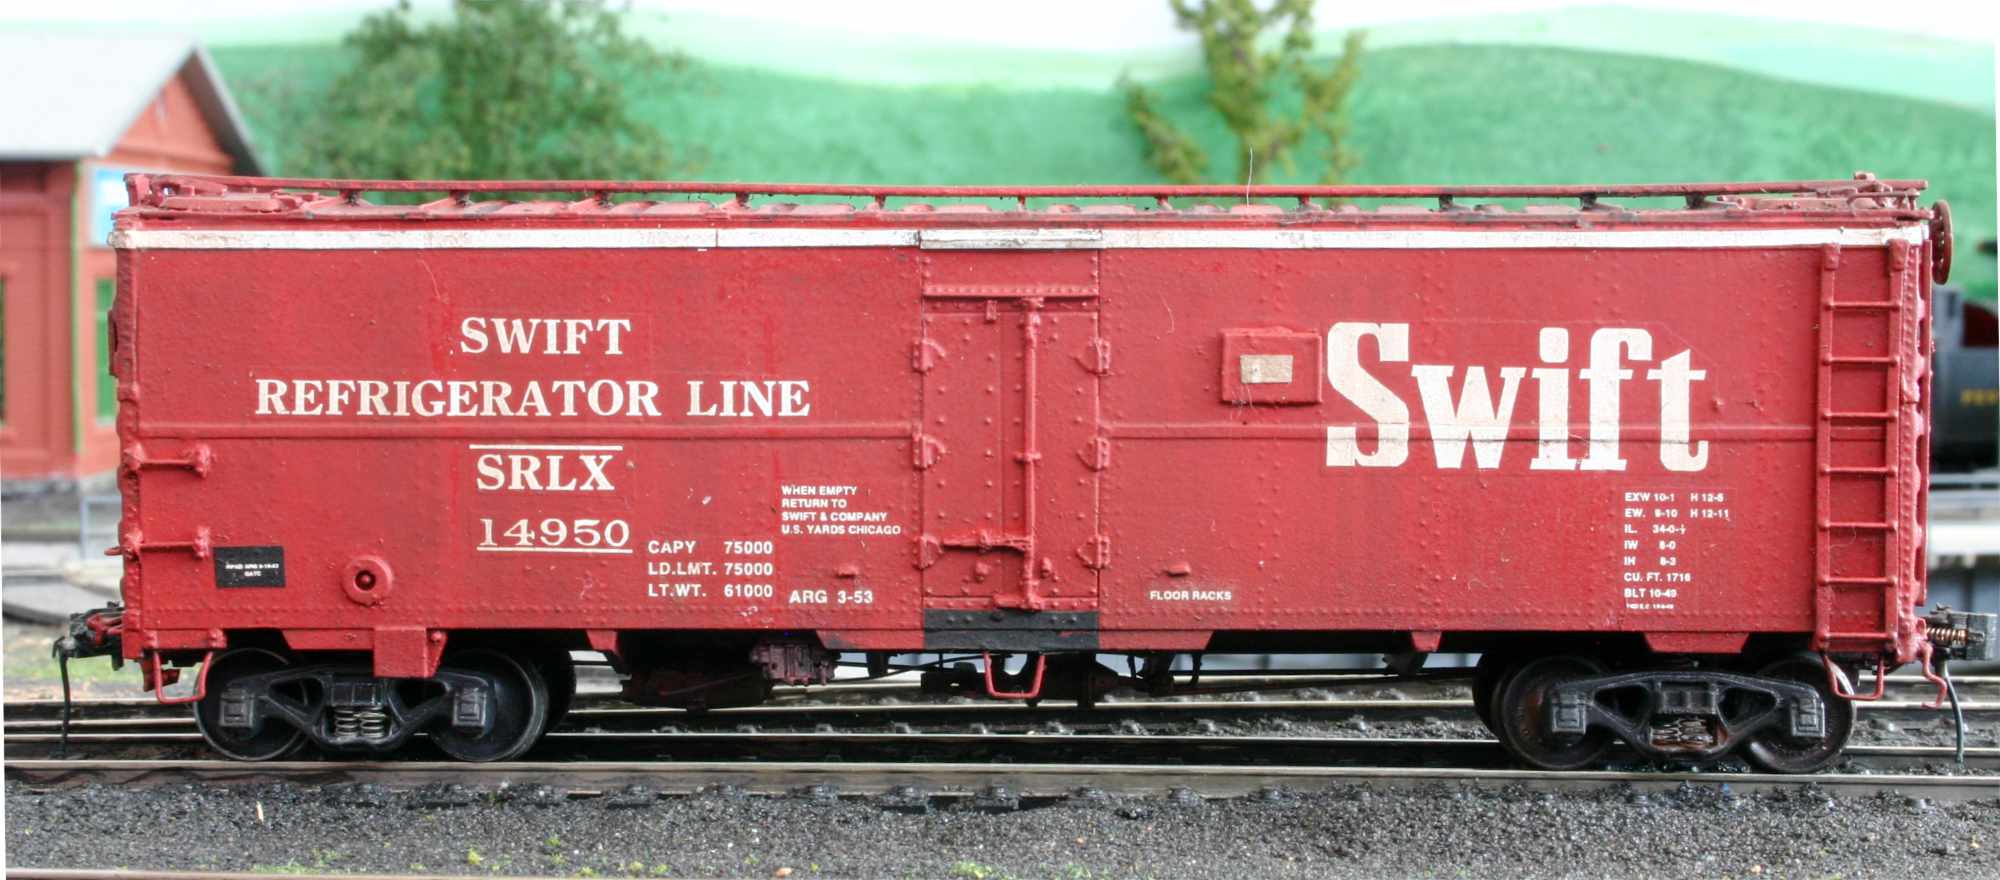
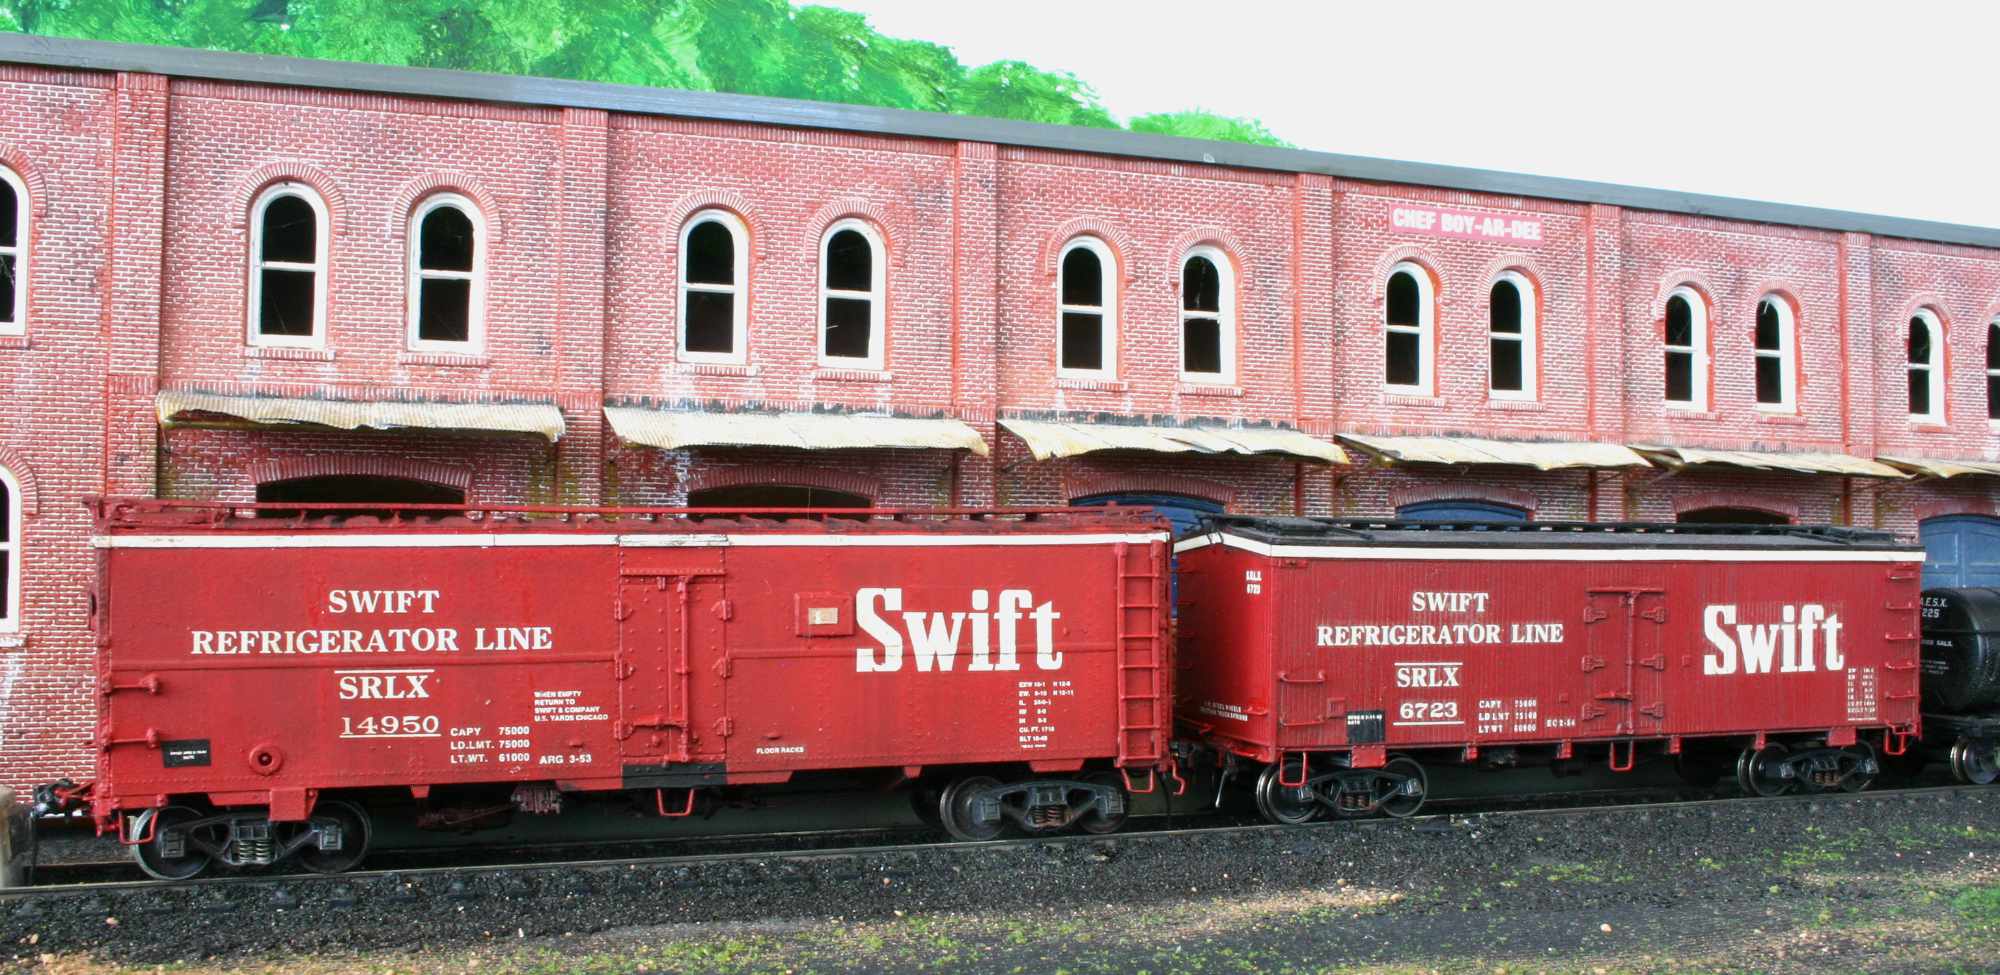
Chuck Cover added a new reefer to his HO scale freight car fleet. He sent the following notes and photos on his SRLX 14950 build, seen above in Chuck’s Northumberland yard.
I purchased a Sunshine Models 40-foot Swift reefer kit about a month ago. There wasn’t a kit box or instructions, only the kit parts. I have built three of the Sunshine 36-foot Swift reefer kits and really like the red cars with the large white Swift herald. On my PRR Shamokin Branch layout the Swift cars service the Chef Boy Ar Dee plant in Milton, PA. I thought that this 40-foot car would complement the three 36-foot cars.
After the package arrived, I checked it to see if all the parts were included, which they seemed to be. I requested copies of instructions and a few prototype photos from the members of the realSTMFC and Resin Freight Car Builders email discussion groups and was quickly rewarded.
The Sunshine prototype information indicated that these Swift horizontal seam reefers were rare since 40-foot was a non-standard length for Swift. They bore an assignment to Union Stockyard in Chicago which can be seen stenciled to the left of the doors. The cars were built in 1948 and 1949 by GATC using the UTRX design with Dart-Not steel ends and Duryea underframe. The only variation from the URTX cars was the use of smaller hinged doors and brine tanks, including brine tank release rods on each end that ran from the bottom of the car to roof level.
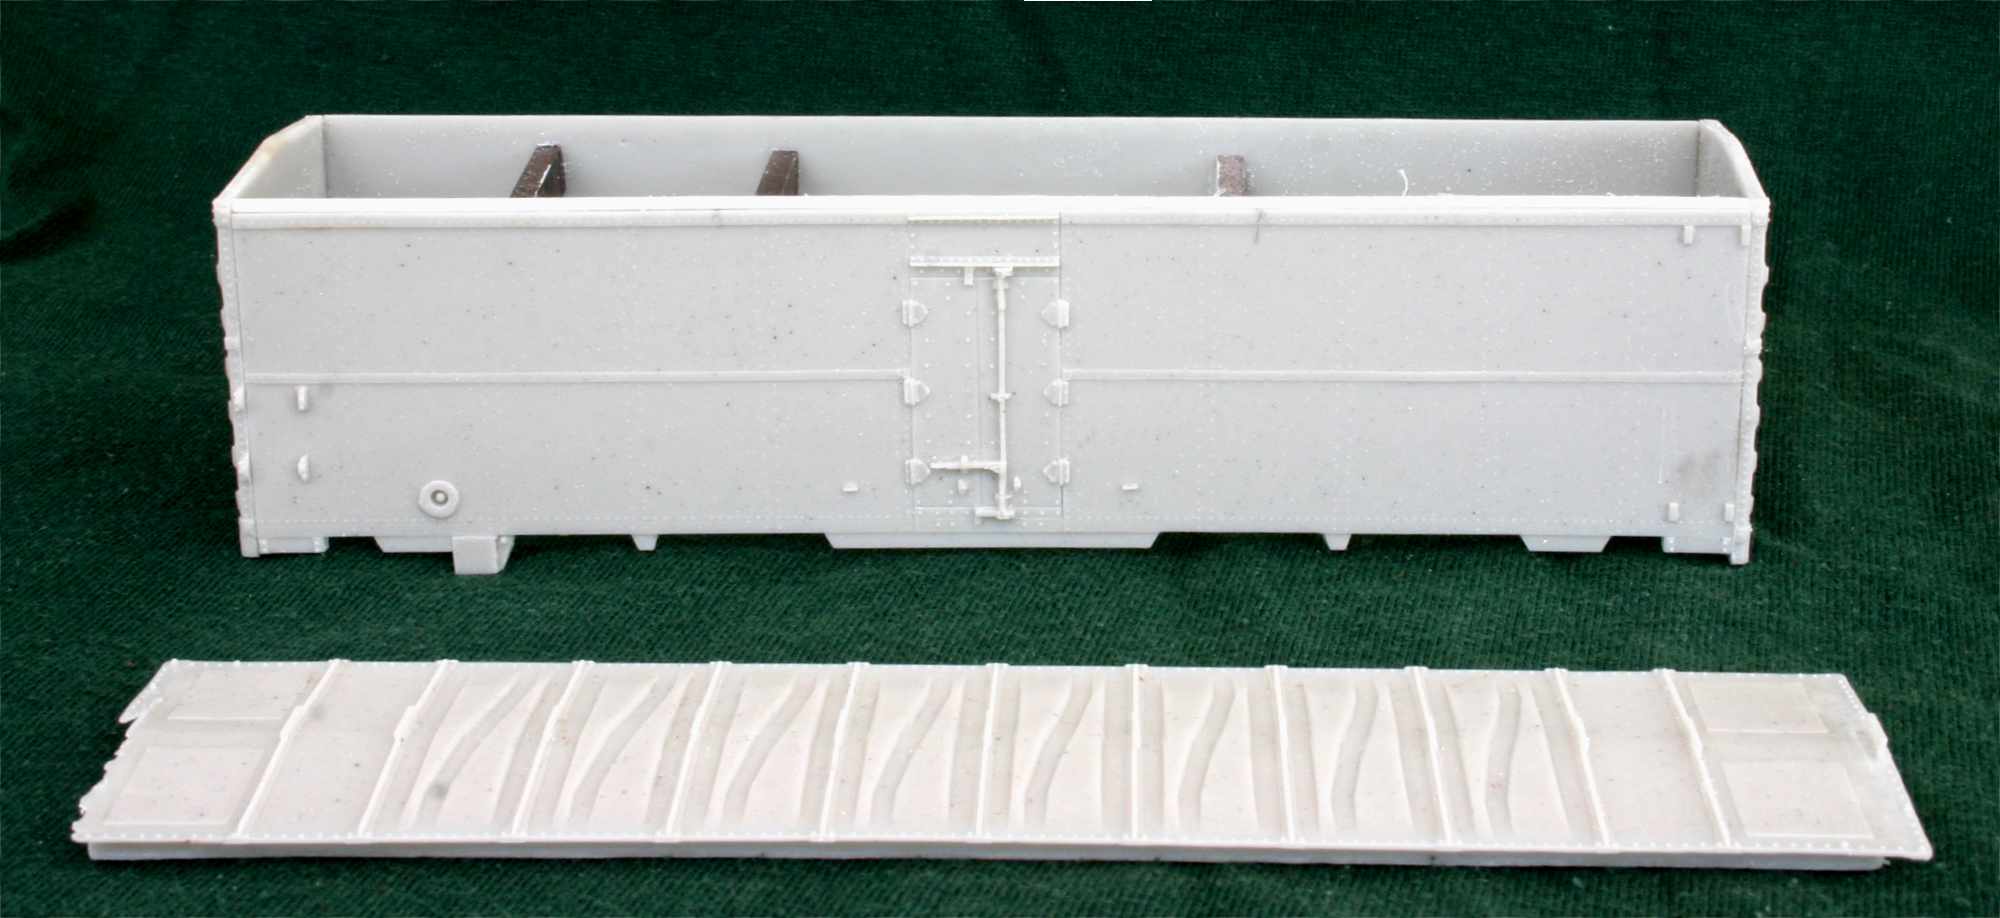
The construction of this model was similar to most Sunshine kits so I will point out some of the differences and problems that made the project interesting. The roof was a one-piece unit, however the previous owner had started cleaning up the castings and one corner and part of the end of the roof had been damaged. I found part of the end of the roof that had been broken off in the parts bag. I reattached that missing section after securing the roof to the four sides. I then trimmed off the corner to make the missing portion square and replaced it with a square of 0.010-inch thick sheet styrene. I left a small defect that I felt was better as it was than to trying to repair.
The results can be seen above. The sides both should have had a 4-inch high inset that made the side the same height as the ends. On one of the sides this inset had been removed, probably by the previous owner when removing the flash. I replaced the missing inset with 2 x 4-inch strip styrene.
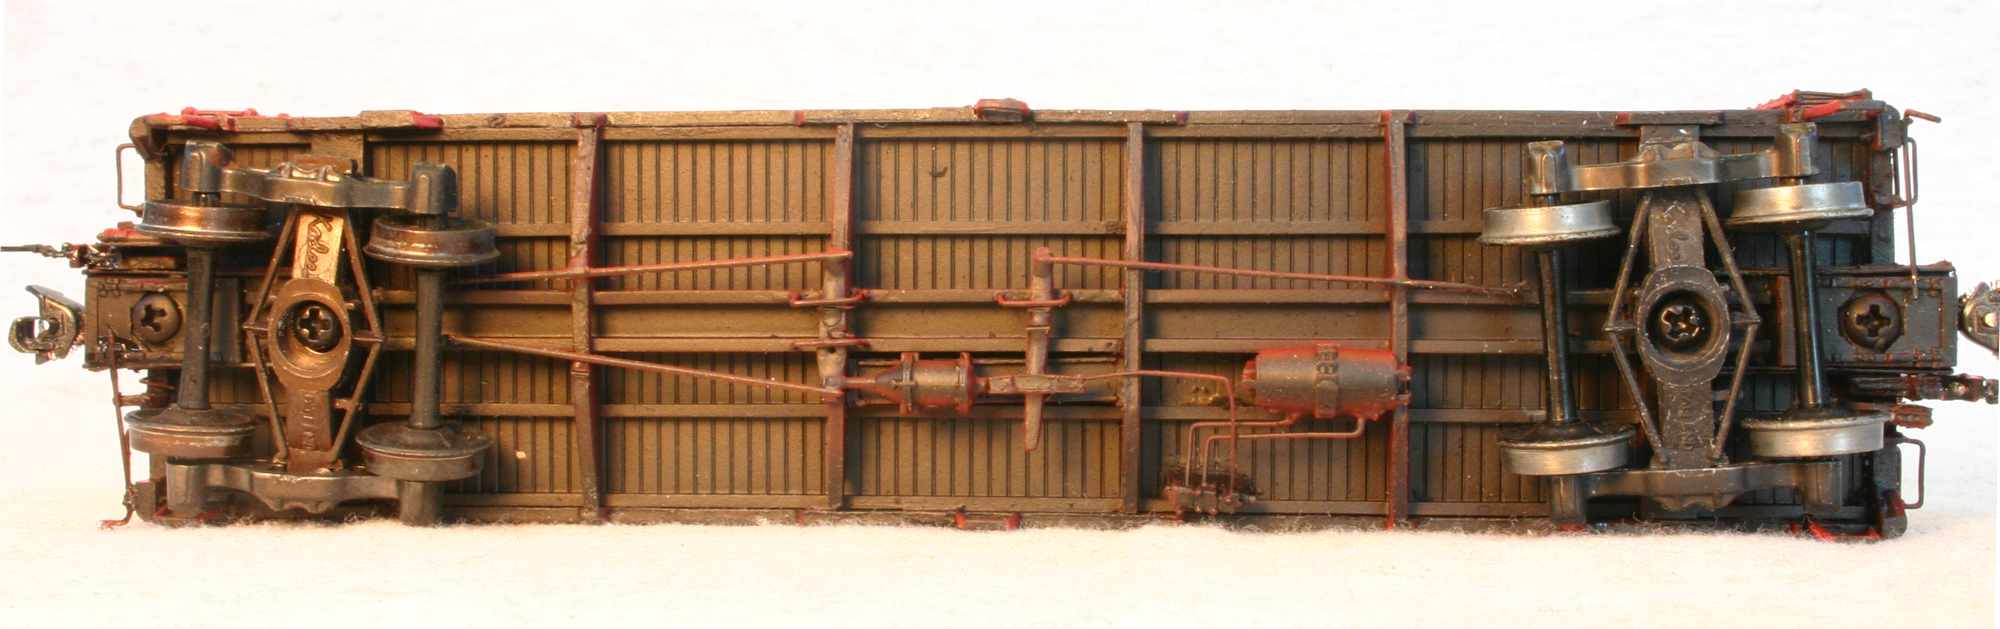
After the shell was assembled, I worked on the underframe. I added weight and drilled and tapped the bolsters for the trucks, then installed the couplers. Once the underframe casting was attached to the car body, I installed the Duryea cushion underframe components, one of the unique features of the model. I only have a couple of models with Duryea underframes and each one looks a little different. The instructions provided a photo with written instructions that made things go smoothly. I usually add the visible portions of the underbody brake details, leaving out the airline.
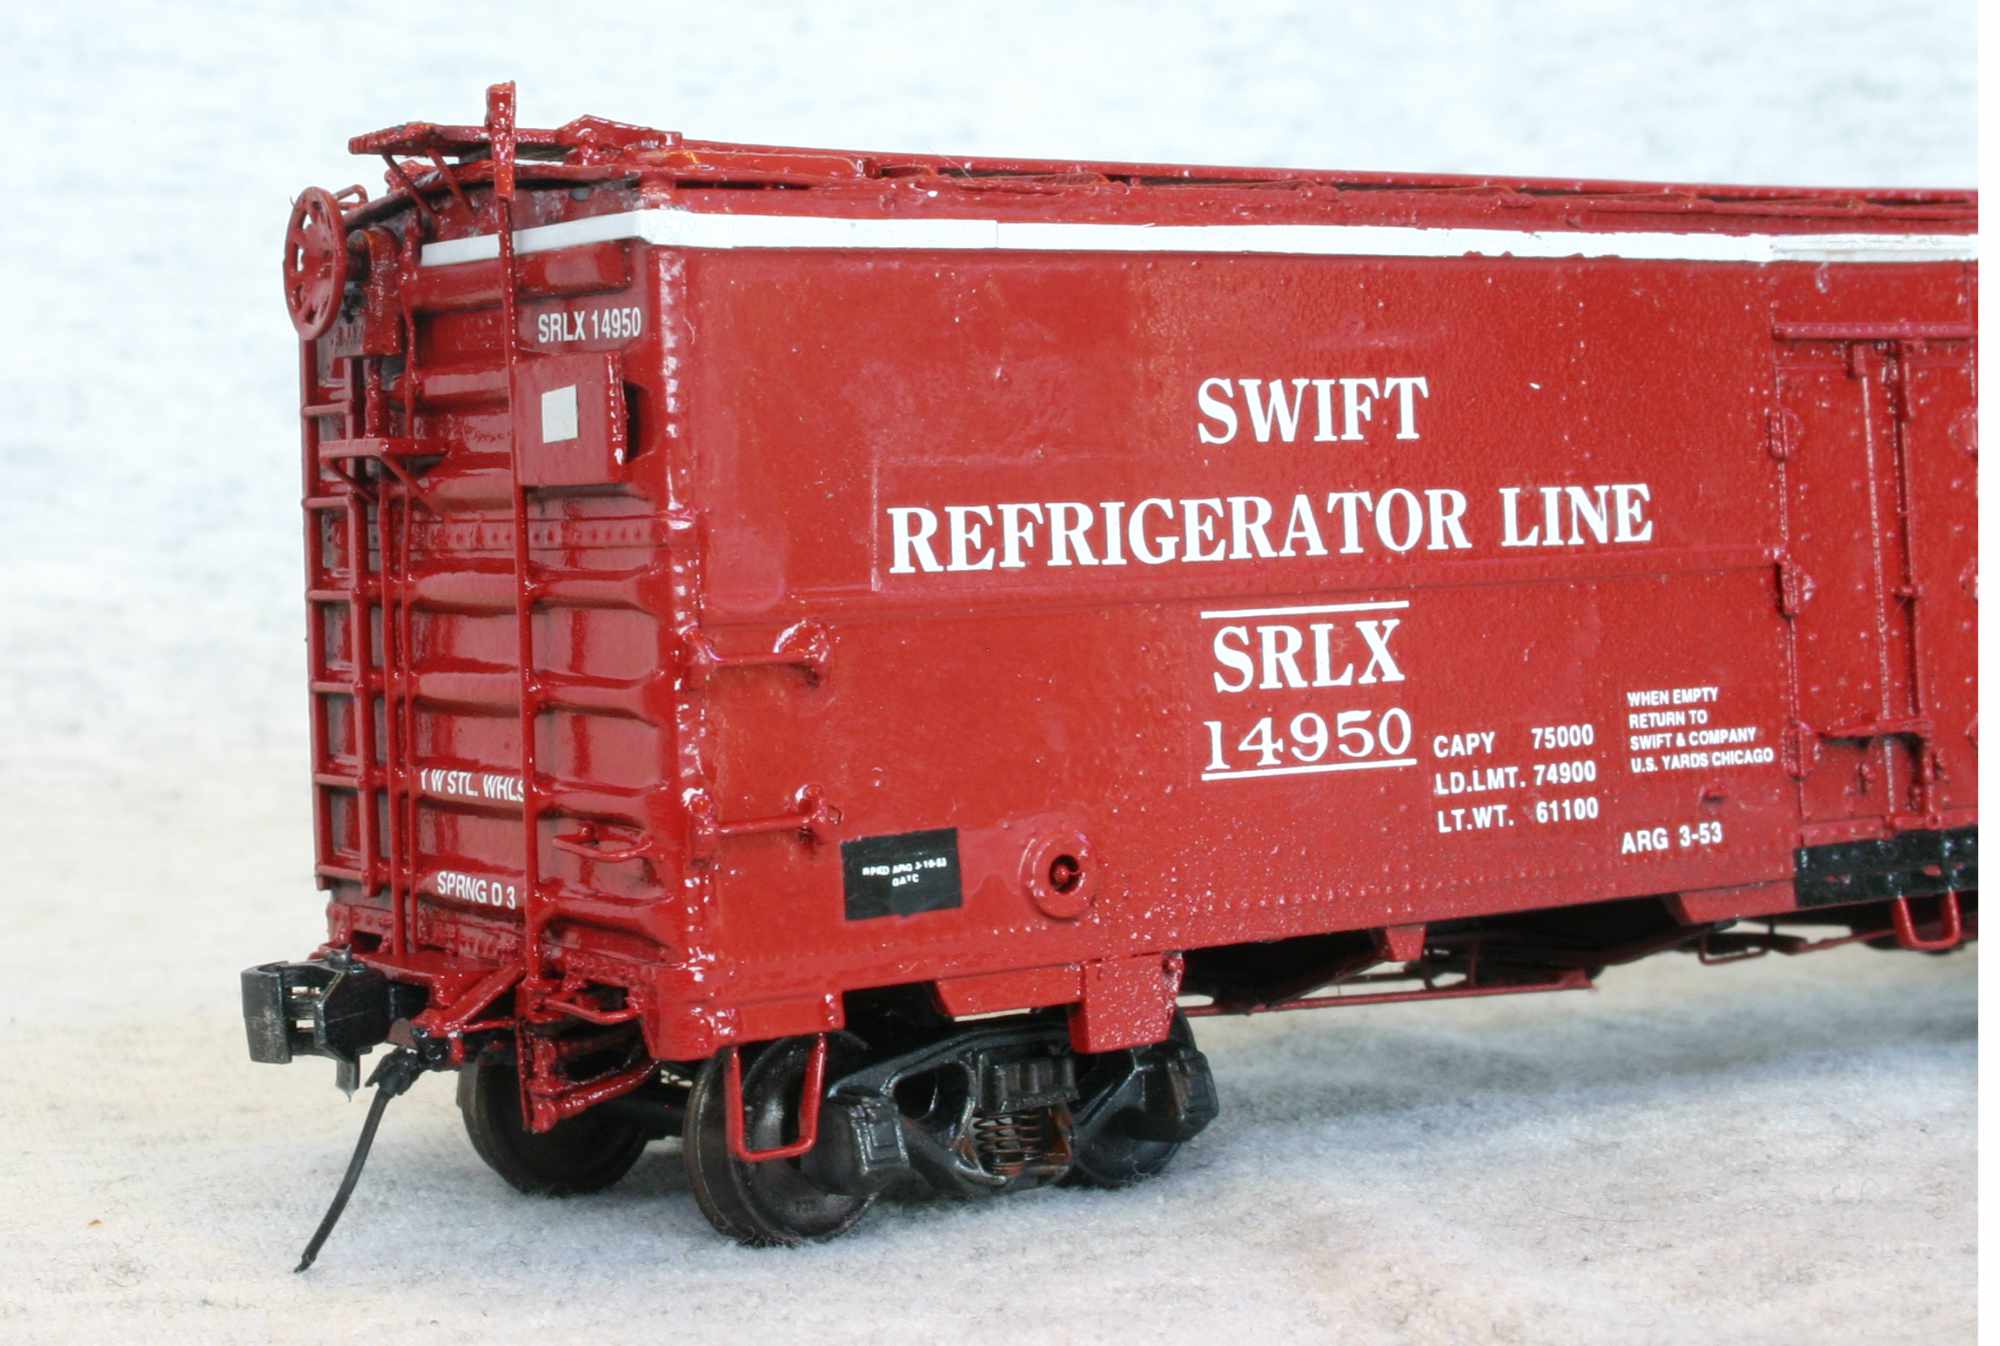
The second unique feature of this car is the brine tank release mechanism. I was fortunate that Steve Hile shared photos of the prototype that clarified the assembly and location of this mechanism (photo 5).
I found that the bottom of this mechanism interfered with the rotation of the trucks so I had to trim the bottom hose to allow the trucks to swing freely.
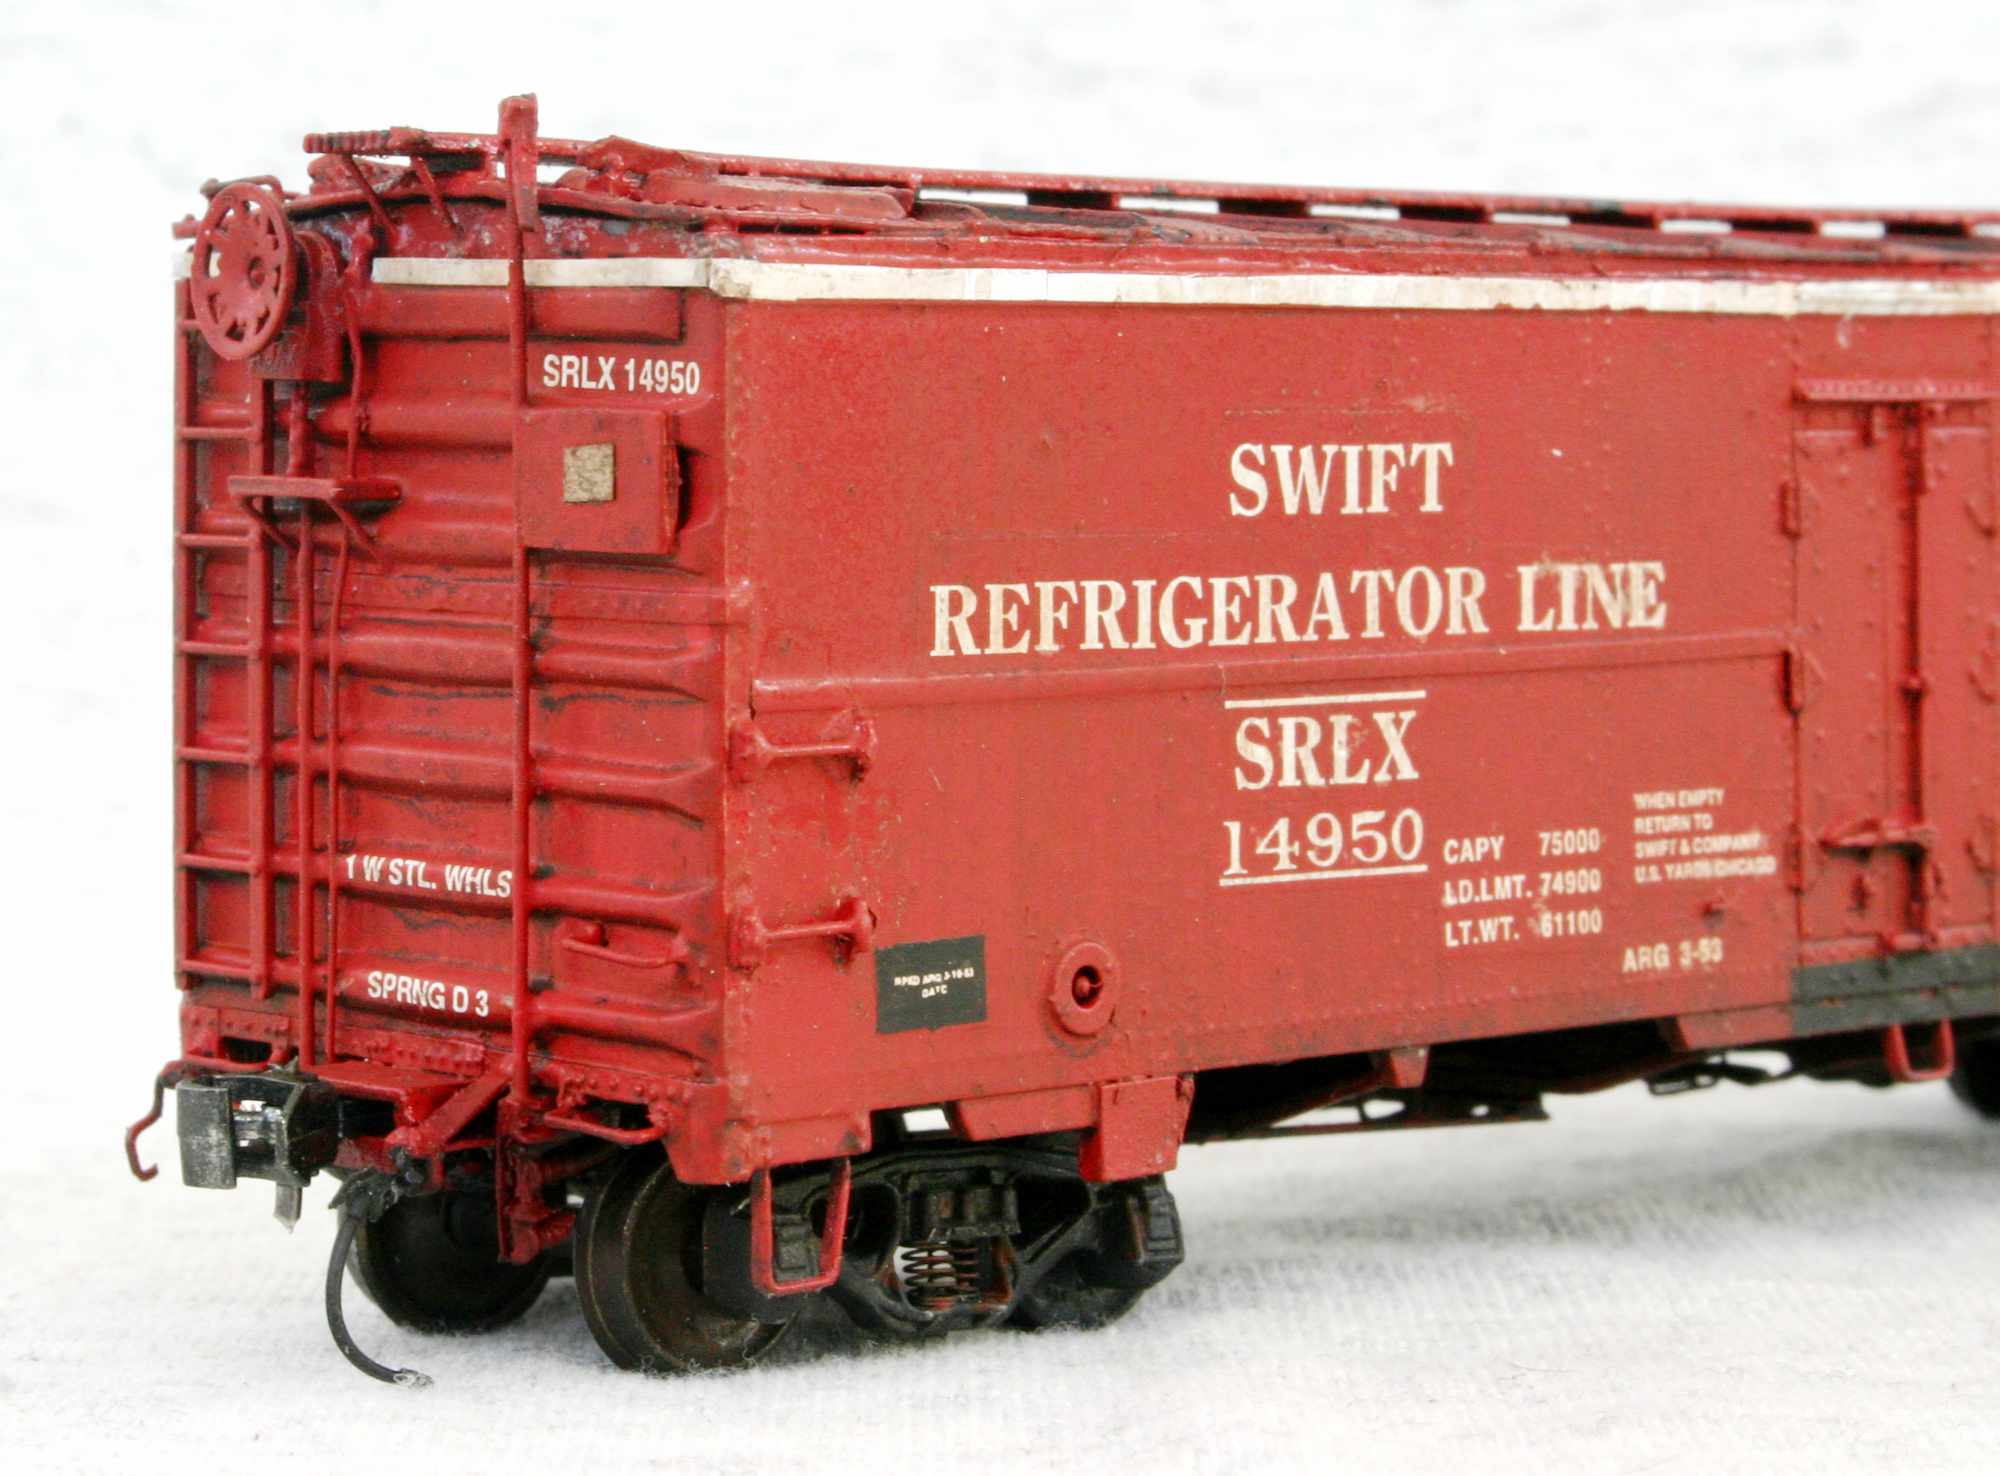
I had painted the three Sunshine 36-foot reefers with Testors gloss red from a rattle can and was happy with the results. However, this time the can blasted out globs of red paint onto the flat black primed model. I cleaned up the mess as best I could with a cloth and some acetone and was able to get the thick globs of paint off the body pretty well without taking off the primer. I ordered a bottle of Scalecoat II Santa Fe Red. This time I used my air brush for a nice gloss red color, which was a bit brighter than the Testers.
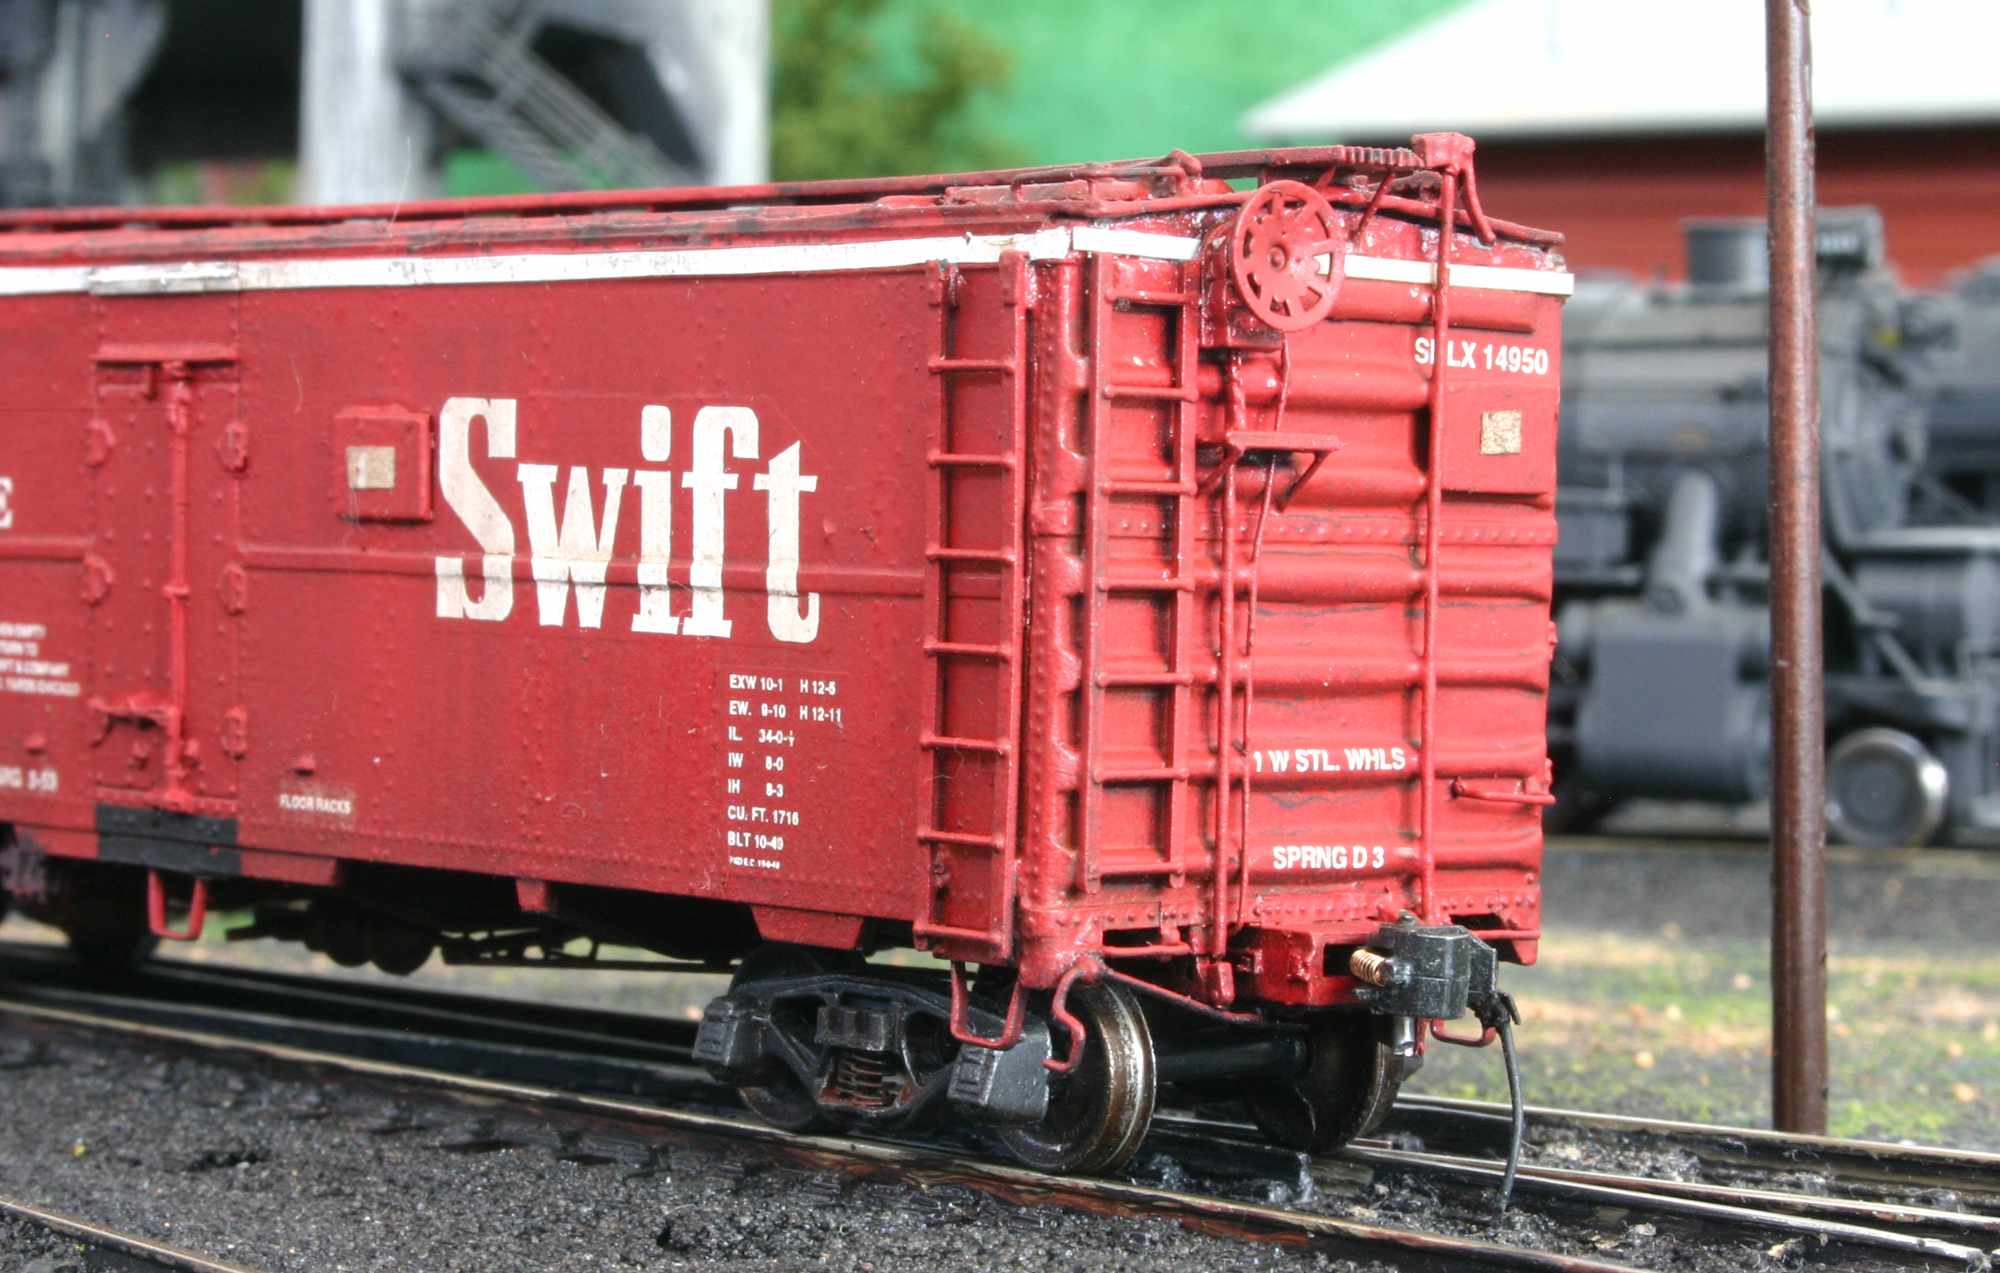
The decals were coated with Microscale Liquid Decal Film the day prior to working on the car. The only difficult part of decorating this car is the white fascia around the top of the sides and ends. I used the decals for the side fascia, having some problems over the doors but then decided to use 1 x 4-inch strip styrene for the fascia right above the top rib on the ends. I had used the styrene strips to do all of the white fascia on the three 36-foot Swift reefers in previous builds.
I weather my models using thin washes of artists tube acrylic paints. I can fine tune the weathering with the thin washes. You can lighten or darken the original freight car color depending upon what colors are chosen for the wash. For this build, I wanted to tone down the Santa Fe Red to more closely match the 36-foot reefers.
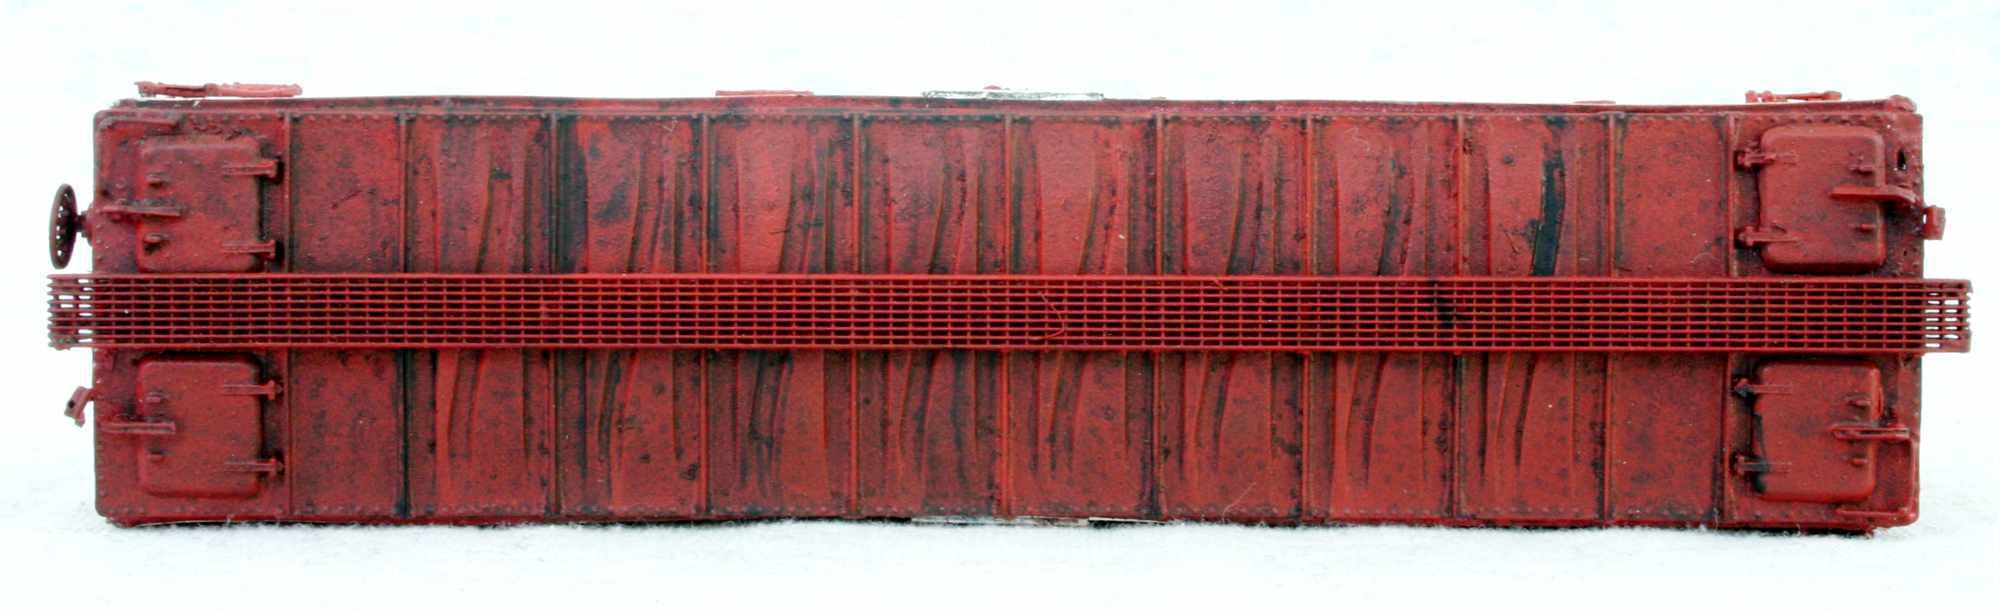
Prototype photos of these cars show the roof to be a very dirty/sooty black color with some red showing through. I used a thin wash of mostly Raw Umber with Mars Black and Burnt Sienna on the sides and ends and a heavier wash of Black and Sienna on the roof. You can remove some of the washes with water and a Q-tip if you are not happy with it once the washes have dried.

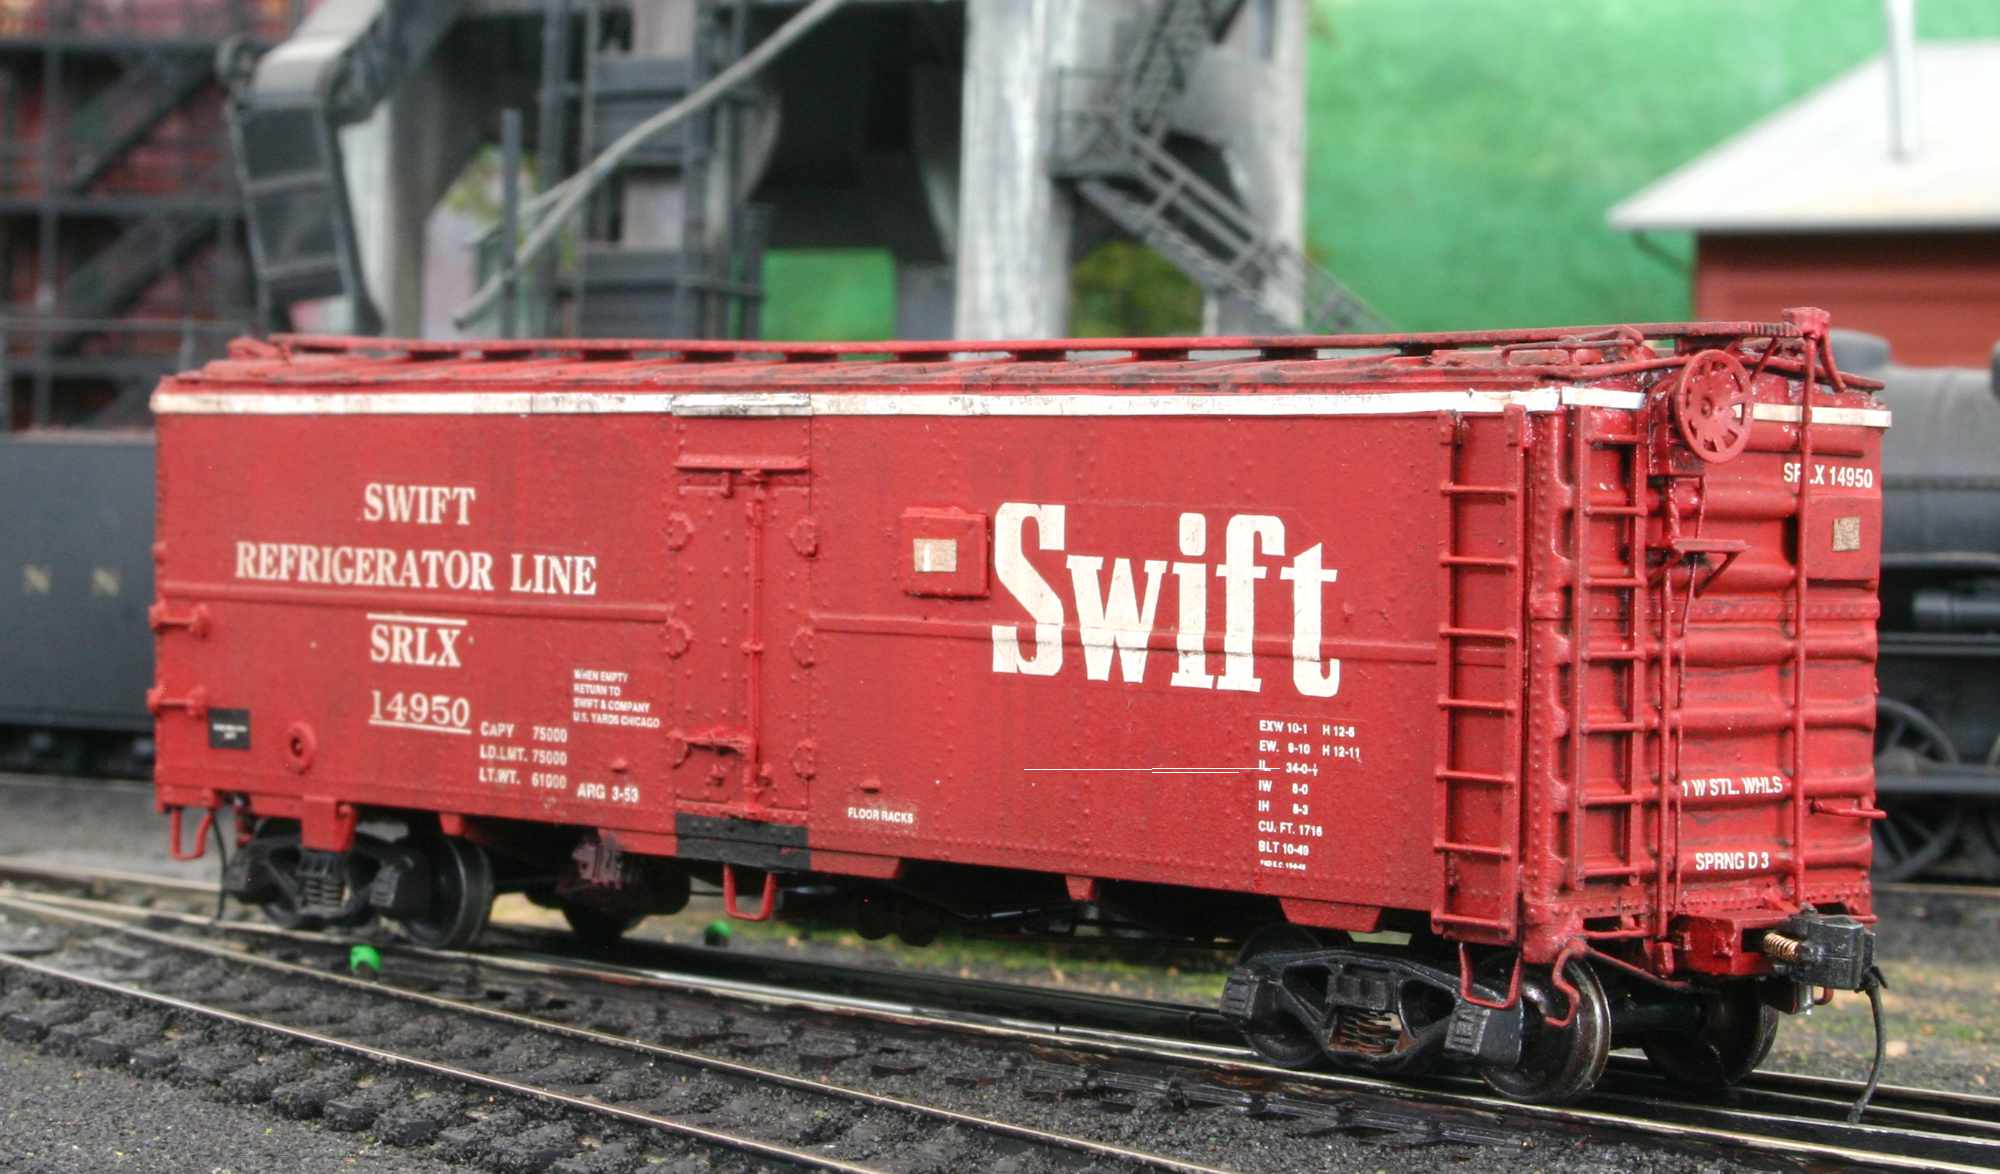
Here’s the finished model with a 36-foot reefer spotted at the Chef Boy-Ar-Dee plant in Northumberland.
We thank Chuck Cover for sharing his experiences in building this Sunshine Models Swift reefer resin kit. I’m sure it’s already racking up the miles on his Shamokin branch layout.
Questions and comments can be posted below. Please follow the instructions so your comment can be posted. All comments are reviewed and approved before they appear. To subscribe to this blog, add your email address to the function at the bottom of the right column on the main page. Share the blog link with other model railroaders.
According to the fact sheet with the kit. These cars were for a product that no one can remember what they carried. They were not mixed with the 36 foot cars. They are nice looking cars.
Excellent model and very interesting article–the more so as I have one of these on my build-pretty-soon list. Are the photos of the tank-draining mechanism available on line?
Thanks John. I asked the discussion list for help with photos for the brine tank release mechanism and was sent a few photos of the prototype. It was sent to me off-list so I don’t want to share them without permission. I will say that the photos show how the mechanism looks on the end of the car, but did not show what the piping under the car looked like. As mentioned in the article, I had to remove some of the molded piping to allow free swing of the trucks, but you can see the piping in the model photos. I have not searched on line for more detail of this mechanism but that is on my to-do list. Good luck with your build.
Chuck
Well done Chuck, the car looks very nice and the weathering is done well also. Fenton
Fenton,
Thanks for the comments, much appreciated.
Chuck
Very nice-looking build of the Sunshine Swift Reefer.
Thanks for sharing your build
Thanks George. Much appreciated. Chuck