Lester Breuer steps in to share notes on building a classic HO scale resin freight car kit.
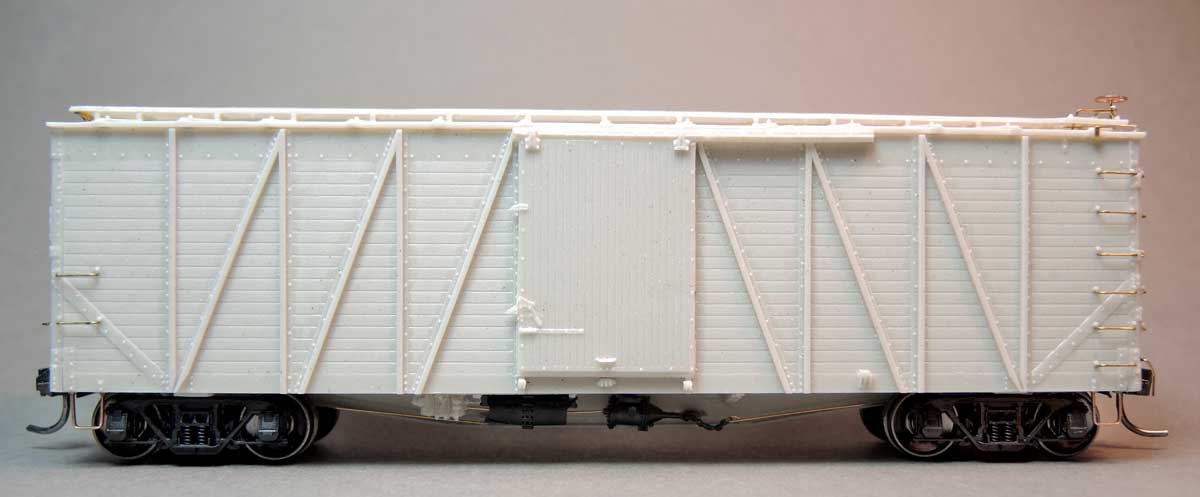
Another car is ready for the paint shop. I recently acquired this Sunshine Models box car kit and thought it would be good to get it on the railroad. This is a CB&Q XM-28 box car, kit 57.3.
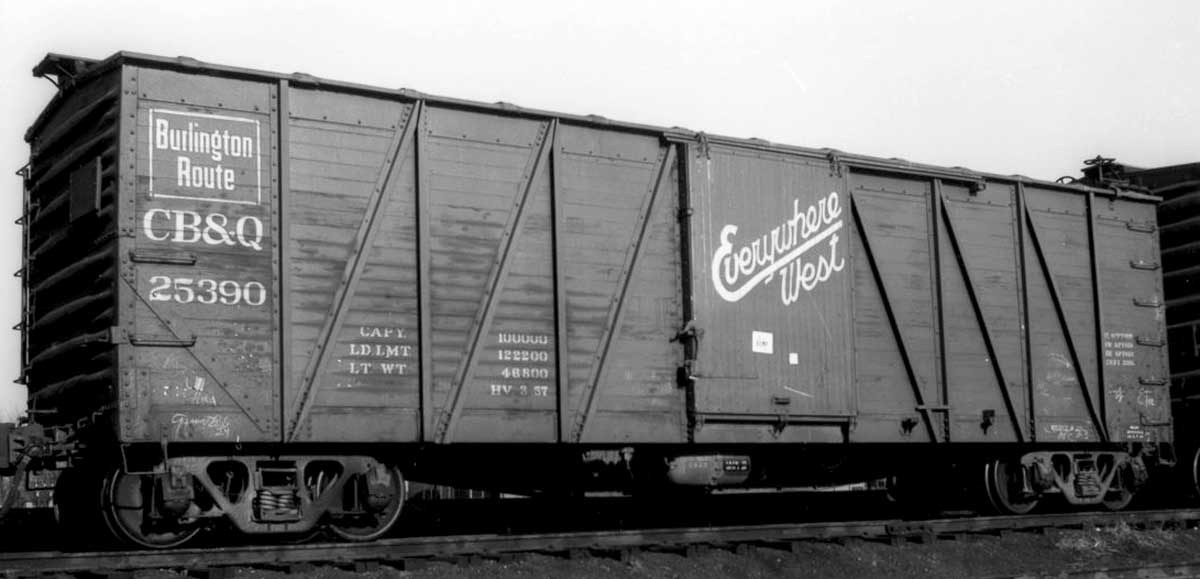
The CB&Q installed 500 of these XM-28 class box cars in 1928. They were numbered in the 25000-25999 series and had steel fish belly center sills. The majority of these cars lasted in service through the mid-1950s but numbers dwindled into the 1960s. Less than 100 were in service by 1965. Additional prototype photos of these cars can be found in CB&Q Color Guide p. 41 and 42.
Car sides, ends, and roof assembled for the basic car body. Six round plastic sprues were added to interior corners and in the middle of the car at the doors to strengthen the car body and to provide mounting supports for fitting the underframe. The model was weighted to 3.8 oz. with metal electrical outlet box punchouts glued to the underframe prior to inserting and gluing it into car body.

A few exterior changes were made with parts not supplied with the kit. Longitudinal running board brackets from Yarmouth Model Works were installed. (Ed note: These etched longitudinal running board brackets are currently unavailable but may be reintroduced this summer.) Latitudinal running board brackets are made from Detail Associates flat bar brass stock 0.010 x 0.030 -inches (part #2524).
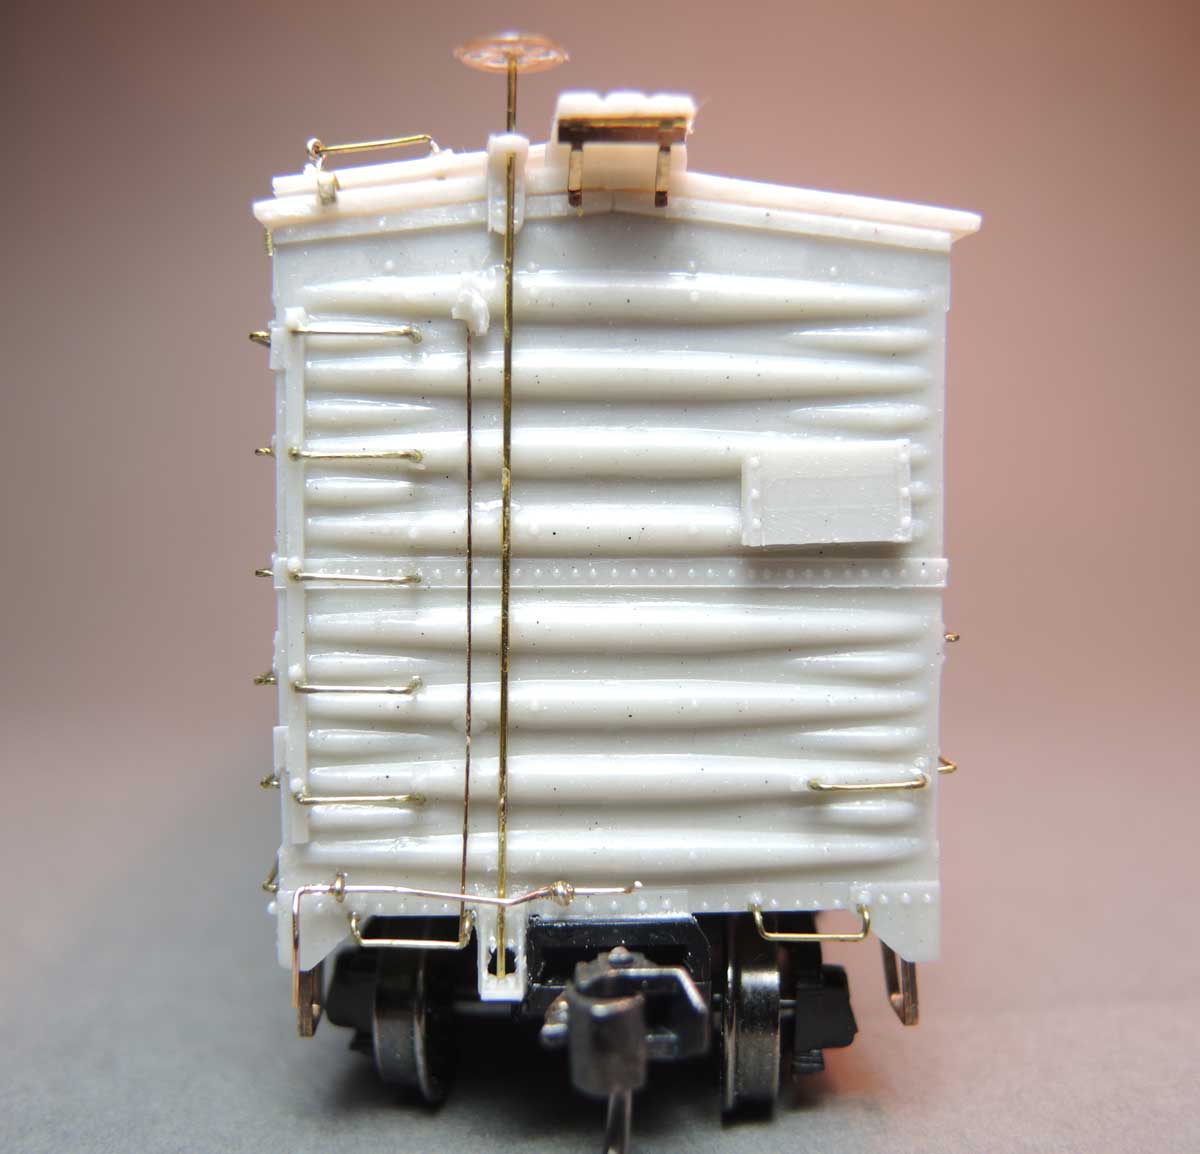
The retainer line is Tichy Train Group 0.008-inch diameter phosphor bronze wire (part #1100). The uncoupling levers were made from Tichy 0.0125-inch diameter phosphor bronze wire (part #1106).

The underframe piping from air reservoir to control valve is Plastruct #90850 0.010-inch styrene round rod. All other piping and rods are Tichy 0.0125-inch phosphor bronze wire. The chain is from Campbell and has 40 links per inch. Kadee #148 whisker couplers were installed in the Kadee #242 boxes. Accurail Andrews trucks with InterMountain 33-inch metal wheels wrapped up the underframe work. I still may add the train line prior to putting into paint shop.
I keep a record of each freight car I build. It includes the purchase price and date, prototype data, extra details added to the model, and construction notes.
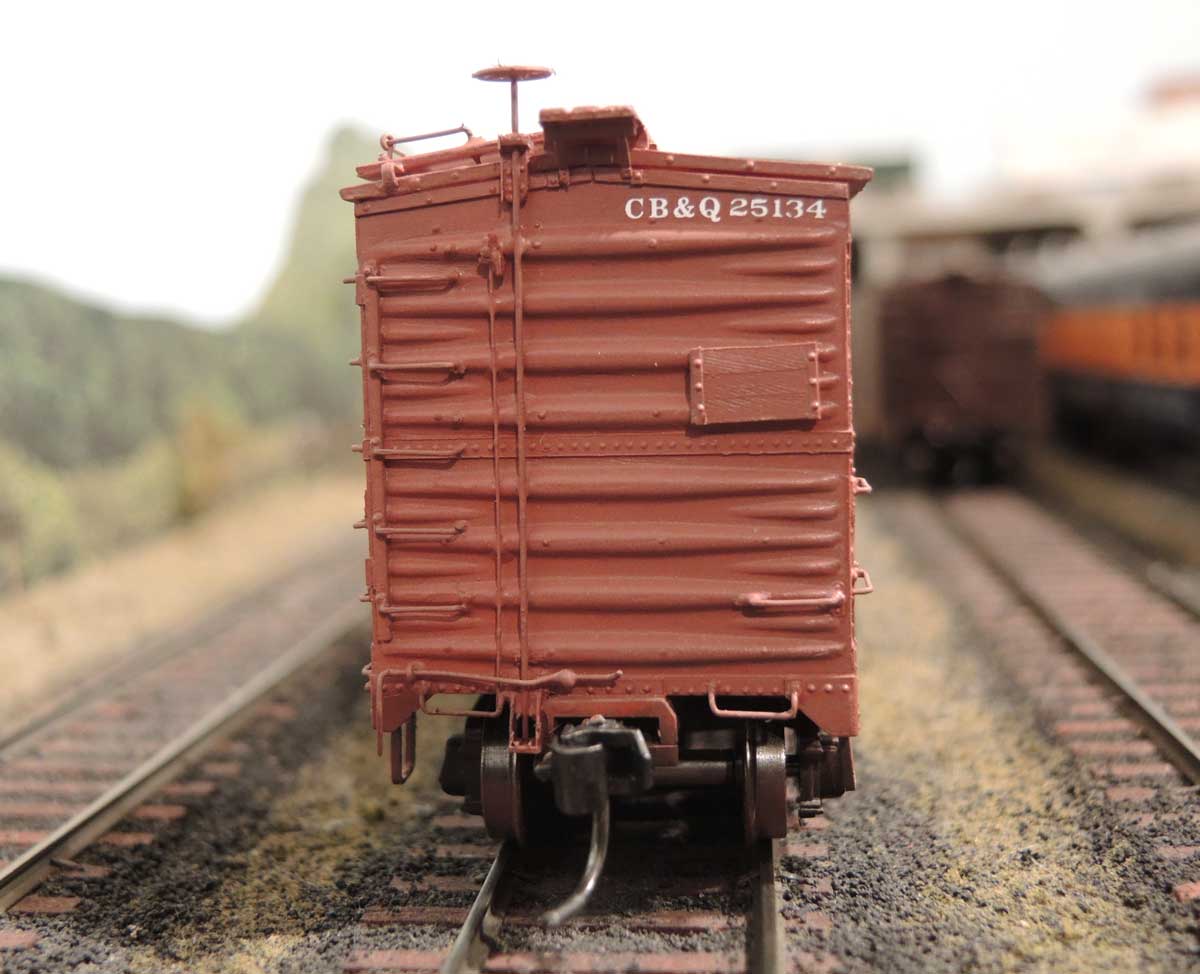
I painted the box car with Vallejo Model Air acrylic Mahogany Brown 70.846, thinned for spraying. To my eyes, this brown color has just a touch of red for the body color. Vallejo Model Air acrylic Tarnished Black was sprayed on the underframe. After the paint dried, Model Master Gloss was sprayed as preparation for the decals. Model Master Flat Finish was used to clear coat after the decals were applied and to prep for weathering. Truck and wheel sets need to be painted with Polly Scale Grimy Black which I still have in stock. I plan to weather the model with Pan Pastels, eye shadow makeup, and Bradgon weathering powders.

I enjoyed building this flat resin kit just as much as the newer, more popular, one-piece body kits. This CB&Q box car will always be special as it is the first time I’ve spraying Vallejo acrylic paints on a resin freight car kit. Not only did I enjoy the building the box car, I will continue to enjoy it each time I have it running in a train consist on my operating railroad, the Minneapolis & Northland Railroad Company.
Thank you, Lester, for sharing your techniques on this classic box car. Questions and comments can be posted below. Please follow the instructions so your comment can be posted. All comments are reviewed and approved before they appear. To subscribe to this blog, enter your info for a comment and check the last box to notify of new posts by email.
Lester, I’m curious as to your thoughts on using full-tread wheels vs. semi-scale on this model (and similar question about the couplers vs. “scale head”).
Your car looks very nice. Like the paint as well. I also have been using Yarmouth Part# 220, however it is now replaced with a different part. Not sure if it is available any more or has a part # change
George Tomn
I sent Pierre a note and he mentioned these parts are currently unavailable but he does hope to reintroduce them later this summer. – Eric
Thanks for your notations on the build. Did you prime the model or go straight to the acrylic? I am still a solvent guy but have heard good comments on the Vallejo acrylics.
Kurt,
I did not prime the car prior to paint. I washed the car, dried it with a hair dryer and applied the paint which took several coats.
Very nice job! Particularly like the use of the Vallejo paint, as I’ve begun to use it, too.
Could you have another look at the Yarmouth part number – the 220 seems to be for a Tangent tank car.
Thanks
Pete
Pete, The Yarmouth etched longitudinal running board support part is currently unavailable but may be reintroduced this summer. – Eric
You really improved upon the features of the kit and it looks really good. The cars stand out in any train.