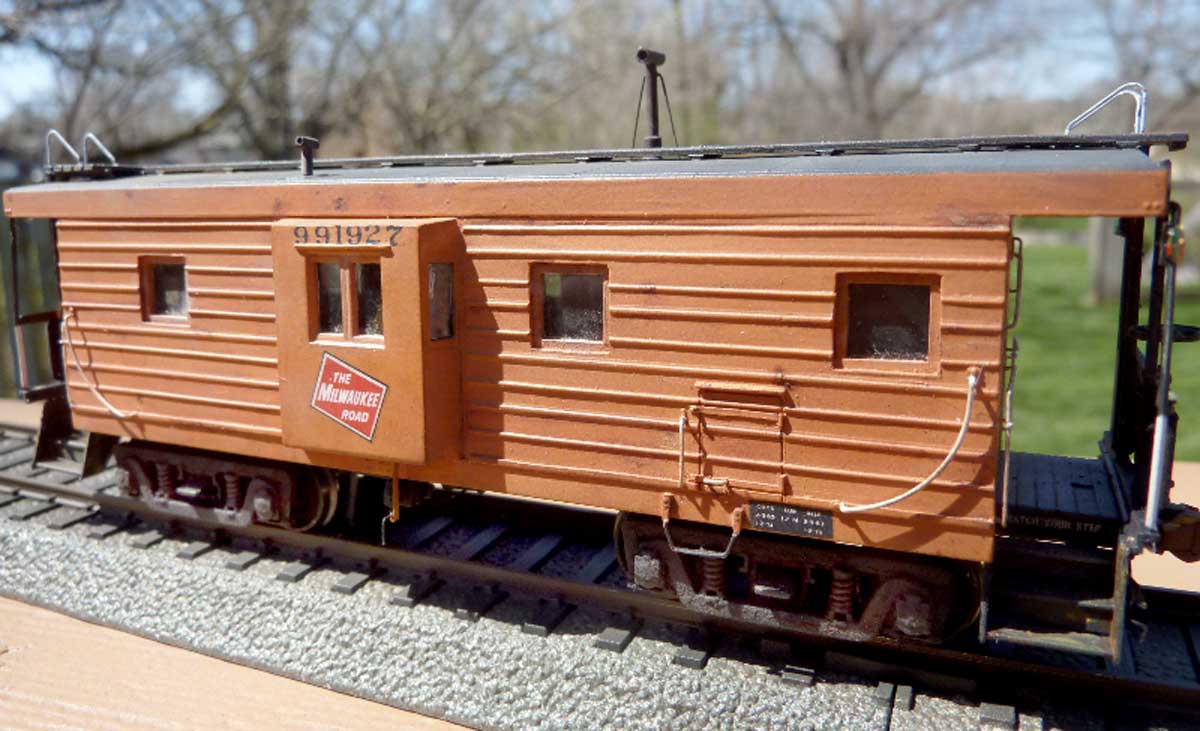
If we model freight cars, we usually need a caboose at some point. George Toman shares tips and techniques to build a classic Milwaukee Road caboose.
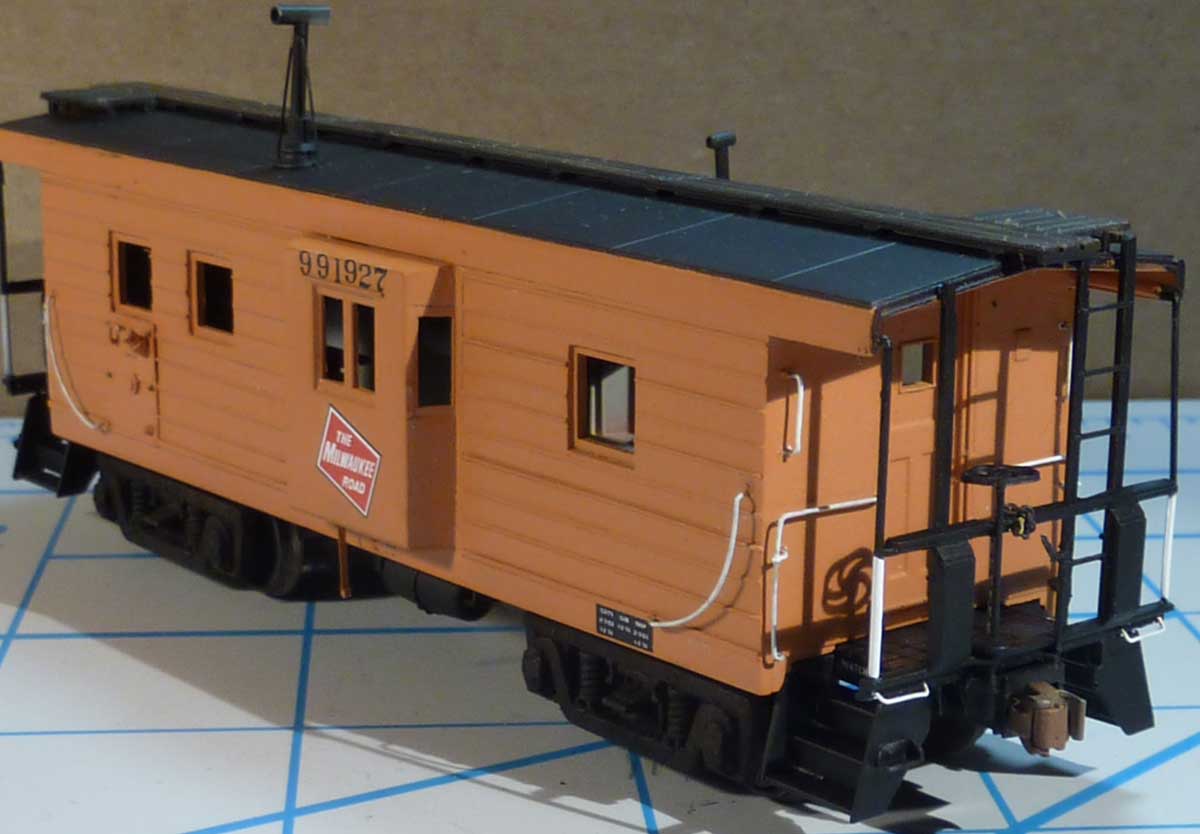
This Milwaukee Road caboose project started out simple. I just wanted to take it out of the box and weather it up. As I researched photos I discovered that the Walthers Model was inaccurate for a 1939 version and decided to upgrade the model to reflect a 1944 version of a shop built Milwaukee Road rib side caboose.
This caboose version was unique in that the rib design was changed to a smaller hat shaped design and also included an intermediate 1-inch rib in between the 4 hat shaped ribs. In 1944, Milwaukee Road wanted to increase the strength of the car sides for both cabooses and box cars. They came up with a smaller size rib and added an additional 1-inch rib in between the hat-shaped ribs. This lasted one year for both cabooses and box cars. Here are links to a couple of prototype images.
http://www.rrpicturearchives.net/rsPicture.aspx?id=421139
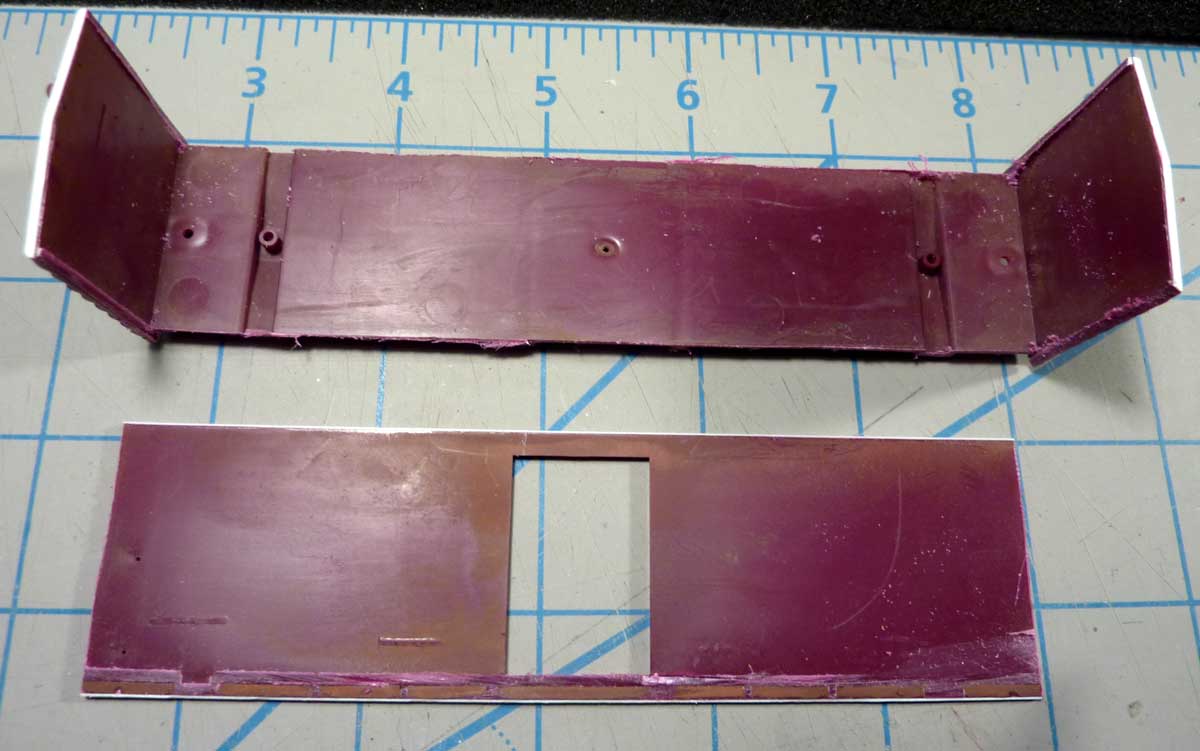
To model this, I decided to use a Walthers 1940’s Rib Side Caboose with AB Brakes and a Rib Side Cars short rib boxcar kit to give me the correct size ribs. I started by cutting off the sides from the caboose being careful not to damage the caboose ends as well as cutting the sides of the Rib Side box car.
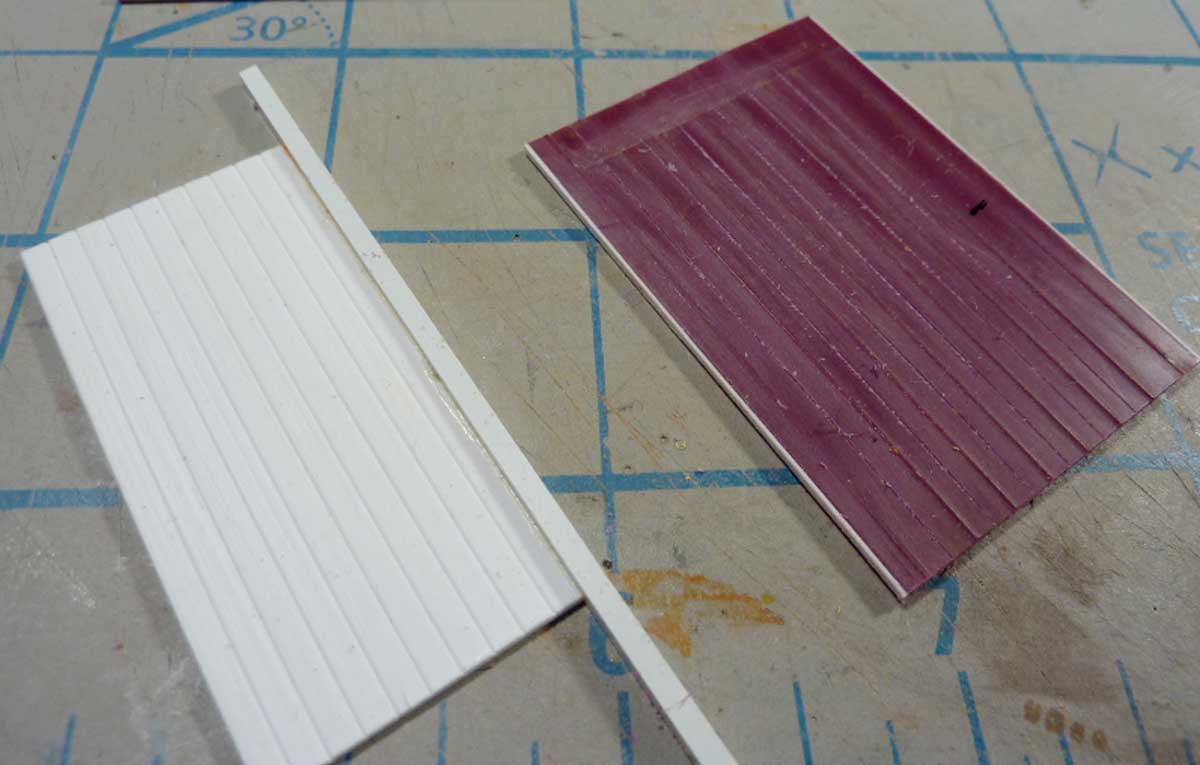
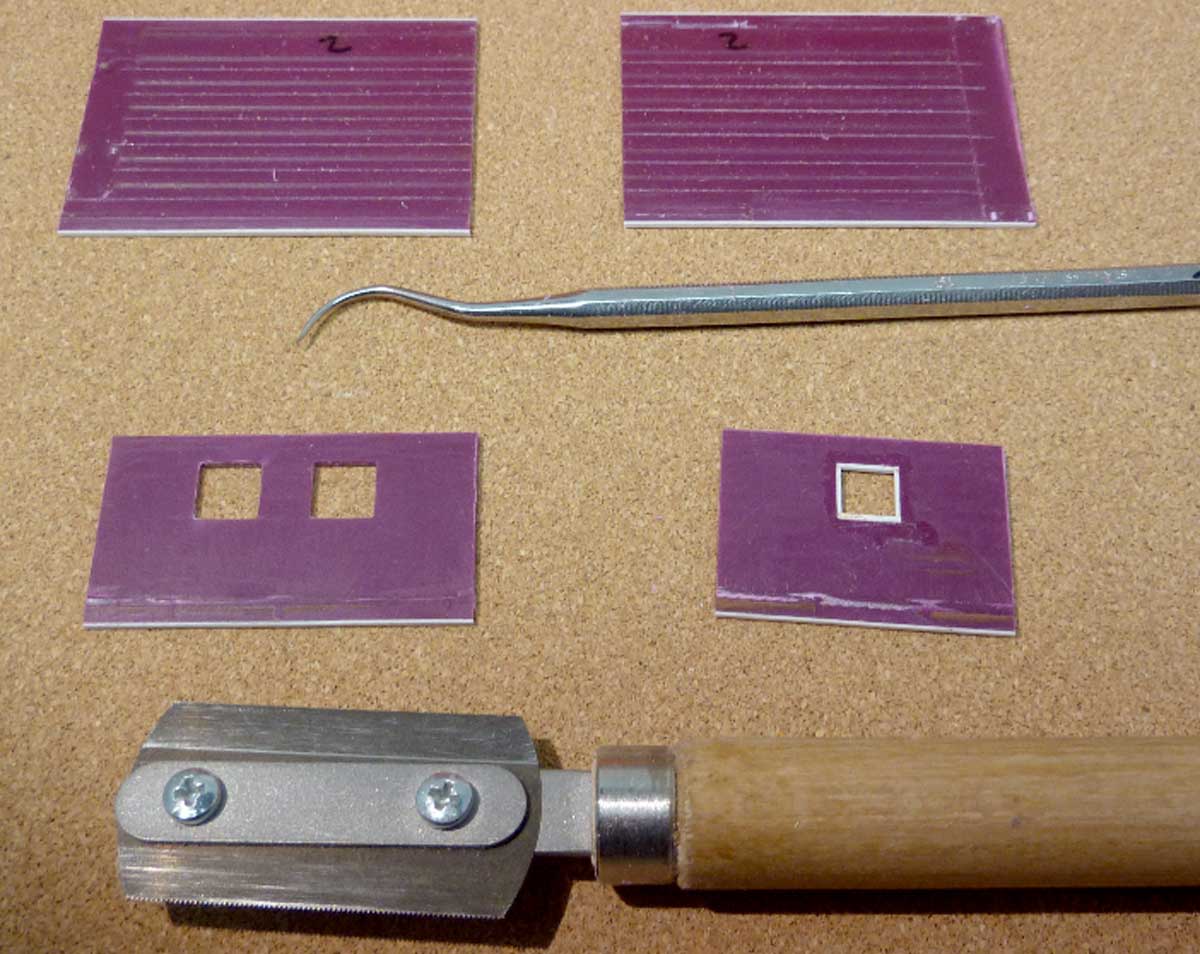
After cutting the sides from the box car, grooves were carefully scribed in between the ribs. A Plastruct 0.010-inch styrene rod would be glued into the groove to simulate the intermediate rib. After scribing, and before gluing the styrene rod in place, I used the dimensions from prototype drawings to measure and cut the side, and to mark and cut the windows.
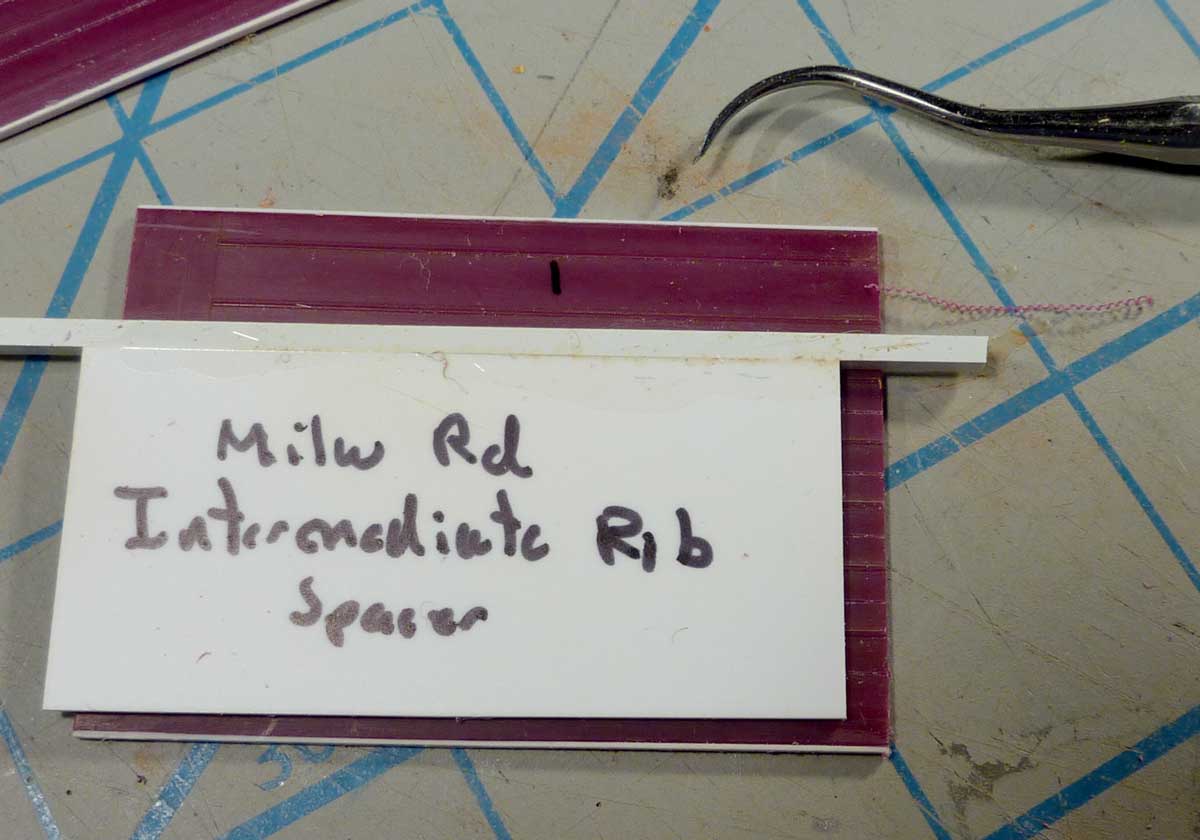
A spacer was created to use as a simple jig to hold a square piece of styrene up against the rib, allowing me to scribe a groove with a Bare Metal Panel Scriber half way between the ribs. It’s simply a piece of 0.080-inch square styrene with one side sanded to 0.070-inches and glued to a piece of 0.040-inch thick styrene sheet. This next photo shows the backside of the jig and a scribed side.
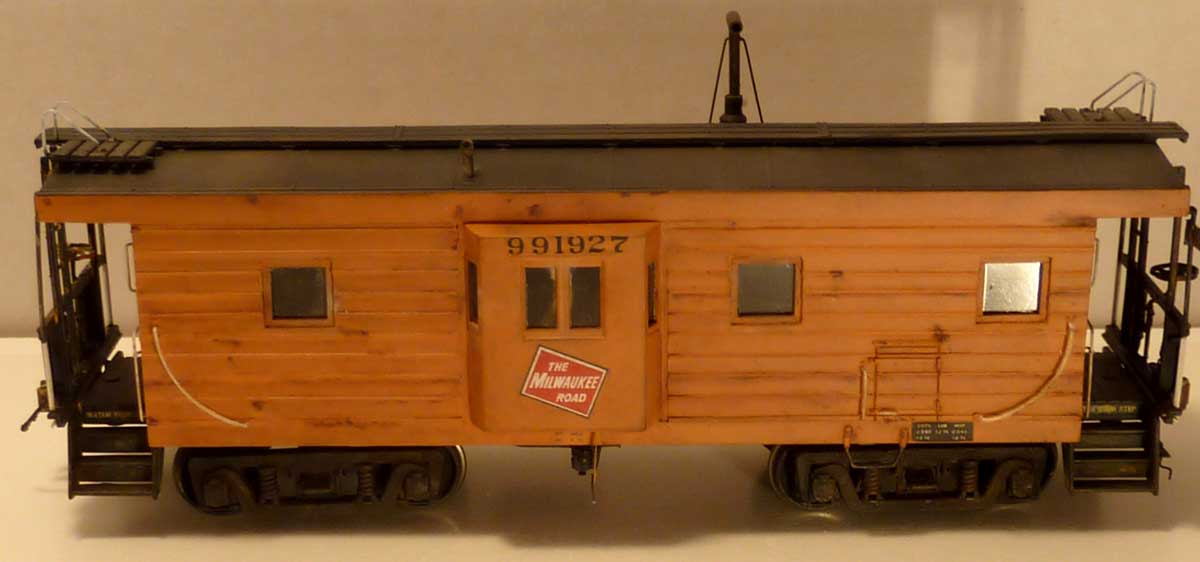
Evergreen Styrene was used to build the window frames. The toolbox door was scribed into the car side and hinges were fashioned from bits of styrene and 0.003-inch shim brass. I also fashioned an oil tank service panel from styrene, Cannon Fuel Filler and some NBW castings. I used the Walthers Bay window, but squared it up and glued some additional styrene to reflect the correct dimensions.
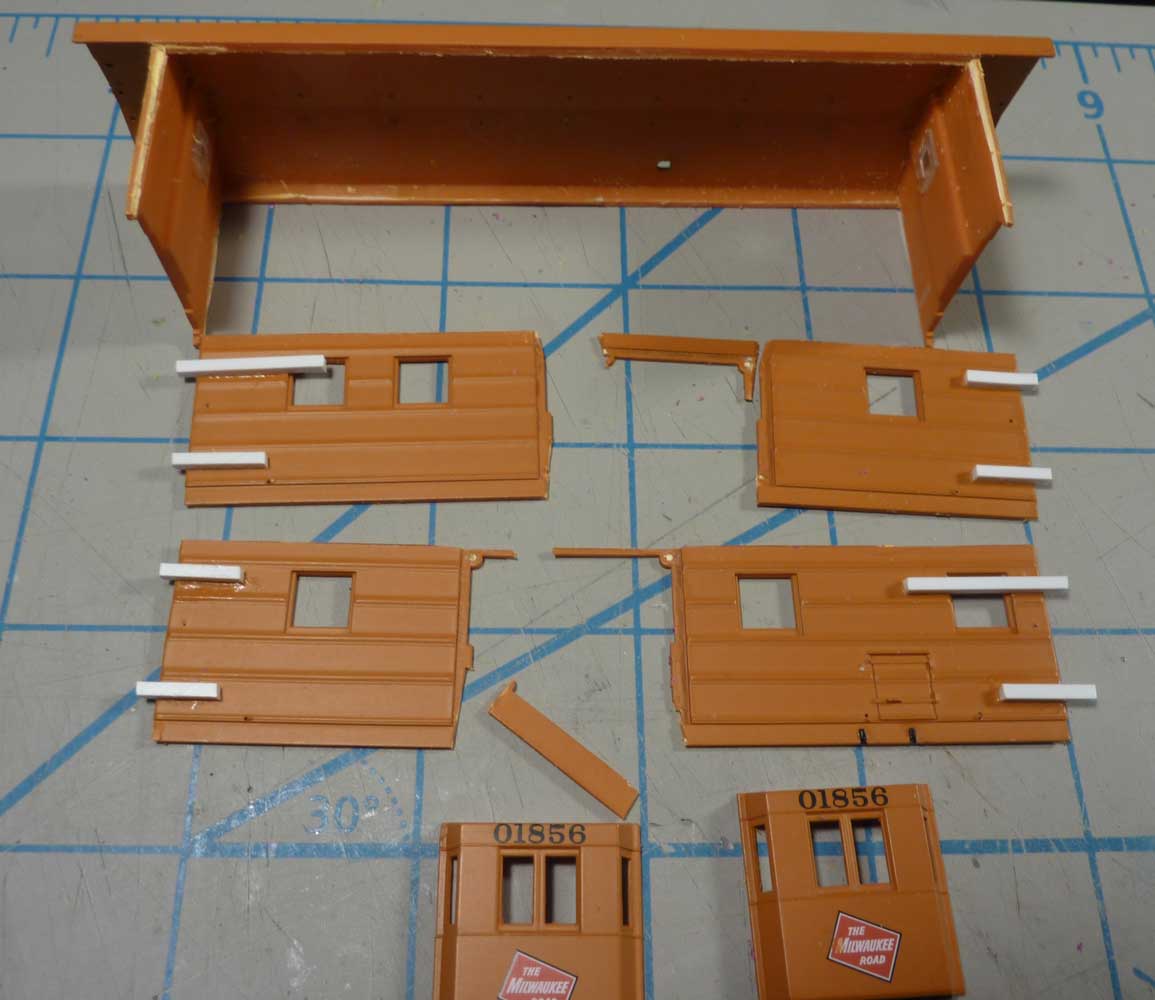
The photo above illustrates the parts you end up with after cutting the side out of the caboose body and the difference between these ribs and those of the Rib Side box car kit. This is why I cut up two cars to build one accurate model. The styrene strips (two on each end) were used to hold a 0.060-inch thick straight edge in place to scribe the cut line. A JLC razor saw was used to cut the sides in all my cuts. The Rib Side car parts can be seen below with the razor saw and trusty scriber.
I carefully fit the two sides together to the bay window and test fit many times. The styrene strips seen above are glued to the sides as a guide for the straight edge to scribe proper lines.
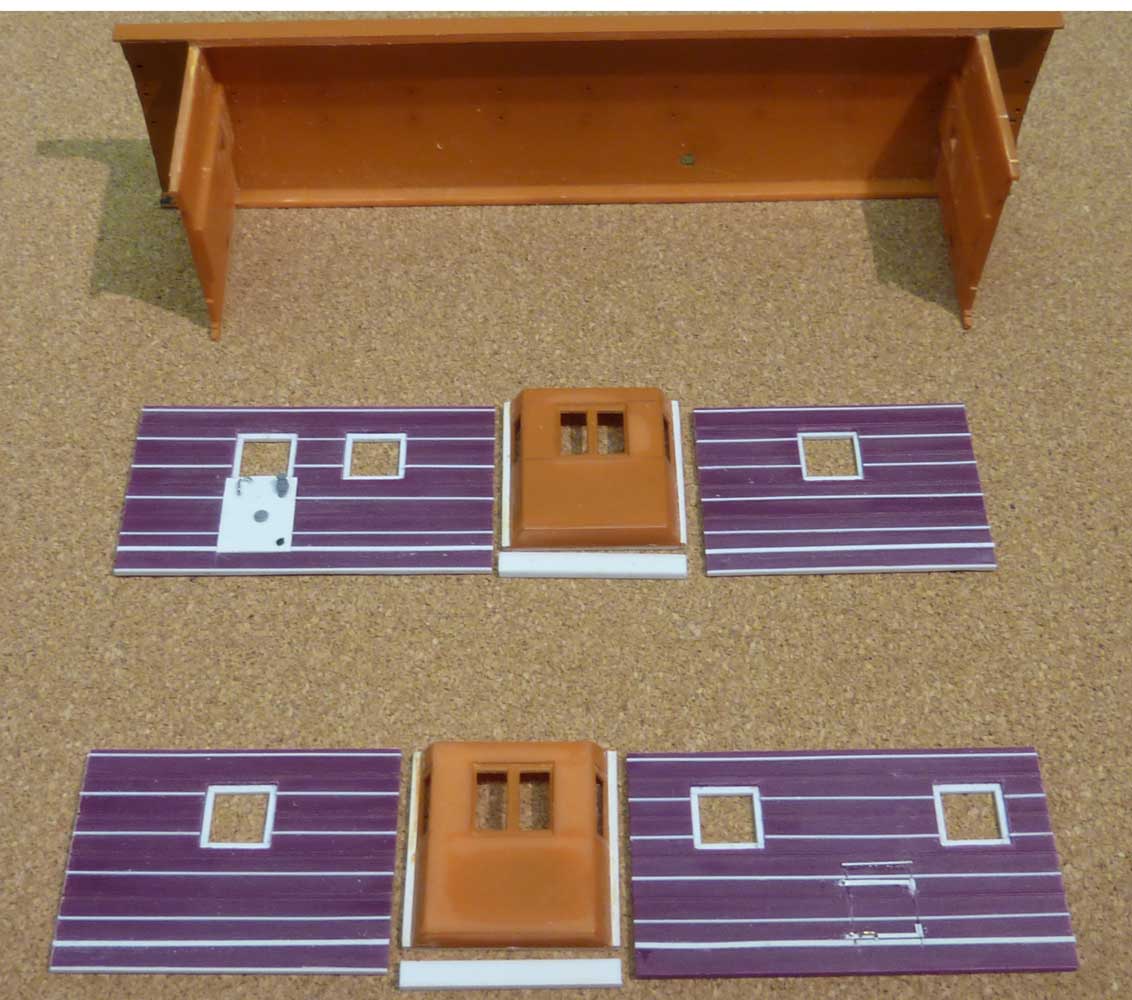
Once I was pleased with the fit, the 0.010-inch styrene rods were glued into place.
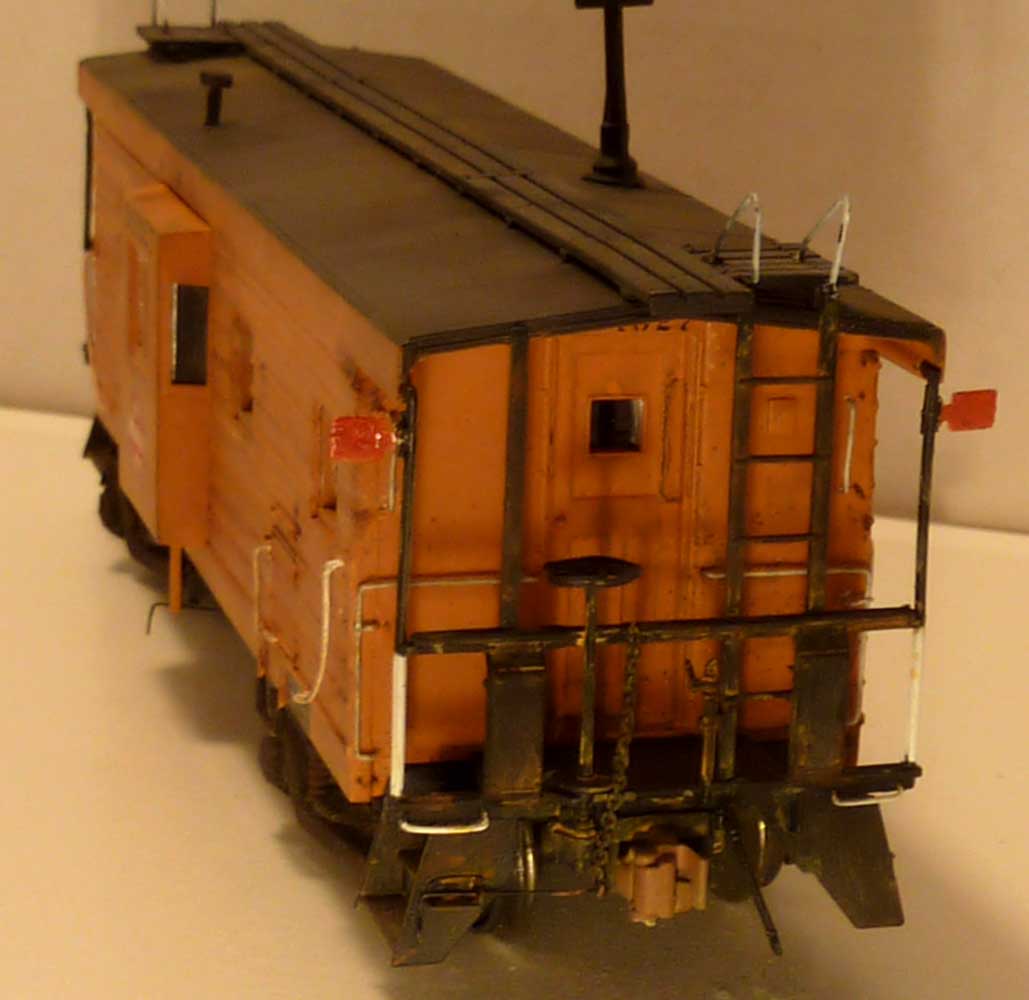
The car body was assembled by gluing the sides, ends, and roof together. After the glue dried, all joints were dressed with files and wet sanded. The side curved grab irons were installed along with Tichy rivets cut from the ends of their box car rungs (#3062).
End details
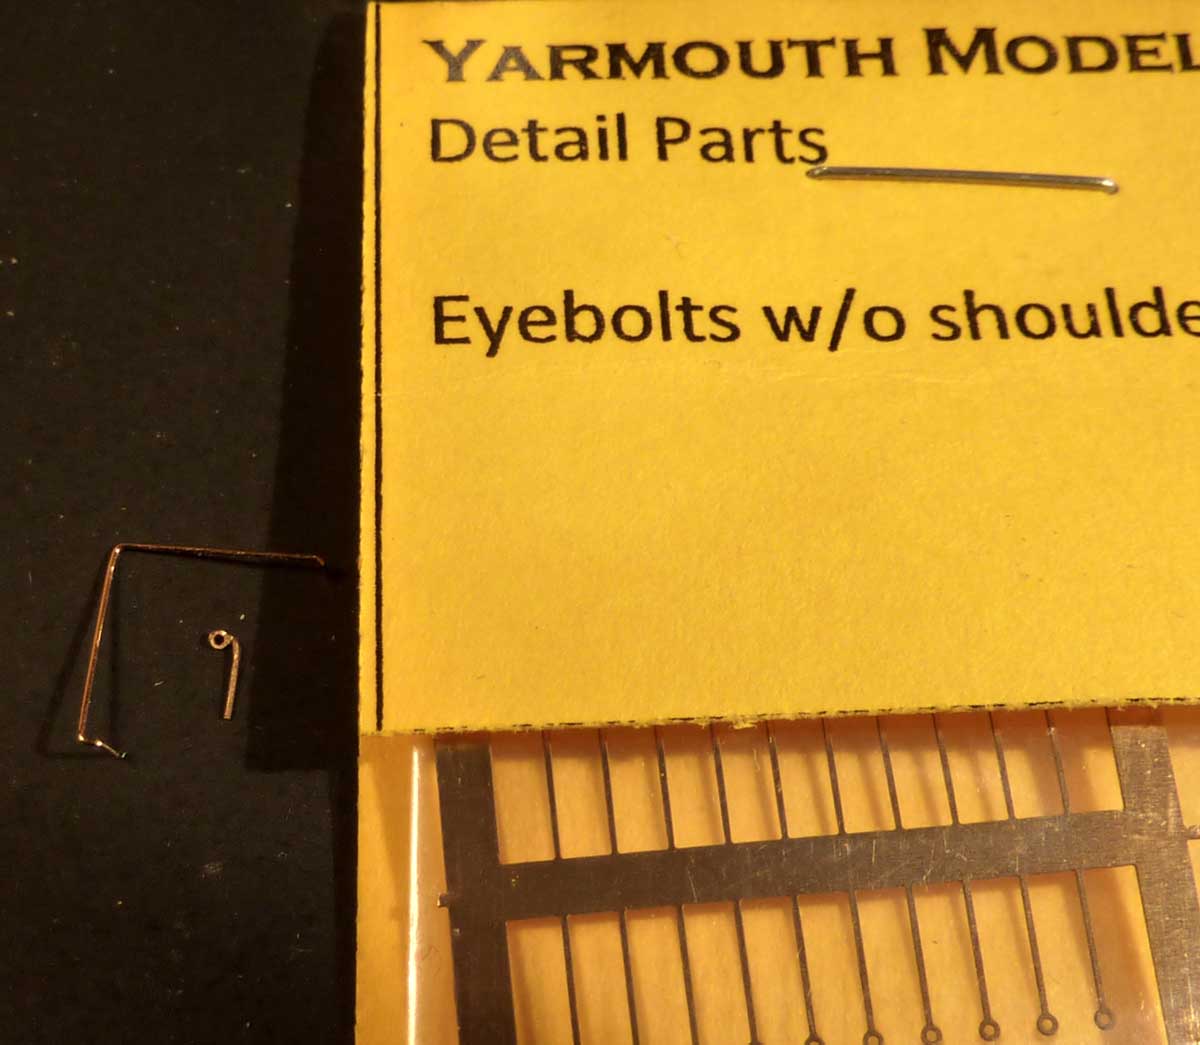
New hand rails were bent for the ends, with rivets donated from an Athearn box car. The right angle grab irons on the end corners also used a Yarmouth Model Works eyebolt that was twisted 90 degrees and then bent an additional 90 degrees for support.
Brackets for the coupler cut bars were fashioned from 0.010 x 0.040-inch styrene. These were sanded to a thinner profile after the glue dried. A couple of Athearn rivets were added. The smoke stack was shorted and support wires installed using 0.010-inch wire.
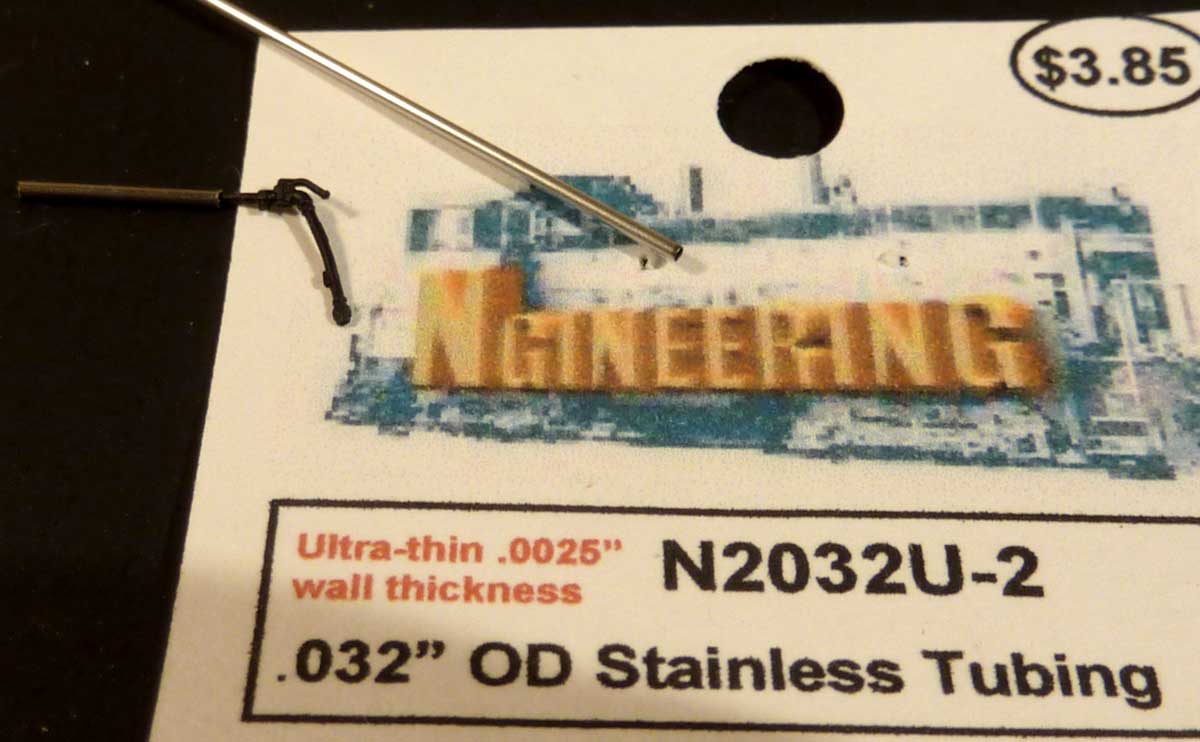
Sergent Engineering couplers were installed along with Moloco air hoses to the otherwise stock Walthers underframe. The hoses were mounted by attaching a 0.032-inch stainless steel, thin wall tube glued to the floor next to the coupler box, allowing an easier way to hold them in place.

An air bleed bracket was made and mounted under the cab windows using an arm of a flat Kadee coupler centering spring. 0.008-inch wire rests in the hook and connects to the brake component. The same was installed under the other bay window.

Finishing
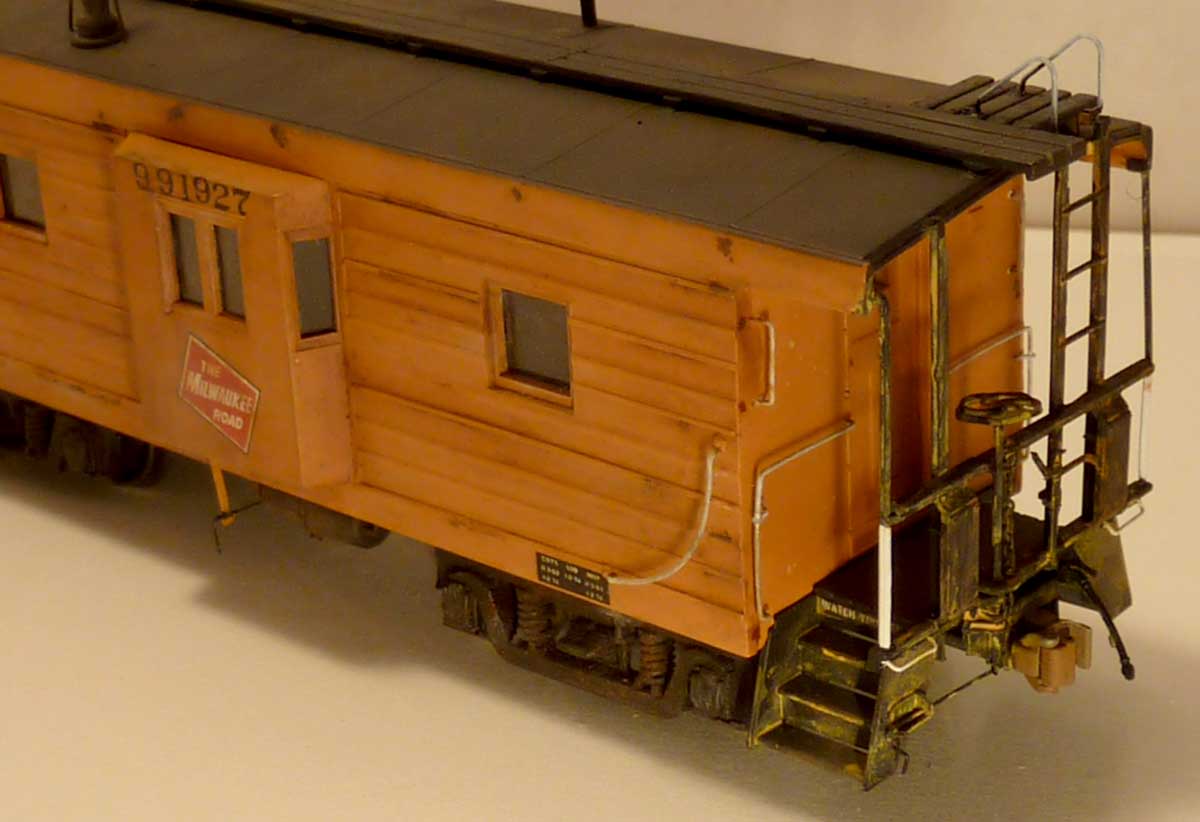
The trucks were grit blasted and an oil-based Burnt Sienna wash was applied. While still wet, some black and rust pastel powders were applied before being Dullcoated. Kadee code 88 wheels replaced the original truck wheel sets.
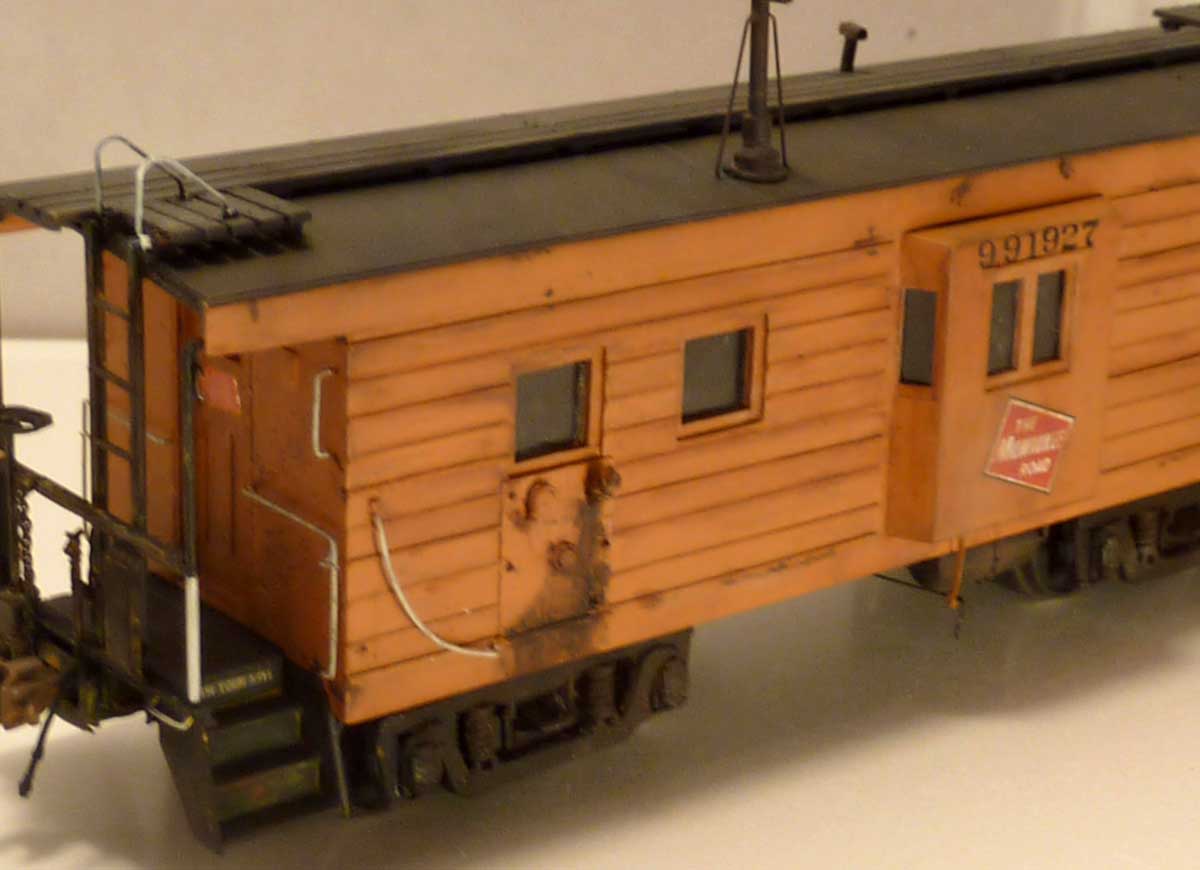
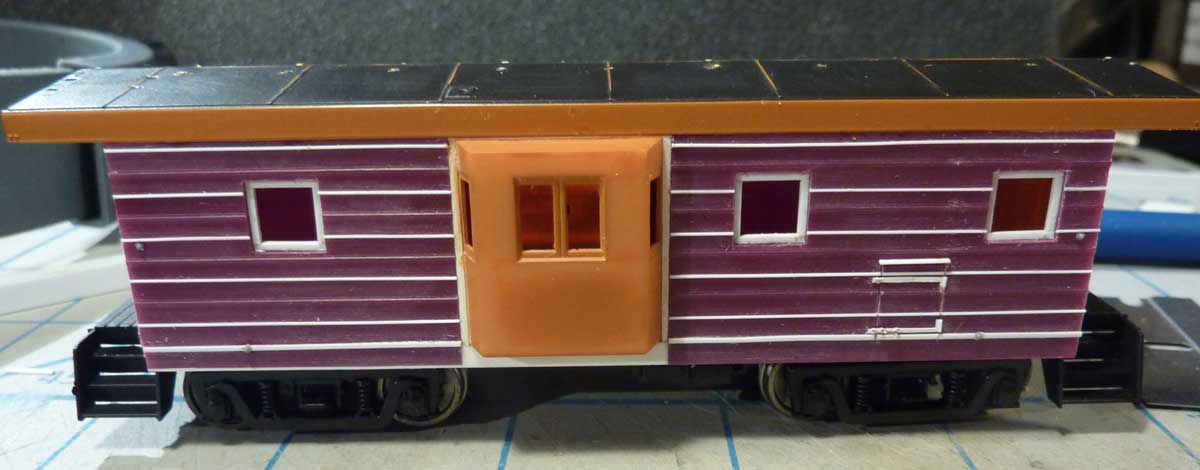
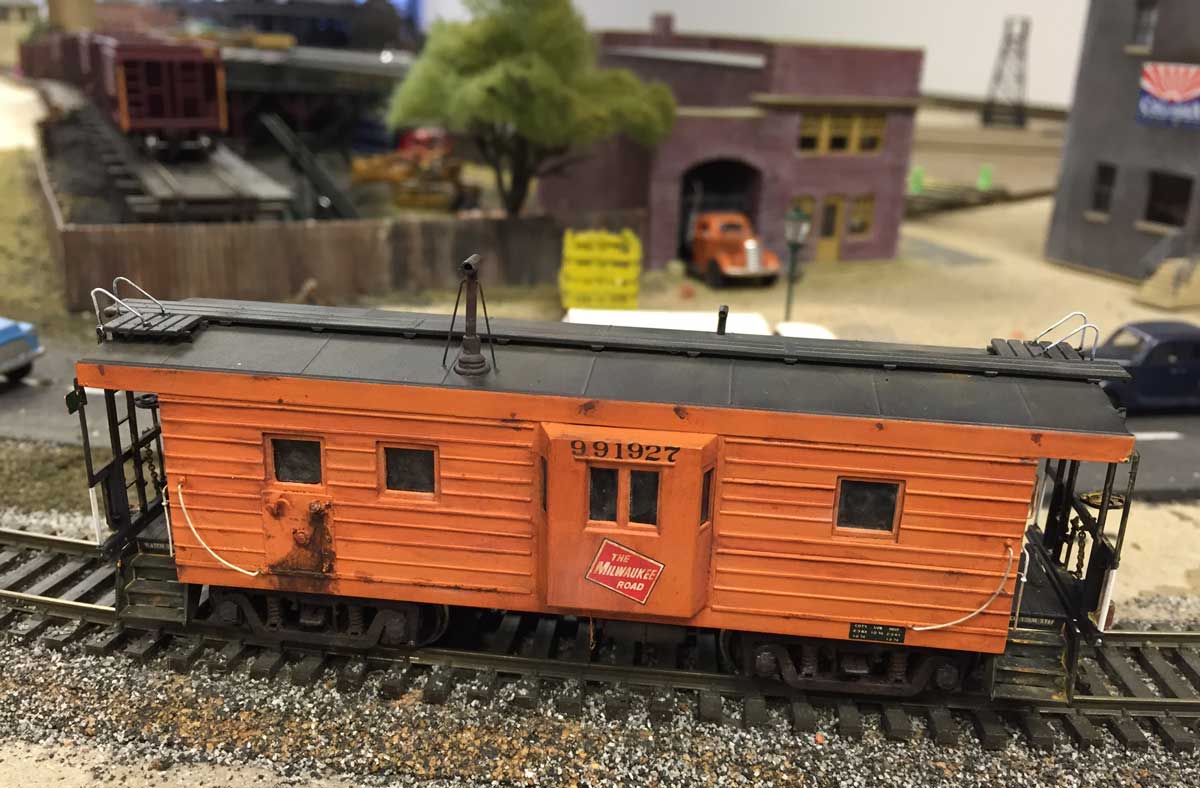
The body was painted using Floquil Milwaukee Orange mixed with Union Pacific Yellow in a 5:4 ratio. The roof was painted Steam Black.
The caboose was weathered with oils and Pan Pastels. New 0.010-inch clear styrene window glazing was installed with Future Floor Wax or Pledge.
This was a satisfying project of a model that to my knowledge was never available. This was a key reason why I choose to do this particular caboose. The 1940 and 1941 version of the Walthers cabooses are very close to the prototype and should be a easier upgrade. The 1946 version can also be modeled using the techniques shown but without the need of the intermediate 0.010-inch styrene rod.
There were more changes made in 1949 and 1951, along with a new style of truck and installation of Duryea cushion underframe components on the 1951 version. The bay window design also changed slightly in different build years. For those modeling the first 1939 version of this caboose, the Walthers stock version has the lowest rib to high up from the bottom, by a few inches so to accurately model this one would have to cut the sides out and move the ribs down. One can see this as the lowest rib should be about dead center of the toolbox door on the side.

As a parting note on this project, weathering requires a whole new set of skills. I tried to follow the prototype photos (linked above) and believe I ended up getting it a bit grungier than I intended. The paint failure on the underside of the ribs in the prototype photos is probably no more than an inch or so. I did try to get this effect but missed the mark. I wiped the car side a couple of times to start over. The thing I learned from this weather experience is “Less Is More.” Stay tuned for more cabooses.
WOW! Thank you, George, for sharing some great techniques on this very interesting caboose. Questions and comments can be posted below. Please follow the instructions so your comment can be posted. All comments are reviewed and approved before they appear. To subscribe to this blog, enter your info for a comment and check the last box to notify of new posts by email.
Great job. One knows not all of many, many rib side cabs were identical. there are always changes made as the design gets used in real road service. Your cab story is a great service to Milwaukee Road models of the transition era.
thanks
George, what a beautiful model! It is most impressive and thanks for all the detail in not only the build, but also of the prototype versions. Well done!
Thanks for all the kind comments.
George Toman
George, I think it turned out very well, don’t be so hard on yourself with the weathering,
Terrific job, George!