Aaron Gjermundson has been busy working on a few models. He sent information illustrating techniques to make a common detail.
While building an HO scale Sunshine Models CB&Q XA-11A boxcar kit, I was unsure how I wanted to mount the lateral running boards. After looking at prototype photos in Railway Prototype Cyclopedia (RPCyc), Volume 12, I noticed they were similar to those on a car I had photographed at the North Dakota Railroad Museum in Mandan, North Dakota.
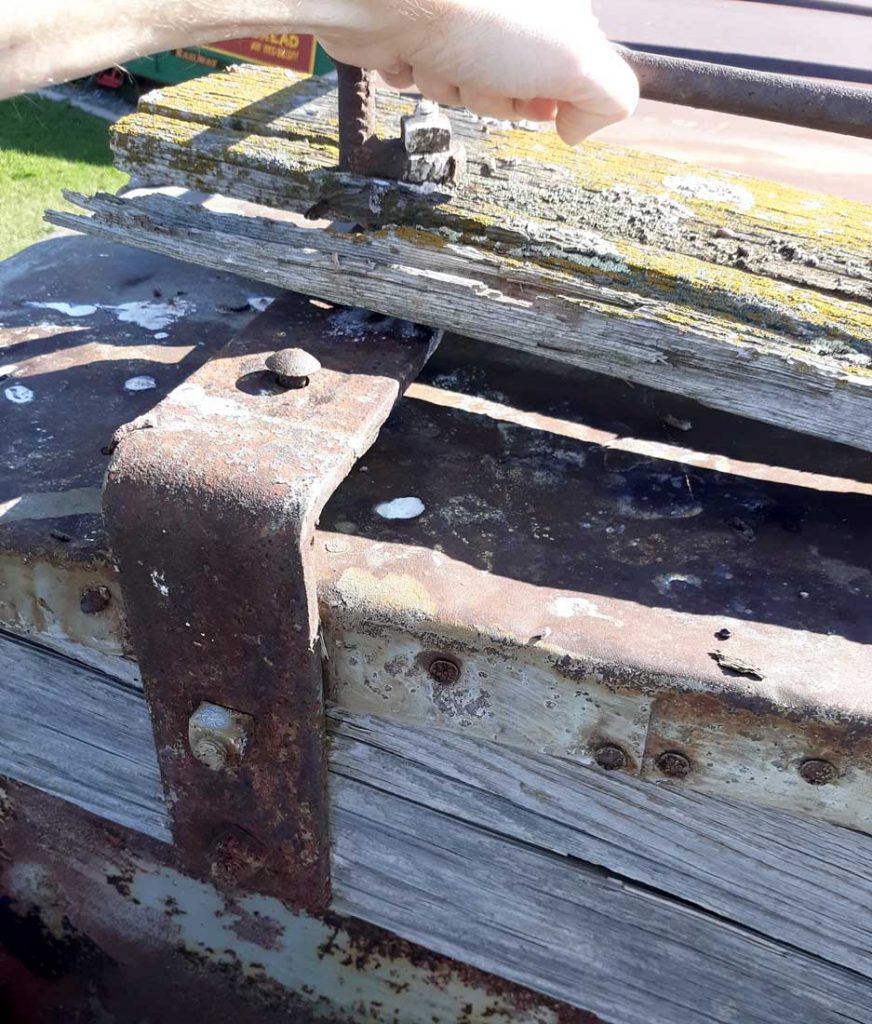
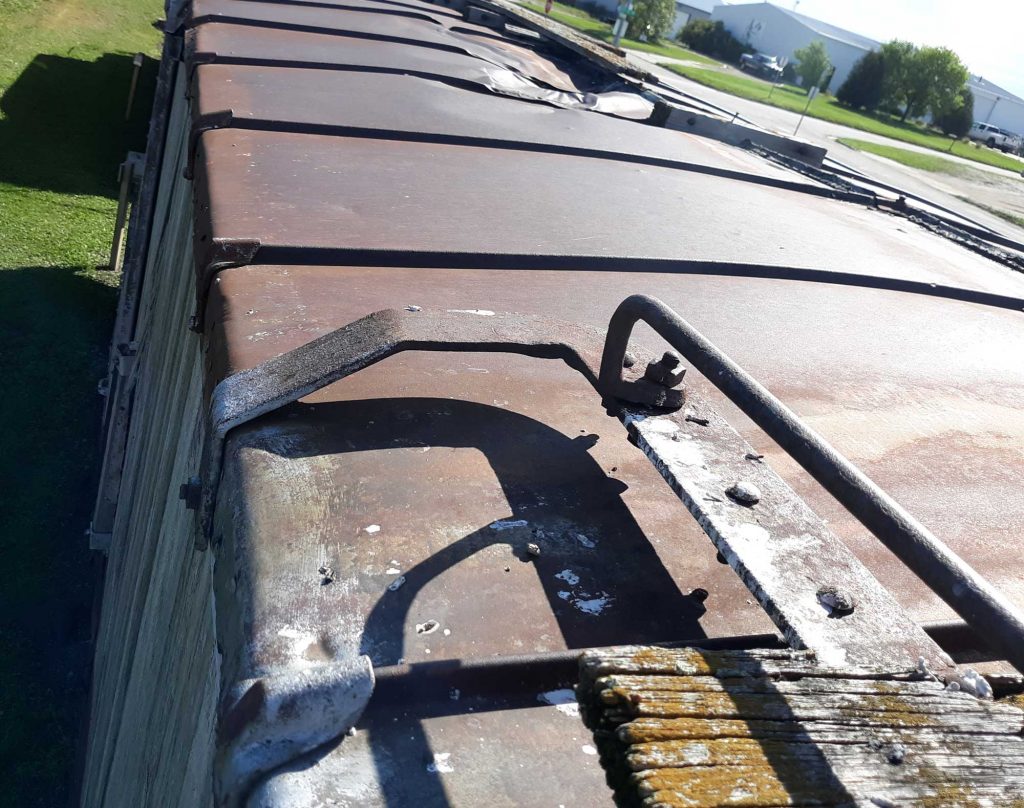
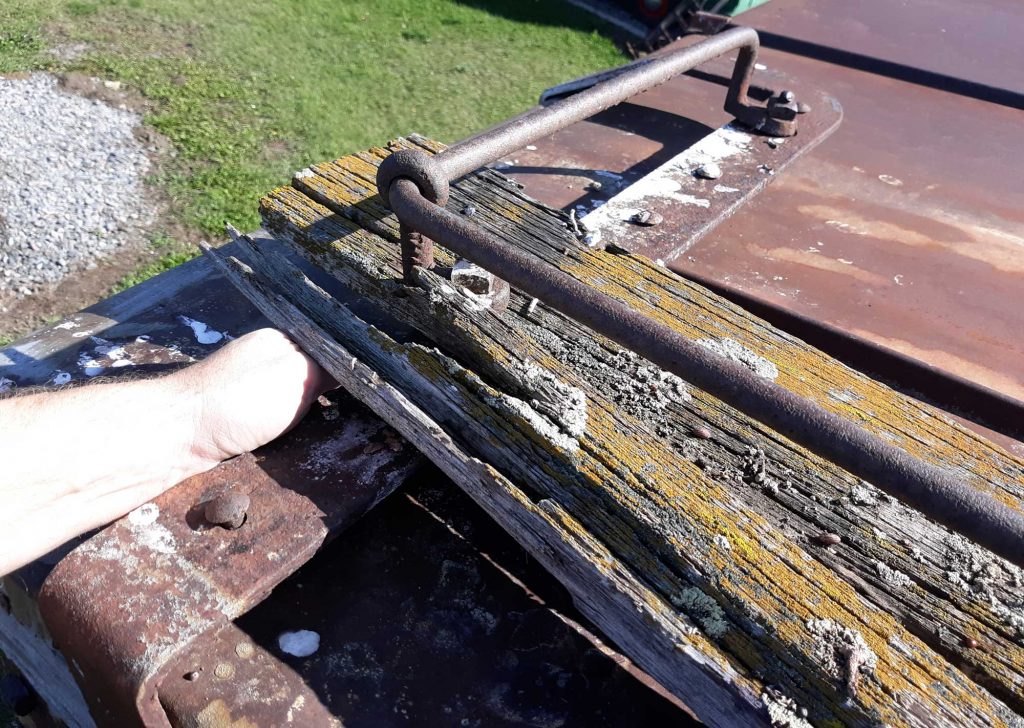
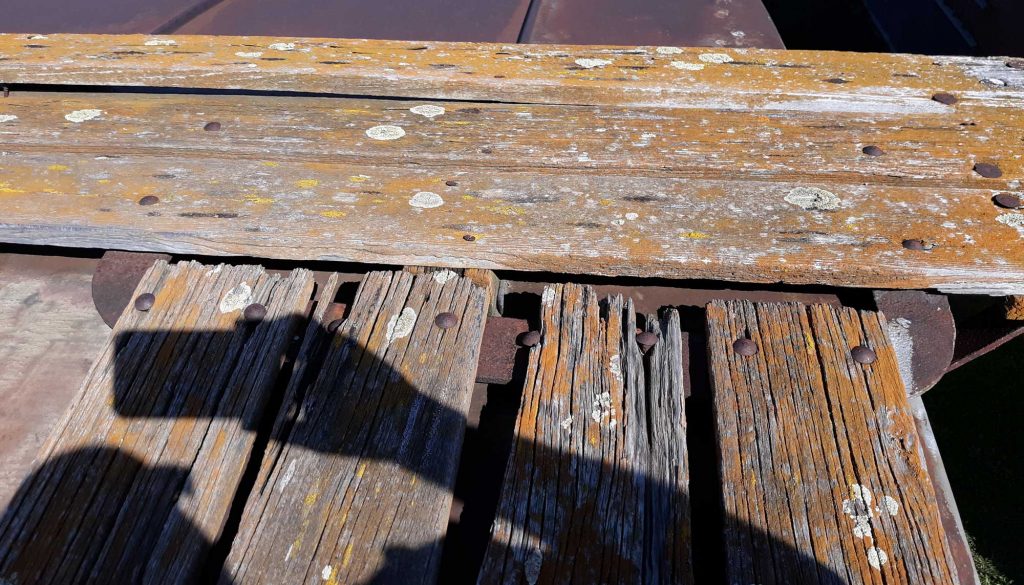
The car on display was a Northern Pacific 14000 series boxcar. The lateral boards are mounted parallel to the roof ribs, each board attached to a thick iron bar that in turn, was attached to the main running boards.
The end of the boards along the roof edge were attached to another bar that was bolted to the car eaves. I decided to try and replicate these details on my model.
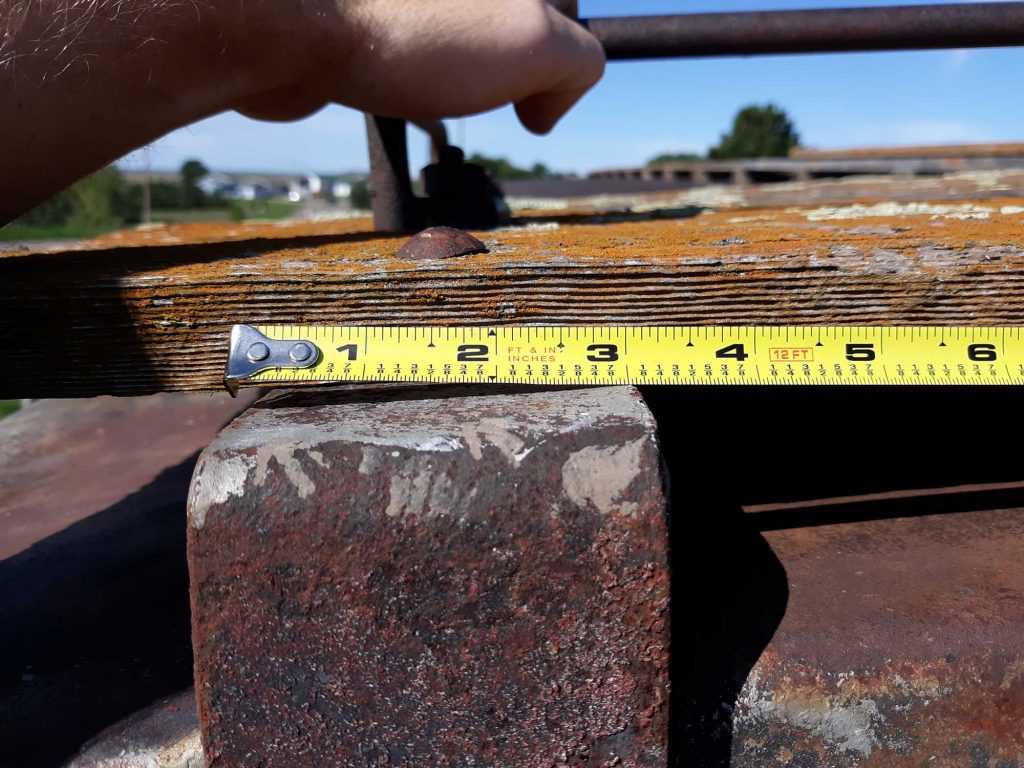
While I was up on the car, hanging on for dear life, with a tape measure and snapping shots with my cell phone, I could tell that the steel bar stock was quite substantial. It was three inches wide and at least 3/8-inches thick. It must have been hammered and shaped by a blacksmith in the early 30’s when the car was new.
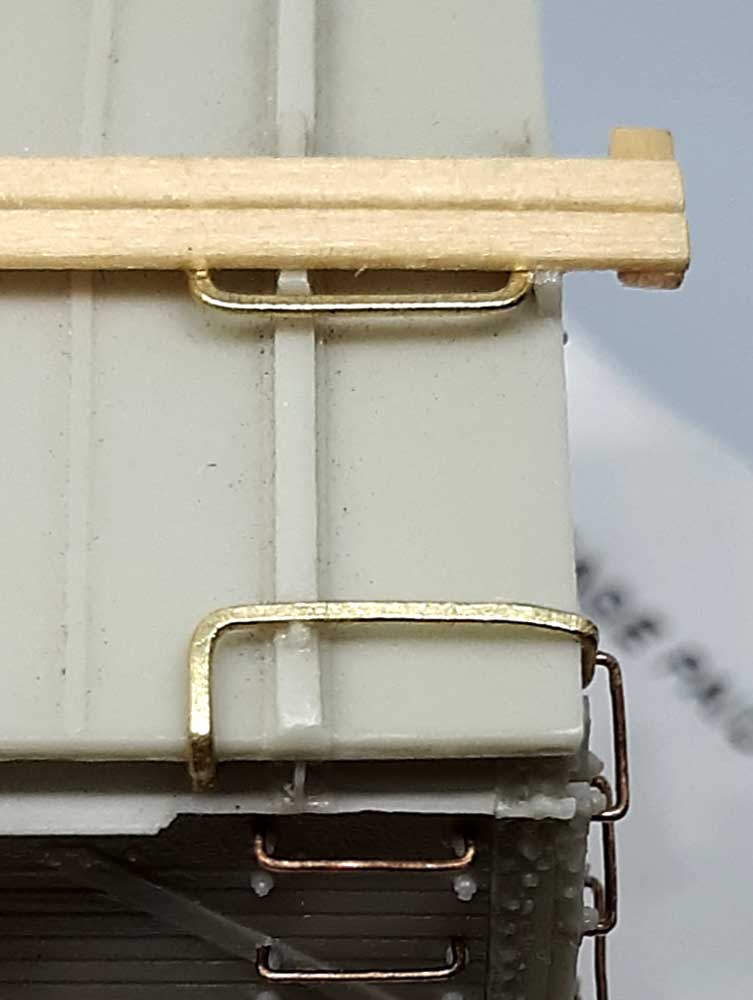
I looked through my brass stock and found that Detail Associates (DA) #2526 flat bar was reasonably close to the size of the actual iron bar. The 0.015 x 0.024-inch flat bar was just over two scale inches wide. I also had some DA #2528 on my desk. Although the pictures in my RPCyc show the CB&Q lateral supports to look a bit wider than what I measured on the NP car, the 0.015 x 0.042-inch stock looked too big and clumsy on the model.
The 0.015-inch thickness of the brass is about one scale inch. I felt thinner stock would have been flimsy or brittle, however. I did not have thin phosphor bronze material with the right width or I would have tried it. I used what I had.
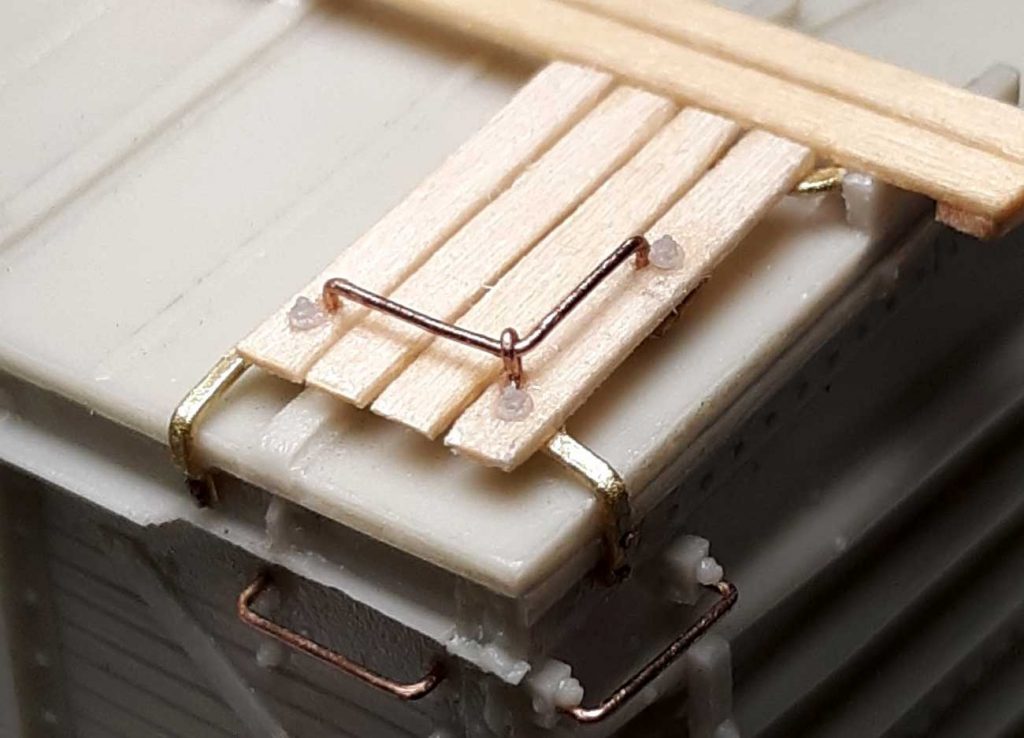
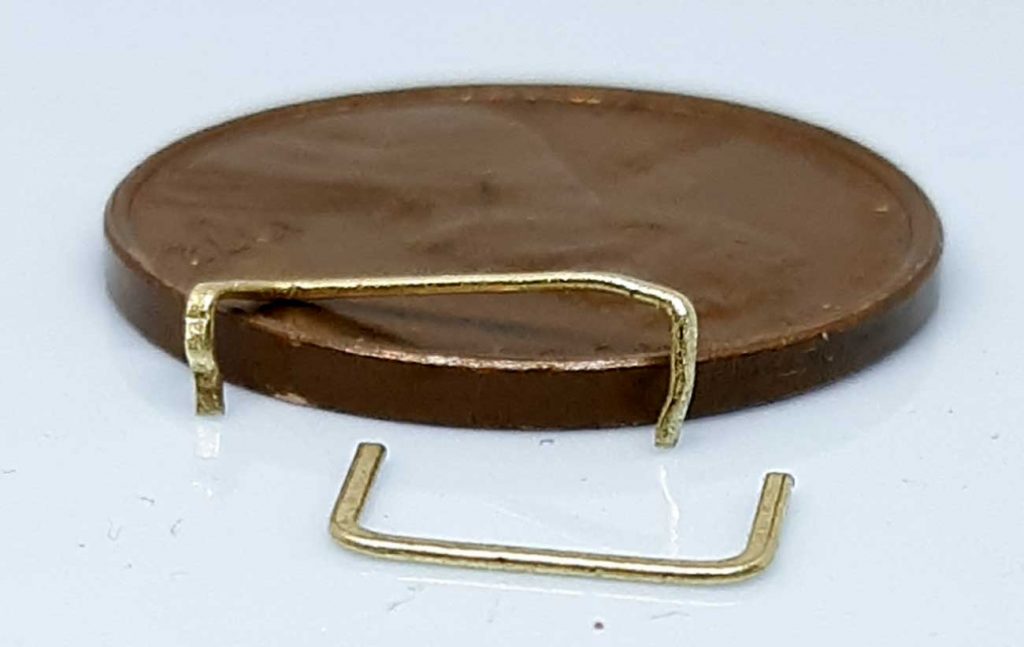
With a couple of needle-nose pliers, I bent the brass to the correct shape for the model. The brown object in the above image is a penny.
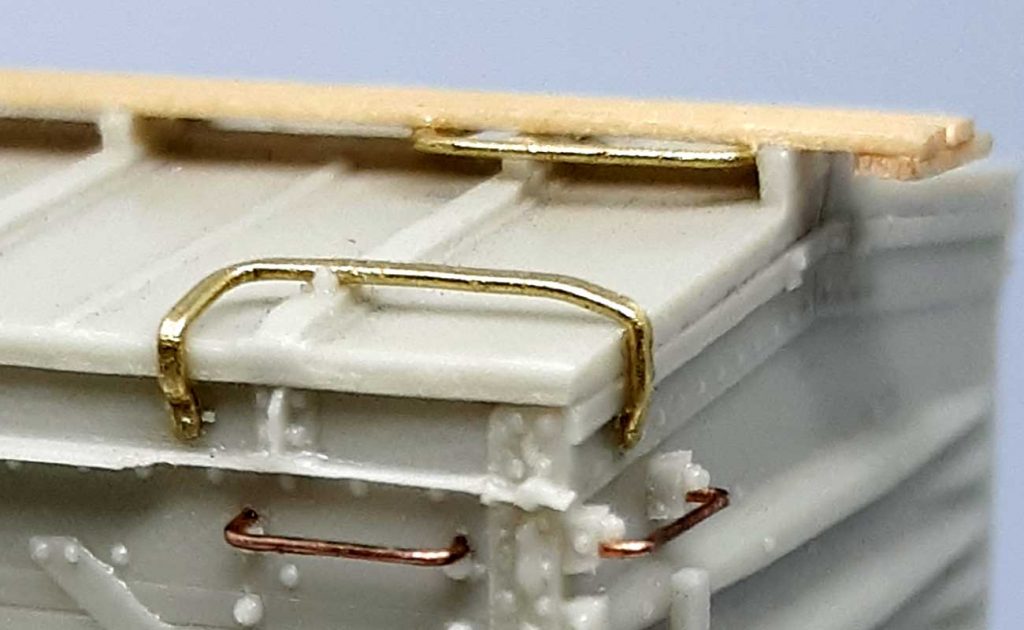
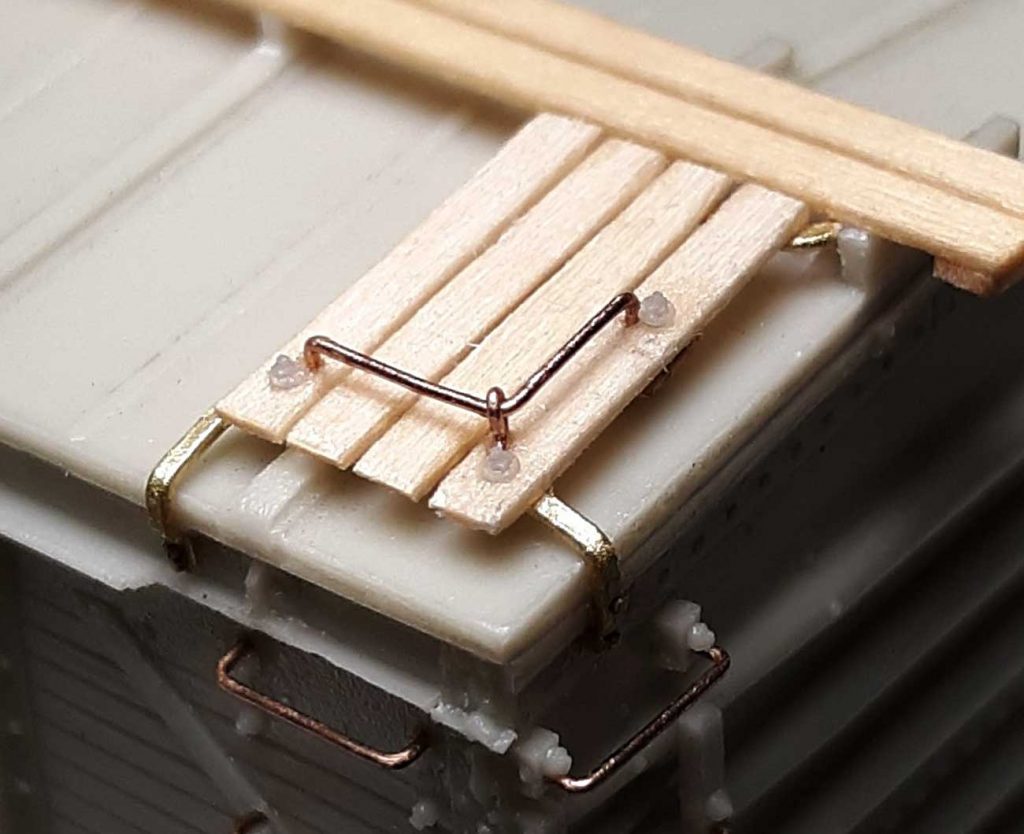
Each length of brass was super glued into position and pinned to the car eaves with a short piece of 0.012-inch phosphor-bronze wire. These pins were installed where the bolts or rivets were on the prototype.
The large U-shaped brass bar was super glued to the bottoms of the first two longitudinal running boards. This is what I think I could see on the prototype pictures in the RPCyc.
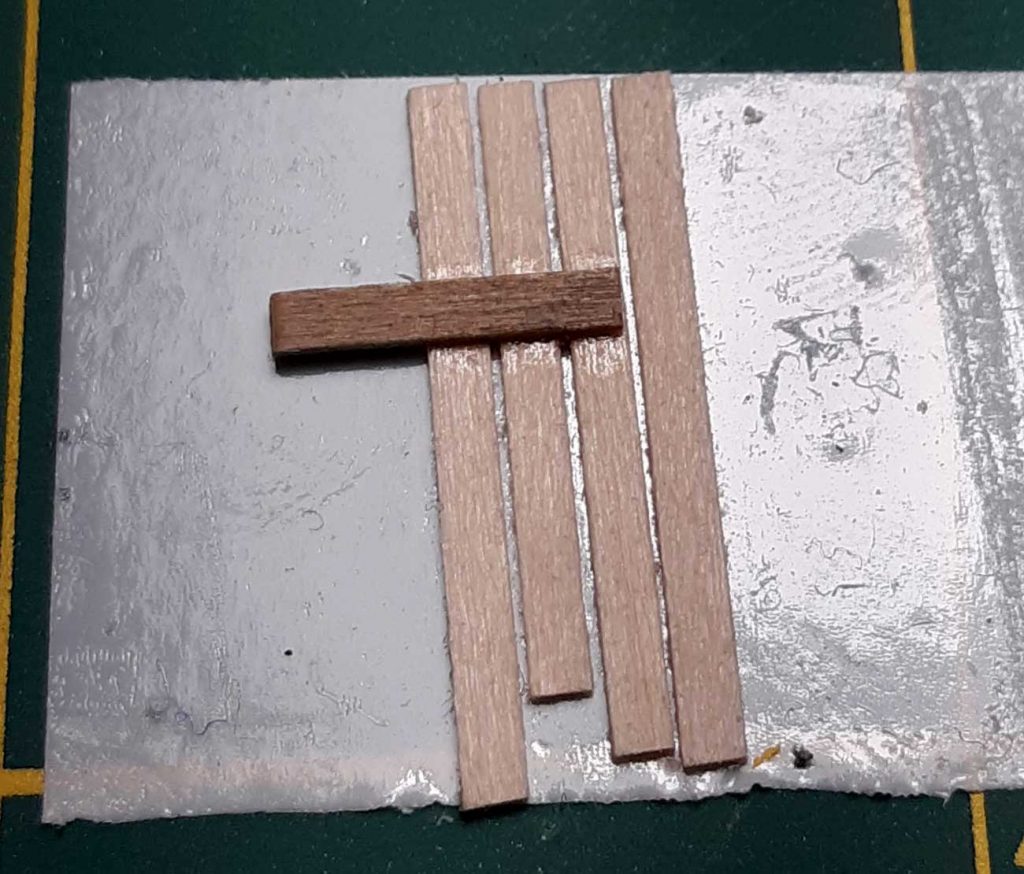
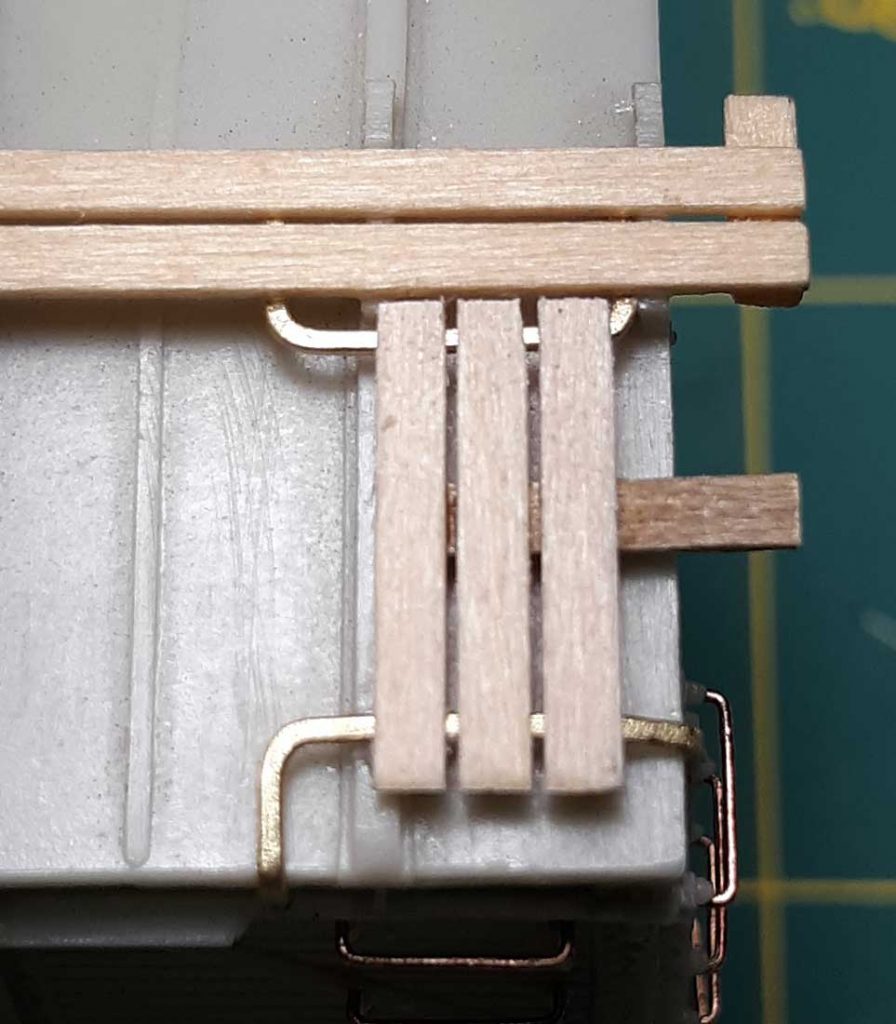
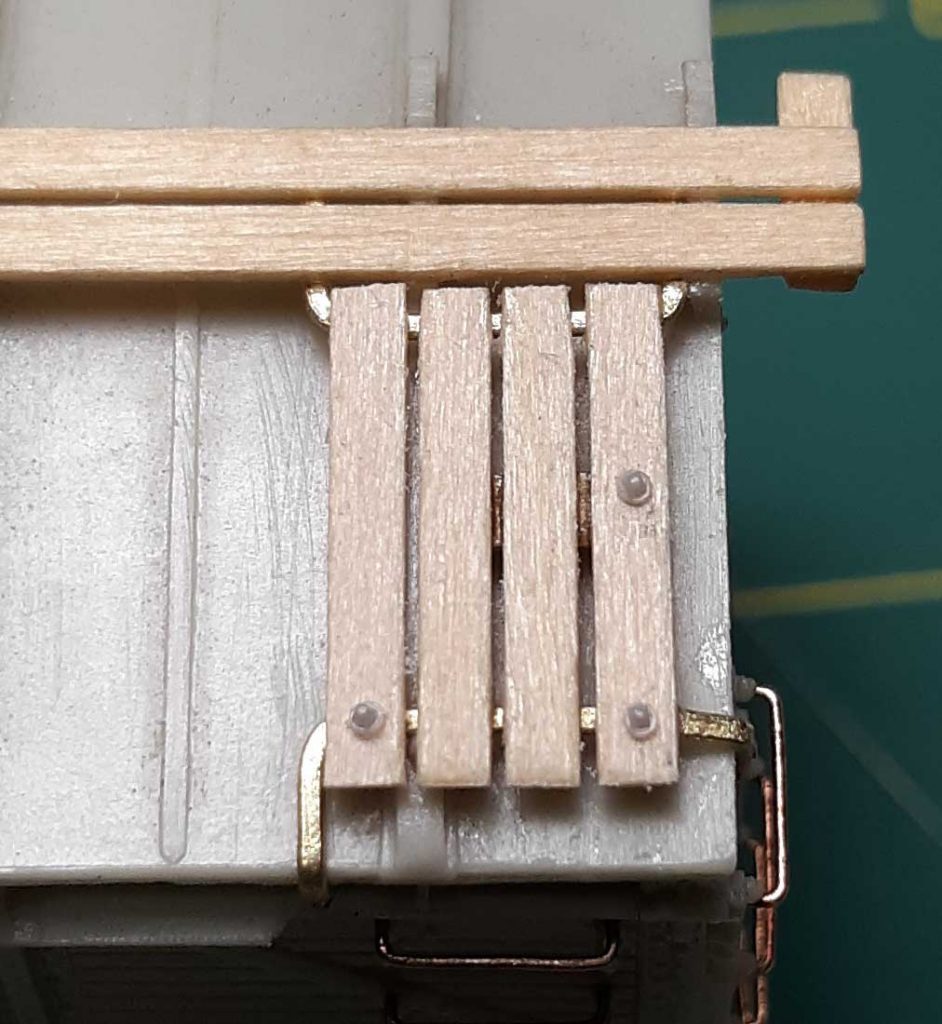
On the CB&Q cars, a hidden board was placed under three of the lateral running boards, and to this, one end of the grab iron was also bolted. The other end of the angled grab iron and an eyebolt (at the 90-degree bend) each went through the running board. These were bolted to the metal bar along the car roof line. I used basswood strips to represent the running board parts on this car.
Getting all of this to line up and in the correct position is going to test your patience, and the brass will fatigue and crack if bent too many times while adjusting. The brass bars are extremely robust when on the model, as the iron versions probably were on the actual boxcars.
I bent my own grab iron and eyebolt out of 0.012-inch phosphor-bronze wire. The bolt heads are a Tichy part.
In the end, I do like the result. Was it worth it to me? It was for one car. Thank goodness I didn’t need to add this detail to a fleet of cars all at once.
Many thanks to Aaron Gjermundson for sharing his technique on these lateral running board details.
Questions and comments can be posted below. Please follow the instructions so your comment can be posted. All comments are reviewed and approved before they appear. To subscribe to this blog, add your email address to the function at the bottom of the right column on the main page. Share the blog link with other model railroaders.
Very nicely done!
Pretty cool.
Aaron the prototype photos a great aid. And, your fabrication and build well done.
Beautifully executed Aaron. With Detail Associates brass wire and flat stock disappearing, I have been cutting up brass sheet for this sort of application.
Very nice Aaron and some great prototype information.
Thanks for sharing
George Toman
Beautiful work