The Jerry Hamsmith group kit build keeps rolling along. Here’s Jerry with the latest update.
After completing the underframe details, the group moved on to the car body. The major details to install are the grabs, ladders, running board, and B end brake components. Each member had a slightly different approach to these details.
Grabs and ladders
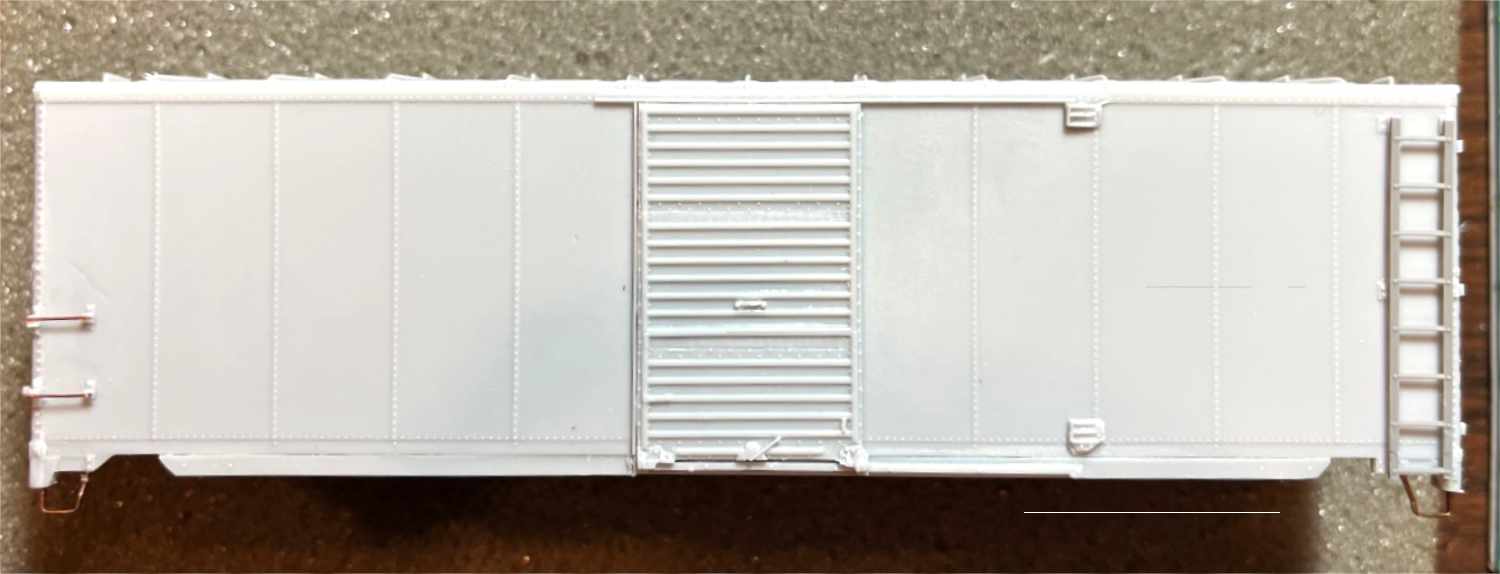
The grab irons on the side of the car are bracket grabs and the body has the bracket ends as part of the casting. Some members left the grab ends and just added the rung. As shown in the lead photo, Bob Hanmer did so by adding a small section of 0.010-inch diameter wire across the brackets.
Other members opted to remove the cast on pieces and use replacement brackets grabs. Ed Rethwisch used Kadee bracket grabs (#2251) by drilling the locator holes and then attaching them.
End grab irons

The end grab irons are a combination of half bracket grabs and simple straight grabs. The half bracket grab could be created by using the cast on bracket or by using a partial Kadee bracket on one end. In either case, a wire grab leg is inserted into the bracket and the car end. The cast-on brackets were used in the example above.
The lower end grabs are the typical 18-inch wide straight grabs that are provided with the kit.
Ladders
The ladders provided in the kit are Tichy ladders. If you use them, an extra rung will need to be added. Some group members did use these ladders and made the alterations. Other members substituted different ladders.
If using the Tichy ladders, first trim the top of one ladder just above the bolts of the rung. Trim the bottom of another ladder just above the rung itself. Dress the edges of ladder pieces with a file to maintain spacing. Working on a plate of glass, cement the two sections together.
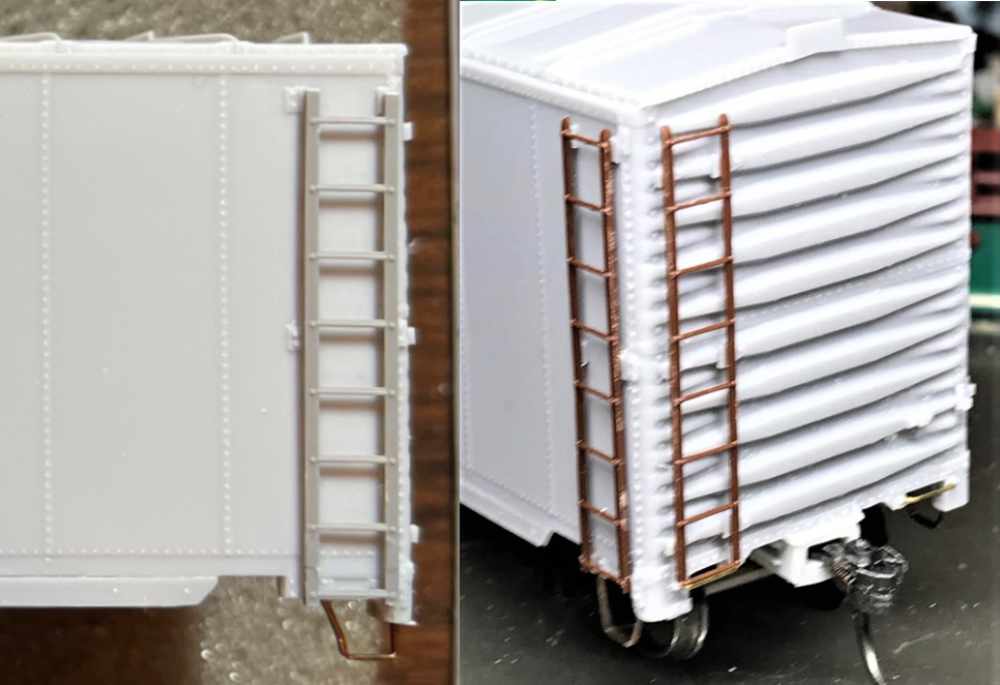
The small tabs on the underside of the Tichy ladder will need to be removed. Dress the ladders with a file, cut to fit, and attach them to the car. Bob Hanmer followed that approach. His ladder is shown in the left side photo above.
One substitute for the provided ladders would be to use Detail Associates (FC #6241) 8-rung ladders. I made that substitution. The results are shown in the right side of the above photo. If you use the DA ladder castings, the bottom of the end ladder is very close to the lower end grab. Install the end grabs first if using this substitution.
Tack boards

The tack and route boards were added next to complete the sides. The car ends also get tack boards.
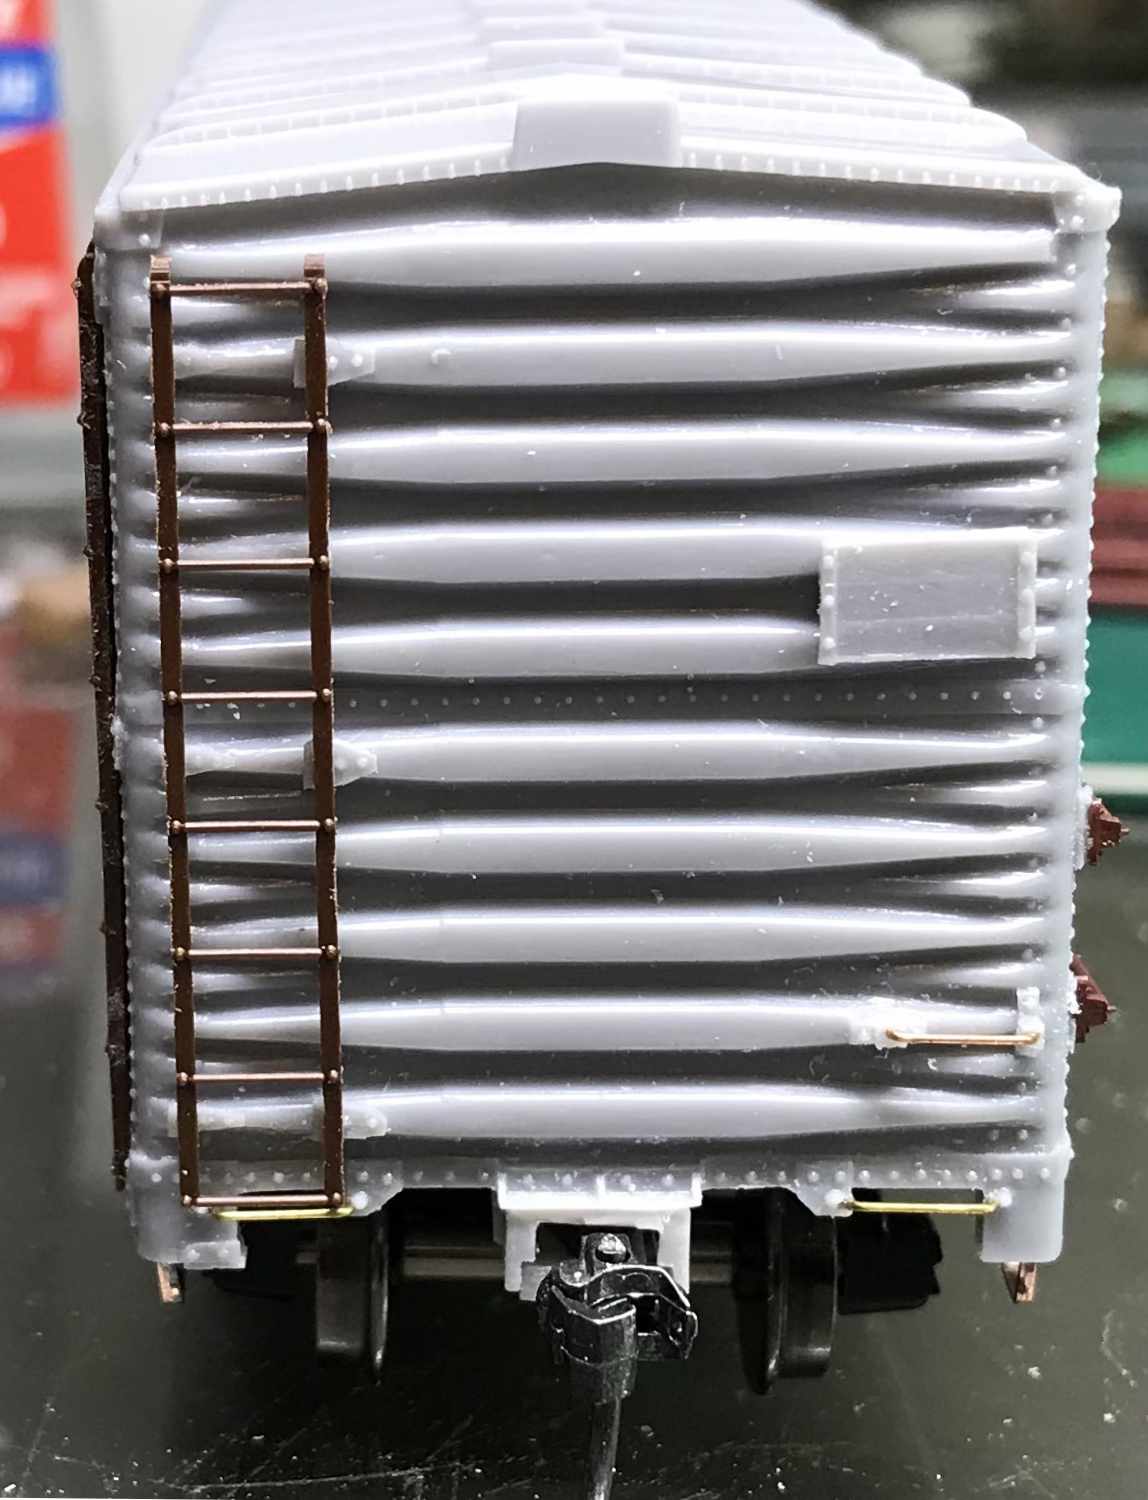
The nearly completed A end of the car is shown above. A cut lever bracket and cut lever need to be added at a later point in the build.
That wraps up installing these details. Adding the B end brake hardware and running board details will be featured in the next post.
A group of modelers (Ed Rethwisch, Chris Vanko, Bob Hanmer, Allen DeBraal, Brad Hanner, and myself) have been progressing on the recently released Resin Car Works Kit 8.05, a Missouri Pacific 1942 ACF boxcar. Here are links to the previous blog posts.
- Part one summarized the background and first steps
- Part two focused on the sill steps and brake appliances.
We hope these step by step blog posts encourages modelers to build any resin kit and, specifically, to aid in building this RCW kit.
Many thanks to Jerry Hamsmith and his group for sharing their resin freight car kit building tips. We look forward to the next part of the story!
Subscribe to the Resin Car Works blog so you don’t miss inspirational modeling and new model announcements. Add your email address to the Subscribe function at the bottom of the page.
Questions and comments can be posted below. Please follow the instructions so your comment can be posted. All comments are reviewed and approved before they appear. Share the blog link with other model railroaders.