Jerry Hamsmith shared the next group kit build progress summary. Here’s Jerry with the details.
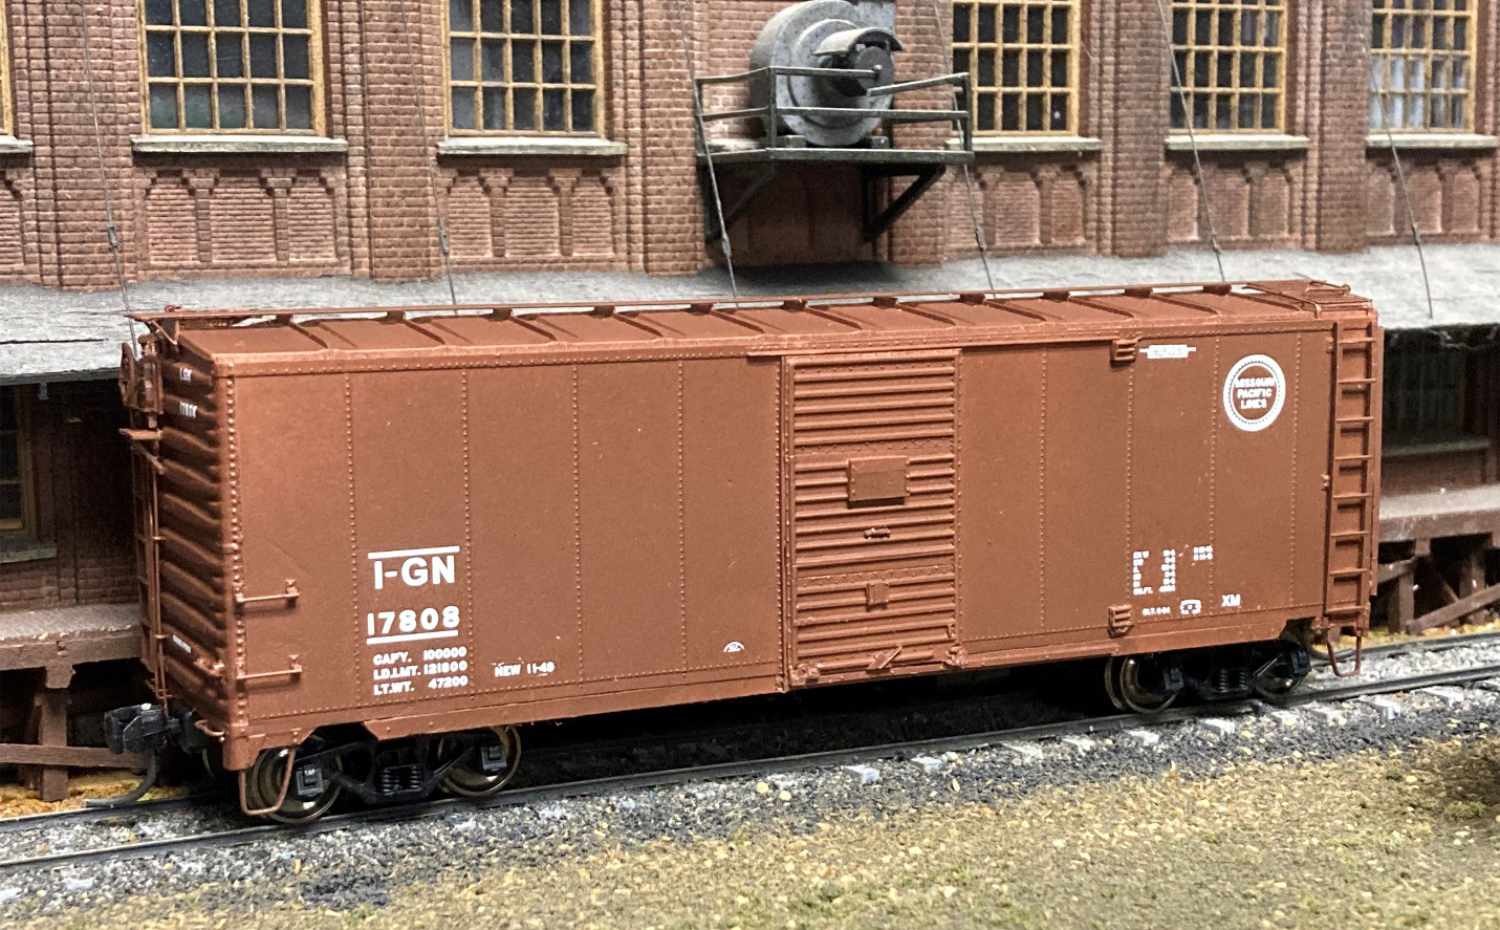
A group of modelers (Ed Rethwisch, Chris Vanko, Bob Hanmer, Allen DeBraal, Brad Hanner, and myself) have been progressing on the newly released Resin Car Works Kit 8.05, a Missouri Pacific 1942 ACF boxcar. Part one summarized the background and first steps. The focus this time is on the sill steps and brake appliances. We hope this encourages modelers to build any resin kit and, specifically, to aid in building this RCW kit.
Sill steps
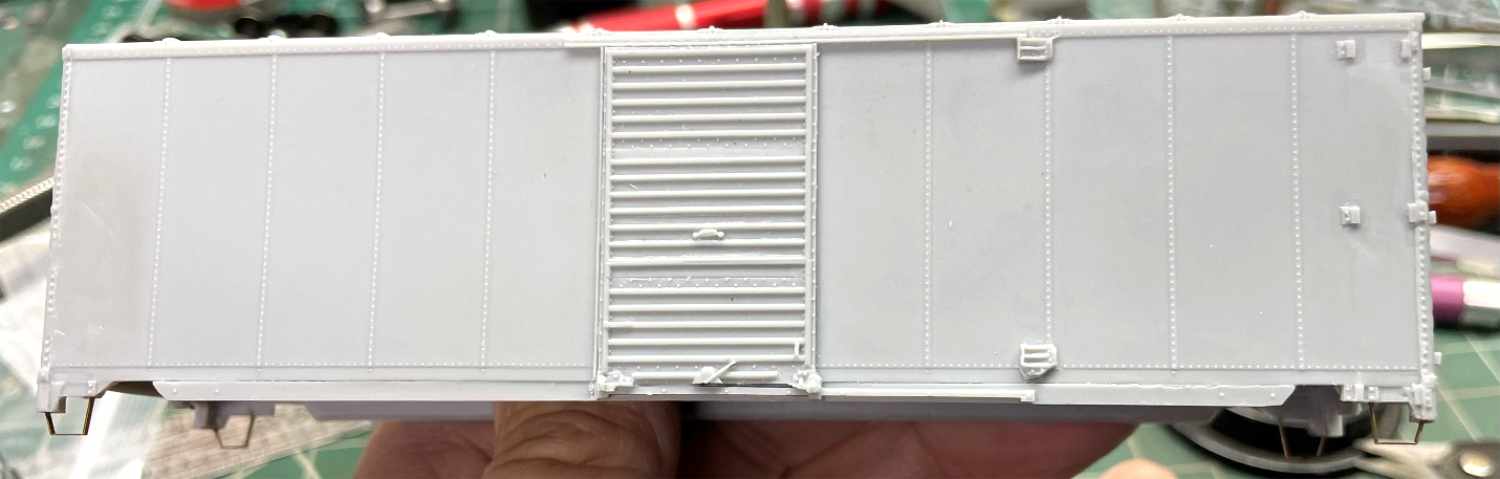
The sill steps provided in the kit are the A-Line Type A steps. They were added in the conventional manner by drilling #76 holes in the underside of the sill and inserting the steps into place.
Brake details
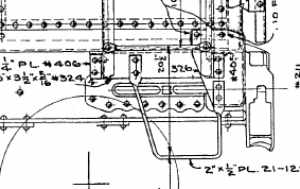
Using the prototype photos on the RCW Kit 8.05 Extras page and drawings acquired from the Pullman Library at the Illinois Railway Museum, the proper brake appliance placement was marked on the underframe. Then we prepared the detail components for attachment.

Brake components (reservoir, cylinder, and control valve) were both included as resin parts and on the Tichy parts sprue provided in the kit. Group members installed the parts they preferred.
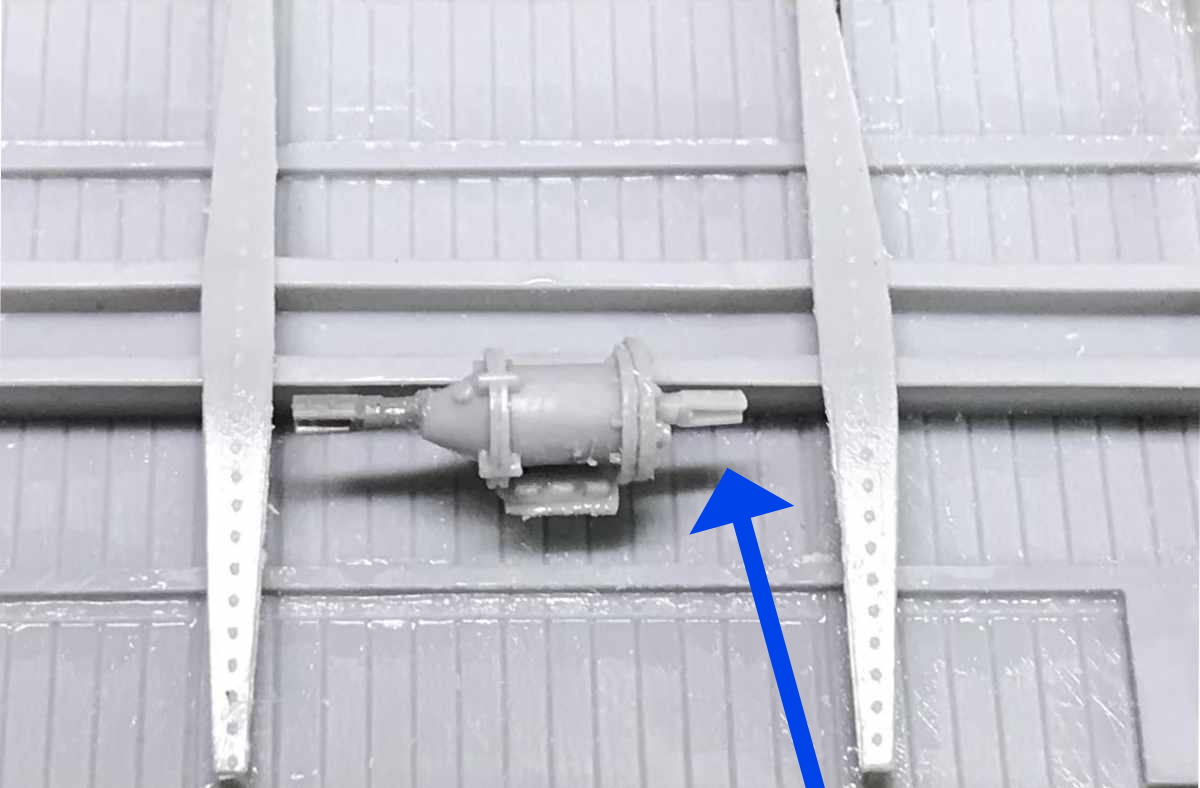
This particular prototype car had a fulcrum brake lever (the one towards the A end of the car) attached to the back of the brake cylinder rather than the center sill. A second clevis piece was provided with the resin parts of the kit for this purpose. In addition to the usual brake cylinder part, this second clevis was attached at the rear of the cylinder.
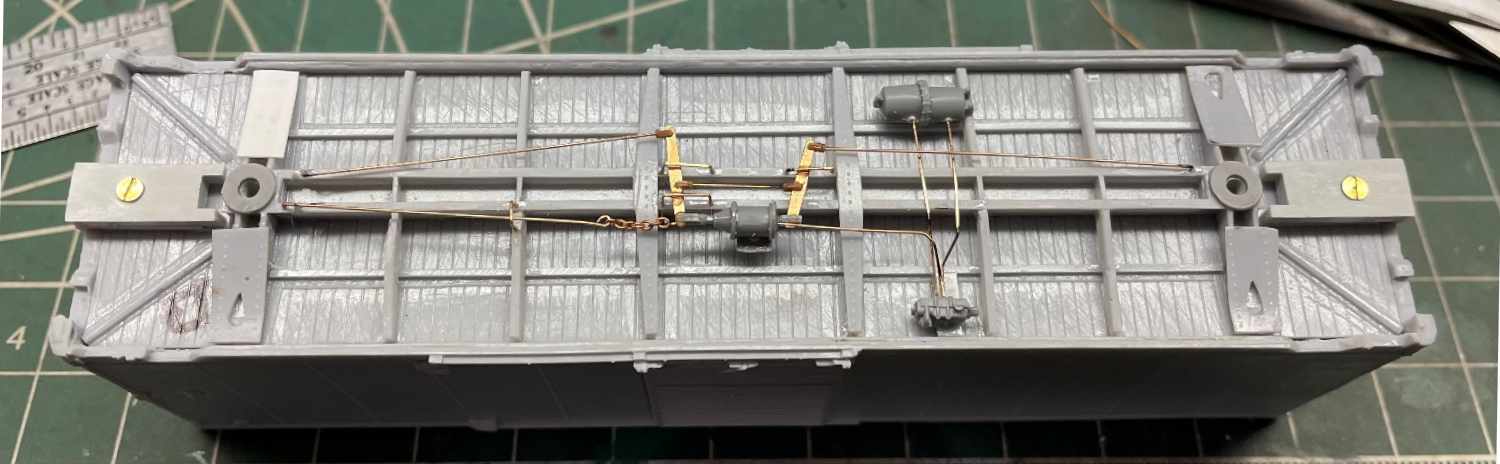
Chris Vanko used the Tichy parts for his appliances and substituted Yarmouth Model Works brass brake levers for those supplied in the kit. He used the turnbuckles provided in the kit as the attachment points between the levers and the brake rods. The turnbuckles were cut in half before installing as clevises. The kit-supplied 0.010-inch diameter wire was used for the brake piping and rods. Chris also added a chain connecting the brake cylinder piston with the hand brake rod.
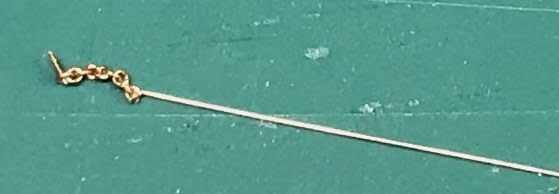
The brake rod chain can be added in various ways. My method is to set an end link over a short section of 0.008-inch phosphor bronze wire and insert that wire onto a hole on the brake fulcrum at the cylinder connection. The hand brake rod at the other end of the chain is looped around for the connection. Each of these are glued in place. Excess wire is trimmed after the parts have set. The chain used was 40-link per inch available from multiple resources. Resin Car Works honcho Frank Hodina also uses this method.

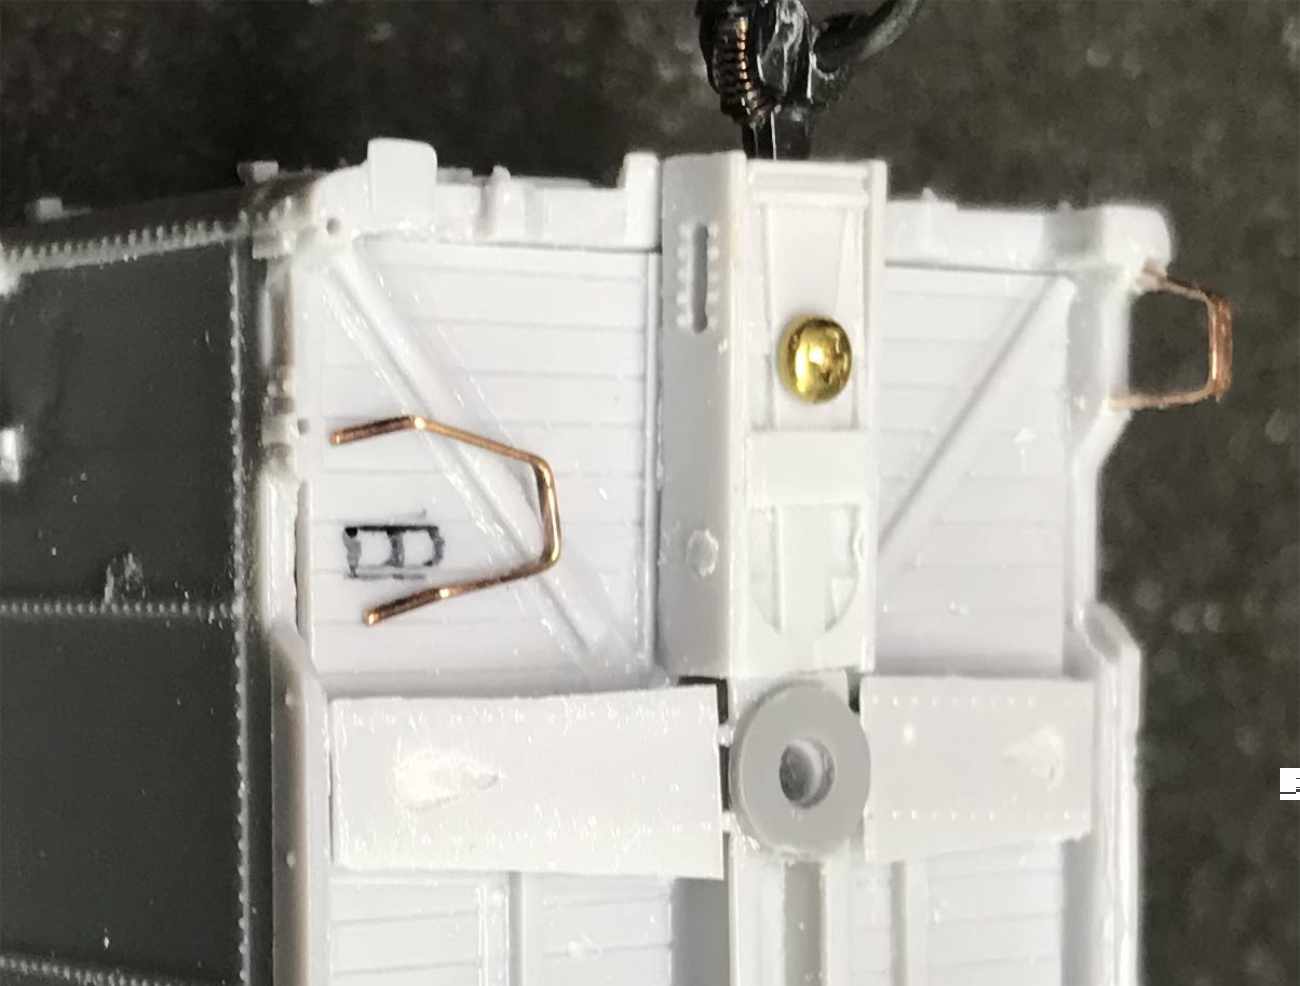
The brake lever guards can be either pre-formed grab irons or brass wire bent to shape. The photo above shows the completed details on Frank Hodina’s pilot model. In some cases, the brake rod will need a hanger to keep it in line with the brake cylinder piston. That detail is visible in the photo above. It looks like Frank used an A-Line sill step for this hanger.
The next round of kit build progress is just around the corner!
Many thanks to Jerry Hamsmith and his group for sharing their resin freight car kit building tips. We look forward to the next part of the story!
Subscribe to the Resin Car Works blog so you don’t miss inspirational modeling and new model announcements. Add your email address to the Subscribe function at the bottom of the page.
Questions and comments can be posted below. Please follow the instructions so your comment can be posted. All comments are reviewed and approved before they appear. Share the blog link with other model railroaders.
The multiple ways of performing the part of a build, the supporting background info and
the resulting outcome all come together for a great learning experience.
Generally one can not achieve the outcome alone that’s possible with the enhanced
input the group provides. Greater prototype accuracy equals greater models and maximum satisfaction. Not to mention the joy in sharing. Thanks to you all.