Here’s part two of Bill Welch building two gondolas at once. Part one can be found here.
In preparation for painting, I like to media blast models with Baking Soda to slightly roughen/etch the surface. A thorough soaking in Ivory Snow is next followed by a good rinse in clear water. I like to do this kind of work in batches of four to six models.
Now I am almost ready to paint. I use some of the green florist wire F&C includes with their kits to make hangers using the truck screws to hold the wire. Holding each model by these hangers I sloshed on 91% Isopropyl Alcohol with a brush and scrubbed them to make sure no fingerprints survived. One of my trusty airbrushes was used to blow them dry.
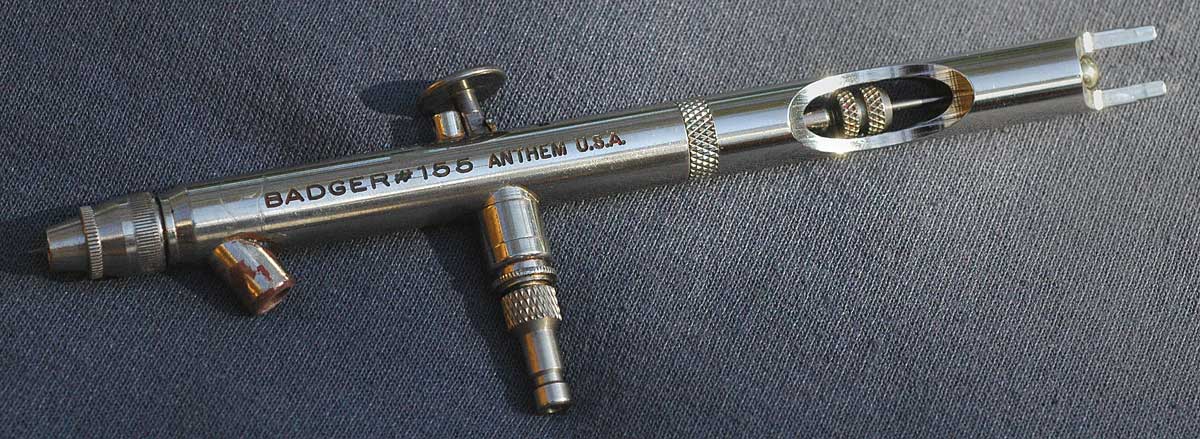
I like the appearance of Floquil’s “Polyscale” Tarnished Black and used it to paint both gondolas with my ever reliable Badger #155 “Anthem.” I like this airbrush because it is designed specifically to spray Acrylic paints with its 0.75mm nozzle and needle combination. I spray this paint at 20 PSI. Cleaning is a breeze, first with water and then 91% Isopropyl Alcohol. I love this stuff—an effective degreaser and paint cleaner and very safe. Some people use it to thin acrylics but I prefer not to use it as it speeds drying. Acrylics already dry quickly and making sure the paint goes on wet on whatever we are painting is very important. I don’t want paint drying on the tip of the Airbrush’s needle nor do I want it drying before it his the surface of what we are painting. I use distilled water when thinning Polyscale and when it is necessary with Badger’s “Modelflex” paint. After the Tarnished Black dried, I used Microscale’s “Micro Gloss” to provide a good surface for decaling. Once again “like things at like times.”
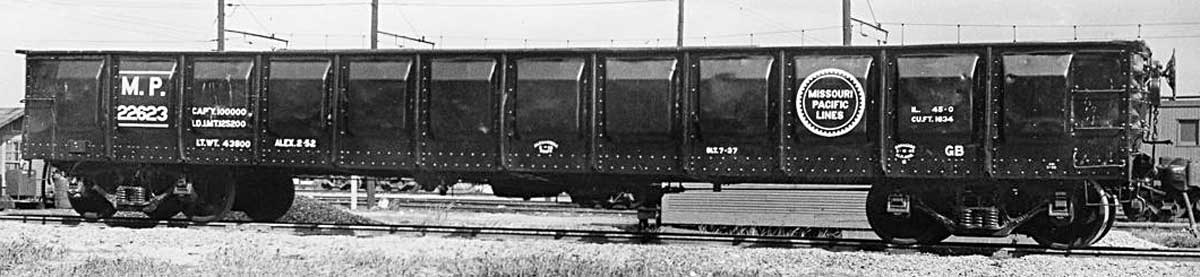

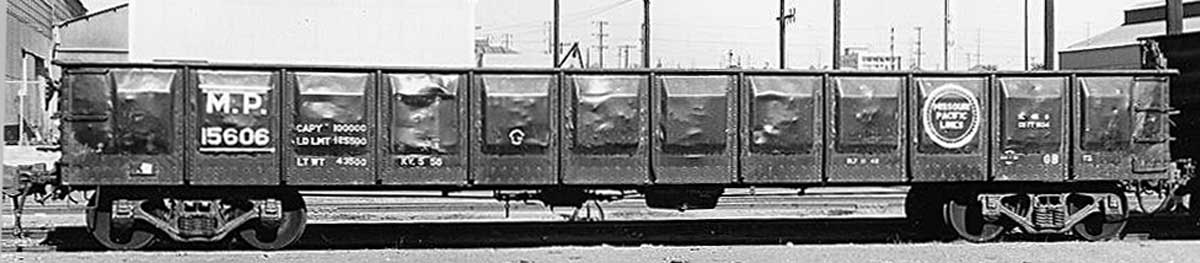

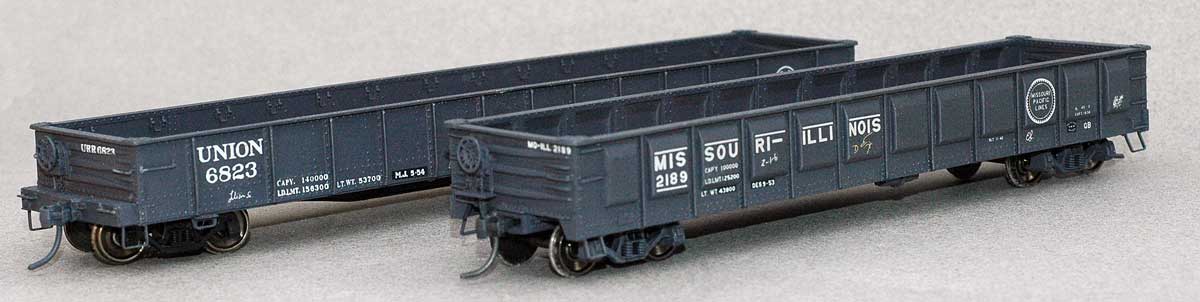
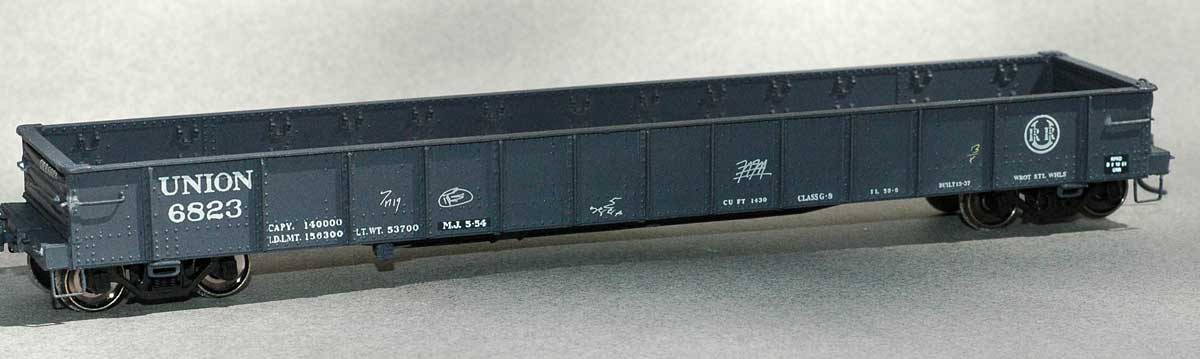
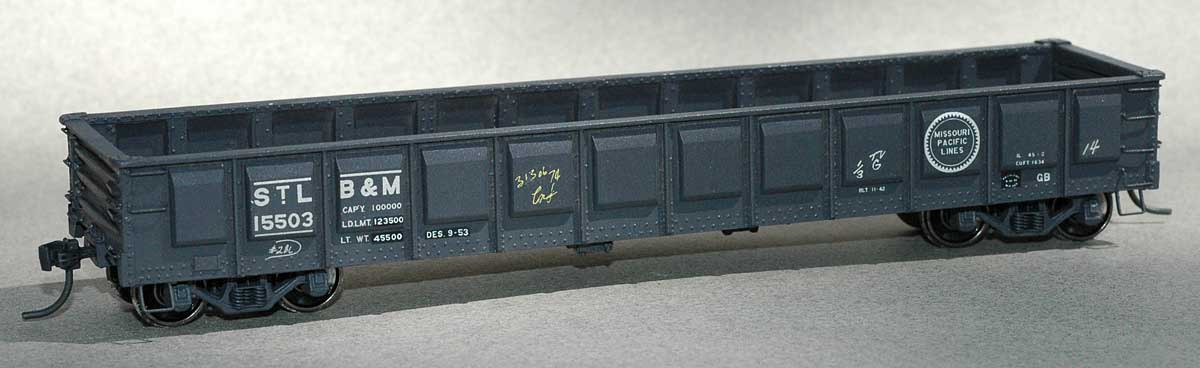
I used good photos of the blister-side gons to help with the placement of decals Although no photos of the StLB&M cars apparently exist, there is no reason to believe their scheme would have differed from the other identical cars. I used the very fine decal set from Speedwitch Media. I had no photos of the Union cars in-service but through the Internet I was able to connect with another modeler who knew a lot about the URR. He sent me a photo of his model representing a re-paint, which I used to guide my work. The F&C decals are not as sharp as the Speedwitch decals but they proved serviceable and once on the model they look good. They presented no application challenges.
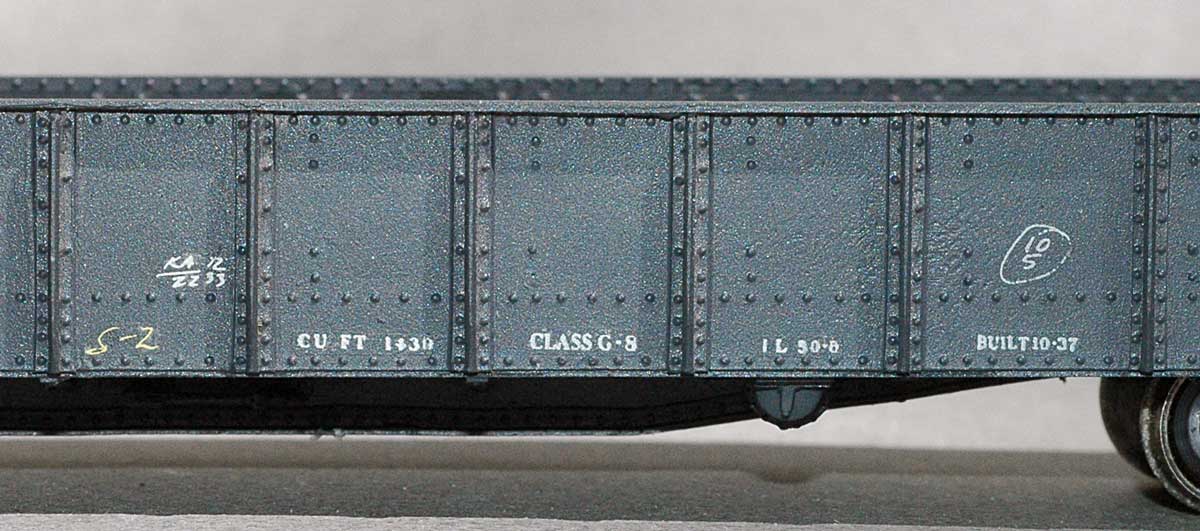
I like to have fun with my modeling, which in this case meant using different reporting marks on each side of the model. For the end reporting marks my thinking was that anyone looking at the side reporting marks it was likely they would see the reporting marks on the end that are closest to the side reporting marks. The Speedwitch decals are very thin but with care they go on easily. My routine is to create a puddle of Microscale’s “Micro Set” (blue label—the one with the smell of vinegar) and when that looks dry come back with “Micro Sol” (red label). The chalk mark decals on both models were once available from Sunshine Models.
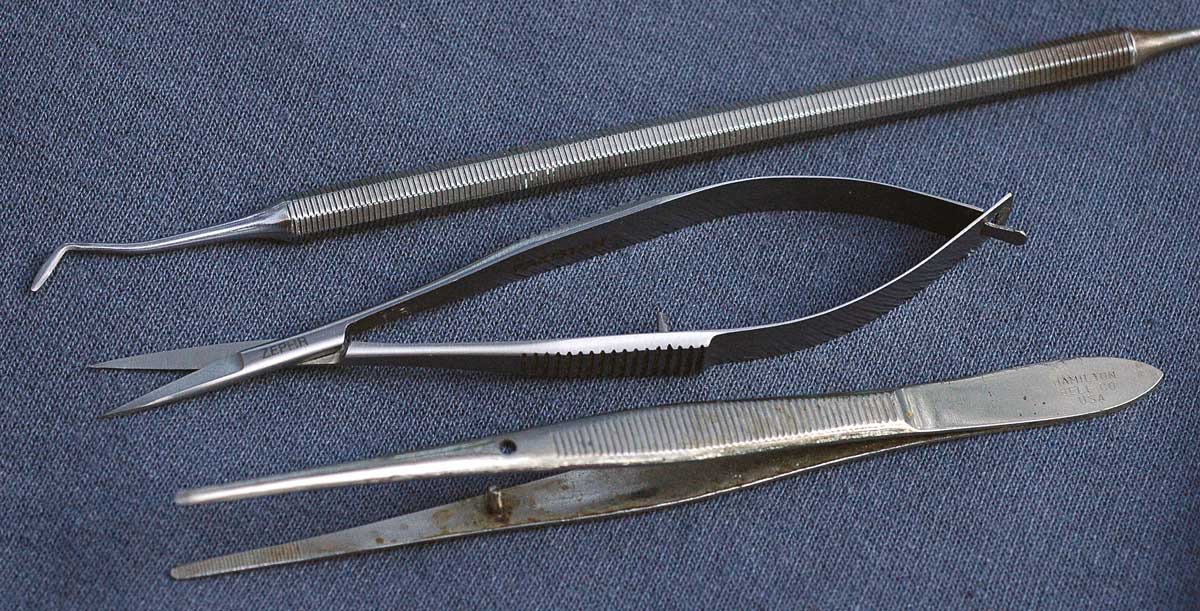
The photo shows my favorite decaling tools. The scissors were purchased from Champ Decals years ago and are joy to work with. The spring action makes them easy to control the cutting and I can trim very closely to the decals. They bear the name “Zephr” and are made in Pakistan. Supposedly they are intended for eye surgery but I have no way of verifying this. I Googled “zephr scissors” recently and found a vendor.
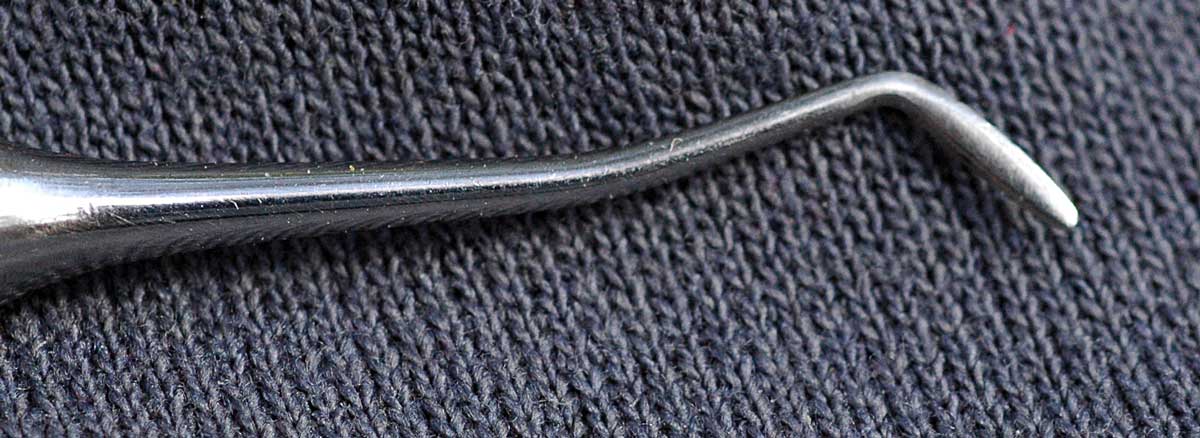
The dental tool is called a Hollenback. I came across it over twenty years ago when I asked my dentist in Tennessee if he had any broken tools I could have. I didn’t know what I was looking for exactly. I just figured he might have something I could use. I used the original one for 10-12 years before dropping it. I really panicked but my dentist in Virginia came through and gave me three, one of which was exactly right for me.
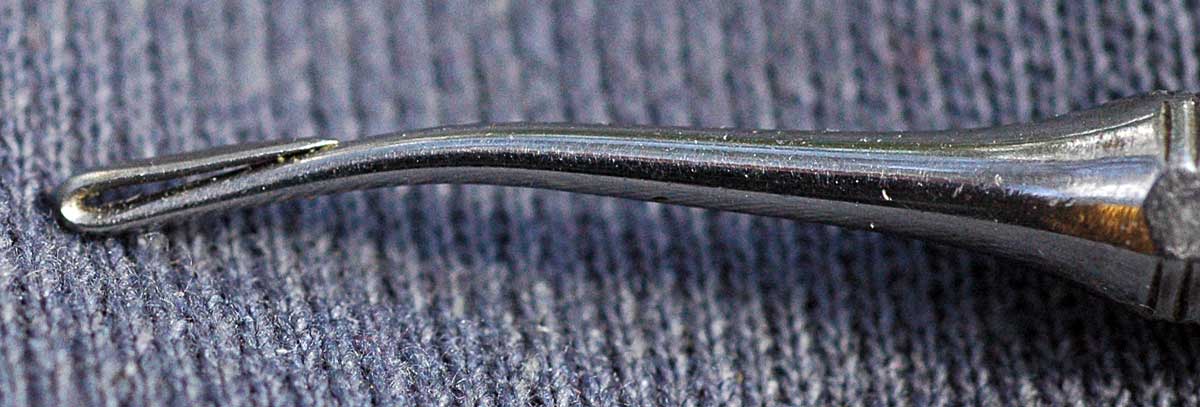
I have filed the end to blunt it. I use it to fish very small decals out of the water and then slide the decal from it with a brush onto the model. I use the tool to move the decal into its precise position. The ends of Hollenback’s come in variety of sizes and angle so having a selection to look at can help someone find one that feels “just right.”
The tweezers are sort of sentimental yet very utilitarian. My memory is that I acquired them when I was working on an insect collection for Jr. High Biology and I have used them ever since. They bear the imprint “Hamilton Bell Co. USA” and it looks like they are still in business. Their items are classed as Student Grade and with about twenty-three years in the classroom I like the synchronicity of still using tweezers intended for a student. Their ends are fairly wide and serrated, enabling a good grip on the decals without damaging them.
After I was finished decaling, I gave the cars another gloss clear coat finish. Then I created a very thin wash using one part paint to nine parts of water and a couple of drops of Winsor & Newton’s “Flow Improver” to prevent water beading and sprayed this mix on both models very thinly. I like the way it helps blend the decals into the painted model. After the wash was applied, I came back with another gloss coat and applied the black decals pieces and then the white reweigh and lube data decals. I want these to look newer and fresher than the rest of the lettering.
We hope Bill has inspired you to tackle a couple of similar kits and build them at the same time. Once you start working on a couple of resin or plastic freight car kits at a time, you will find a nice rhythm to the construction processes, and your fleet begins to grow
Questions and comments can be posted below. Please follow the instructions so your comment can be posted. All comments are reviewed and approved before they appear.
Bill,
I have the tools you suggest but I never thought of using the dental tool as you do. I will give it a try as It can be a pain fishing foe small decals with a brush.
Thanks for the tip,
Jim Kubanick
Morgantown WV