Craig Zeni recently built an HO scale Yarmouth Model Works Wabash box car kit. He steps in with thoughts on the model and construction processes.
At first blush upon opening the box, this Yarmouth Model Works kit is a lot like many other kits with folded printed instructions, the one piece car body, and the separate floor wrapped in tissue paper. What is different is that one is greeted by the etched running board taped to the inside of the box lid and the balance of the parts in small zip lock bags. One thing I found very refreshing to see are etched parts for the ladders, brake levers and other brake brackets instead of resin pieces. Kadee grabs, Kadee Miner brake wheel, Moloco Miner brake housing, Tichy brake parts, and phosphor bronze wire make up the rest. The included decals are from Black Cat and are very nice, and trucks from Kato. This is a top shelf kit.
The castings themselves are outstanding. Very little flash was evident on the main body casting. I had it cleaned up and ready to go in about 10 minutes; the crossbearers and such not much longer. There are a lot of styrene kits that wish their parts were this clean.
History
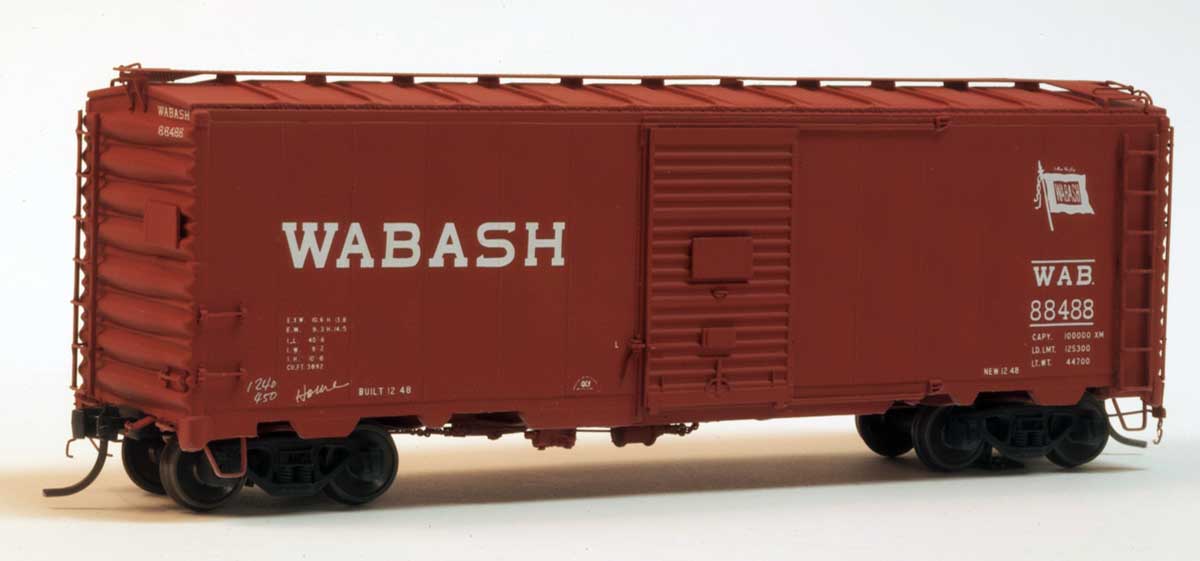
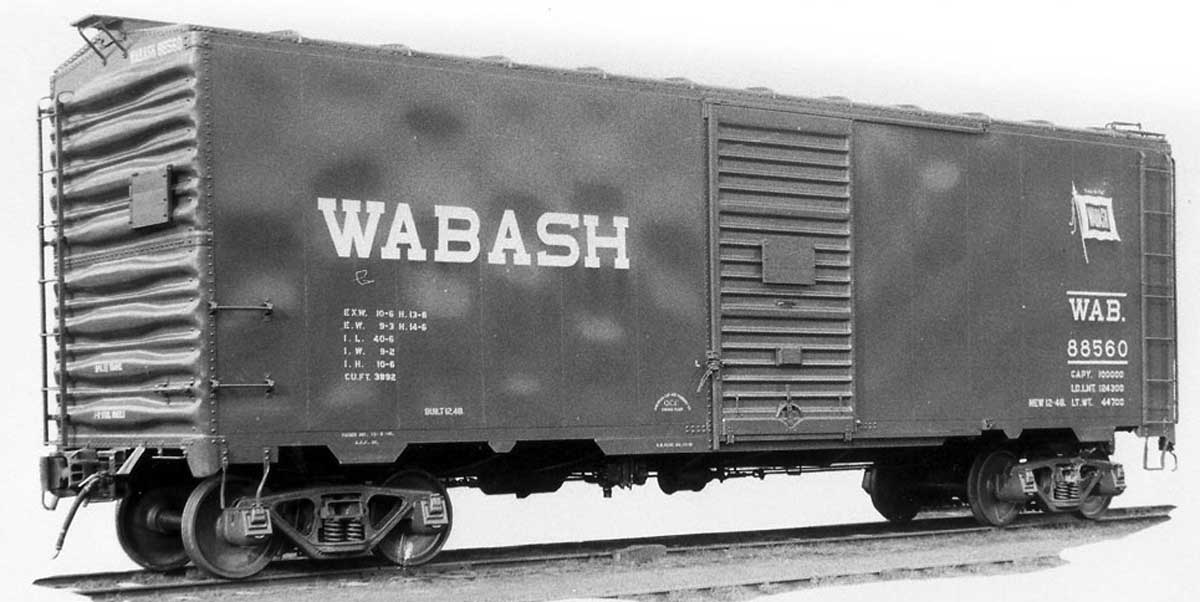
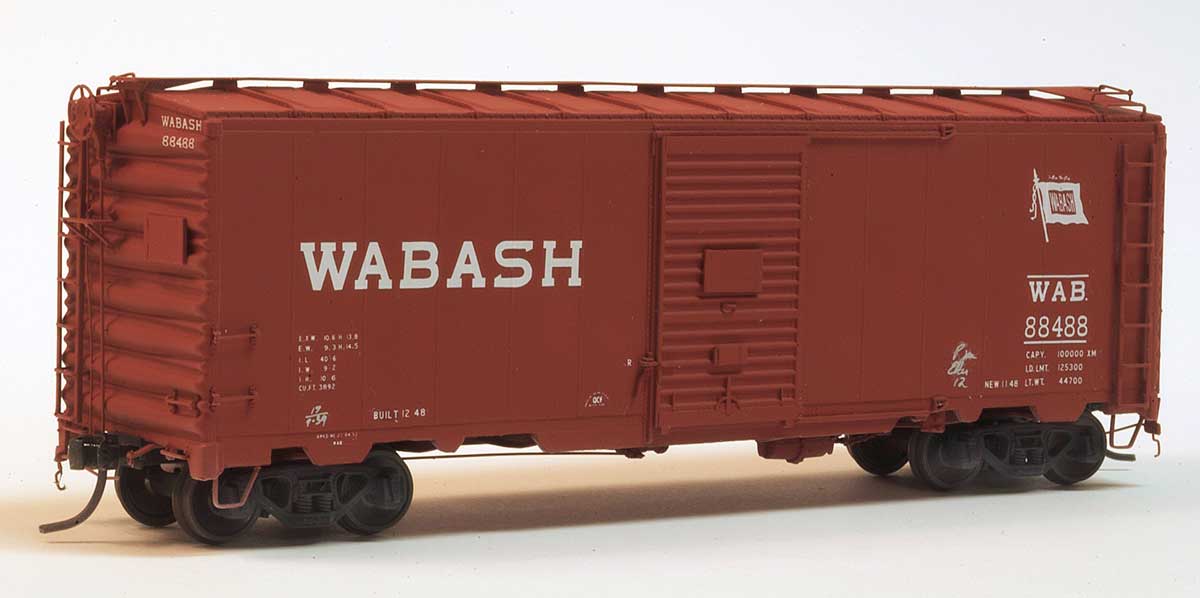
I had a couple of prototype questions, so I sent them to Yarmouth honcho Pierre Oliver and he replied with the following information. The Wabash prototype was one order among a large number of box cars from American Car & Foundry (ACF) that used welded 12 panel sides built between 1948 and 1953. The Wabash car was the only one that used the 4/4 Improved Dreadnaught End (IDE). ACF installed different end components on many of the other batches. These include the 3/4 IDE, CarBuilder 3/4, and ACF corrugated end. There was also a mix of roofs installed; diagonal panel, Murphy, and AC&F. Many of these hardware details have been documented by Ed Hawkins and published in Railroad Prototype Cyclopedia Volumes 26 and 29. In addition to end and roof components, there were variations in doors and sizes to fit six-, seven-, and eight-foot wide openings.
The Yarmouth instruction sheet offered the following prototype details. The 88200-88699 series of Wabash box cars were built in November and December of 1948 by ACF. They were the first welded box cars built for the Wabash. The cars were built with Apex running boards, Miner hand brakes, ASF A-3 trucks and a Universal Rotary slack adjuster. As delivered they were painted with the small “Follow the Flag” emblem.
Construction
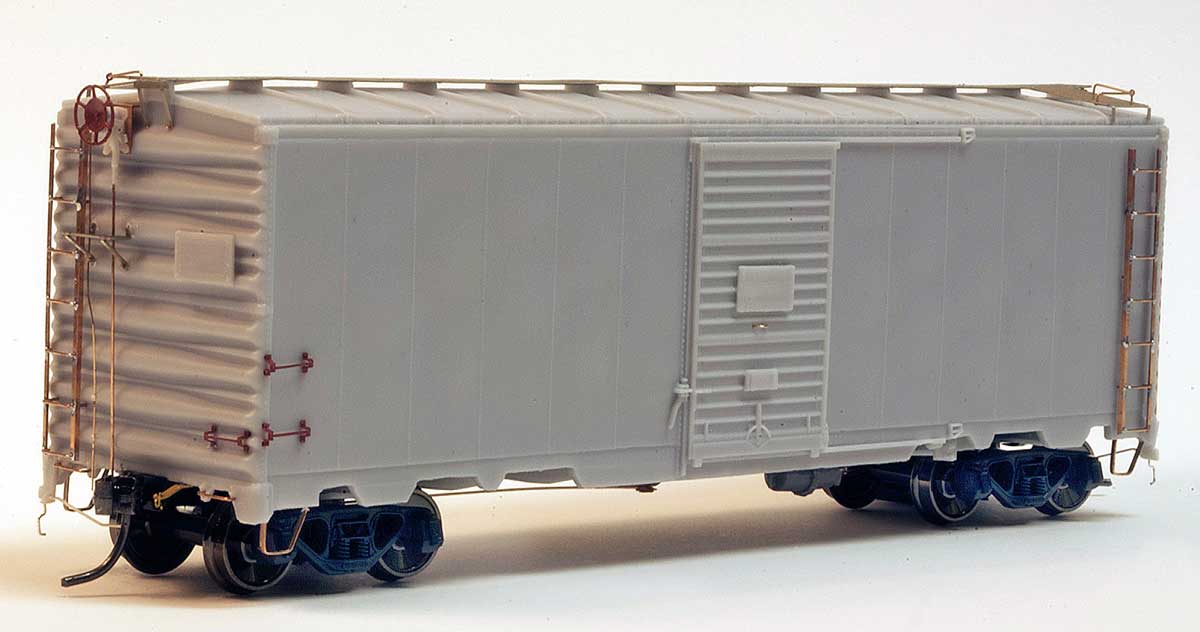
The model was built pretty much to the instructions. The only real parts variation I chose was to use A-Line steps instead of the exquisitely delicate etched steps provided with the kit. I have no evidence to question their fragility but I do have reason to question the less than delicate touch of some of my friends. The Yarmouth method of pinning the running board angle supports and brake step is an excellent idea, easy to do, and makes for a durable installation of the parts. Along the running board I used canopy cement to secure it to the roof.
One other change I did was in assembly of the ladders. The instructions called for gluing the rungs into the stile etches after trimming the legs off the rungs, then gluing the assembled ladder to 2×3 standoffs and securing the assembly to the car. Again, allowances for reality in handling led me to the following method.
- I put together a fixture from scrap basswood with 0.034-inch thick wood secured to a base; this basswood was 0.021-inch wide per the instructions. The stiles, bent to 90 degrees of course, fit over the raised part of the fixture.
- I then ‘clamped’ the stiles to the fixture with my dial calipers, just enough to keep them from moving much.
- Holes were drilled thru the stiles and fixture for the 2nd and 6th rung.
- I pushed the two Tichy metal grabs for the rungs thru the stiles and the fixture, and soldered them in place.
- Removed the assembly from the fixture and soldered the other five rungs in place.
- Trimmed most of the rungs flush, leaving rungs 2 and 6 in place, then used the fixture to make three more ladders.
- The kit came with a fifth (extra) set of stiles. I formed them up and in place over the fixture and soldered an etch fret scrap across them to create a drilling jig to mount the ladders to the car.
- Drilled and mounted the ladder – they are very sturdy ladders and certainly won’t get knocked off the car during handling.

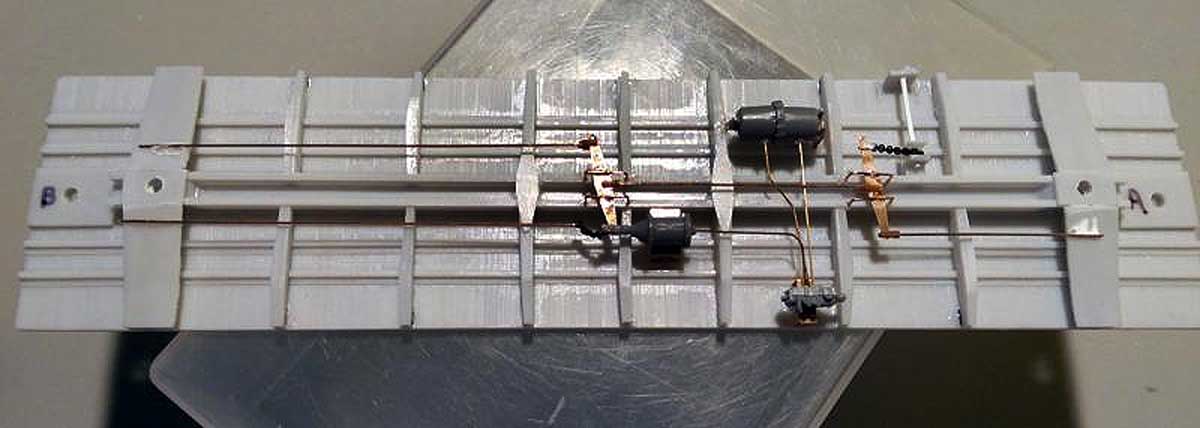
And finally, I assemble my cars wherever possible to allow access to the interior with a length of 1/4″ square styrene across the width of the interior ends. The coupler screw is extended up thru the floor into this block.
Apart from the A-Line steps, I added the brake hose brackets and Kadee couplers.
Finishing
The model was painted with Scalecoat II Oxide Red, lettered using the kit’s decals and some chalk marks from Sunshine then flat finished with Model Master Clear Flat Lacquer.
This is a superb kit. The well thought out design shows Pierre Oliver’s experience in dealing with other less-than-user-friendly kits. My one suggestion would be to make some larger and clearer detail photos available on the Yarmouth Model Works web site than what comes on the printed instructions.
Thank you, Craig, for sharing your work here on the blog. Questions and comments can be posted below. Please follow the instructions so your comment can be posted. All comments are reviewed and approved before they appear.
Great work, Craig.
I’m especially intrigued with your method of soldering the ladders, and creating a jig with the extra stiles. I also prefer soldering over gluing when using metal part assemblies.
I also like your approach to gaining access to the interior of the model. May I ask; how do you add weight to resin models?
Scott Haycock