Bill Welch returns with a double treat. Click on any image here to review a larger size.
For years now whenever I can, I try to build two models at the same time. There are many similar steps for each build, such as washing parts, removing flash, drilling holes, mounting brake systems, installing grab irons, and more. Adding work time to an extra model on the bench seems to reduce the overall build time for two models.
Resin kit building usually involves a lot of hole drilling. I like to use a sharp object to create a starting point for the drill bit so that it will not wander. Mine is different from the one pictured in that link. When drilling holes for sill steps, I like to make a starter hole with a smaller bit before I drill the final hole with a #75 bit. It is just as easy to do this on two cars at once as it is to do it on one. Body motions like changing bits require time, so doing two models at one time can actually save time. My modeling/railroad historian/general raconteur friend Dr. Frank Peacock, DDS, observes that in dentistry this approach is termed “like things at like times.” As my description with the two Funaro & Camerlengo gondola kits will demonstrate, the two models only need to be similar, not identical.
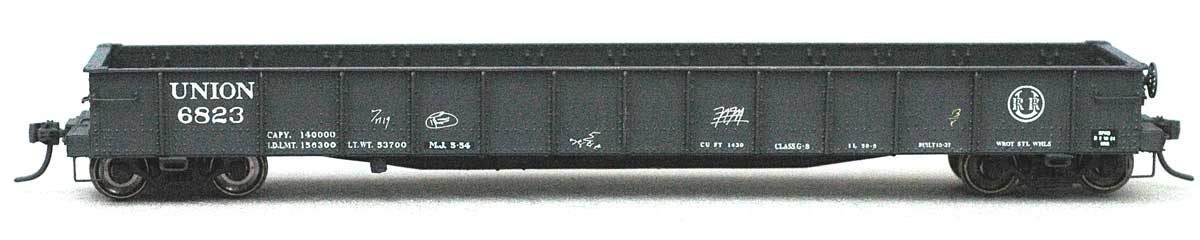
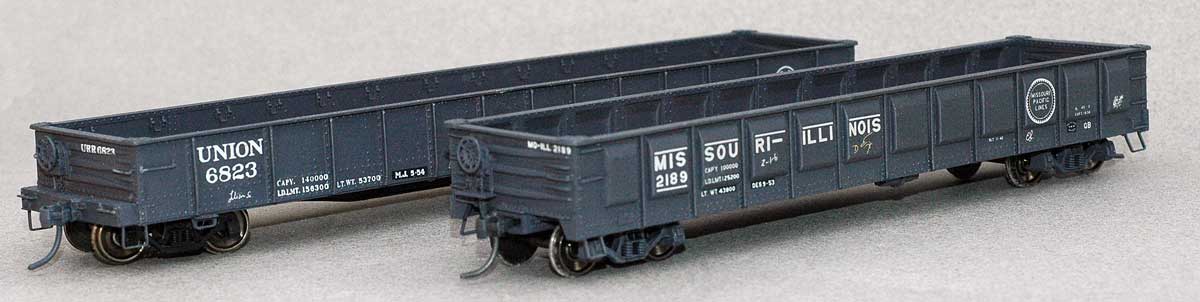
I think Funaro & Camerlengo introduced their steel railroad-owned 50-foot mill gondolas about three years ago. Their one-piece casting version has interior detail so I purchased Kit #8141. These kits come with decals choices for each of the three owners and since the US Steel owned Union Railroad rostered two thousand of these gons, URR was my choice from the start.

About the same time this kit was introduced I realized F&C had redone the Missouri Pacific Panel Side gondolas (I call them blister-side) as a one-piece casting, also with interior detail, so I purchased that kit as well (#6143). Since both prototypes had several grab irons and similar if not identical sill steps, it was an easy decision to build them both at the same time. As a clarification, when I say the bodies are one-piece castings, I am referring to the ends and sides being cast together. The floors are separate casting and need to be fit into the body. This goes quickly in my experience.
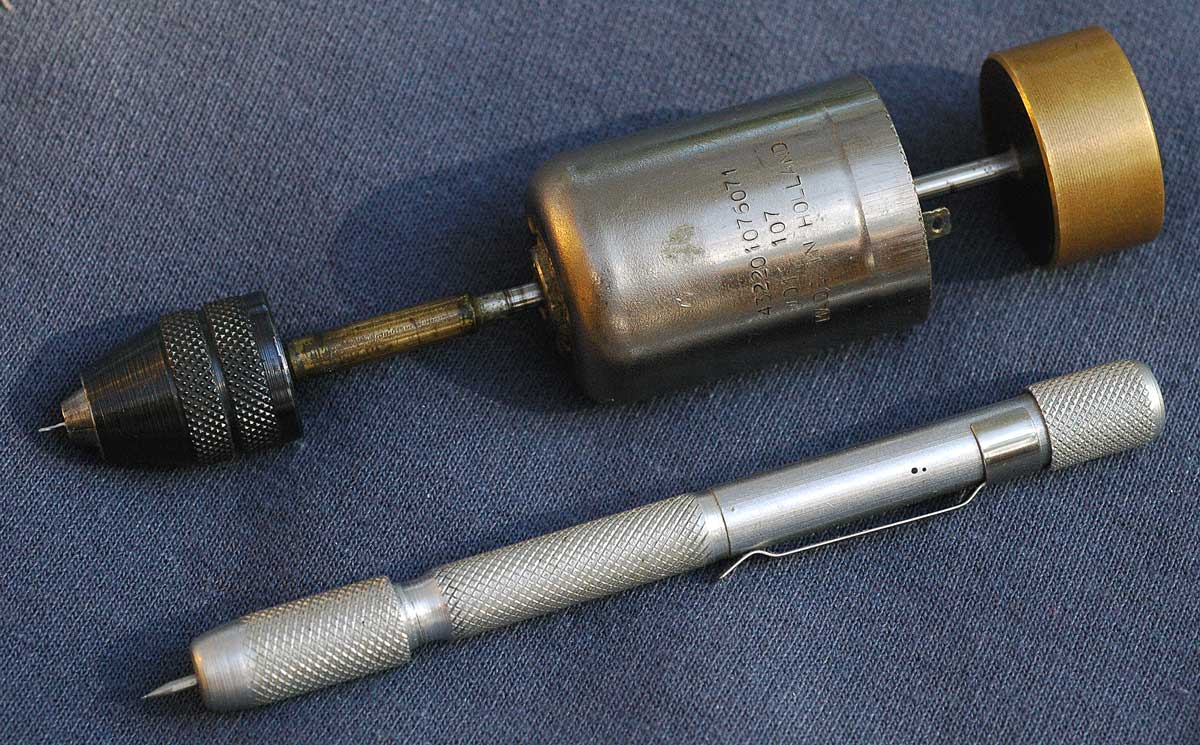
Drilling for and placing the various grab irons is routine on both of these models but there are a some exceptions with some non-standard shapes required. I like this change from the routine as it adds character and uniqueness to the models, and it tests my skill. I actually enjoy bending the wire, 0.012-inch in most cases, and getting it to look just right. The photo of my drill explains what it is—a Holland can motor with a flywheel on one end and a chuck (a Dremel I think) on the other. The smallest drill bit I can use in it is a #79. Alligator clips attach it to a small power supply. Brian Ehni in Nashville, TN assembled all of the parts over twenty years ago. I am not sure what I would do without it—I might stop modeling.
One feature both of these gondolas share are the gussets located on top of the Bulb Angles on each corner: I decided I wanted to experiment with modeling these to make them as fine as possible. I began by cleaning them up then thinning the parts as much as possible and still be able to handle them. Like most small parts they tend to act like fleas and easily flick away so I was careful as I rubbed the gusset parts across the 320 Grit sandpaper on my sanding block. I worked carefully to ensure all of them looked to be the same thickness.
Meanwhile I also worked on the top of the bulb angles to make the area flawless and flat. Again I used my sanding block and a light touch. There were several air holes in the bulb angles on the MP gon so I stopped sanding process because the bulb angle was looking very thin. Instead of trying to fill the holes I laminated 0.005-in. styrene strips to the tops of both sides and ends and trimmed it to match the remaining resin. This produced a nice even surface with no flaws.

Once I was satisfied with the appearance of the bulb angle on each model, I carefully rounded all four corners on each gondola. Once again, here is something that is just as easily done eight times as it is four times. To me this is getting into the rhythm of a step. After rounding a couple of corners I get the feel of what I want them to look like making the whole process go quickly. Once I was happy with how the corners looked, the gussets were carefully glued into place making sure they were attached squarely. Prototype gussets were stampings and their edges wrapped around and over the edges. I wanted to capture this so I cut some 0.005 sheet styrene into strips and CA’ed them to the edges. Once the CA (cyano-acrylate cement) had cured, I used a sharp single edge razorblade to trim the styrene and then filed the top outer edge to make the styrene and resin appear as one solid piece. While not perfect I am largely pleased with the final appearance, especially after they were painted.
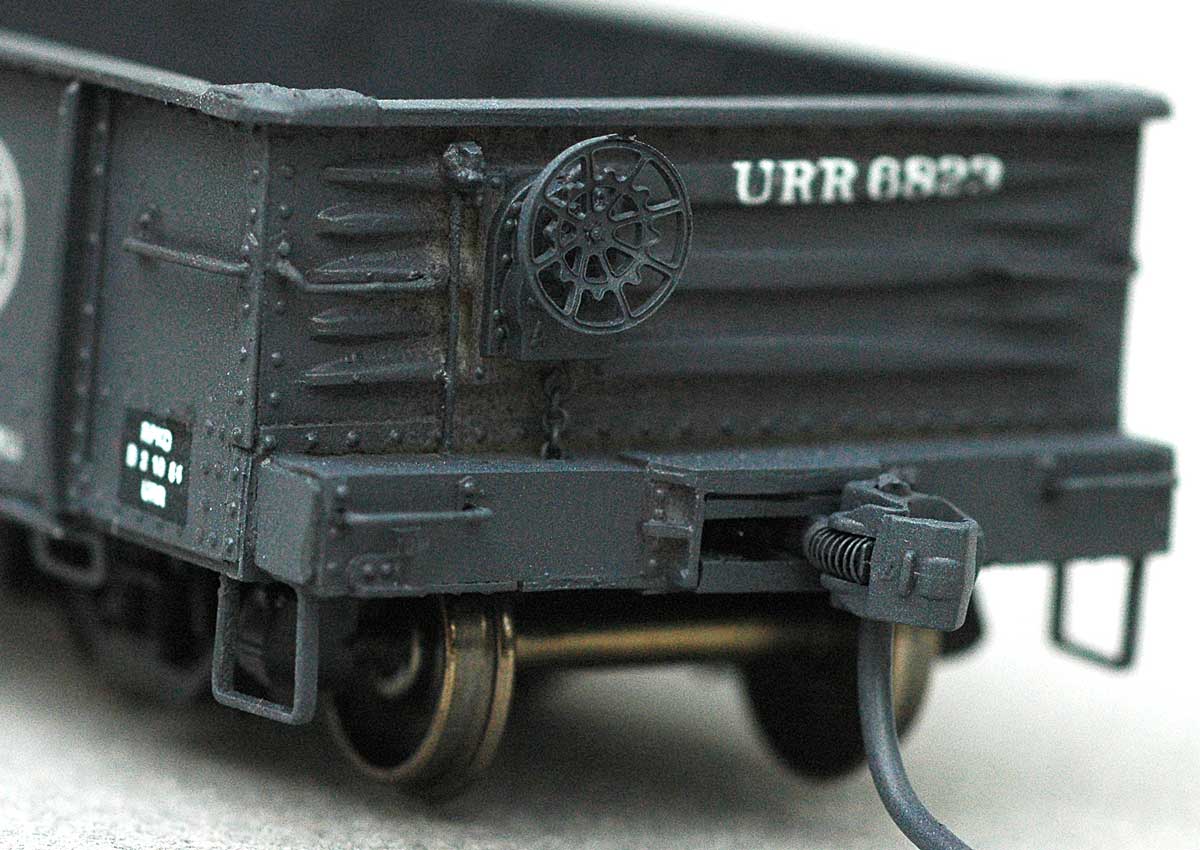
In terms of detailing the two models, the only significant differences in my mind is the “B” end of each. Because of its extended end sill the URR gondola has only the brake housing, brake wheel, and retainer valve. The Kadee Ajax brake wheel is pinned in place with a piece of brass wire inserted in a hole drilled through the top of the brake housing.
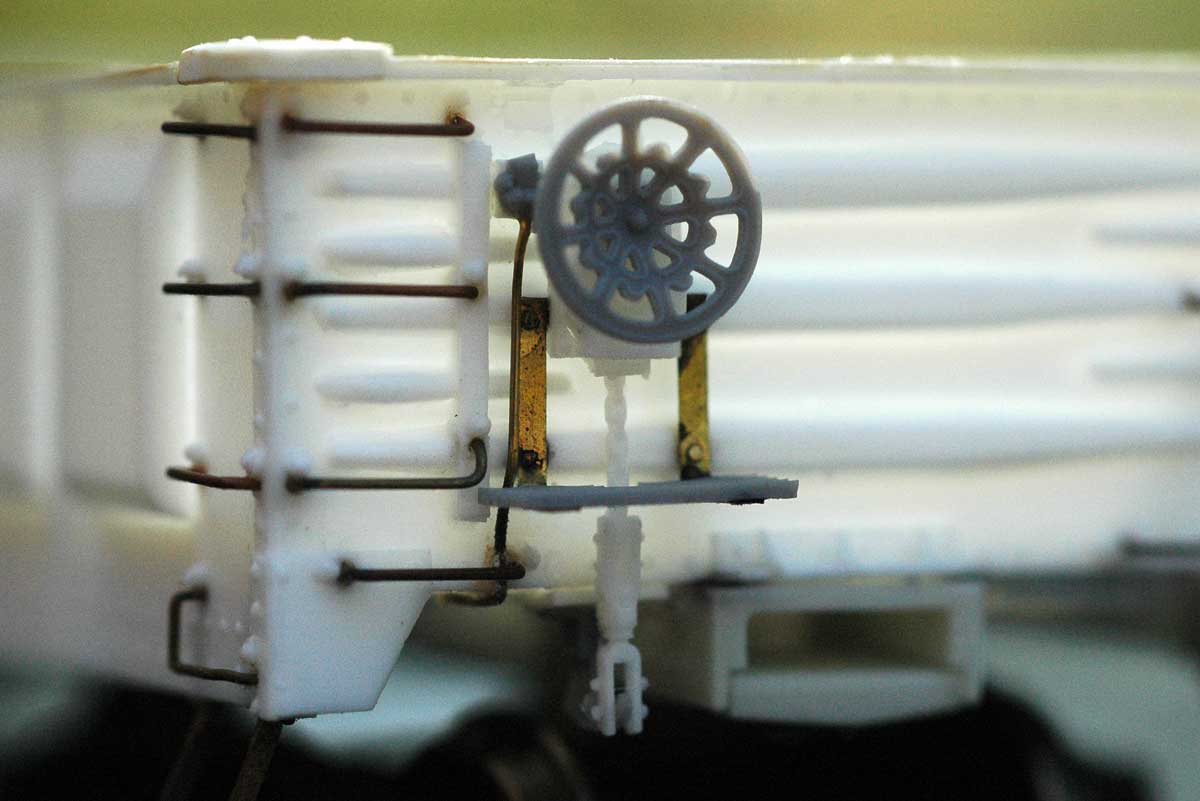
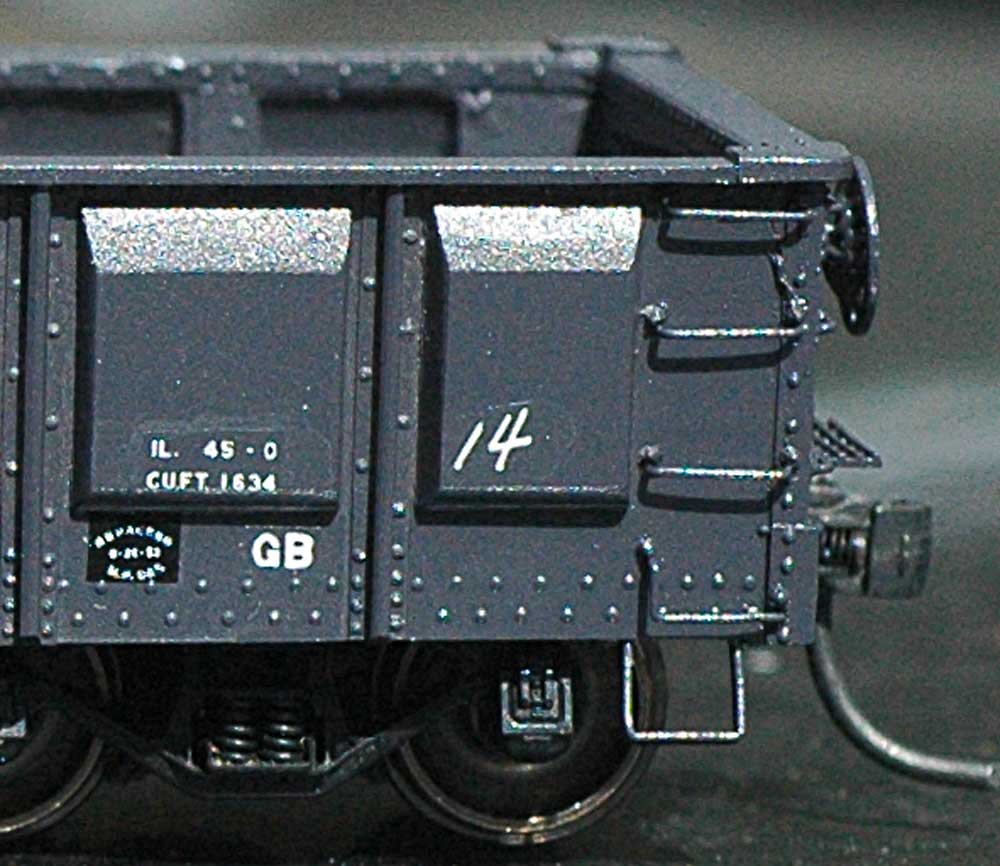
The M-I/StLB&M gondola’s “B” end is more detailed as the photos above and below illustrate. I cut brass strip using small shears to form the brake step supports, drilled them with 0.012-inch holes and used brass wire of the same size to “bolt” them in place. The open grid type brake step is styrene sanded until it looked good to me. I am not sure why I used the Tichy Ajax brake wheel instead of the more delicate Kadee version.

Gondolas are typically light and need extra weight to operate well. A few years ago I purchased one square foot of 0.020-inch thick lead sheet to add weight to gondolas and other situations that could arise. I have cut pieces to size to fit between the under frame and interior floor of a couple of gondola models but decided on a different approach with these two models. This time I cut the lead sheet into strips and then into little cubes. I used Liquid Nails “Clear 100% Silicone Adhesive” (Product # AHE20706CL0) to attach them to the various sections of the two underframes, stacking them two or three pieces per section. Please handle lead carefully. Do not rub your eyes after handling lead and wash your hands thoroughly after handling lead.
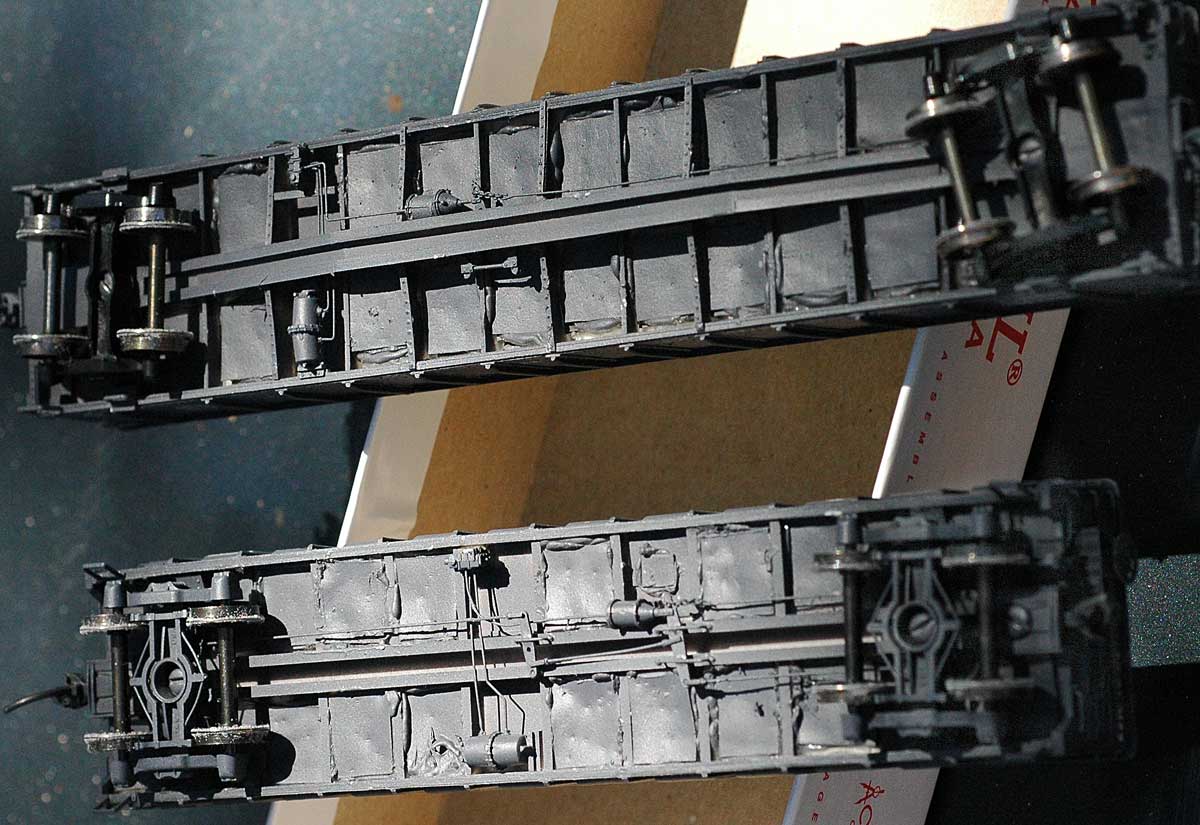
Lead shot can also be used to fill the underframe cavities. The above photo shows the models after they were painted.
Bill will cover painting and decaling in the next installment. Questions and comments can be posted below. Please follow the instructions so your comment can be posted. All comments are reviewed and approved before they appear.
Check out part two of Bill Welch’s Building Two Kits at Once here http://blog.resincarworks.com/like-things-at…s-at-once-pt-2/.
By coincidence, I am completing work on two Sunshine composite gondolas (SAL and L&NE), built simultaneously as you did here. I agree with the concept and find that it does save some time and helps clear the kit backlog somewhat.
I am waiting for the Scalecoat to thoroughly cure prior to applying decals. I look forward to seeing your comments on decaling your cars. Maybe I can pick up a tip or two.
Prior to this gondola build, I assembled four Sunshine D&RGW boxcars of nearly identical construction, also using a production line process. Here, I really saved time as all of the construction steps for each car were the same . This worked especially well on the fussy Duryea underframe and brake components. This was the first time I built four cars at once and, for me, I feel that is about the maximum multi car build I could do. Some of the steps were beginning to get a bit tedious and I fear that if I did a fifth car, I would have to give the project a rest several times and, thus, lose much of the time savings.
I will post photos of all of this once the gondolas are lettered and weathered. Thank you for continuing to post your construction techniques. I find them very inspirational
Super job.Can’t wait to start mine.Great help.You just raised the bar again.