Lester Breuer sent tips on detail additions for the HO scale CB&Q resin gondola kits. We also get a peek at his paint booth. Here’s Lester with more.
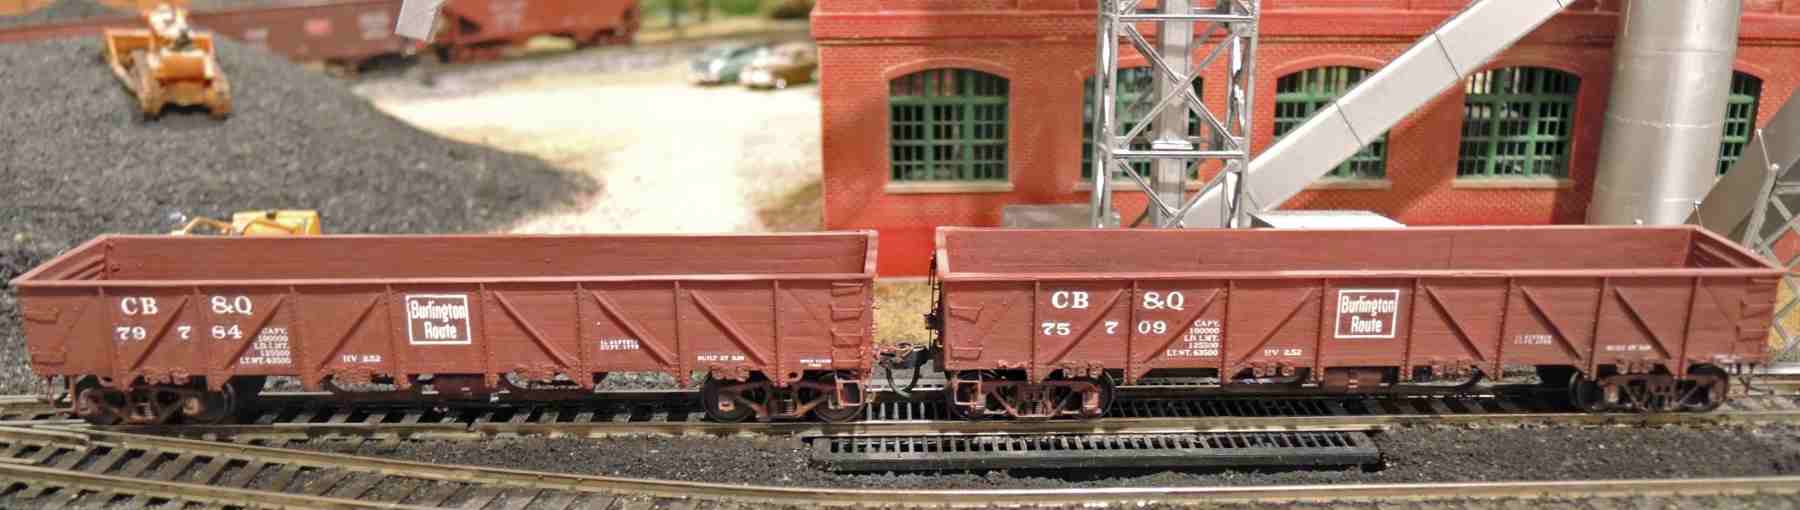
After taking a break from building resin models I returned to build two CB&Q gondolas, a class GS-7, number 75709, and a class GS-8, number 79784. The gondolas are RH Models resin kits produced by Jerry Hamsmith and Ed Rethwisch . The kit instructions are very well done and easy to follow. The prototype data and table listing each of the GS series and truck types can be found in Nelson Moyer’s RCW blog post. Therefore, I will only discuss several changes I made and the paint and decal process I used to complete my gondolas.
The first changes were simply substituting other parts for those provided or suggested in the kit. These changes include:
- Cal-Scale air reservoirs from set 190-283
- Precision Scale # 31796 retainer valve
- Yarmouth Model Works, YMW 355, eyebolts for uncoupling lever brackets
- Red Caboose plastic grab irons for brake lever hangers
- Kadee #2032 Miner brake wheel
- Tahoe Model Works Double Truss Barber, TMW 107, on the GS-8
- Accurail Andrews #0166 on the GS-7
- InterMountain 33-inch diameter code 110 metal wheels
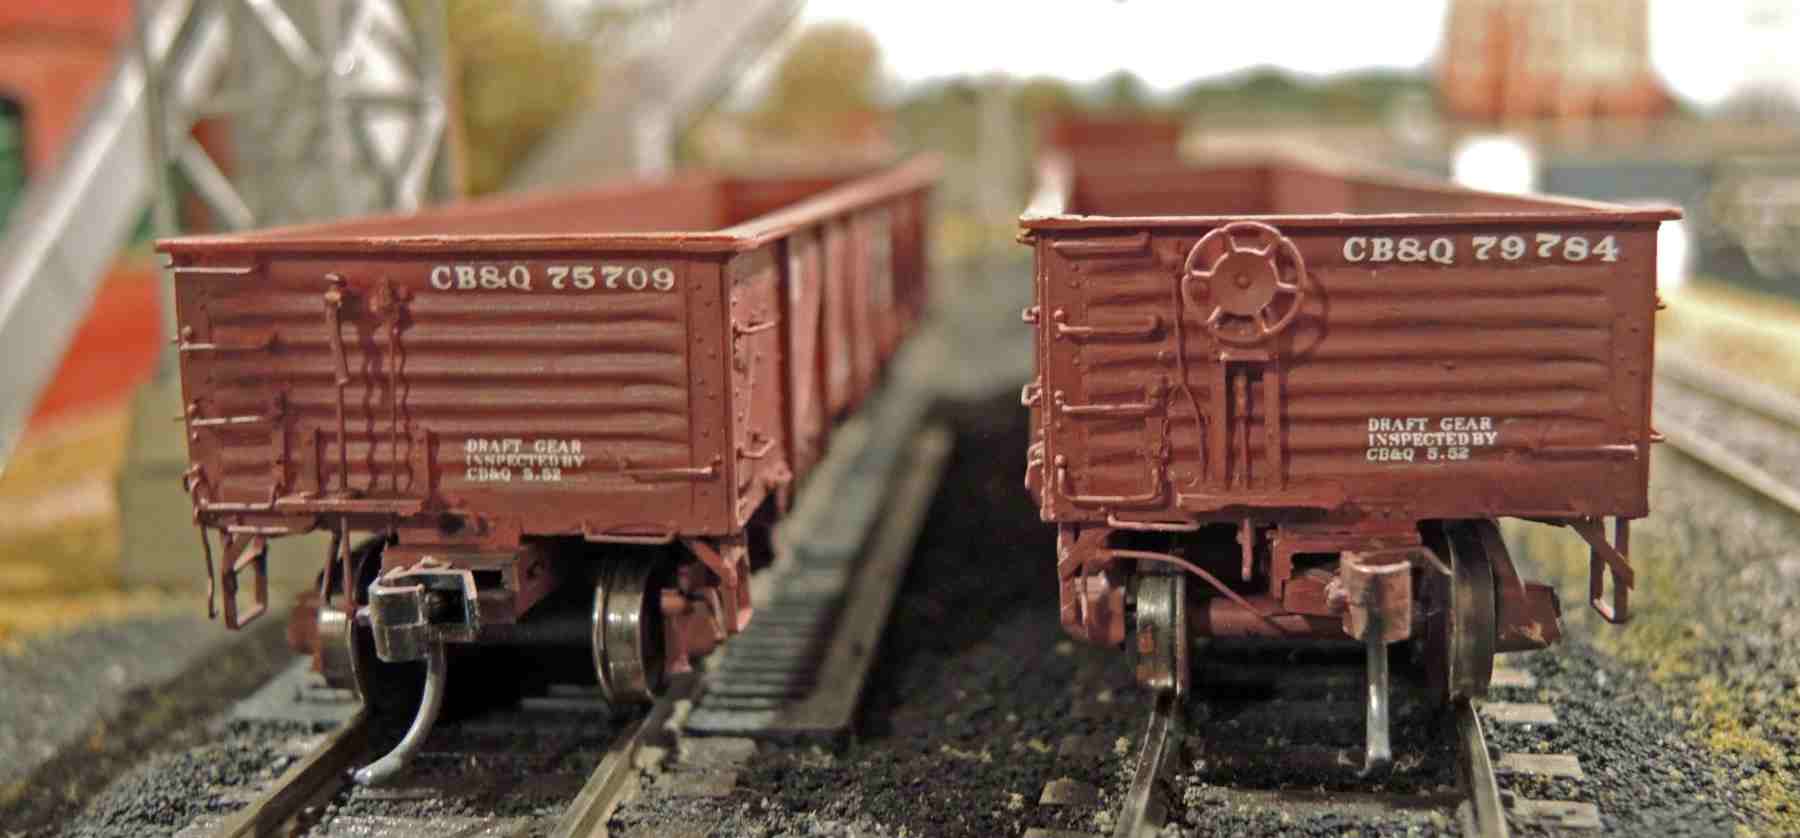
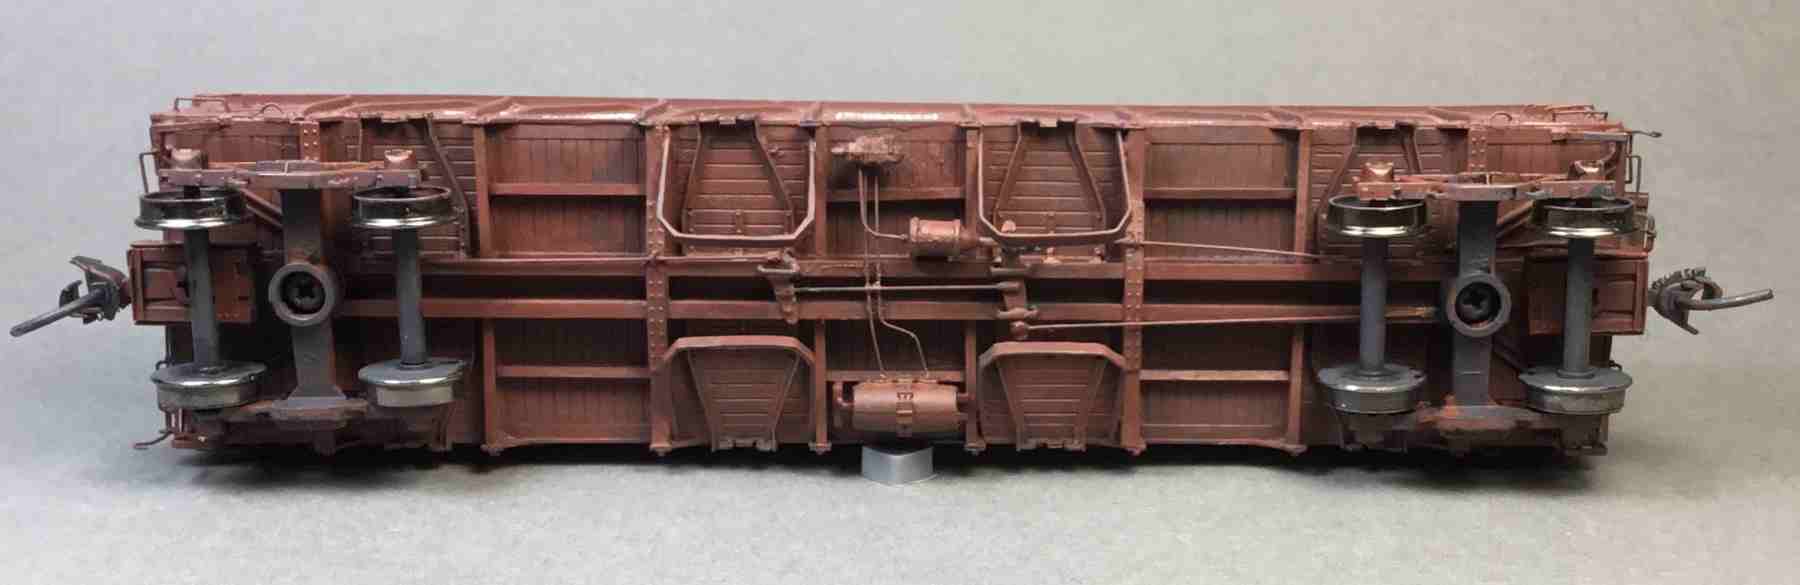
Additional changes required fabricating parts, which included brake levers made from Evergreen strip styrene, uncoupling levers made from Tichy Train Group #1106 0.0125-inch diameter phosphor bronze wire, and sill steps fabricated from Detail Associates #2524 0.010 x 0.030-inch flat brass bar stock. I made the new sill steps because I felt the fine cast resin ones in the kit would soon be broken when the gondolas went into service on my operating Minneapolis & Northland Railroad Company.

I began the double step sill steps by making a drawing of the resin cast sill steps in the kit on a piece of white cardboard. I used the drawing to do the bending and soldering of the Detail Associates flat bar stock. I used a needle nose plier to bend two “U” shaped pieces from Detail Associates flat bar stock. The large “U” shaped piece was taped to the drawing facing upward. The small “U” shape was inserted inside the large “U” shaped piece taped to the cardboard facing downward. A soldering iron with a fine 1/8-inch tip and 0.015-inch diameter solder was used to solder the two “U” shaped pieces together creating a sill step. The finished sill steps were inserted into holes drilled with a number 56 drill in the gondola sill. The flange on each side of the step which on the prototype was used to attach the step to the sill was cut from Evergreen 0.010 x 0.30-inch strip styrene and glued to each side of the step.
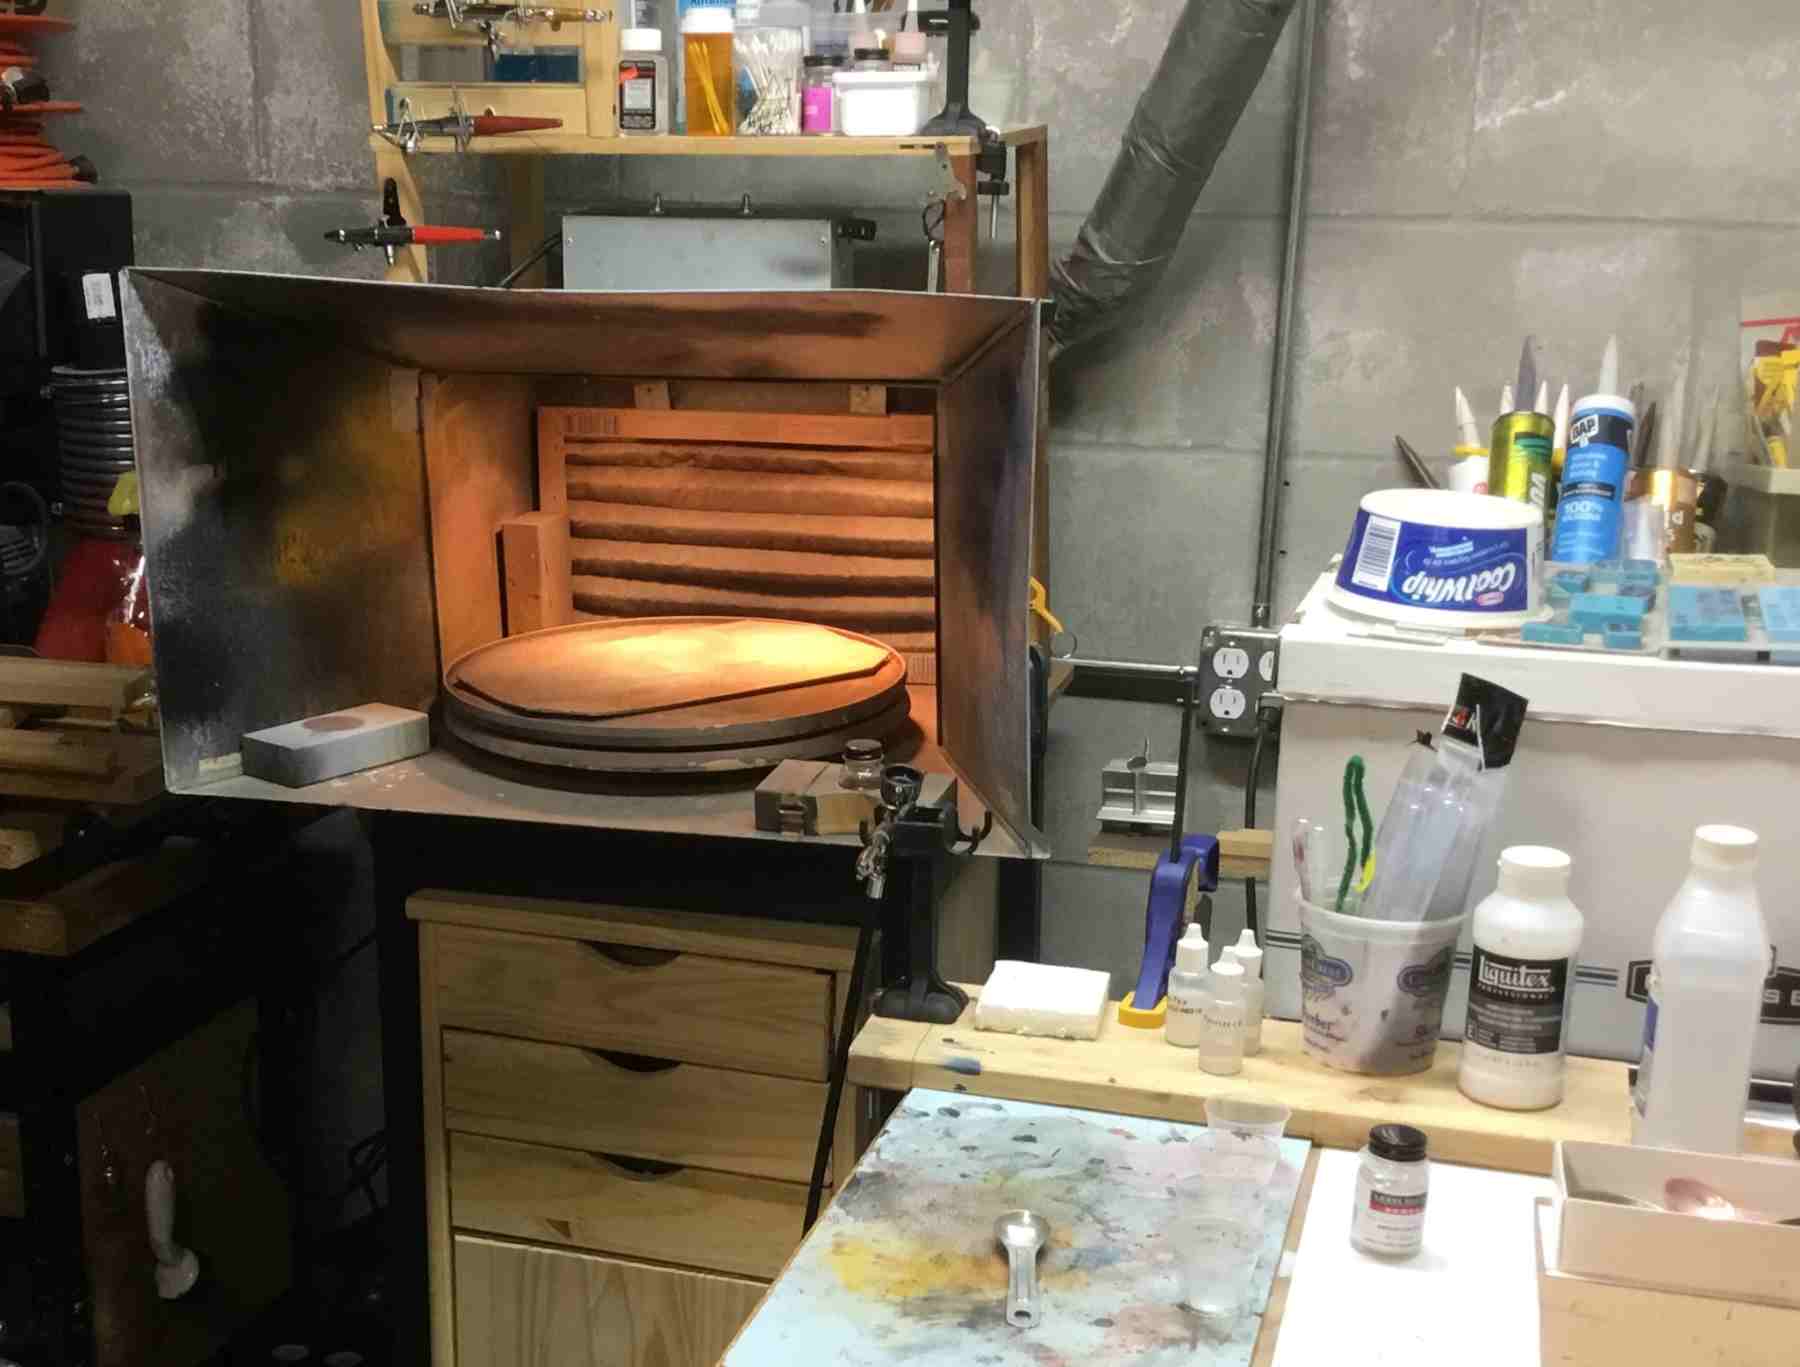
Once the gondolas were built into the paint shop they went. The gondolas were washed using an eye makeup applicator dipped in isopropyl alcohol to prep them for paint.

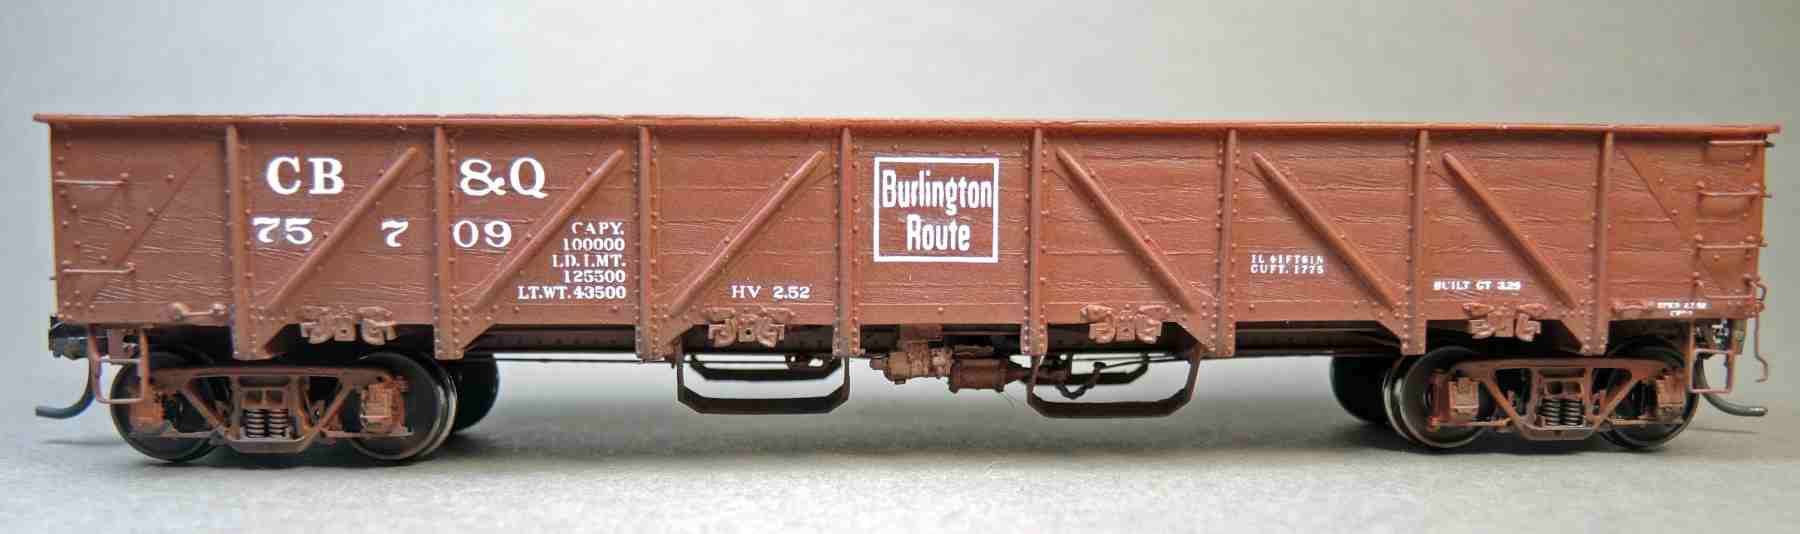
After washing, gondola bodies and underframe were sprayed with Polly Scale Oxide Red F404079 and the trucks on both gondolas were brushed with Model Master Oxide Red Flat #4882. I used Oxide Red as the photos of gondolas after a time in service to my eyes appeared to fade to this color from the Mineral Red used when first painted in the paint shop.

Once the Oxide Red was dry the cars were sprayed with Model Master Gloss Clear Acryl #4638 for decal application. All paint was put into a spoon via disposable eye dropper, thinned, usually 2/3 paint (60 drops) and 1/3 thinner (30 drops), with a custom mixed thinner consisting of distilled water, Vallejo flow improver and Vallejo air brush thinner, and stirred in the spoon with a wire prior to pouring it into the paint cup of the airbrush. I have found I get better results mixing the paint in the spoon rather than the airbrush paint cup itself. All spraying was done with a Paasche Talon, TF#2L double action gravity feed (paint cup) with a 0.66-mm needle or double action gravity feed Badger Patriot 105 spraying at 25 to 28 psi.
After drying, lettering was done using the wonderful decals supplied in the kit and photos in the instructions and the GS-8 gondola photo in the “CB&Q Color Guide to Freight and Passenger Equipment” by Moore. Decals were set with MicroScale Micro Set and Micro Sol decal solutions. After the decals were dry, Model Master Flat Clear Acryl #4636 was applied to protect the decals.
After the clear coat, I let the cars sit for a week or two prior to weathering. Weathering was done with Pan Pastels, eye shadow makeup, and Bragdon weathering powders.
Both kits provided hours of enjoyment, even with the detailed underframes and detail upgrades. These models will continue to please me while hauling coal to J.D. Owen coal on my Minneapolis & Northland Railroad Company.
Thank you Lester for providing insight on additional details for these neat gondola kits. Your techniques can be applied to many models. These cars are a must for many Q fans.
We were busy attending the RPM-East prototype modeling meet in Greensburg, PA, last week. Here’s a photo gallery of the event to enjoy and inspire your next projects.
Questions and comments can be posted below. Please follow the instructions so your comment can be posted. All comments are reviewed and approved before they appear. To subscribe to this blog, enter your info for a comment and check the last box to notify of new posts by email. Share the blog link with other model railroaders.
Sweet looking cars, Les. Hope to see you in Ames next month. Friend Brad Hinton from AUS will also be there.
I like the deluxe paint booth in the picture. Did Les use air brush or Pan Pastel weathering on the booth?
These are very, very nice models and I would be proud to have them on my layout. However, the 110 wheels and large Kadees really pop out. I would suggest that these be replaced with parts of a more scale size.
Jared, I can not disagree; however, having hundreds of operating cars I am not going to change to code .088 wheels except for tank cars where they are very visible. I am in the process of doing that. As for the couplers, if I were starting today I would use the closer to scale Kadee #58; however, again with the number of operating cars I have is one reason I am not going to change. Another reason is my operators ( among them six operating railroads ) who prefer not to have mixed couplers. And, as we age they believe the larger coupler head easier to open with skewer uncoupling tools. In addition, I have one operator due to medical reason who can not uncouple cars without the glad hand so that is why those do not get cut off.
Very nice work, Lester. Ed and Jerry have truly done us a great favor in releasing this kit. Now that the weather is warming up enough to work in the garage, I hope to prime and paint my backlog of cars. I use spray cans of Tamiya Fine Light Gray Primer in the garage, then airbrush everything else in the paint booth inside the house. Your photos are further incentive to get them on the layout.
Very fine work from assembly to painting, to decaling to weathering! The work area appears to be FAR too pristine and requires much more clutter to substantiate that it is a work area!
Lester, great job on assembling and painting. Thanks for the tips on the brass sill steps.
These look great.
George Toman