John Golden, currently living in Ramstein, Germany, recently completed his Resin Car Works Illinois Central single-sheathed boxcar mini-kit. Here are John’s notes.
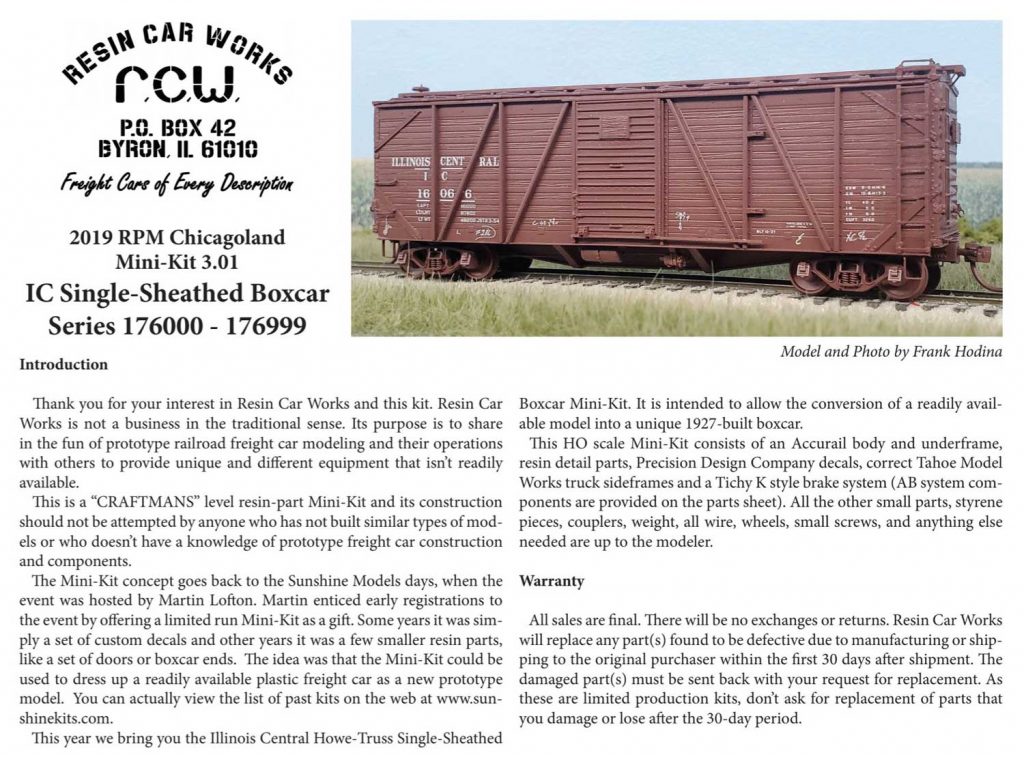
I just completed my Resin Car Works’ Mini-kit 3.01, Illinois Central single-sheathed box car. This model has been featured twice on the RCW blog. First was with the mini-kit introduction and Lester Breuer’s model instructions, which you can access on the kit extras page. The instructions include all the prototype information gathered on the car by the RCW minions. Later, George Toman followed up with his excellent February 2020 post.
What’s in the box?
The box included an undecorated Accurail car body and underframe, replacement resin ends and underframe components, Tahoe Model Works trucks, improved draft gear, excellent brake gear equipment, plenty of tack boards, sill steps, and lots of extra details. A large instruction package is available on the RCW website to guide construction and finishing. The modeler only needs to provide wheelsets and couplers.
Building the underframe
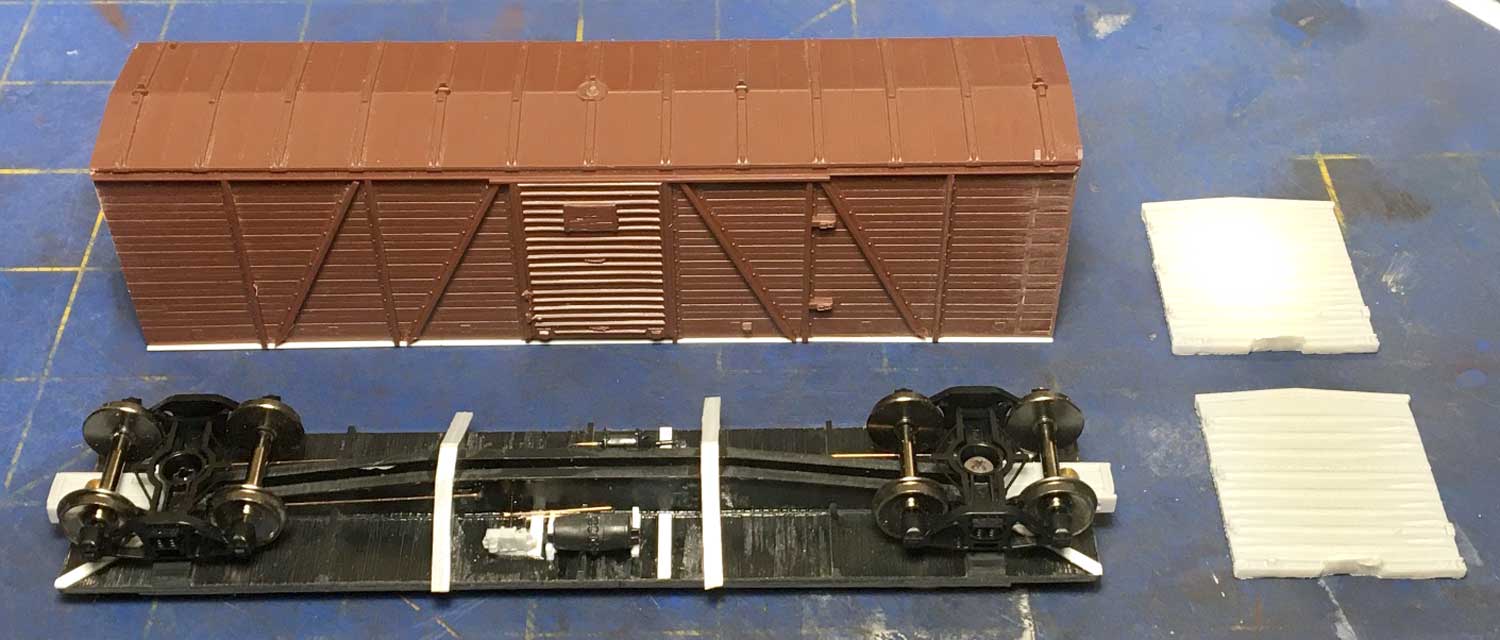
I began construction by building up the underframe and adding brake and draft gear. The kit-supplied replacement cross bearers and scale coupler pockets were added, then brake gear and rigging were installed. I used the prototype photos supplied by RCW as my guide for brake gear placement. The RCW coupler pockets included in the kit were measured and added. I weighted the model to four ounces by placing double-sided adhesive tape on the underframe and using four 50 Euro-cent coins for weight. US nickels would work too.
Superstructure
Building the superstructure was a little tricky. First, I carved off the cast-on ladders on the car sides, then sanded down the area with sanding sticks. Then I removed the ends, taking care not to remove too much material while sanding the ends clean and square.
The Accurail body shell was a little warped at the bottom, so I decided to fix the superstructure to the underframe to perfectly square the model so I could apply the ends.
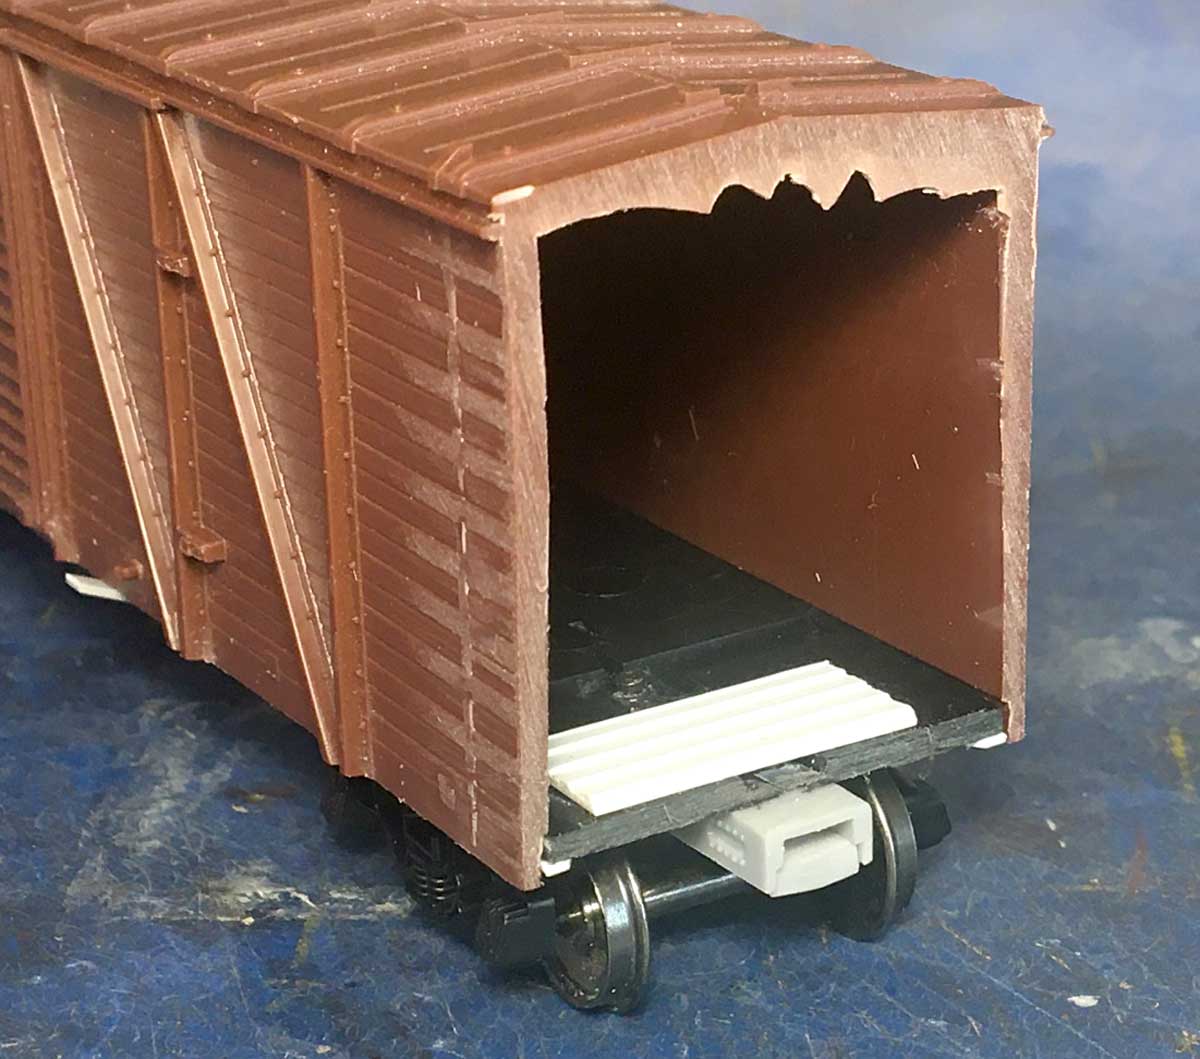
The car ends presented a minor problem. When comparing the car parts to prototype photos, like the photo below, I discovered that the resin ends provided with the kit are about 10-12 inches too short. If I lined up the top of the end casting with the roof, the space between the bottom would be about 10-12 inches, not 3-4 inches as the prototype photo shows.

It appears the U-channel end sill on the casting isn’t wide enough. Since the ends are short, the modeler must accept a gap either on the roof line or on the bottom of the end. I considered replacing the U-channel end sill but decided instead to split the difference and fix the end on the superstructure, leaving a small gap on top.
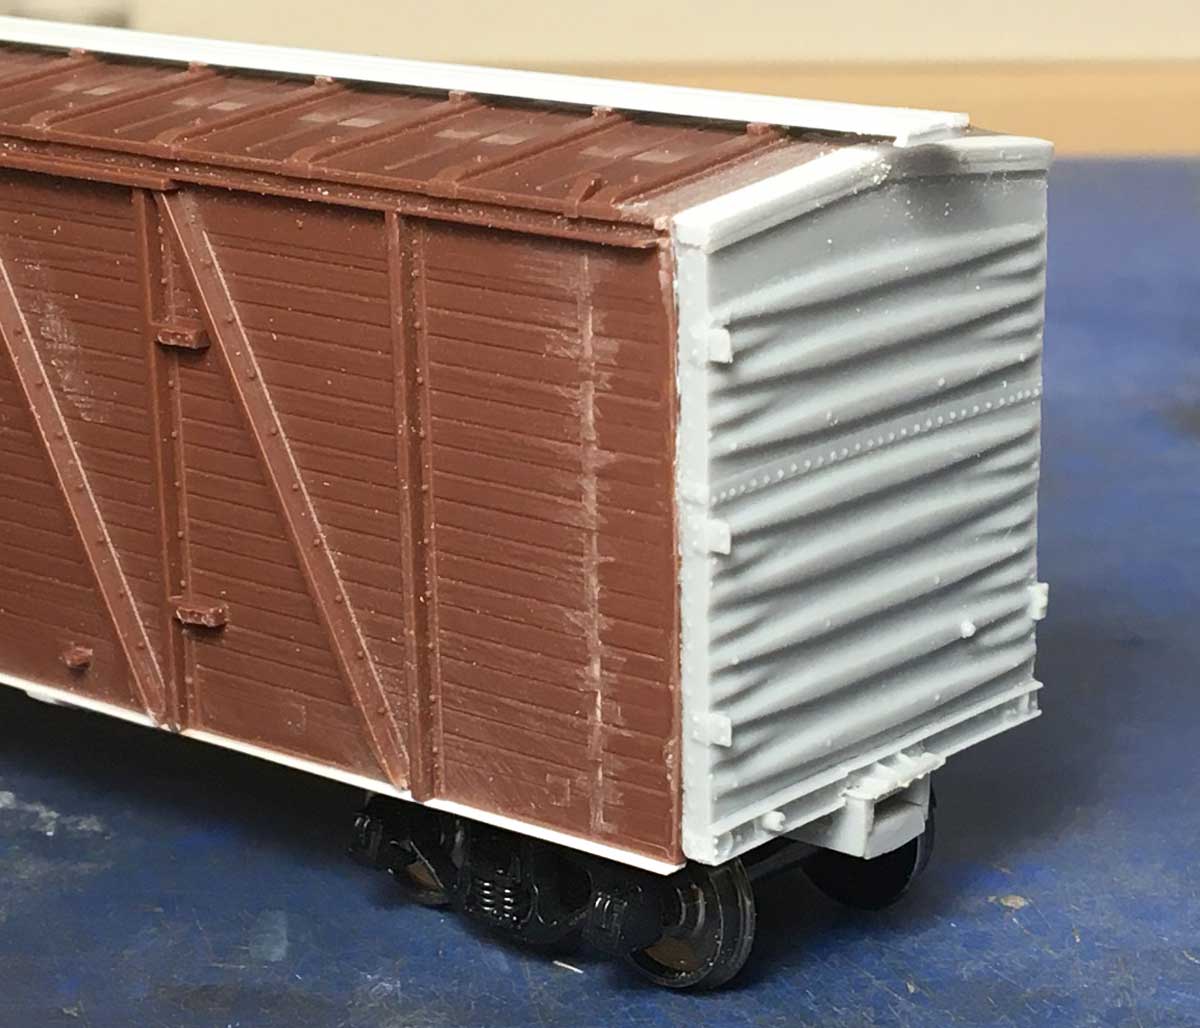
I was happy with my compromise. As you see in the image above, the bottom of the end fit precisely into the cut-out on the end casting for the coupler pocket. To mind the gap at the roofline, I added a strip of 0.010-inch thick styrene and sanded the styrene to match the level of the roof evenly.
Adding carbody details
With the major carbody assembly complete, it was time to add all the details. I started with the B end first, applying Details West seven-rung ladders, a vertical brake wheel assembly topped with a Tichy hand brake wheel, a retainer line and valve, tack boards, and various other details. I added running board supports made of 0.005-inch strip. I lost the kit-supplied brass Carmer uncoupling devices and used Yarmouth Model Works etched-metal parts instead.
The A end was completed in a similar fashion. Once both ends were complete, I added running boards made from three Evergreen HO scale 2 x 6 styrene strip and attached them to the running board supports on each end. Latitudinal running boards were supported by Yarmouth parts.
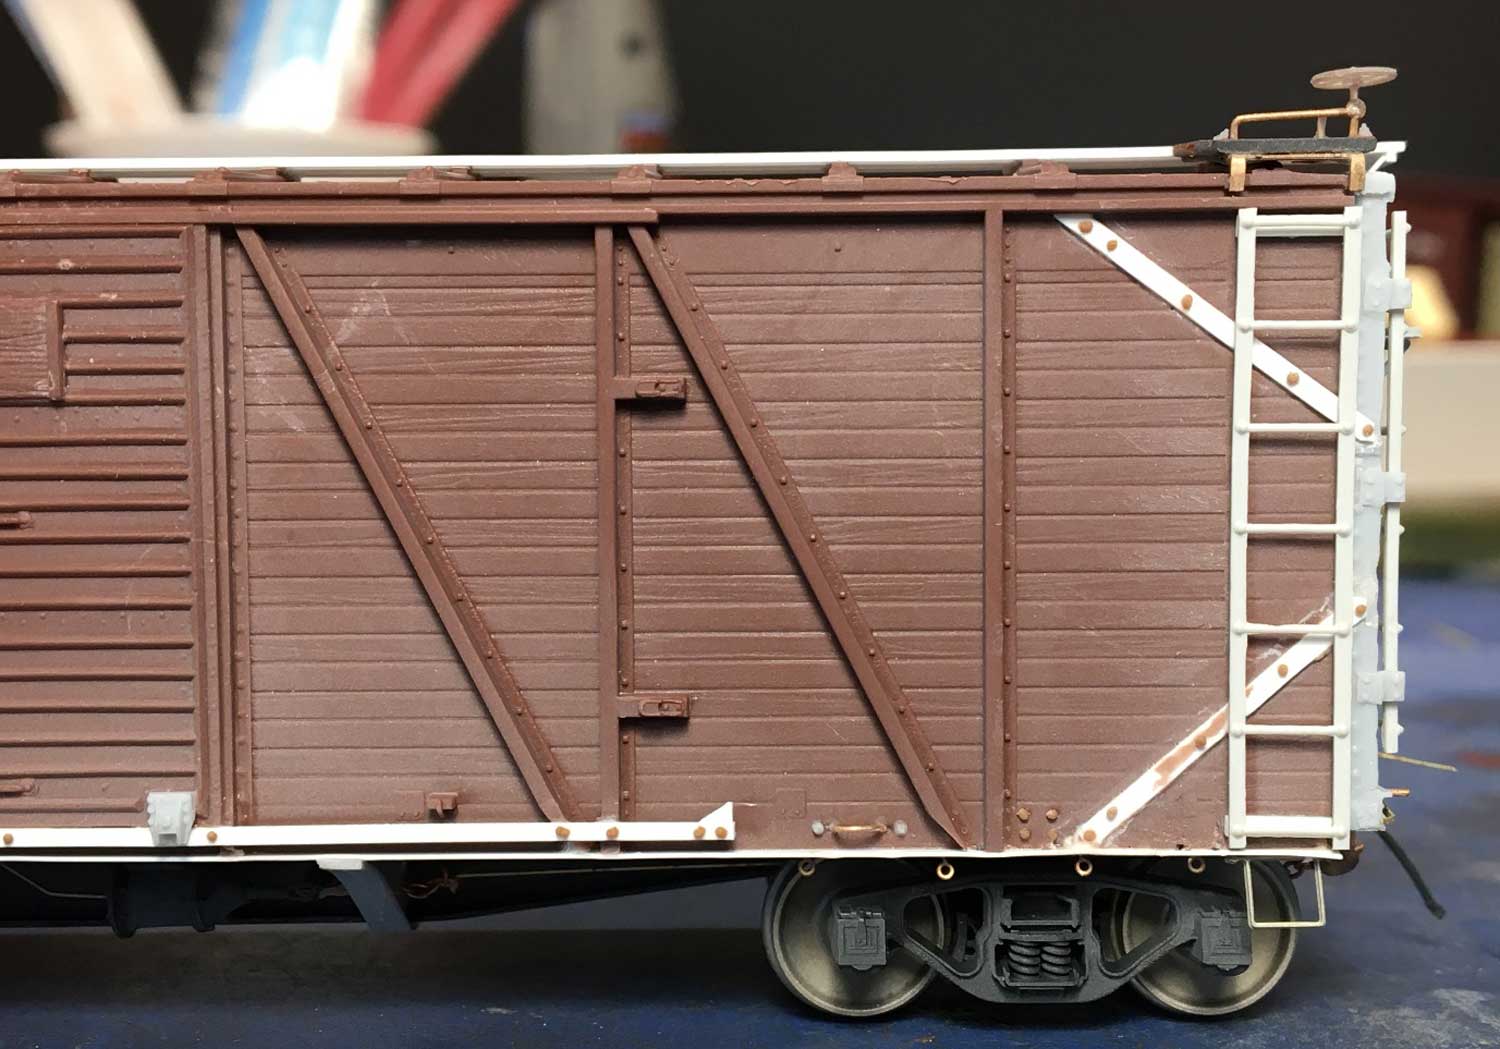
Each car side took a lot of work. First, I applied diagonal braces for the ends made of 0.010-inch thick styrene strip. Later I realized the kit came with these parts, including fine rivet detail. I should’a known!
Once the braces were installed, I added Details West ladders over the top of them. I applied a bottom chord made of 0.010-inch plastic strip, following the prototype photos to get it right. I also added a lower door track made of 0.020-inch styrene strip, a few wire grabs, and roping staples. I retained the cast-on door stops because I didn’t want to cut up the carbody side any more than necessary.
As an additional detail, I installed a few Yarmouth etched metal eye-bolts on the side sills above each truck. These were can holders on prototype cars. Cans of water could be hung to drip water on the journal boxes to keep them cool.
When all the detail parts were applied, I finished the model by adding rivets and nut-bolt-washer castings. I used Tichy 0.020-inch diameter rivets and Tichy 1-3/4-inch nut-bolt-washer castings in all the appropriate places. I added about 100 rivets and 15-20 NBW castings to the model.
Paint and decals
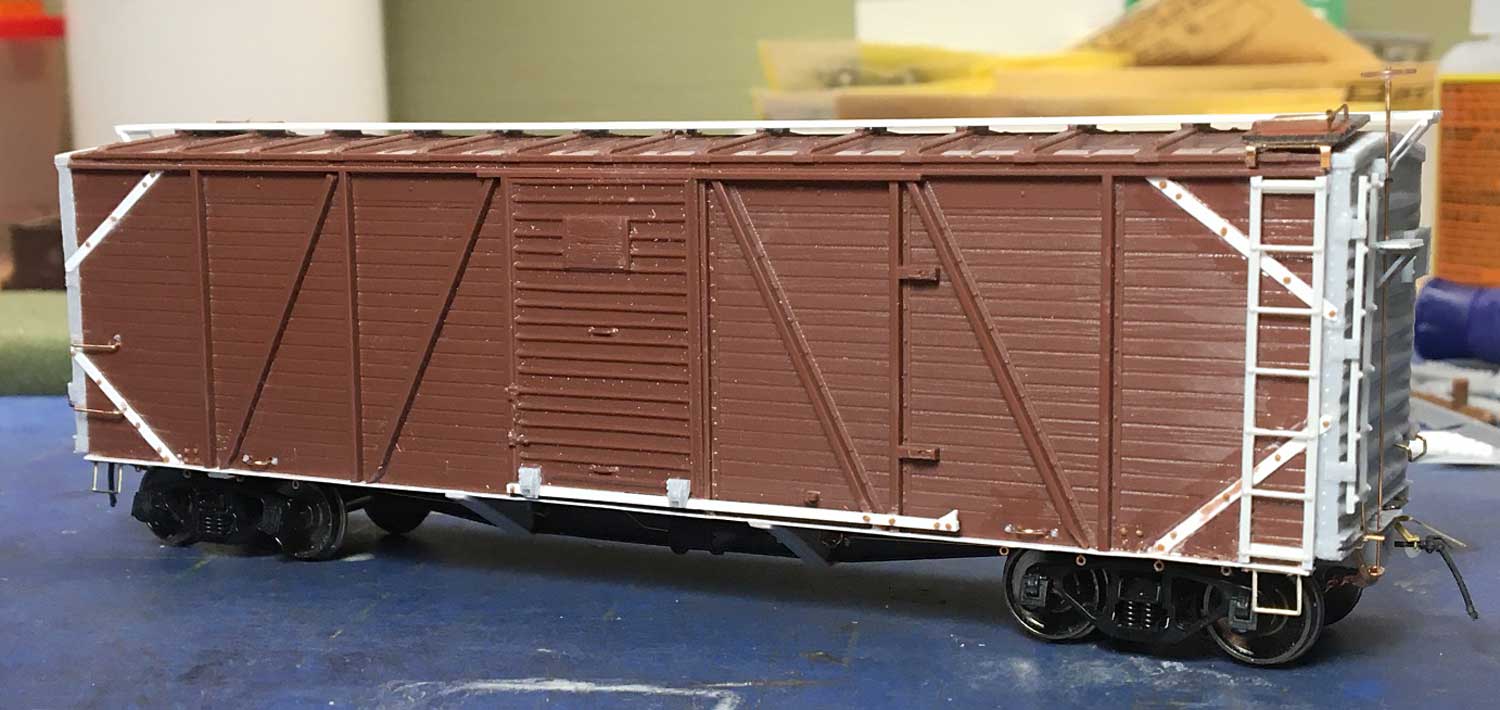
When construction was complete, I sandblasted the model in my North Coast sandblasting booth. That prepped the multi-media surfaces for paint and cleaned off any leftover adhesives. I washed the model with warm, soapy water and set it aside for a few days to dry. Here’s the model ready for the paint booth.
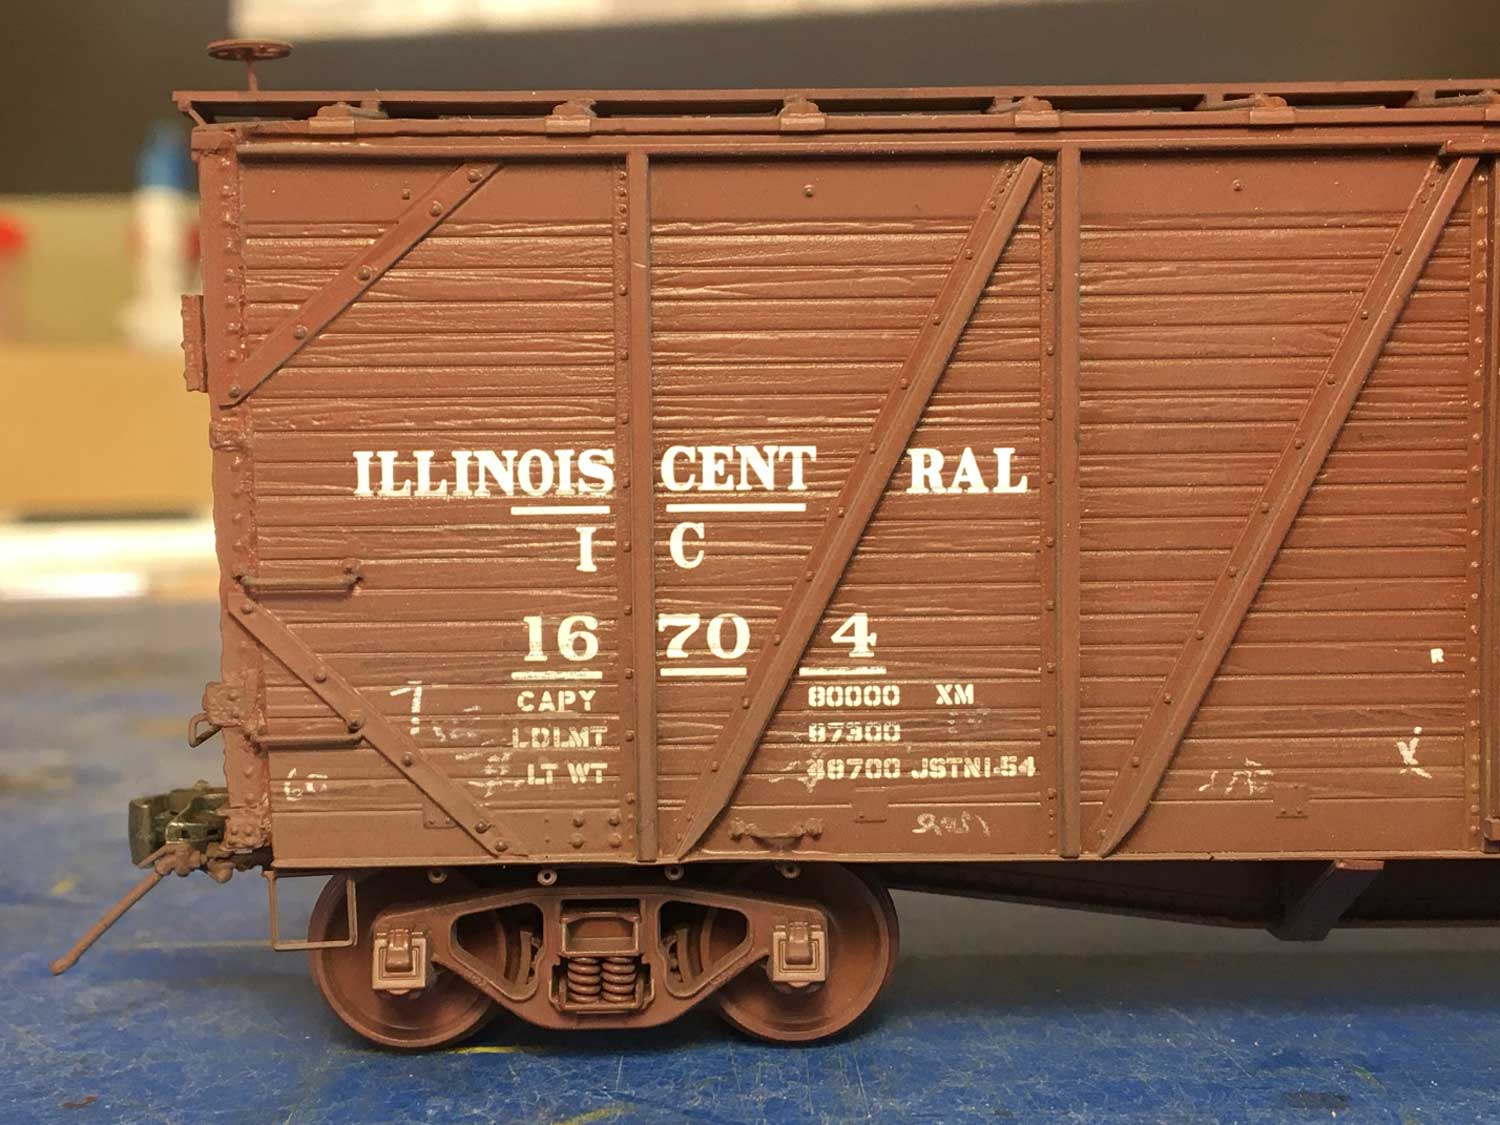
I painted my model with Tru-Color Paint TCP-205, Illinois Central Freight Car Red. This is great paint that adheres well to media-blasted surfaces. I find it dries fast and provides an excellent glossy surface for decals.

The paint was dry in a few hours and I began decaling the model later that evening.
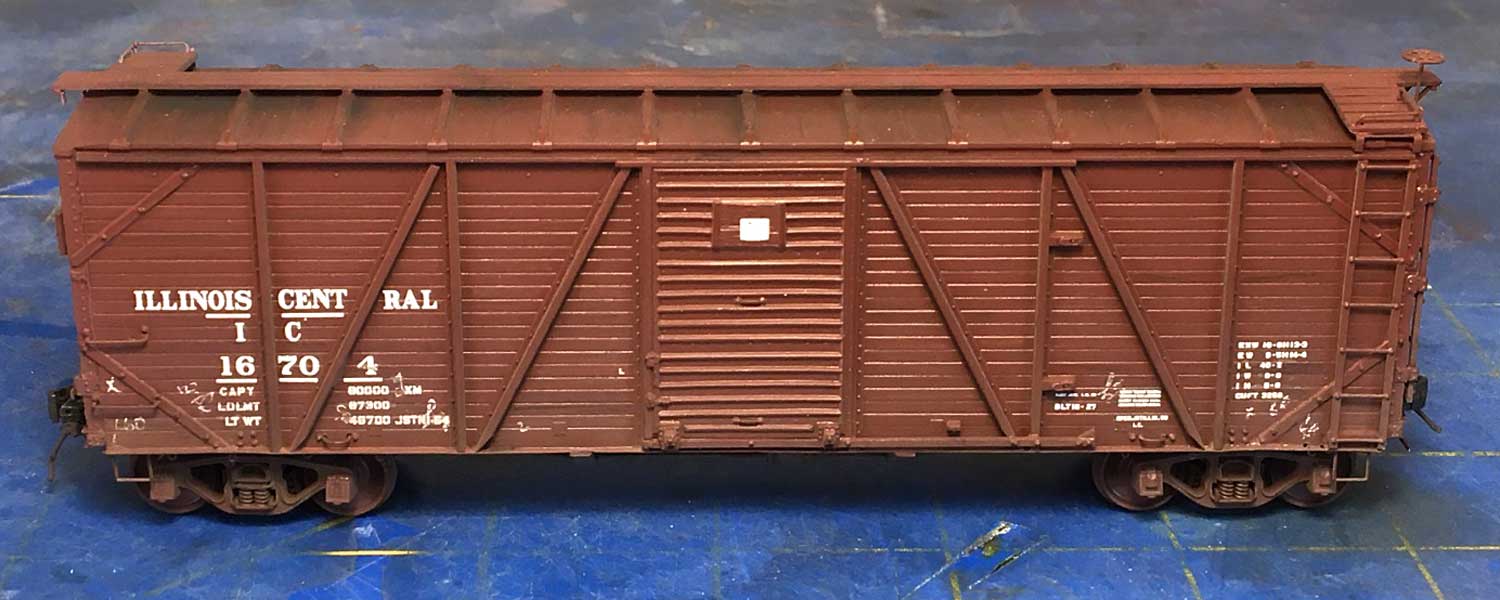
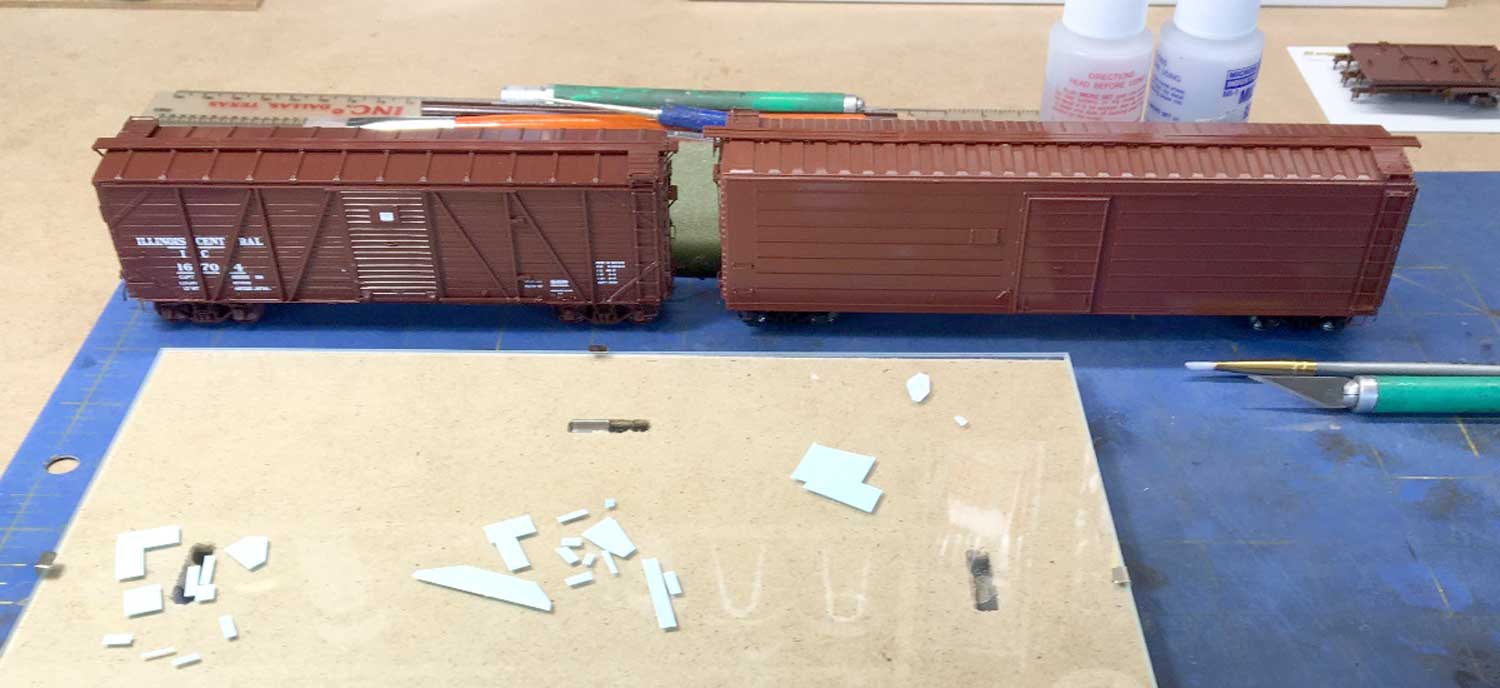
Using the prototype photos in the instructions as a guide, I decaled the model as it would appear in early 1950. I cut out all the decals on a sheet of heavy glass and apply them one side at a time. I was also finishing a Ribside Models Milwaukee Road 50-foot boxcar that week.
After the decals were applied, I washed the model again, let it dry completely. I sprayed a finish coat made of approximately 60% Testors Glosscote, 20% Testors Dullcote, and 20% thinner to produce a satin finish on the car.
When the finish coat was dry, I sprayed the trucks, underside, and ends of the car lightly with Testors Dark Tan. I colored a few of the side-sheathing boards using various shades of red and brown artist’s pencils. I also applied hand-drawn chalk marks with a white artist’s pencil and added a little AIM Soot Black weathering powder to the roof. A bit of AIM Delta Dirt weathering powder was brushed onto the trucks, couplers, and a few other select areas of the frame and lower side sills.
Finally, I gave the model one additional complete coat of Dullcote as a finish coat. I painted the wheel faces black, simulating oil and lubricant leaking out of the backside of open, plain-bearing journals.
With the paint and finish steps complete, I cleaned the wheels with a Dremel tool, spinning the wheel sets in the trucks using a Dremel No. 531 brush at about 5,000 rpm. I installed the couplers, tested the coupler height, and declared the car ready for service.
My only gripe with the kit is that the decals don’t include enough shop dates. I model 1950 and the closest I could get was 1954. I still need to change the 1-54 weigh stencil to 1-50 to match my mid-summer 1950 modeling date.
Many thanks to John Golden for sharing his build processes on a Resin Car Works mini-kit.
Questions and comments can be posted below. Please follow the instructions so your comment can be posted. All comments are reviewed and approved before they appear. To subscribe to this blog, add your email address to the function at the bottom of the right column on the main page. Share the blog link with other model railroaders.
Thank you for sharing that great article by John Golden. Love the car! Can they still be purchased?
John it was nice to see another build of the IC mini-kit. Interesting how each is the same but different. Yours turned out very nice. Thanks for sharing your techniques and finished model
Thanks for another fine construction report. Between Lester, George and John, the IC mini-kit may be the best documented mini-kit yet. I’ll have to decide how far into the super detailing I want to go. This kit is ‘next up’ on my list of kits to build.