Duryea cushion underframe installation

George Toman shared his latest workbench update. He’s upgrading a kit with Duryea underframe parts.
The Duryea underframe is a cushioning device used to reduce damage. The center sill can slide about 12 to 16 inches to cushion impact when coupling. This requires different mounting than the more conventional AAR underframe. National Scale Car has captured the Duryea underframe in great detail using resin castings and photo etched parts in their MK 106 kit that upgrades an Intermountain 1937 Modified AAR boxcar model.
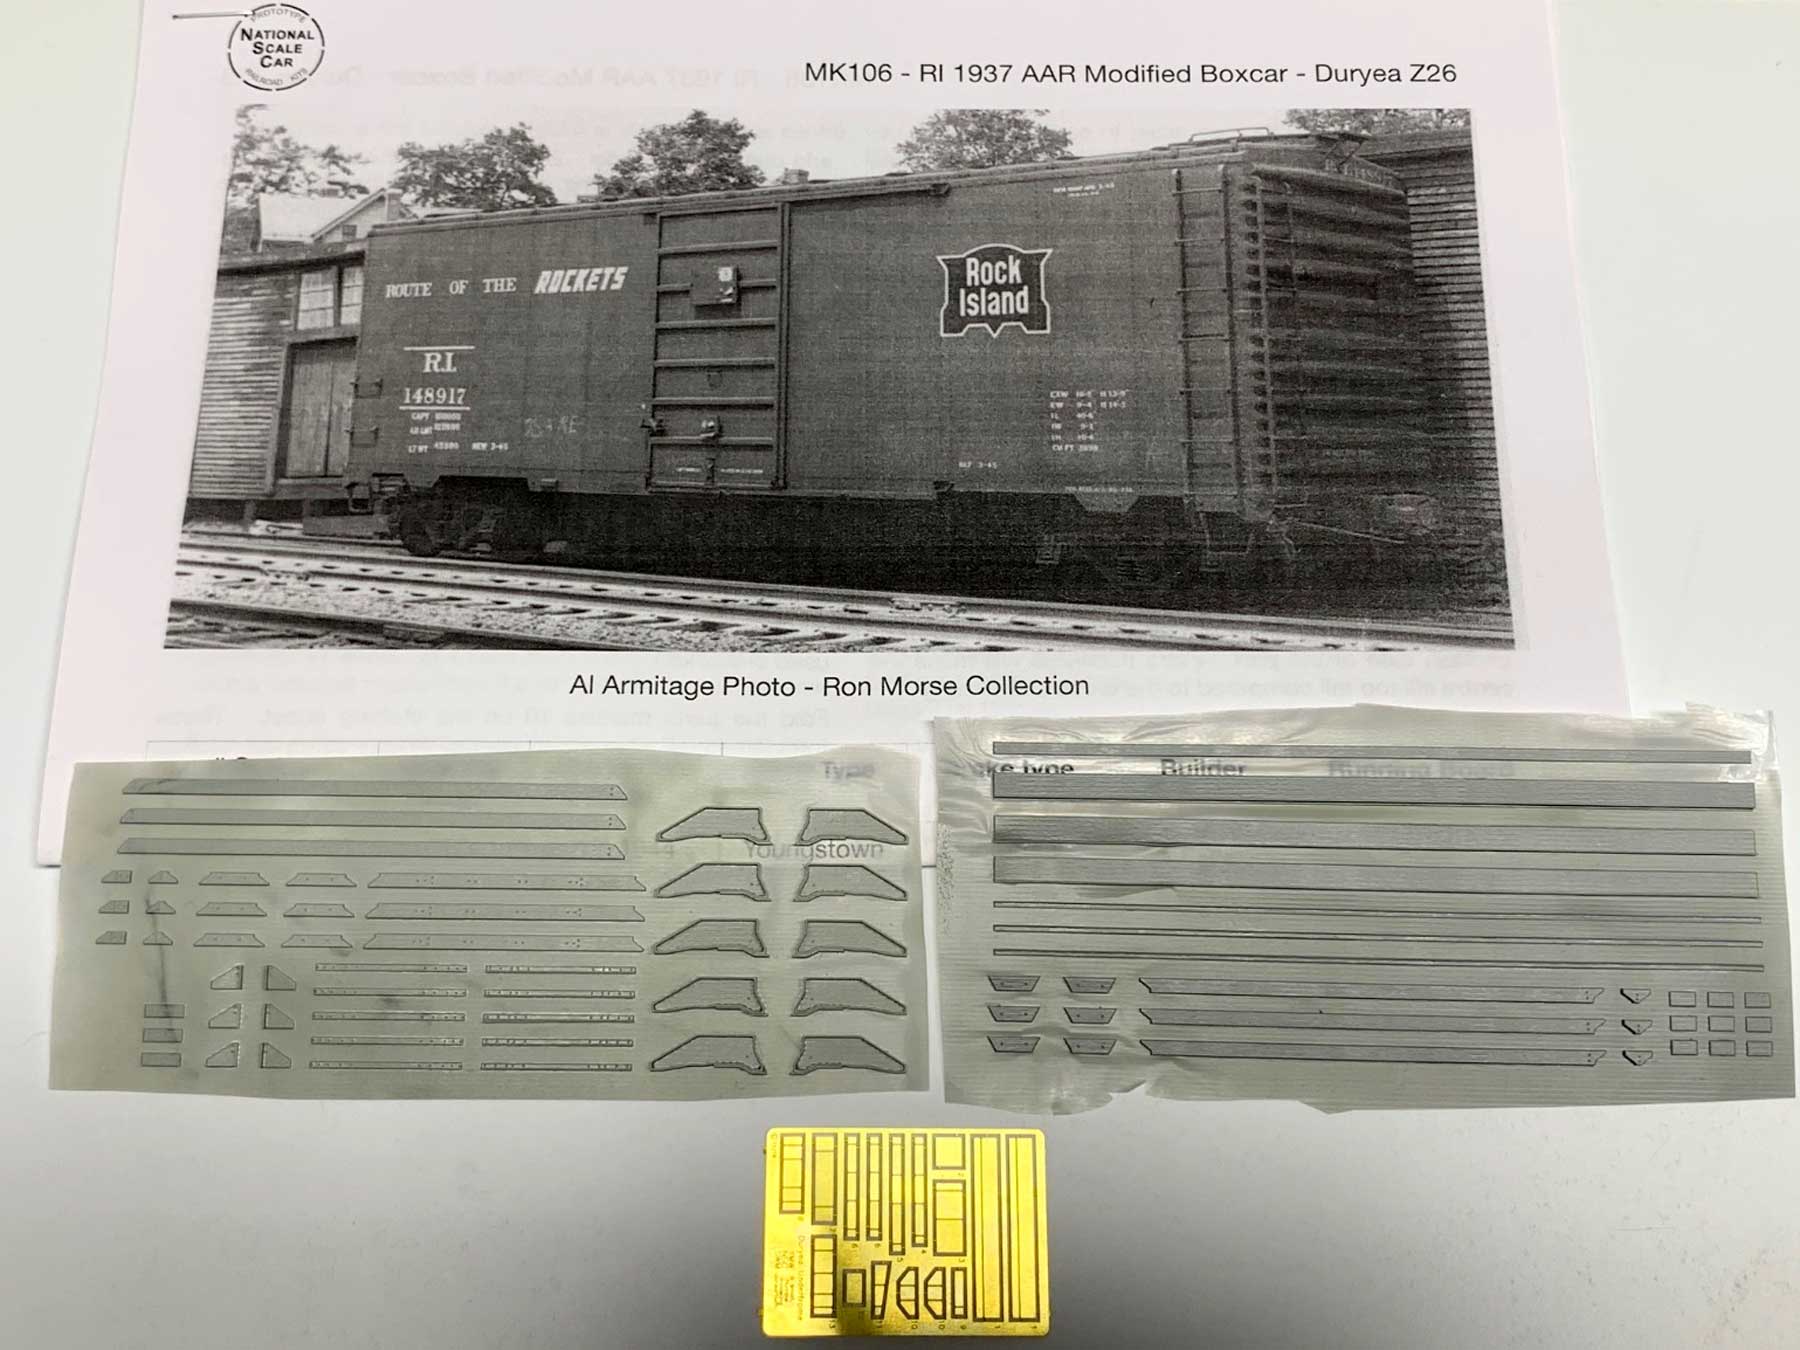
Here are the resin and photo etched parts included in the Rock Island mini-kit. Not pictured are the included decals. You will need to supply a modified AAR 10-ft, 6-inch boxcar with 5/5 ends such as the Intermountain Railway part # 49899 kit.
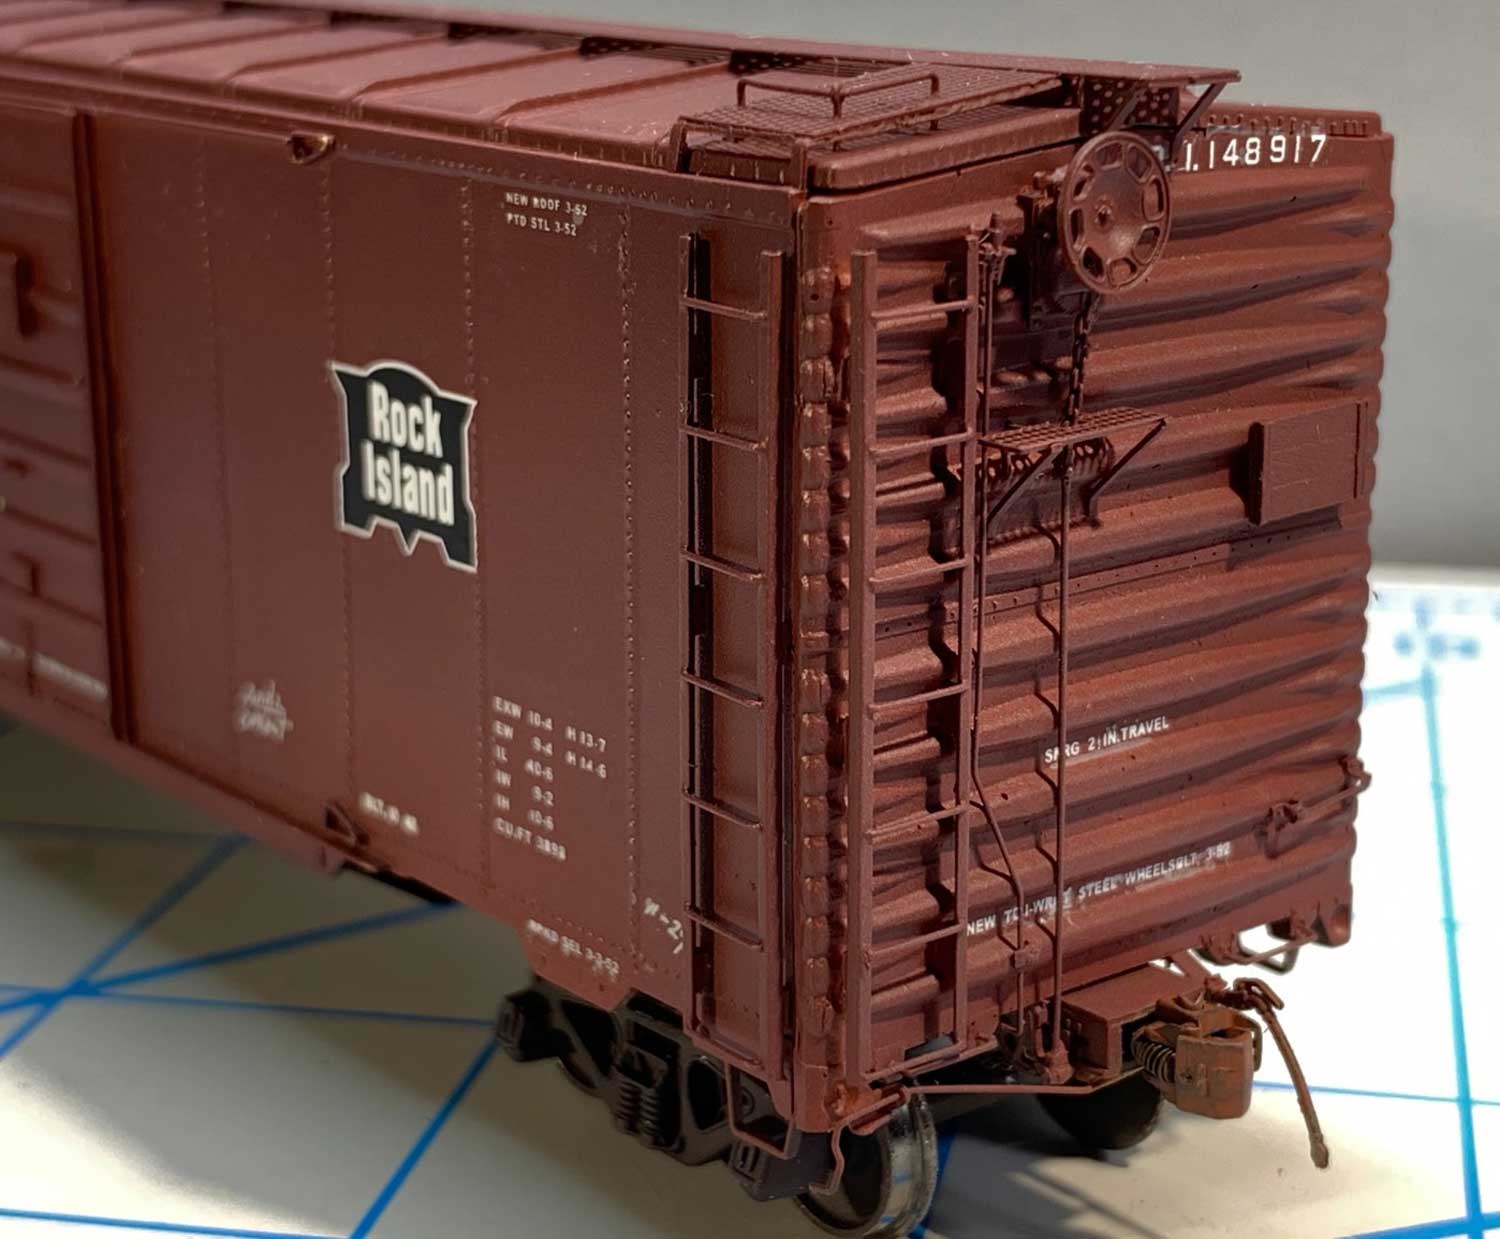
After reviewing the instructions, I choose to model a Rock Island car in series 148800-149049 built in 1945. This series of cars used a Superior seven panel door that matched the Southwest Scale Productions part # 672 door.
The hand brake was a Universal type from Kadee Products. I used a Gypsum Running board from Plano (part #192). My choice of brake gear was Tichy AB brake set (part #3013).

Here’s an in-process photo showing the sliding center sill and cross bearers that are some of the main pieces for the underframe. I glued a piece of 0.020 x 0.060-inch styrene between the center sills. This raises up the center area for the pieces to fit properly.
Note the cross bearers form a cradle structure that allows the center sill to slide. I also trimmed the cross bearers on the side sill end to allow the center sill to just fit on the model. National Scale Car has cast these longer to allow for different models of future projects.

Here’s the center sill glued in place with the cross bearers trimmed and glued, too. I had some bad cyanoacrylate cement (CA) that ruined some of my parts, so I made some new ones from Evergreen styrene.

Here’s my interpretation of the underframe piping and brake parts. I differed from the instructions a bit by moving the AB brake reservoir and three-way valve to follow what I observed in available prototype photos.
I discussed the slack adjuster with Ryan Mendell of National Scale Car. I had no information on the part or location, so this is my best guess. I mounted the brake cylinder and slack adjuster on brass Z-bars between two of the cross bearers and not the center sill. You can see the train line does not go through but rather over the center sill. This is because the center sill moves so fixed hardware cannot be mounted to it.
My slack adjuster was made from styrene and mounted to the brass Z-bar that I formed from 0.005-inch thick brass; these were not part of the kit.
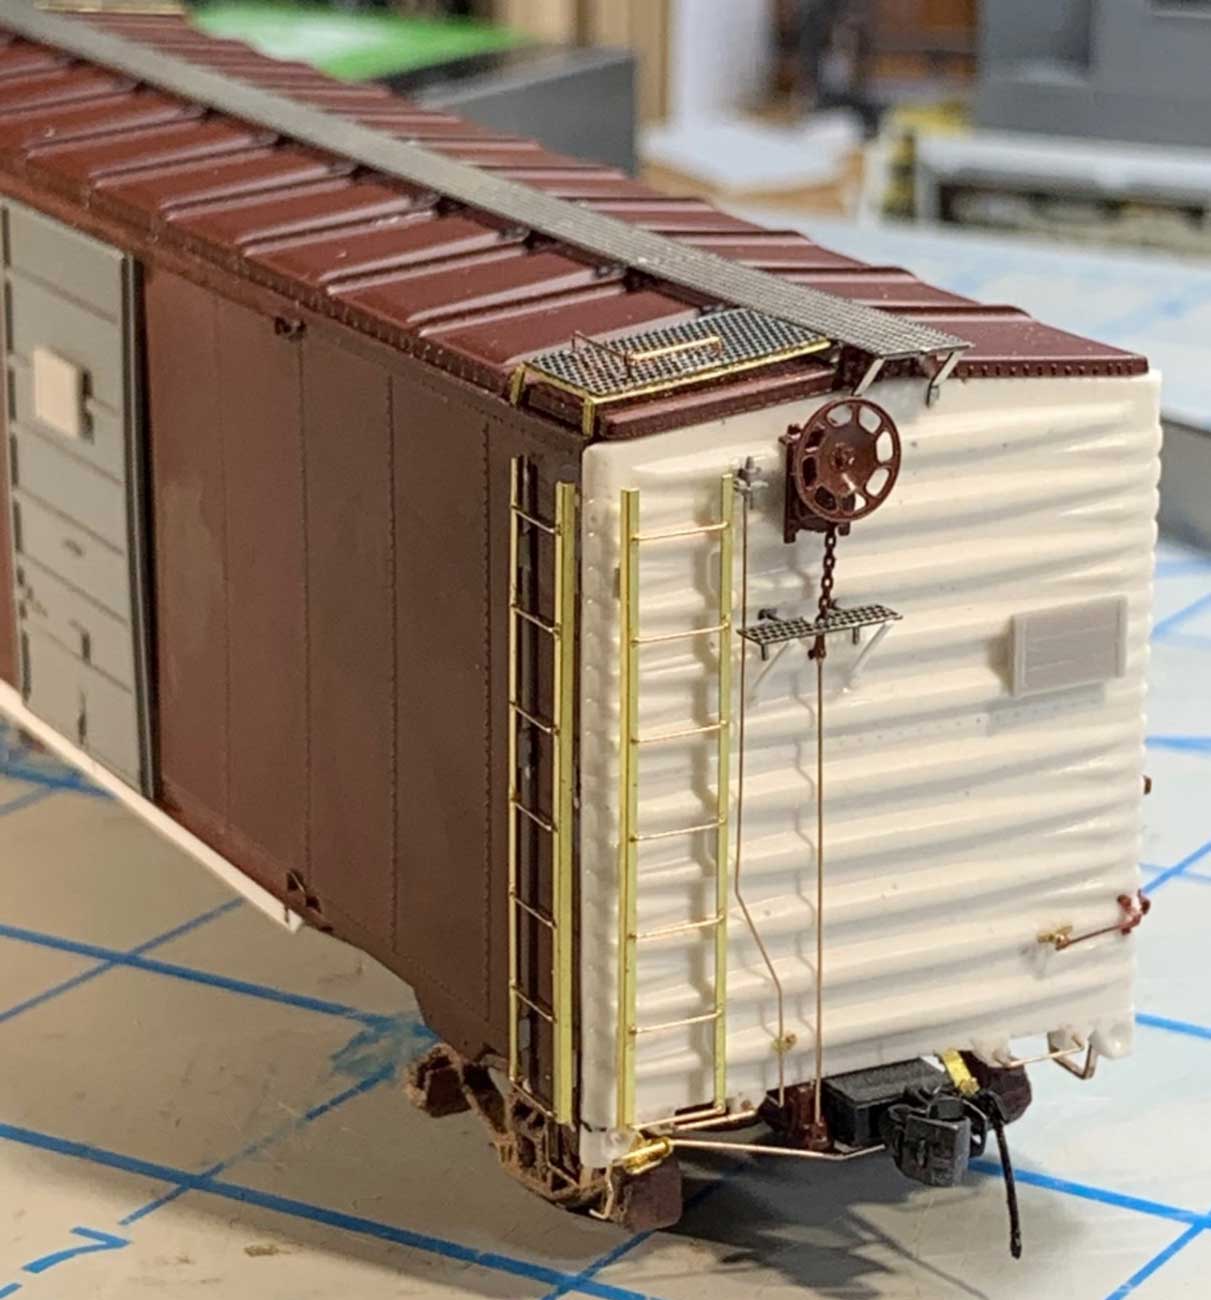
I used a number of parts to detail the B end of the car. Yarmouth Model Works 18-inch, 7 rung ladders (YMW304), Kadee Universal brake housing and wheel, and Plano Morton photo-etched running board and brake step. The draft gear is from Smokey Mountain Model Works and I trimmed them to extend past the end sill. I removed some bolt detail from the top ends of the draft gear as the Dureya underframe center sill slides and would not be bolted to the car end frame
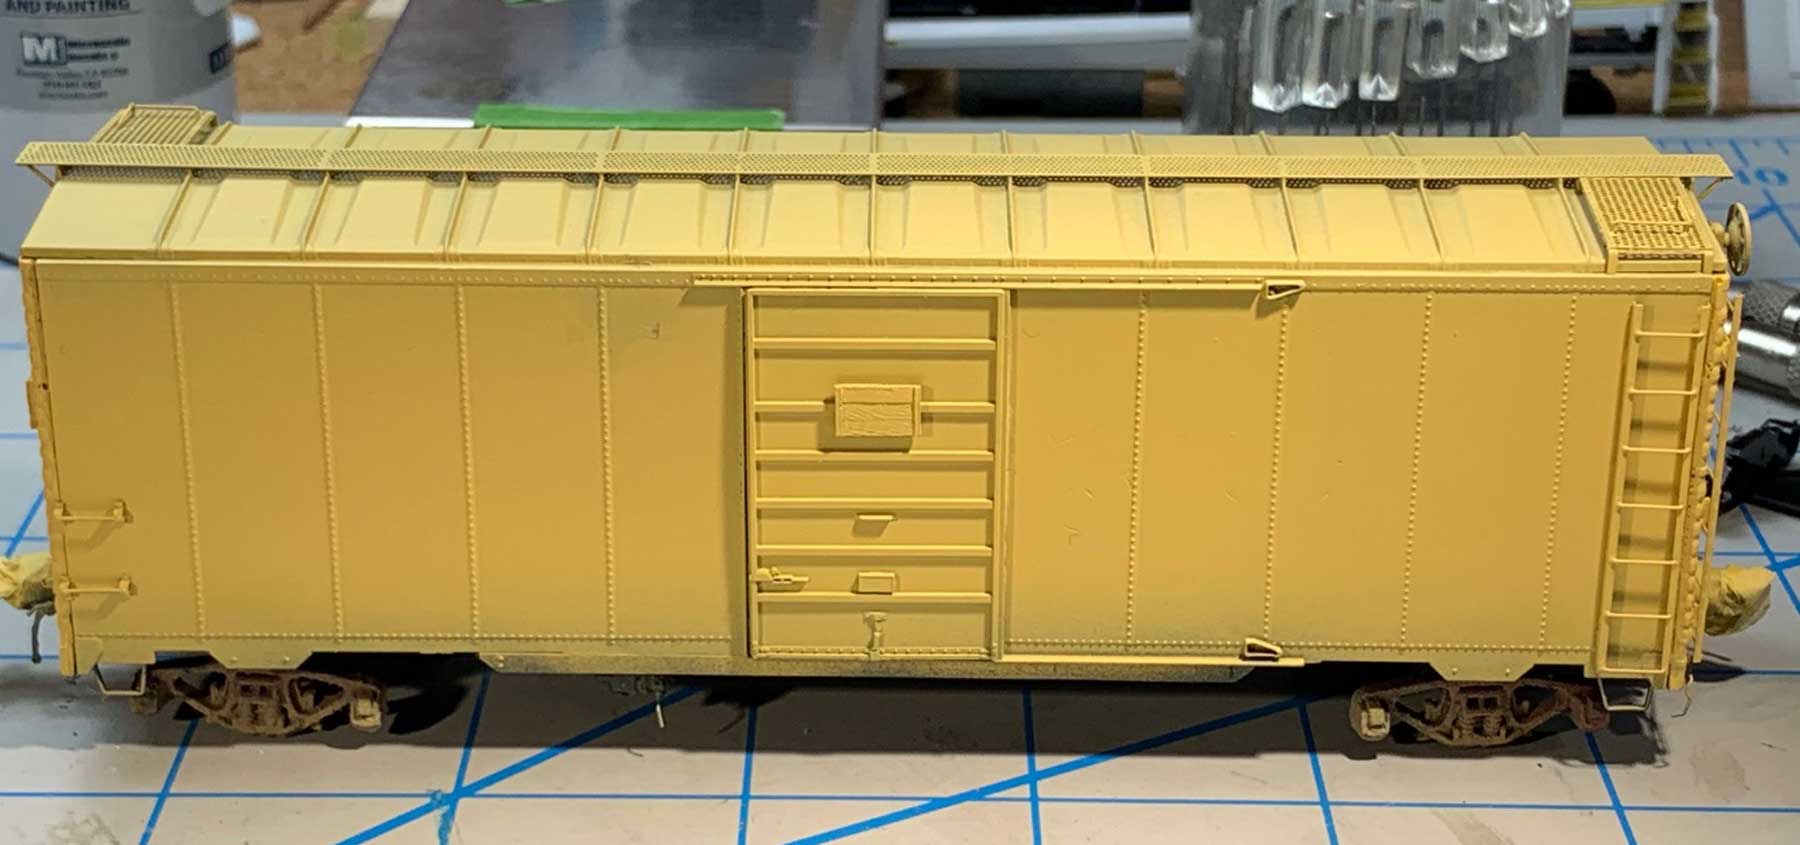
I primed the car with Badger Stynylrez Neutral Primer. I like this when spaying any boxcar color that has a shade of red or mineral red. To my eye, the primer makes the reds pop.
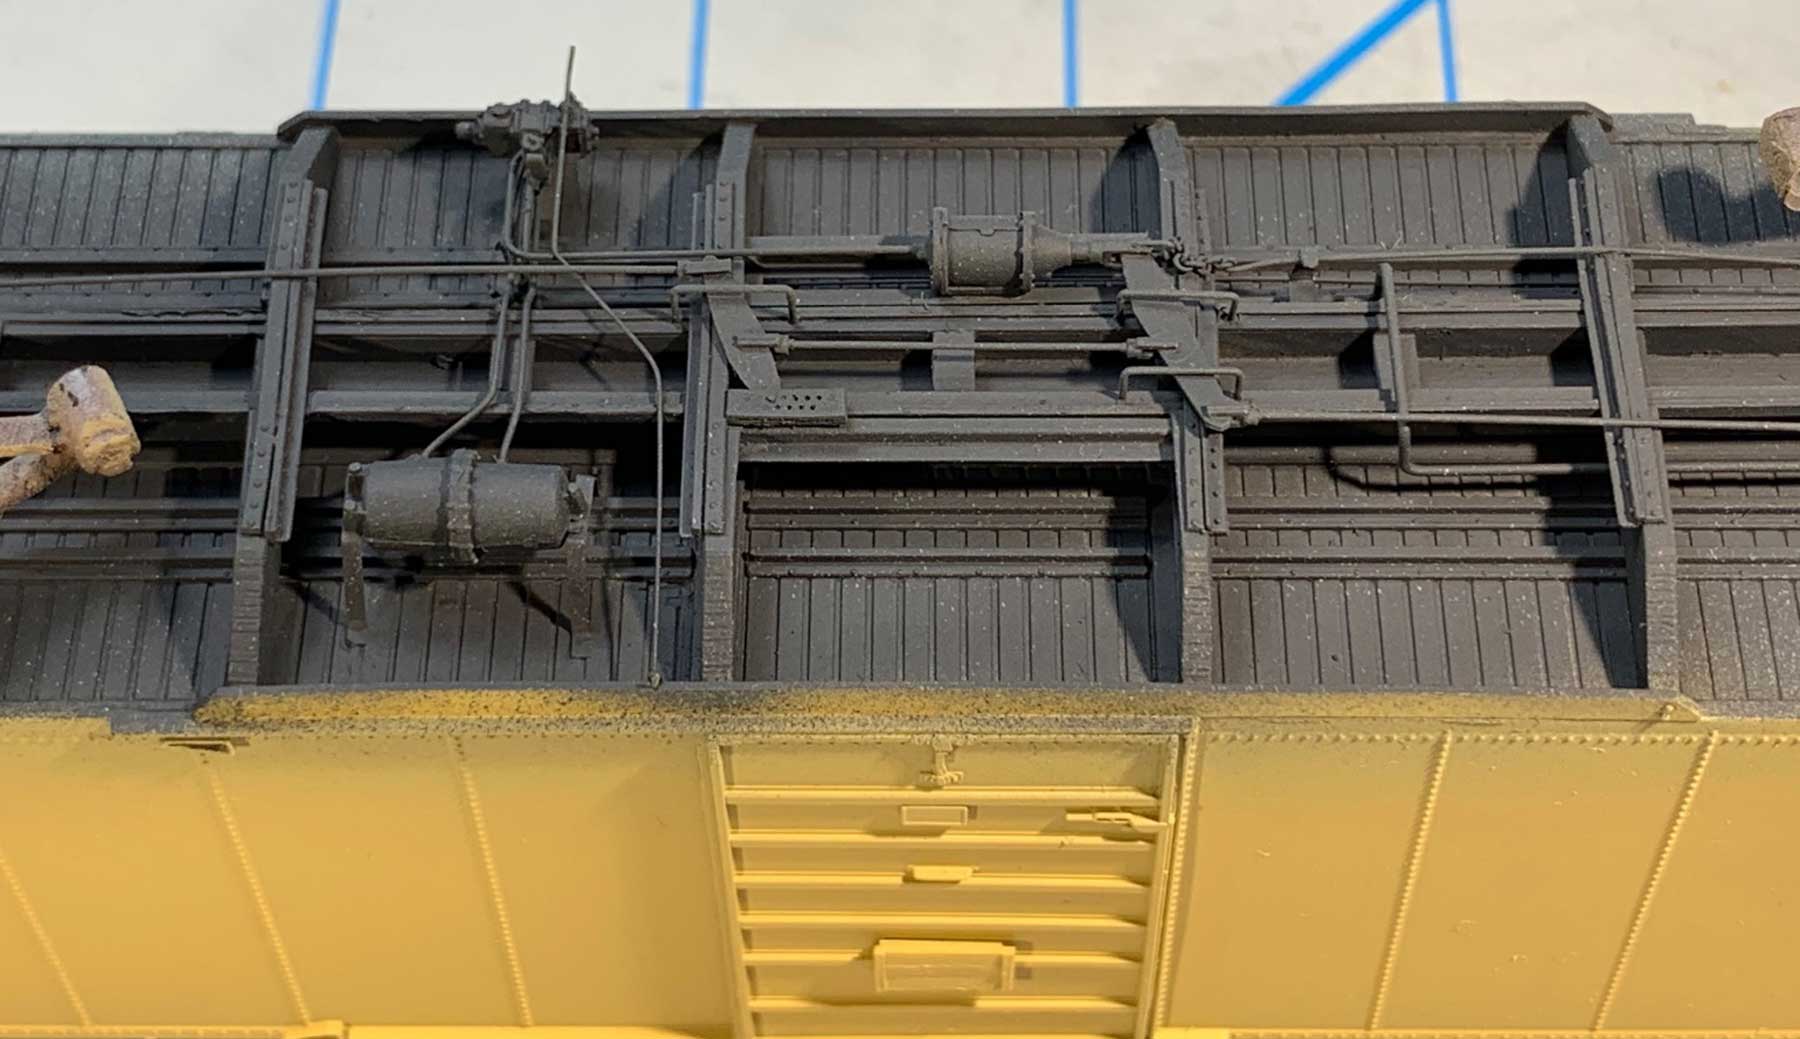
I painted the underframe with Vallejo Gray Black 70.862. You can see how that the train line passes over the underframe and not through it, as would be typical of a car with a fixed center sill.
I custom mixed the car color using Vallejo Black Red 70.859 (75%) and Flat Yellow 70.953 (25 %) for the final Rock Island color. These are the Vallejo Model Color so they need to be thinned for airbrush use. I use a Grex TSG airbrush with a 0.5mm needle sprayed at 20 psi. Thanks to Lester Breuer for providing this formula.
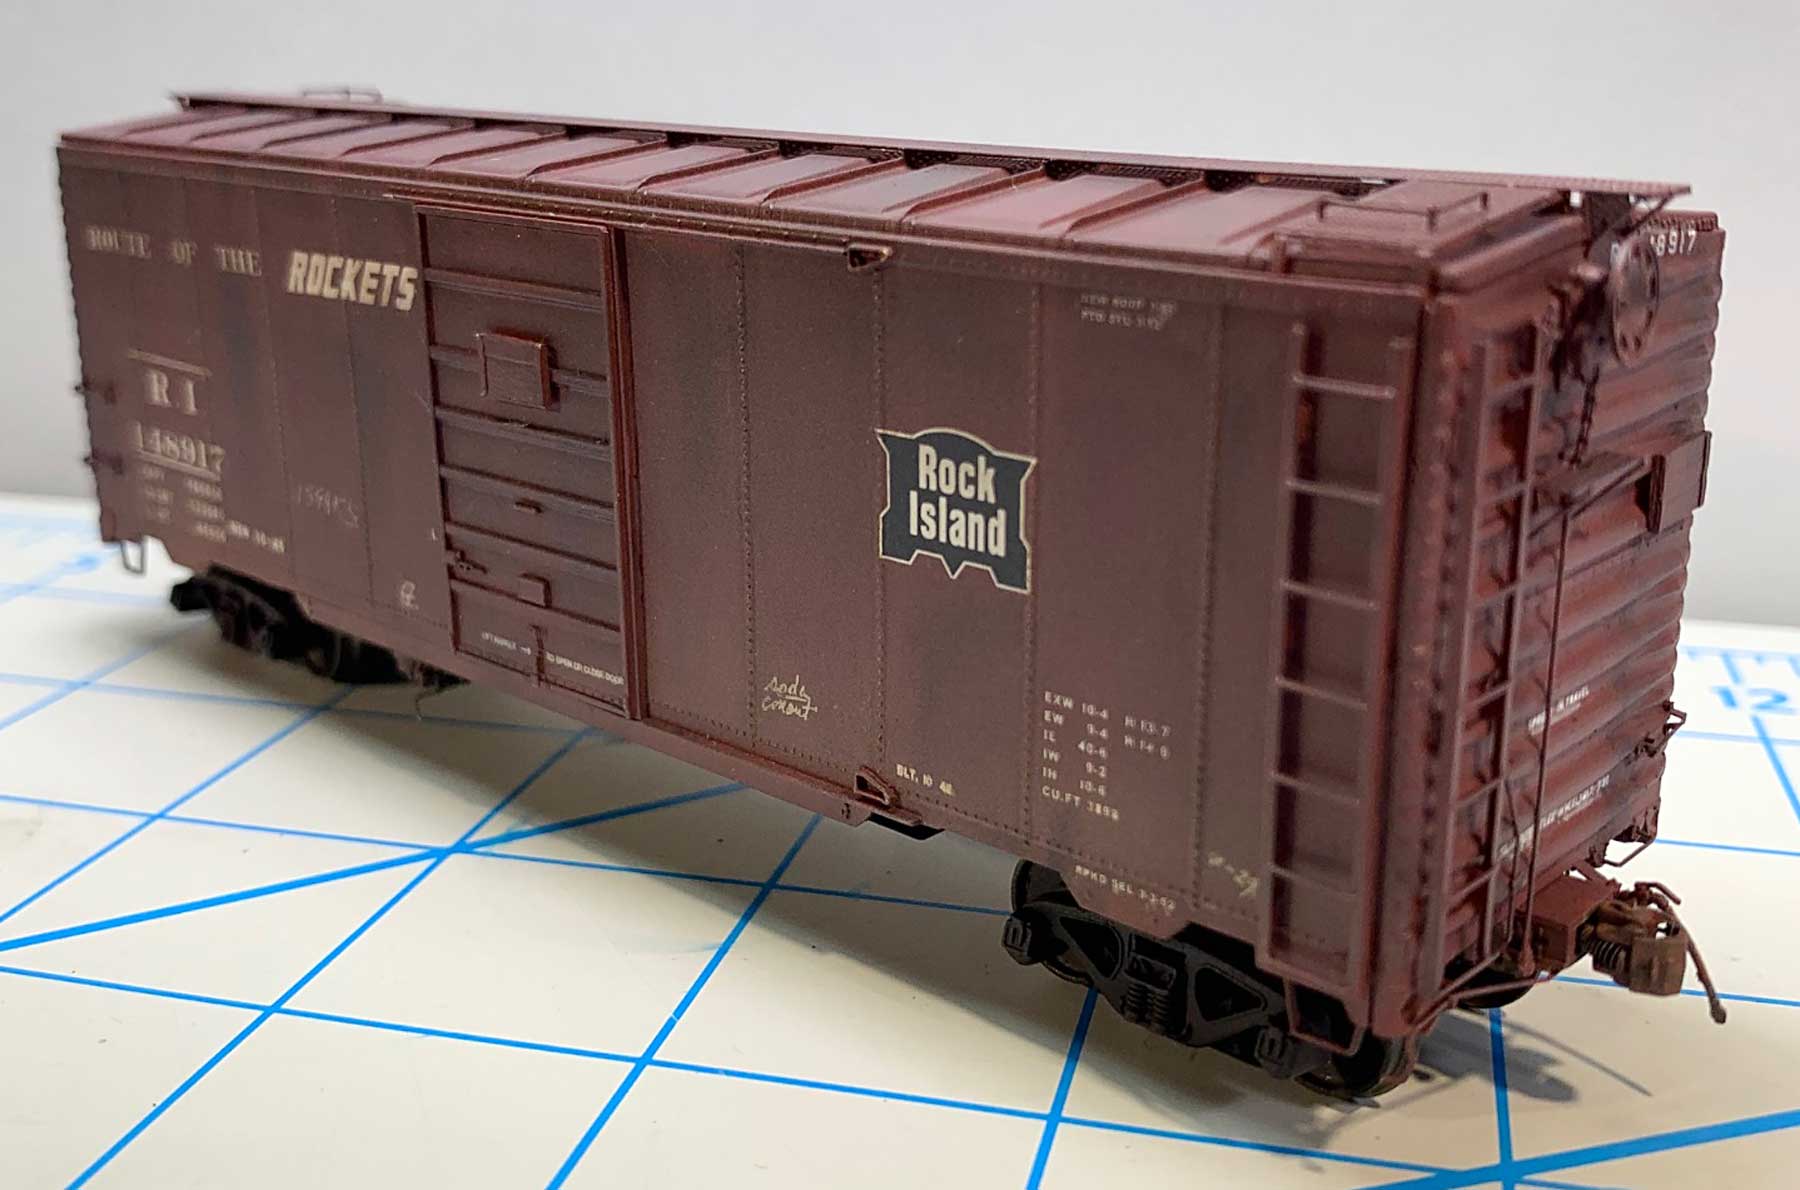
Here’s the finished car with a bit of weathering. I used the airbrush to spray some dirt along the bottom sill and ends. Darker streaking was done with Pan Pastels using blacks and neutral grays. A coat of Model Masters flat clear was sprayed over the weathering.
This National Scale Car product was a well-designed and enjoyable kit to build. I did have some problems gluing the resin parts that turned out to be the CA glue going bad. A new bottle fixed the problem, but I ruined some of the parts.
I would like to thank both Steve Hile and Ryan Mendell for helping me with questions while building this car. Thanks for reading my workbench notes on my Rock Island boxcar.
George Toman
Many thanks to George Toman for sharing his work installing the Duryea underframe parts.
Questions and comments can be posted below. Please follow the instructions so your comment can be posted. All comments are reviewed and approved before they appear. To subscribe to this blog, add your email address to the function at the bottom of the right column on the main page. Share the blog link with other model railroaders.
George,
Great job. I’m in the final stages of the same build with the Youngstown door and the 100 Years decals, albeit yours is better detailed than mine; I have another one that I’m going to build with the Superior door, I may try to up my detail game on that one. I painted mine with a mix of Tamiya paints, after a prime coat with Stynylrez red/brown – I’ll try the neutral yellow on the next build. It was a bit of a challenge getting some of the thin resin center sill parts cleaned up, but overall a nice upgrade kit. BTW – what are the extra piping details on the three way valve?
Thanks,
Lou
Thanks Lou.
The retainer valve line is modeled, so there are 5 lines going into the valve. Also I modeled the relief valve using a Eyelet made of #36 magnet wire and .008 tichy PB wire for the rod.
I love the modeling!
I only wanted to know, where do you get the “middle leg” for the roof top corner grabs. I have a bunch of Kadee corners, but they don’t have a third middle leg, i guess it’s a post molded in to the kadee corner platforms.
The brake piping is spectacularly well done.
That looks like a Yarmouth Model Works etched eye bolt.
Thanks Matt.
The middle leg for the corner grab on the Plano Running board is a Yarmouth Models PE eyelet with shoulders part # YMW 501
George Toman
A truly great job on modeling the Duryea underframe.
However it looks like the brackets holding the brake levers are attached to the bottom flanges of the center sill, which is a moving part. These brackets should be on the car’s underframe, on the stand-off angles on each side of the center sill, in the center.
Edward, Yes the brackets are attached to an inward facing L shaped flange that the center sill actually slides in, however do to the almost scale size of the Duryea components it is very difficult to get a secure mount of the brake hangers without coming close to the center sill and drilling for a secure mount. A trade off. If I made it in brass I would have soldered it. The Flange is .010 and the hanger is .010 PB wire so not much room to drill.
George Toman