C&O 70-ton triple hopper
Bruce Smith shares an update on a Funaro & Camerlengo HO scale hopper kit that he recently wrapped up. Here’s Bruce with the details.
This Chesapeake & Ohio triple hopper model was fairly straightforward but there was difficulty in understanding a few details. Suggestions on the RealSTMFC Groups IO discussion list a few months ago helped clarify these details and push the model towards completion.
The prototype hoppers were a USRA car design built by several railroads after USRA control was relinquished. These cars were originally owned by the Hocking Valley. These cars were originlly owned by the Hocking Valley. After the company merged with the C&O, many of these 70-ton hopper cars hoppers were rebuilt in 1932 with blister panels installed to increase the capacity.
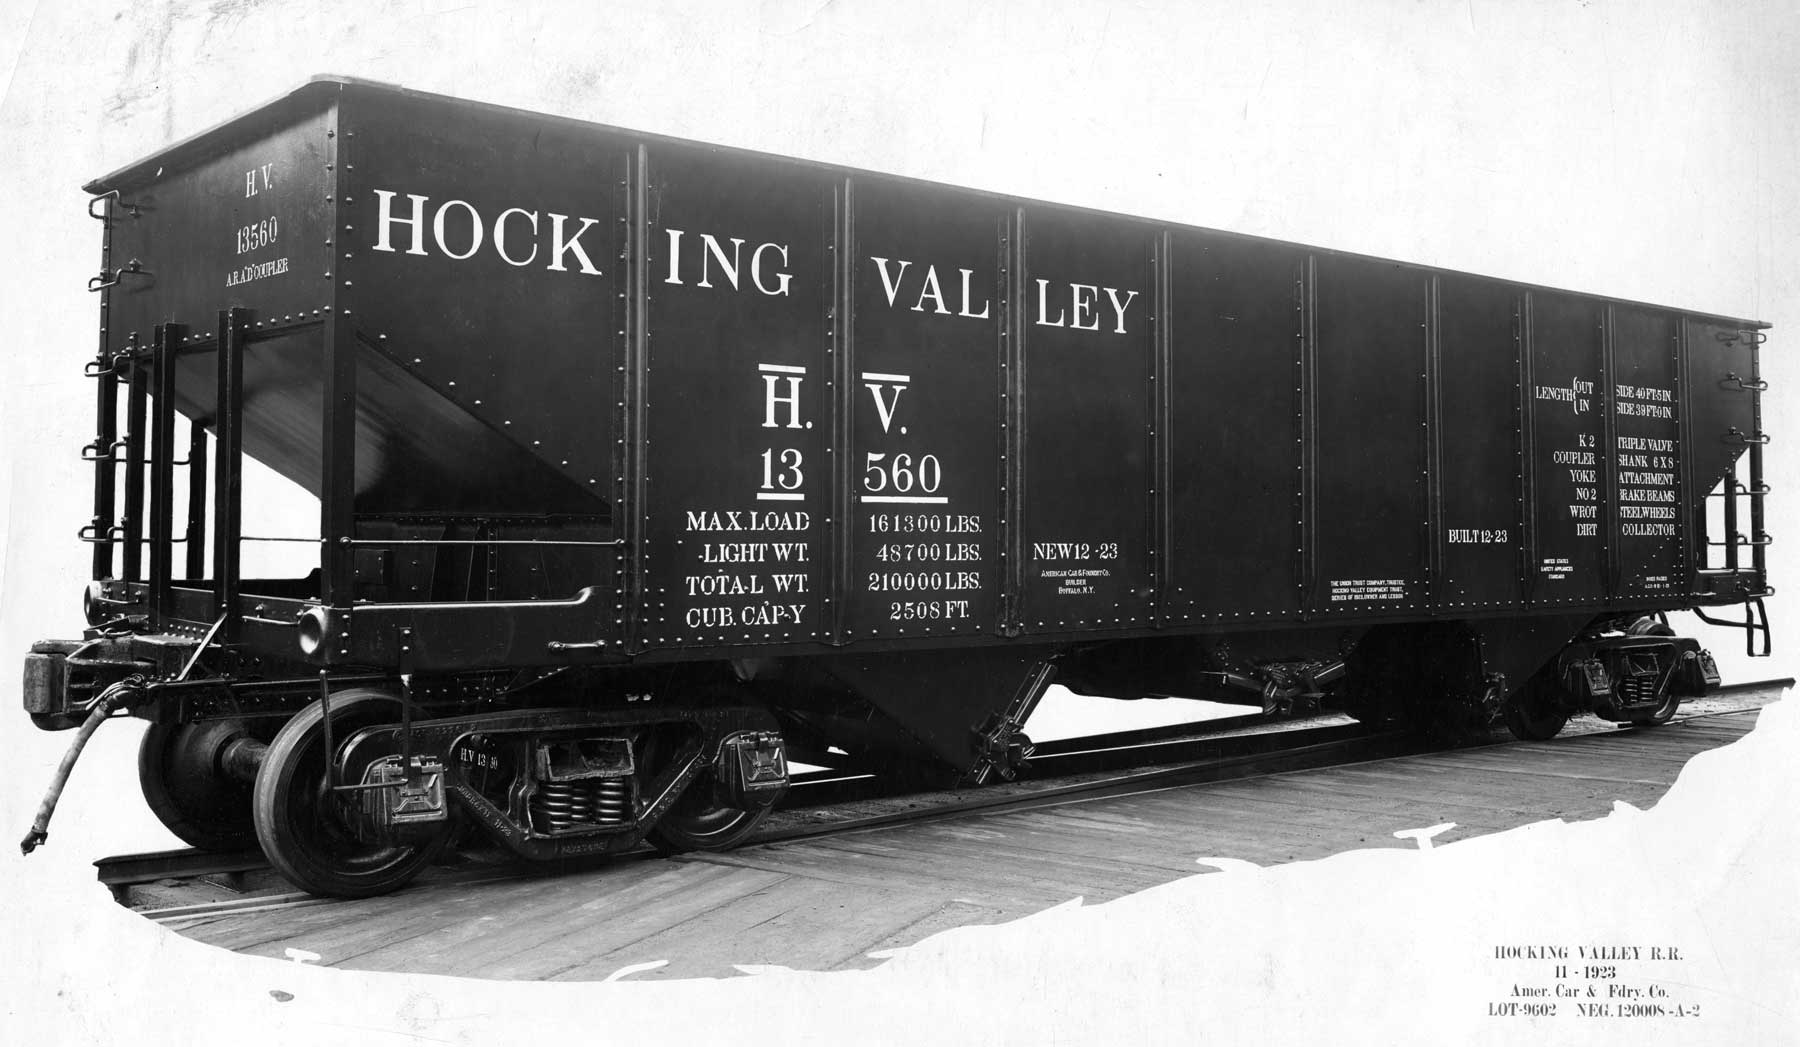
Photo from the John W. Barriger III National Railroad Library Flickr collection in the AC&F photo album.
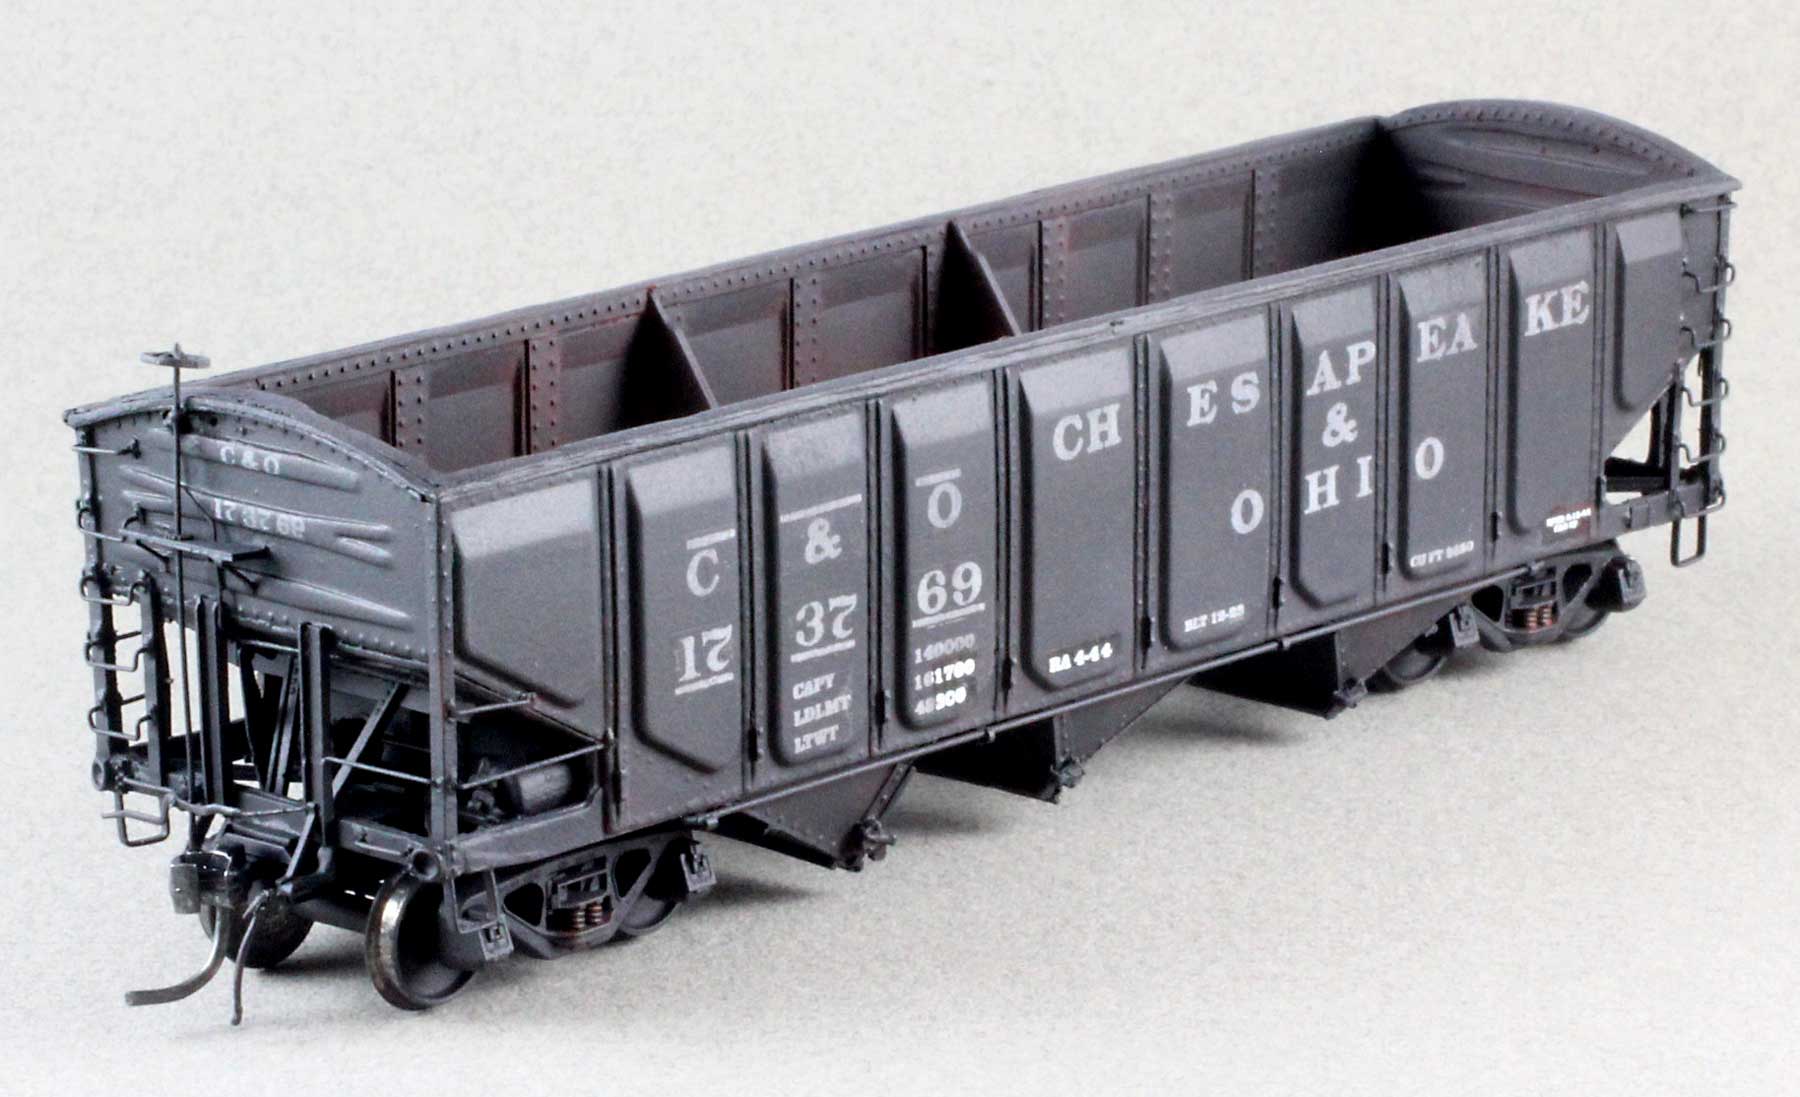
The hopper is a Funaro & Camerlengo kit, #8380, a 70-ton, rebuilt, ex-Hocking Valley hopper. I used wire grabs throughout, either from the kit or hand bent. The trucks are Tahoe Model Works 70-ton ASF with semi-scale wheel sets and the couplers are Kadee 158s. I basically built the model according to the directions, with the exception of the air hose bracket and Carmer uncoupling levers. The body was painted with Model Master Acryl Black from a spray can after grit blasting and washing.

Photo from the John W. Barriger III National Railroad Library Flickr collection in the AC&F photo album.
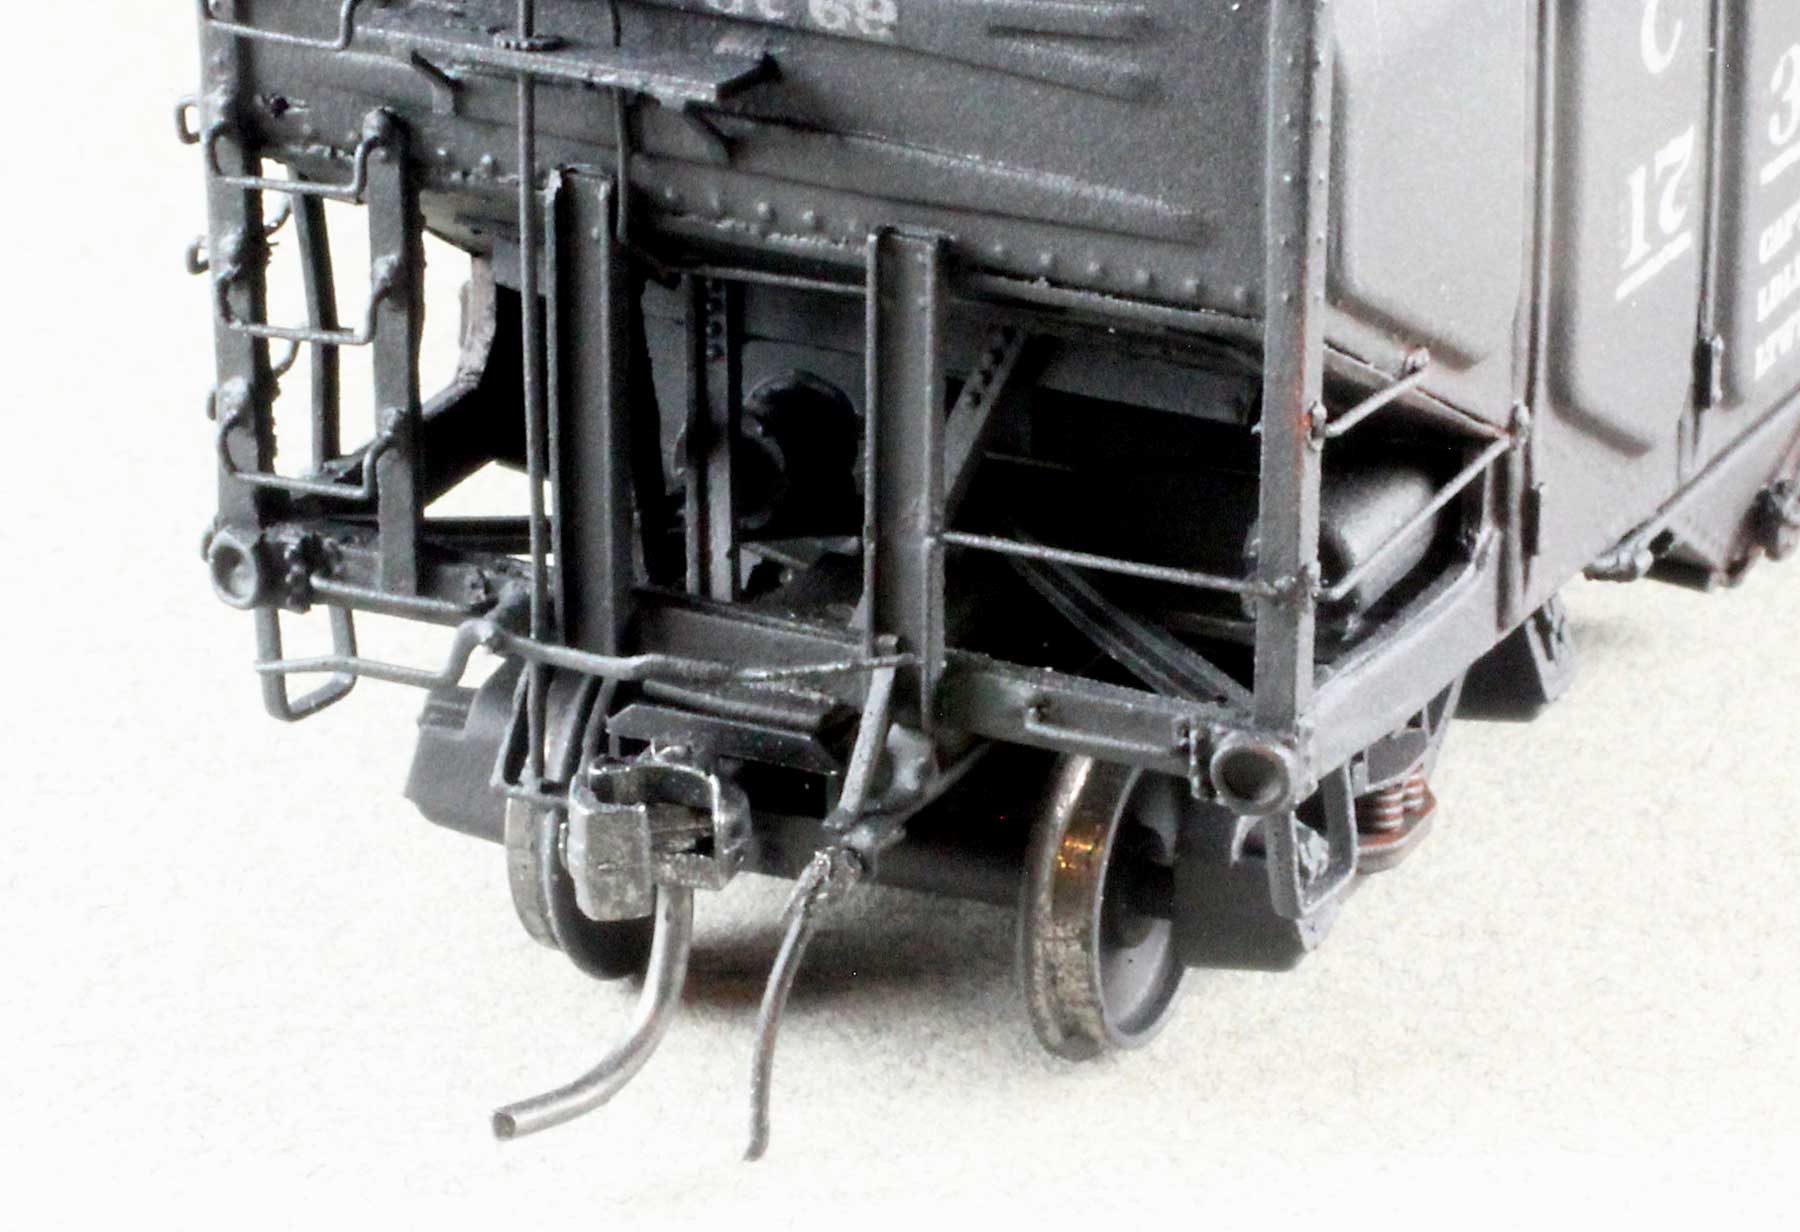
The prototype photos show what appears to be a flat (horizontal) strap that is undermounted on the car end sill with a short vertical segment, combined with a diagonal metal strap from the top of the bracket to a few inches up the end brace.

Fastening that part to the very narrow end sill of the car was a challenge. Drilling that part is possible, since I added Details Associates sill steps before installing the air hose bracket. Dennis Storzek offered a suggestion that I followed.
I drilled a hole in some brass shim stock for the air hose then bent the bracket down at that end. The inner end was bent up, and then horizontal, and another hole was drilled in that end for a brass wire pin to attach the part to the bottom of the end sill. I soldered a brass wire to the bottom to represent the air line, trimmed it all to fit, and glued it into place. A diagonal brace was added using a piece of styrene. Careful examination will show that the diagonal brace is off center, as is the prototype. Hi-Tech air hoses finished it off. The Hi-Tech air hoses are very light, and do not transmit any force back to the attachment point of the bracket.
The other details were part of the kit. The door locks were molded onto the car body, as was the interior detail. If needed, Microscale offers an HO scale decal set for C&O hoppers.
The weathering makes the interior details “pop” and that was done with Doc O’Brien’s Weathering Powders, as was the exterior weathering. Truck springs were highlighted with a dry brushing of raw sienna followed by a wash of burnt umber, both Model Master acrylics.
What’s on your workbench?
Bruce
Definitely inspirational and a very nice job. I model the C&O in S scale and I am amazed how you guys manage to highly detail these HO models and make them so accurate. I actually designed and 3D printed an end that will work on an AF or American Models car and I have a set of the flat panels that were cast years ago. I may give this a shot although it will not start nor finish up to be your standards. Thanks Chris Rooney
Very nice build. Article will be very helpful when I get around to building mine.
Bruce nicely done and finished.
George Toman