Pete Hall has been busy upgrading a Proto2000 USRA 0-8-0. He sent along details and some great photos. Click on any image to review a larger size.
My friend Chris Vanko runs a Northwest model railroad, and asked me to upgrade his Proto2000 0-8-0 to be more “NP-ish.” He provided the photos and the model, and I added a few things here and there to help it come to life.
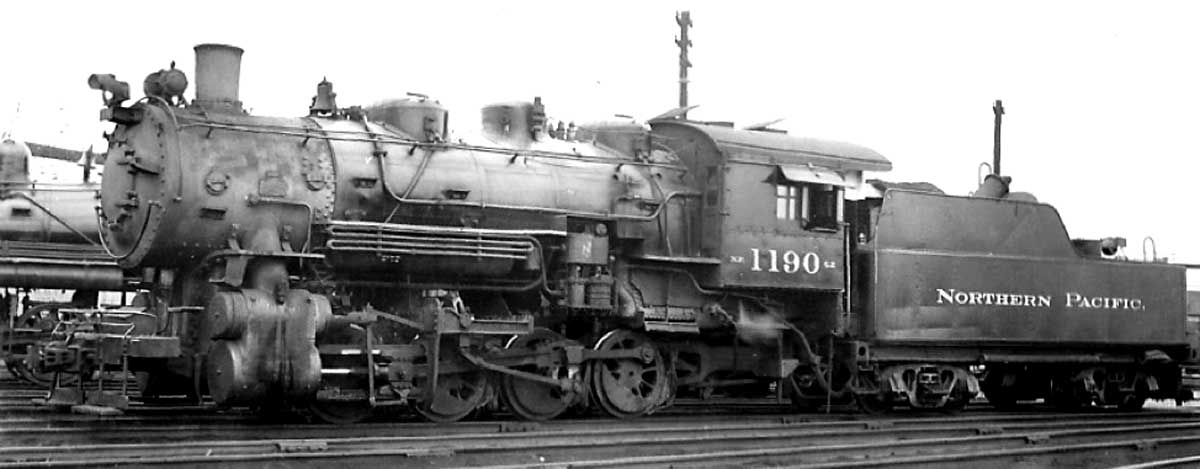

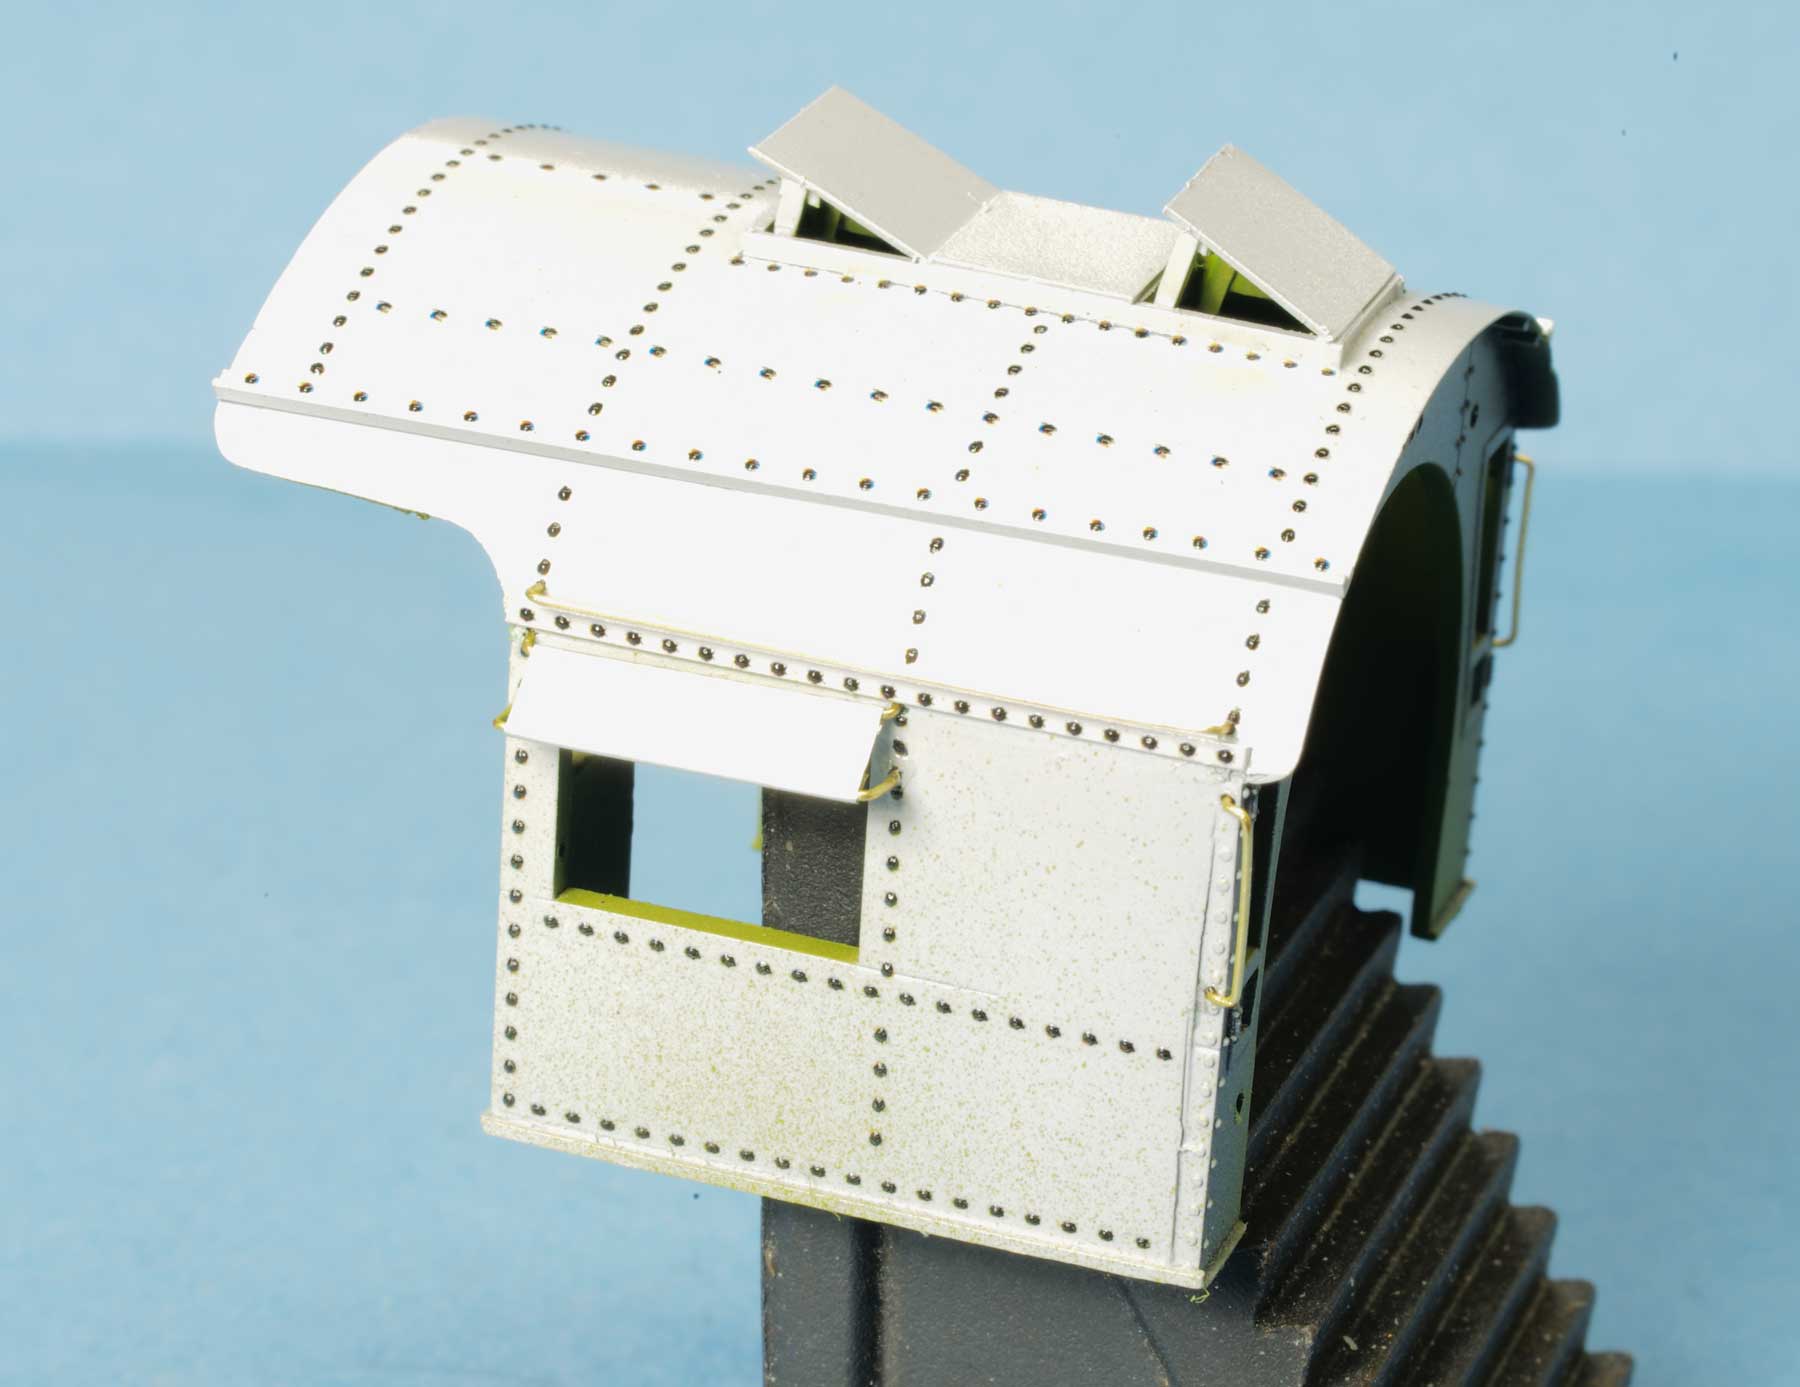
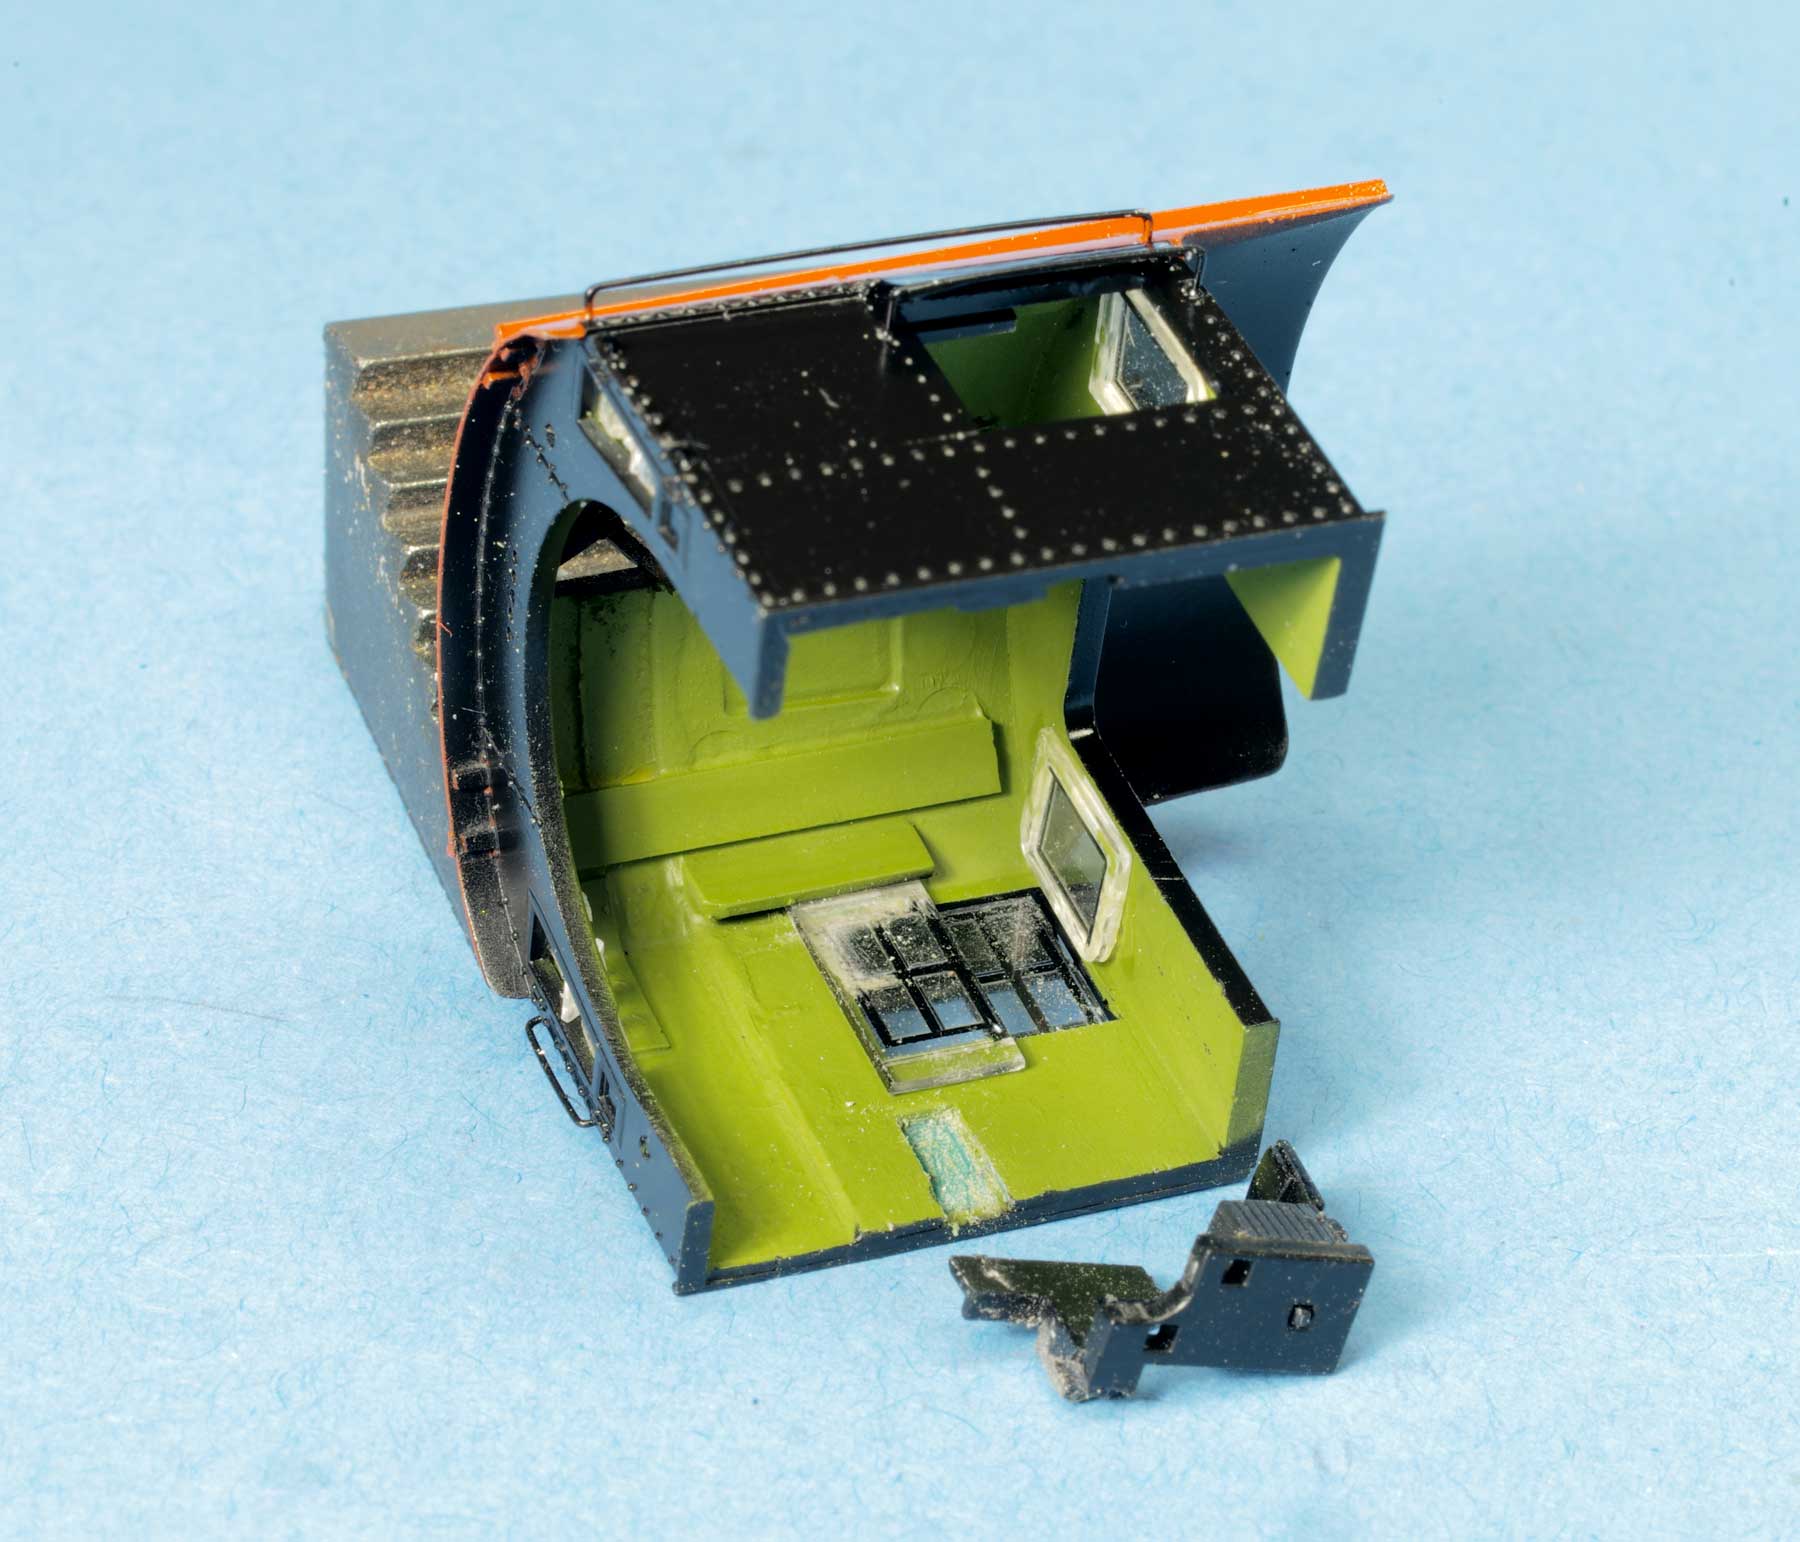
Here’s where the project starts. A comparison between the model and prototype. The two biggest changes were the cab profile and the tender coal extensions. To start, I removed the cab from the boiler, and removed the window assemblies. On Frank Hodina’s suggestion, I cut right behind the front wall with a razor saw. I added three strips of 0.030 x 0.250-inch styrene to the front of the cab, and then glued the front wall back on. The roof vents needed to be changed, so I sanded off all the roof detail and started over. I filled the old and created new roof vents, added a new riveted drip strip above each window, and a footboard at the bottom of each side.

Next, the cab interior was re-painted green. Decals won’t stick to bare plastic, so the cab exterior was given a white primer coat and a clear gloss coat before adding all new Archer rivets. New grab irons were installed at the front wall, new handrails across the top above the cab, and new awnings. This was the first time I had tried using aluminum foil as the awning material; I folded it around the awning supports at top and bottom and glued it in place from underneath.
The original cab front wall fits into a groove in the boiler, so a new groove had to be cut where the wall would fit, farther forward on the boiler. This also required moving the two rear stanchions supporting the handrail. A little MEK was applied to the plastic stanchions where they fit into holes in the boiler, and they slipped right out of the holes. MEK was used to loosen their grip on the handrail, and they came off intact. The handrails are steel, and very tough to cut, so heavy wire cutters were used to trim them shorter. New holes were drilled and the stanchions reinstalled.
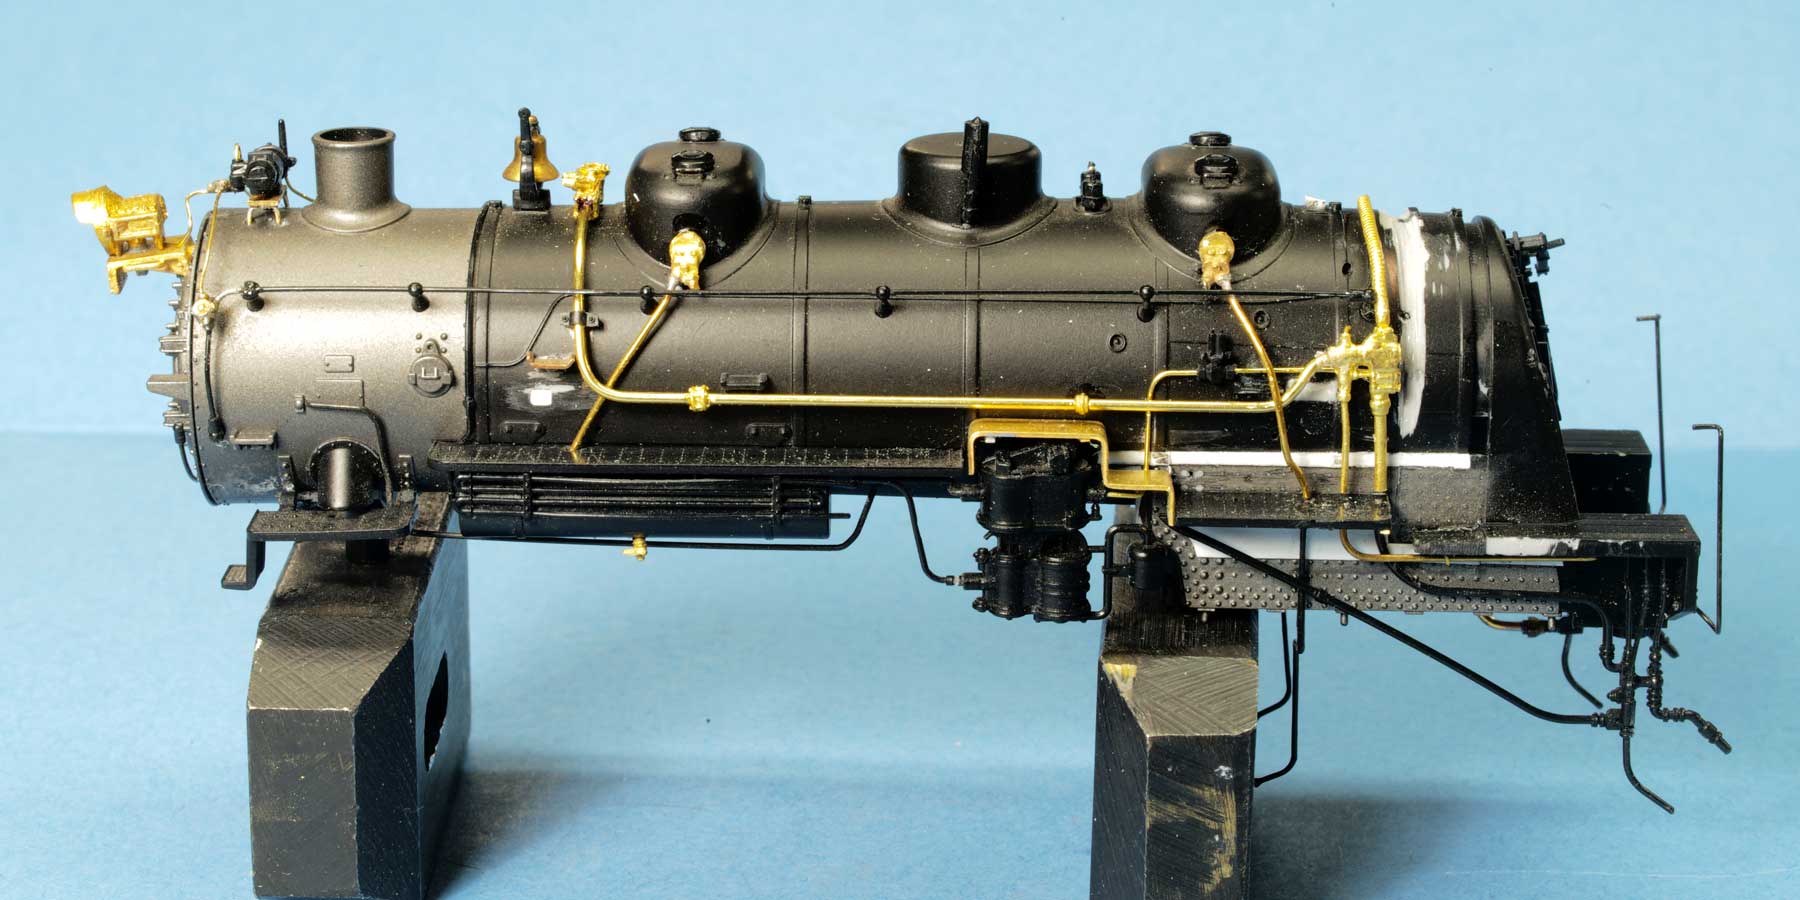
There were several boiler details that needed to be changed. Starting at the front, the headlight and taillight are plastic castings with a central clear plastic core that transmits light from LEDs on the inside. The NP used Pyle National headlights with a tapered profile. The original light was removed and the remaining hole was filled. New holes were drilled in the filler to accept a Cal-Scale brass casting 331 and bracket 241 (headlight).
The sander valves were not well-detailed. All four were replaced with Cal-Scale 286 sanders, with one leg cut away from each of them. They wrap around the boiler and under the handrail and feedwater lines, and connect with the existing plastic sander lines which run in front of the first driver and behind the fourth driver.
The boiler check valves on the sides were replaced with a central top feed valve (Cal-Scale 251) with lines coming up both sides of the boiler. The brackets holding the original plastic lines in place were the same as those on the NP engines, so I cut the plastic lines, drilled through the brackets, and slid them onto the new brass pipes. Lift rings were used as rear stanchions to hold the pipes in place, and a union was added on each one. On the left side, the line connects to a new starter valve (Cal-Scale 293) which also connects to the turret. It was a close fit to the new position of the cab front wall.
Next, the existing running board around the air pump was cut away and a new step-over was fashioned from 0.015-inch brass strip. The rear portion of the running board on each side needed to be lowered, and a piece of 0.010-inch styrene added as a lagging cover over the firebox for half of the firebox below the running board. A new brass line was added below the running board from the starter valve. I also removed the existing governor valve, drilled it, and slipped it onto a new piece of 0.015-inch brass wire. Two small Cal-Scale valves were added as air tank drains. A plastic step was re-positioned and a new brass step was added from my parts box. Another step was added to the right side of the smokebox front.
On the right side, I made new brackets and created four new air cooling lines, as well as new piping with three lines below the cab. In each case, I tried to keep the existing plastic lines and appliances, connecting the new brass lines to them with unions. I also added a new air line to the pilot.

With the longer cab there is no room for the turbine generator, so it was moved from in front of the turret and placed on a new brass bracket in front of the stack. I added a steam line running from beneath the lagging, and new electrical junction boxes and lines from the generator. The boxes had to be notched and glued onto the handrail, as the steel wire won’t take solder. The line going forward slips under the new headlight casting.
On the tender, the existing coal bunker was removed and the front wall was cut away. This opened up the cavity so the speaker would have an unimpeded path for DCC sound. I added new side extensions made from 0.020-inch black styrene. The sides were trimmed with 0.010 x 0.030-inch strips. To ensure they would bend and not break when MEK was added, I glued the strip to the top of the side and left it in place overnight with the strips ends held down into the curves with clamps. The next day the styrene strips were bent and glued into place without breaking. The front wall was reinserted farther forward to match the front curves of the new sides. Finally, a new slope sheet of black 0.020-inch styrene was added along with a Coal Pusher (Custom Finishing # 134) with a power line, and a new ladder on the back side.
For the rear light, I filled the existing hole, re-drilled it, and replaced the light using the same casting as the headlight.
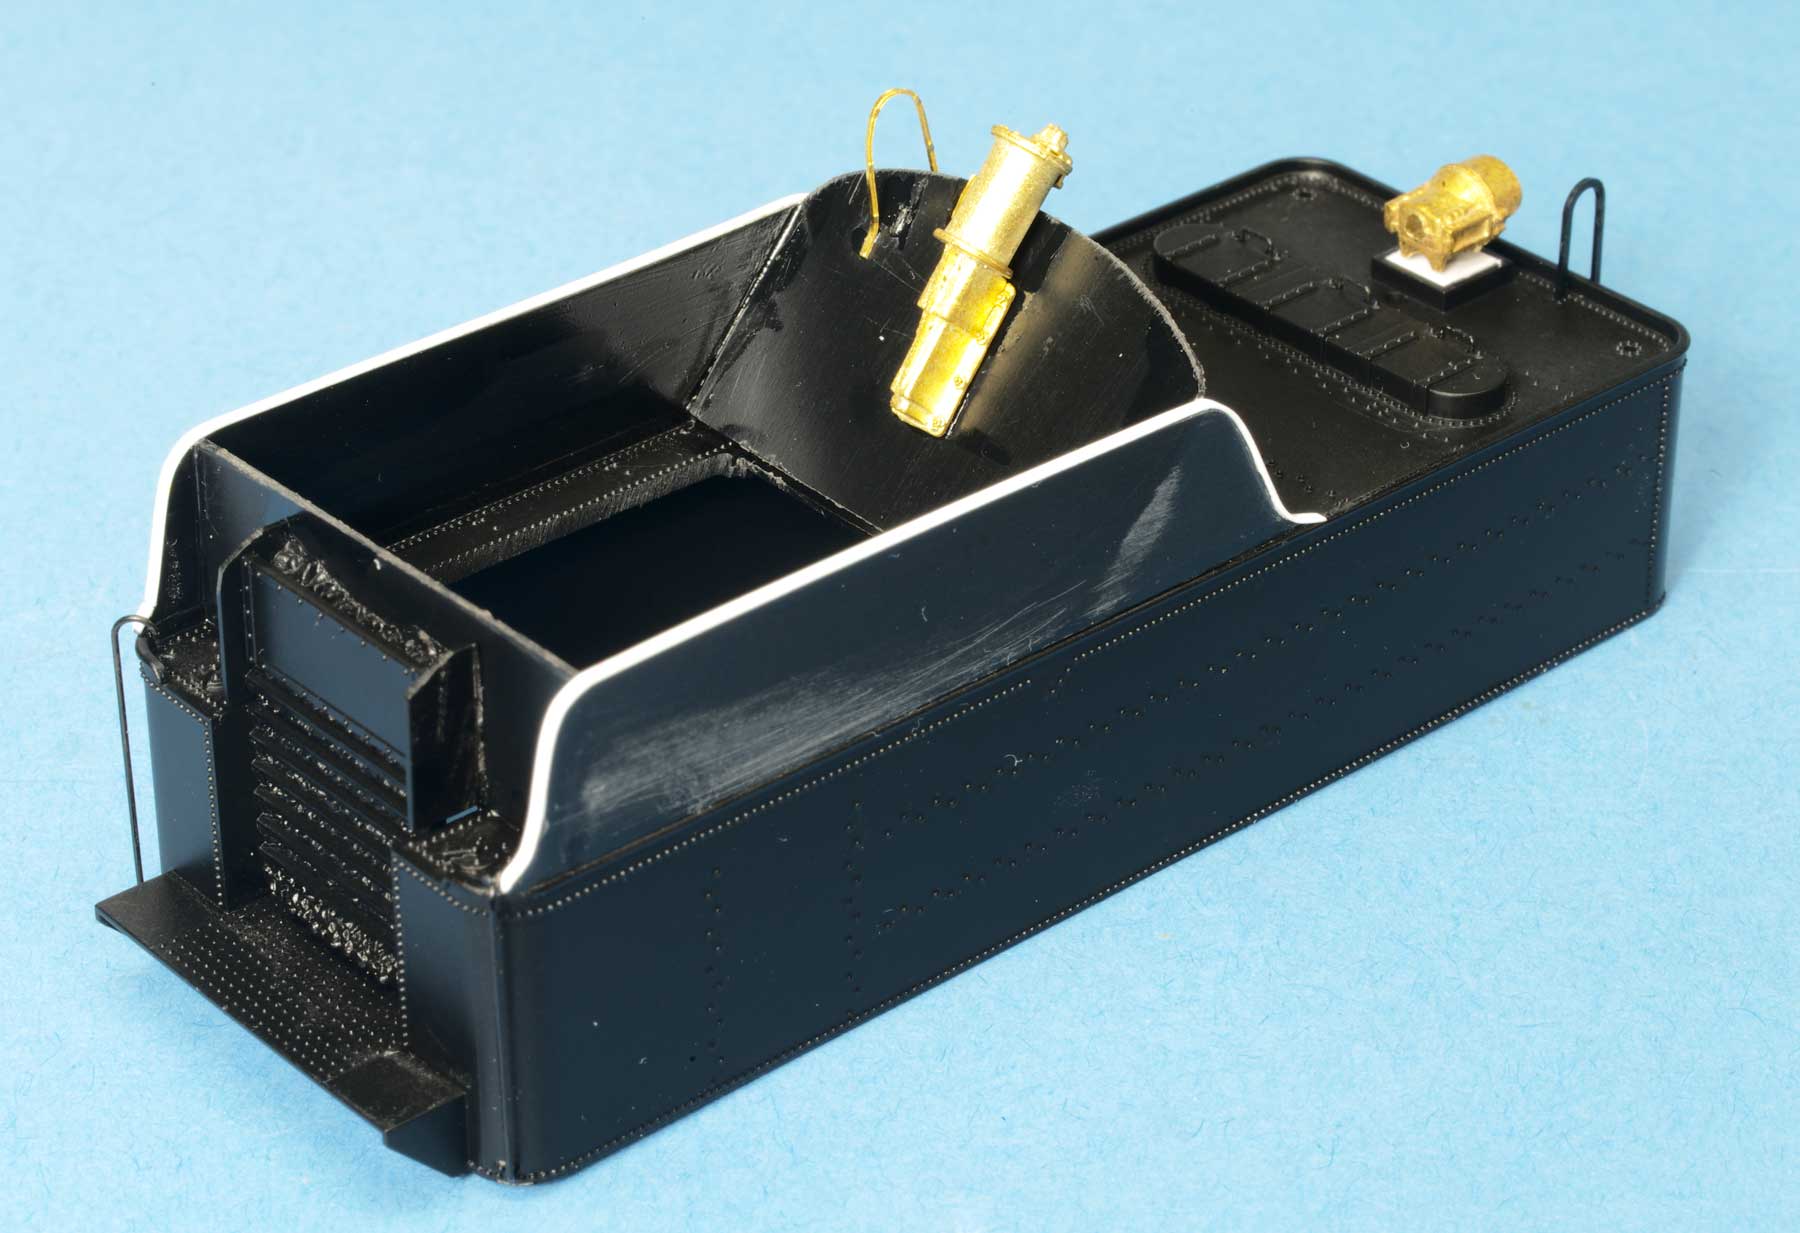

As a final upgrade to the tender, I added two re-rail frogs (Cal-Scale 592) and a new air hose (Cal-Scale 274) to the rear of the frame.
Chris Vanko had already equipped the tender with a decoder and speaker, but the existing LED lights had to be replaced due to the new light castings. Two new “Chip Nano Pico LEDs” from Evan Designs were wired in. These are tiny surface-mount LEDs connected to very thin wires and current-limiter boards. They are extremely small, very bright, and fit through holes in the castings. I coated the wire connections with black nail polish before inserting the LED into the light to ensure it would not short against the metal light casting
A hole in the tender deck was drilled in front of the tail light for the LED to pass through, but getting the front LED in place took some thought. The engine weight had a piece of plastic attached to the front, which was designed to connect with wires from the headlight bulb. However, it was in the way of the new current limiter, so I cut it away from the weight. That gave a good space to mount the new board, with a piece of double-sided tape.
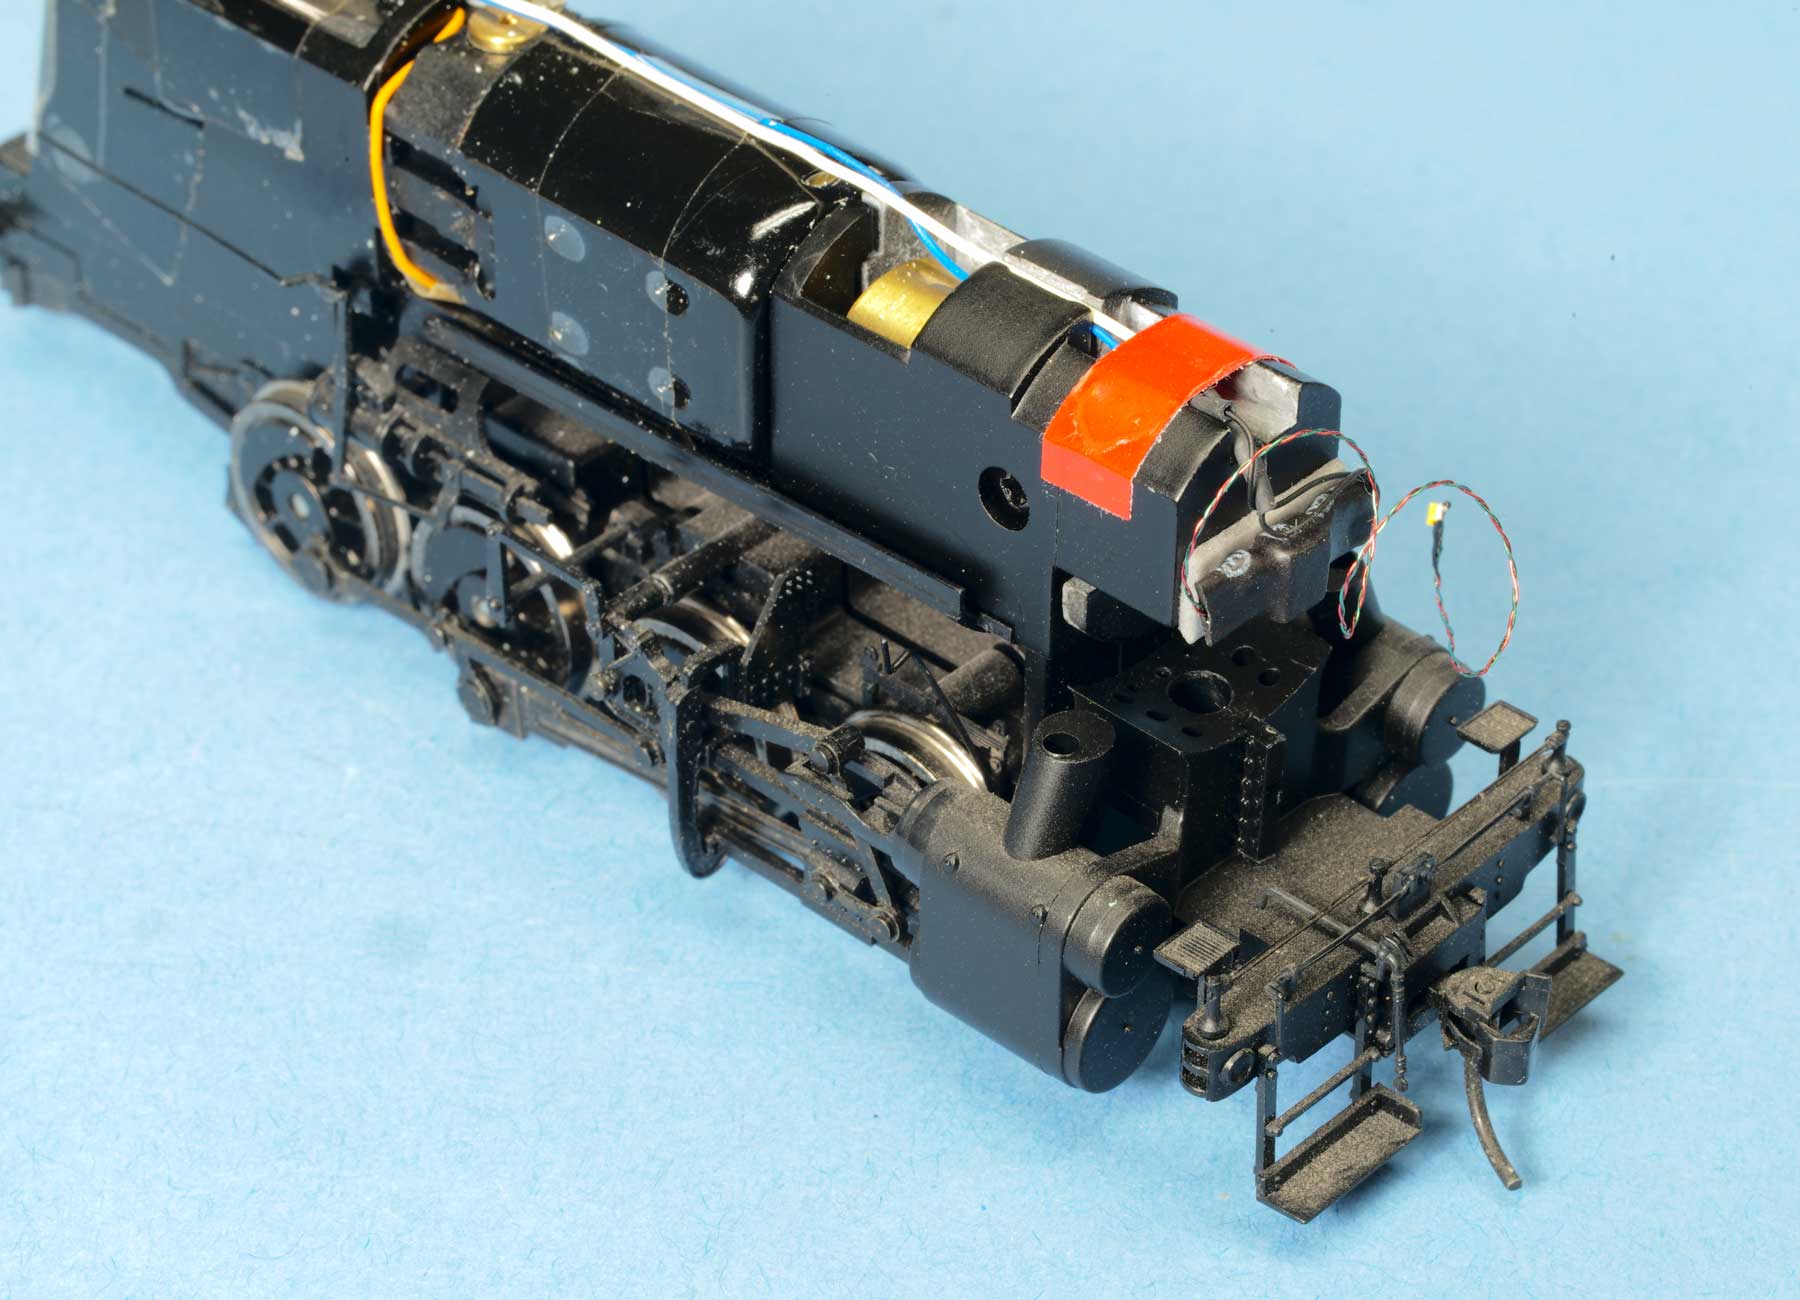
The headlight was placed at the very top of the smokebox front, and there was no room for a second hole for the wires. So, I decided to drill a second smaller hole off-center and adjacent to the primary hole for the headlight bracket casting sprue. The LED was passed through the main hole and then its wires set aside into the smaller hole before gluing the headlight into place. Here you can see the LED sticking out of the smokebox front, with the wires to the left in the smaller hole.

The boiler and tender shell were washed and painted with Scalecoat #10 black, #2 Oxide Red on the cab roof, and #23 Silver on the smokebox front. Getting the motor back into the boiler was a struggle. I had to loosen the screws holding the motor in place; they are on the bottom plate holding the drivers in place. Of course, when I removed those screws, the drivers sprung out of their slots, and getting them back in place was a chore. The engine is a puzzle-box of parts. Two hands are barely enough to put it all back together.
I re-inserted the six windows and glued the side window keepers back in place. The keepers allow the windows to slide back and forth. The keepers fit into a slot in the cab wall, and are a one-piece casting with the cab seats. While the cab was open an engineer and fireman were added. The cab was re-attached to the boiler. The power reverse rod and the lines from the turret were inserted through the cab front wall. The lagged pipeline to the turret was attached on the right side, and a whistle rod was slid through the wall. As a final touch, I painted the cab awnings with Floquil Grime; it’s a great color for canvas.
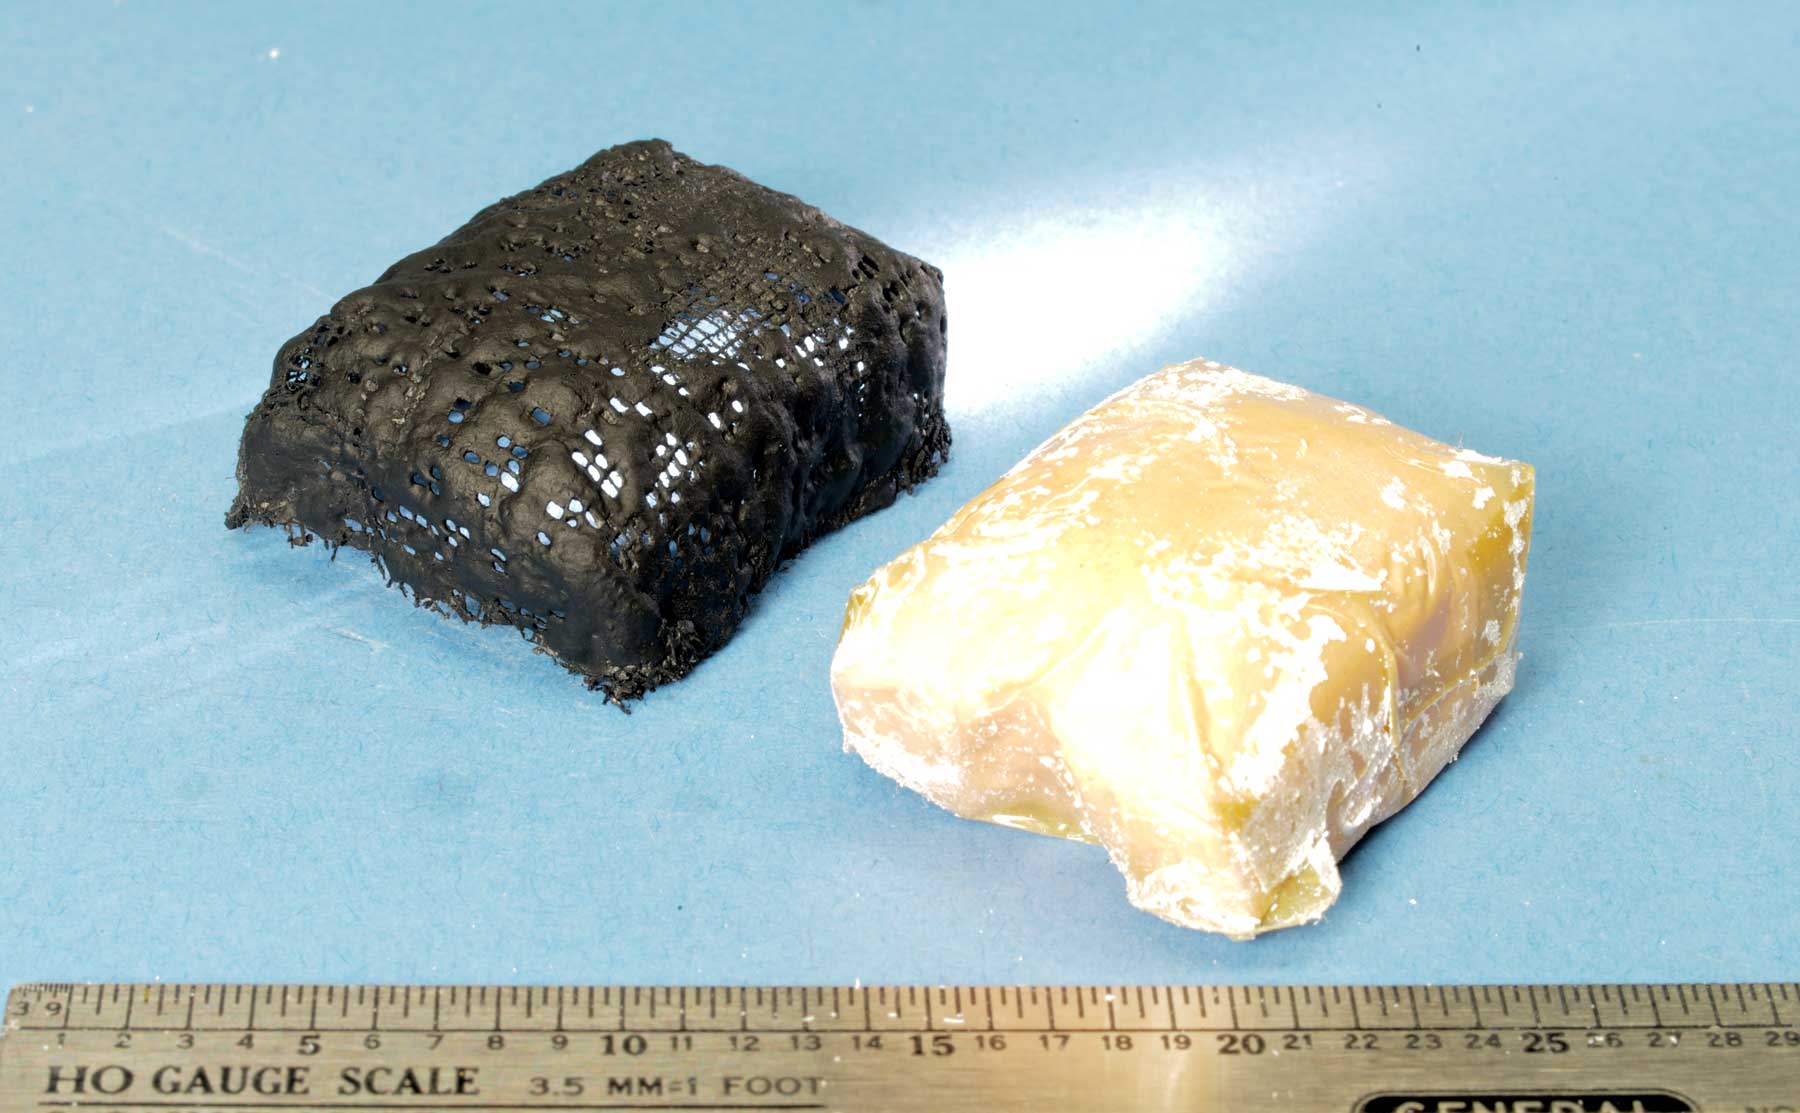
I tried something new for a coal load. Since the speaker in the tender faces upward, sound projects through the coal load. A block of pink foam insulation was formed into a coal load and covered with slick tape. A piece of plaster cloth normally used for scenery was draped over this. I sprayed it, and let it dry. When I removed the cloth, it kept the coal load shape, but remained a large-weave porous cloth that would allow sound to pass through. The cloth was sprayed with black acrylic paint and Scenic Cement was used to adhere sifted crushed coal onto it (photo taken before coal was added). The load rests inside the bunker and is still transparent to the sound; it is removable.
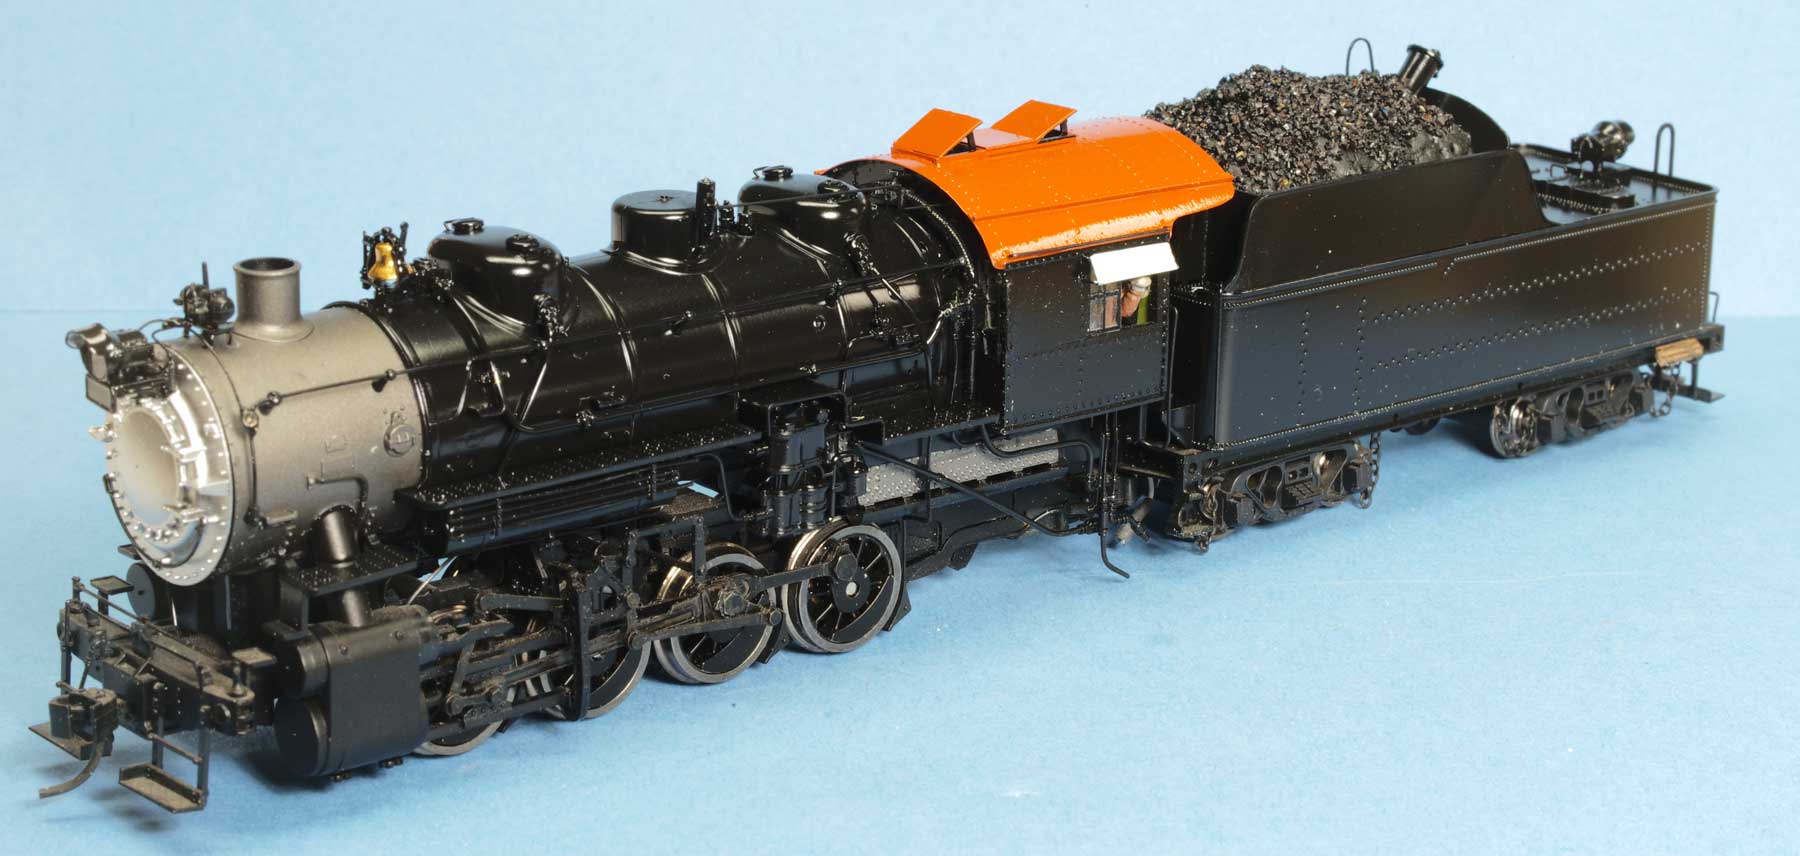
Here’s the final result. Chris will finish the locomotive with his customized lettering.
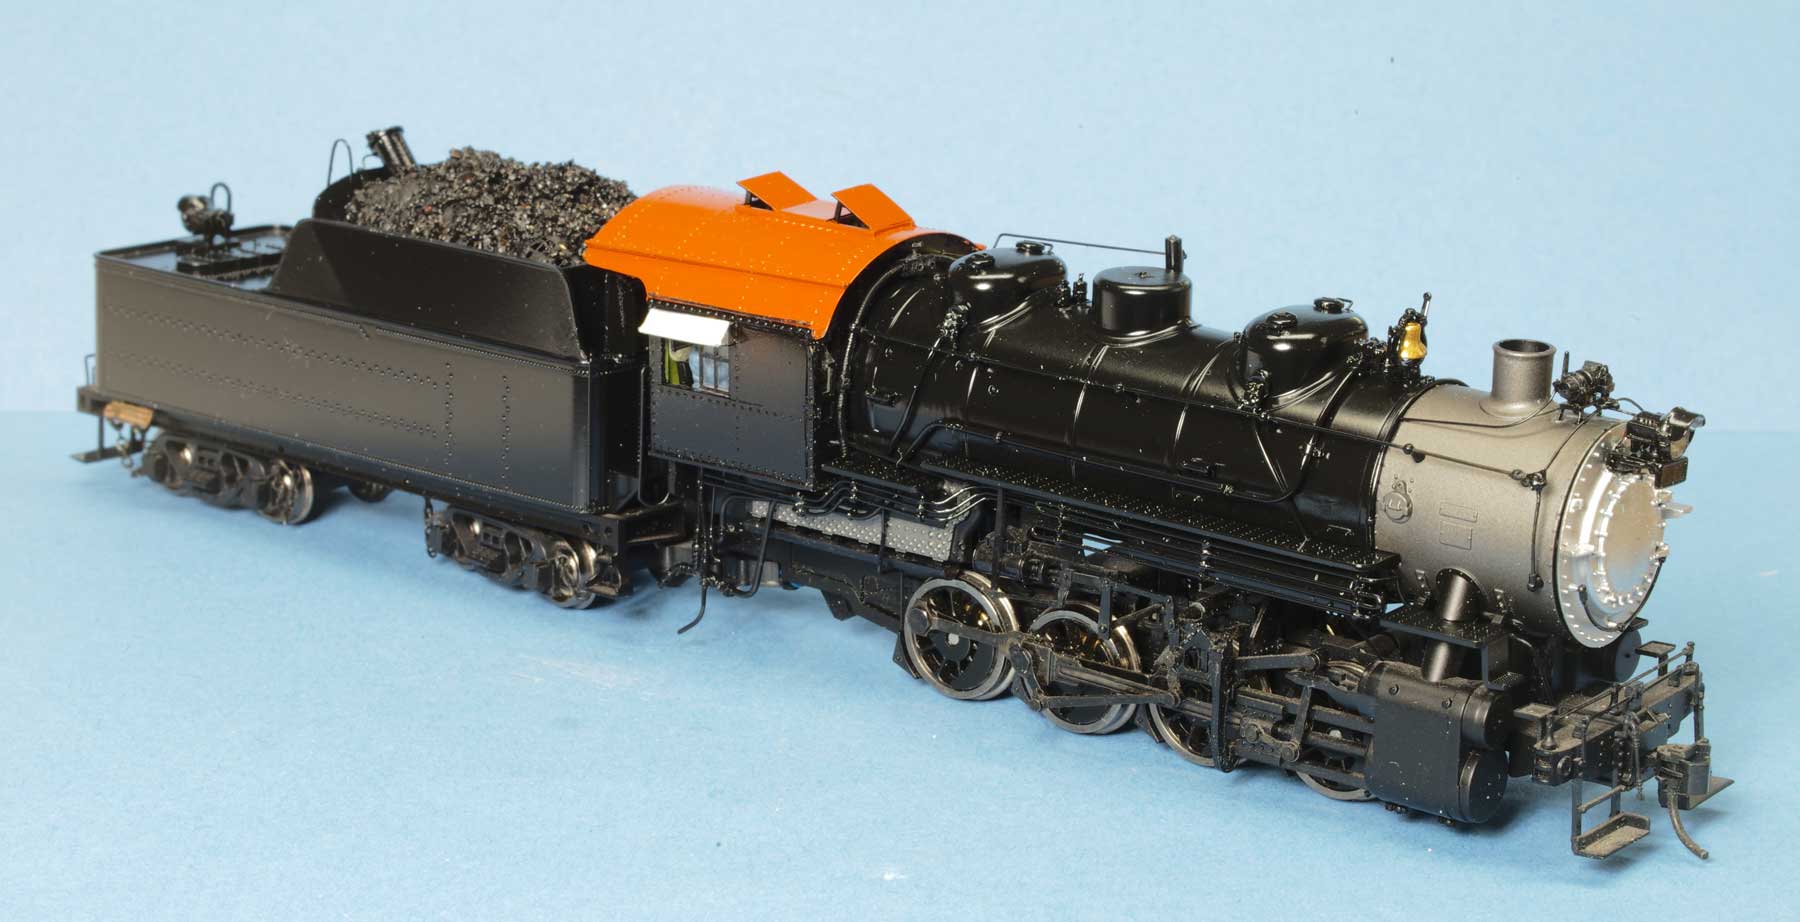
It’s great to see what can be done to upgrade a common locomotive model. We thank Pete Hall for sharing his fine work. Questions and comments can be posted below. Please follow the instructions so your comment can be posted. All comments are reviewed and approved before they appear. To subscribe to this blog, enter your info for a comment and check the last box to notify of new posts by email. Share the blog link with other model railroaders.
Your modeling skills are exceptional. Good job!
Fantastic! I have two of these and hoped to do this someday.
Love it!
Now where did I put my 0-8-0 and my saw…
Hi Pete and Eric,
Great work Pete, especially the original thinking regarding the coal load and speaker arrangement.
Very enjoyable reading material to go with my Monday morning breakfast time.
Claus Schlund
Very nicely done
Pete, the upgrades and modifications turned out great and make for a Terrific looking engine and tender. Nice looking paint job as well. That coal load cloth trick looks to be a good idea and one I will have to try. Thanks for sharing your techniques, this should help me on a 2-8-0 project that I have planned.
George Toman