John Ritchie recently shared progress on his latest resin freight car kit with the Resin Freight Car Builders discussion group. Here’s John with the scoop.
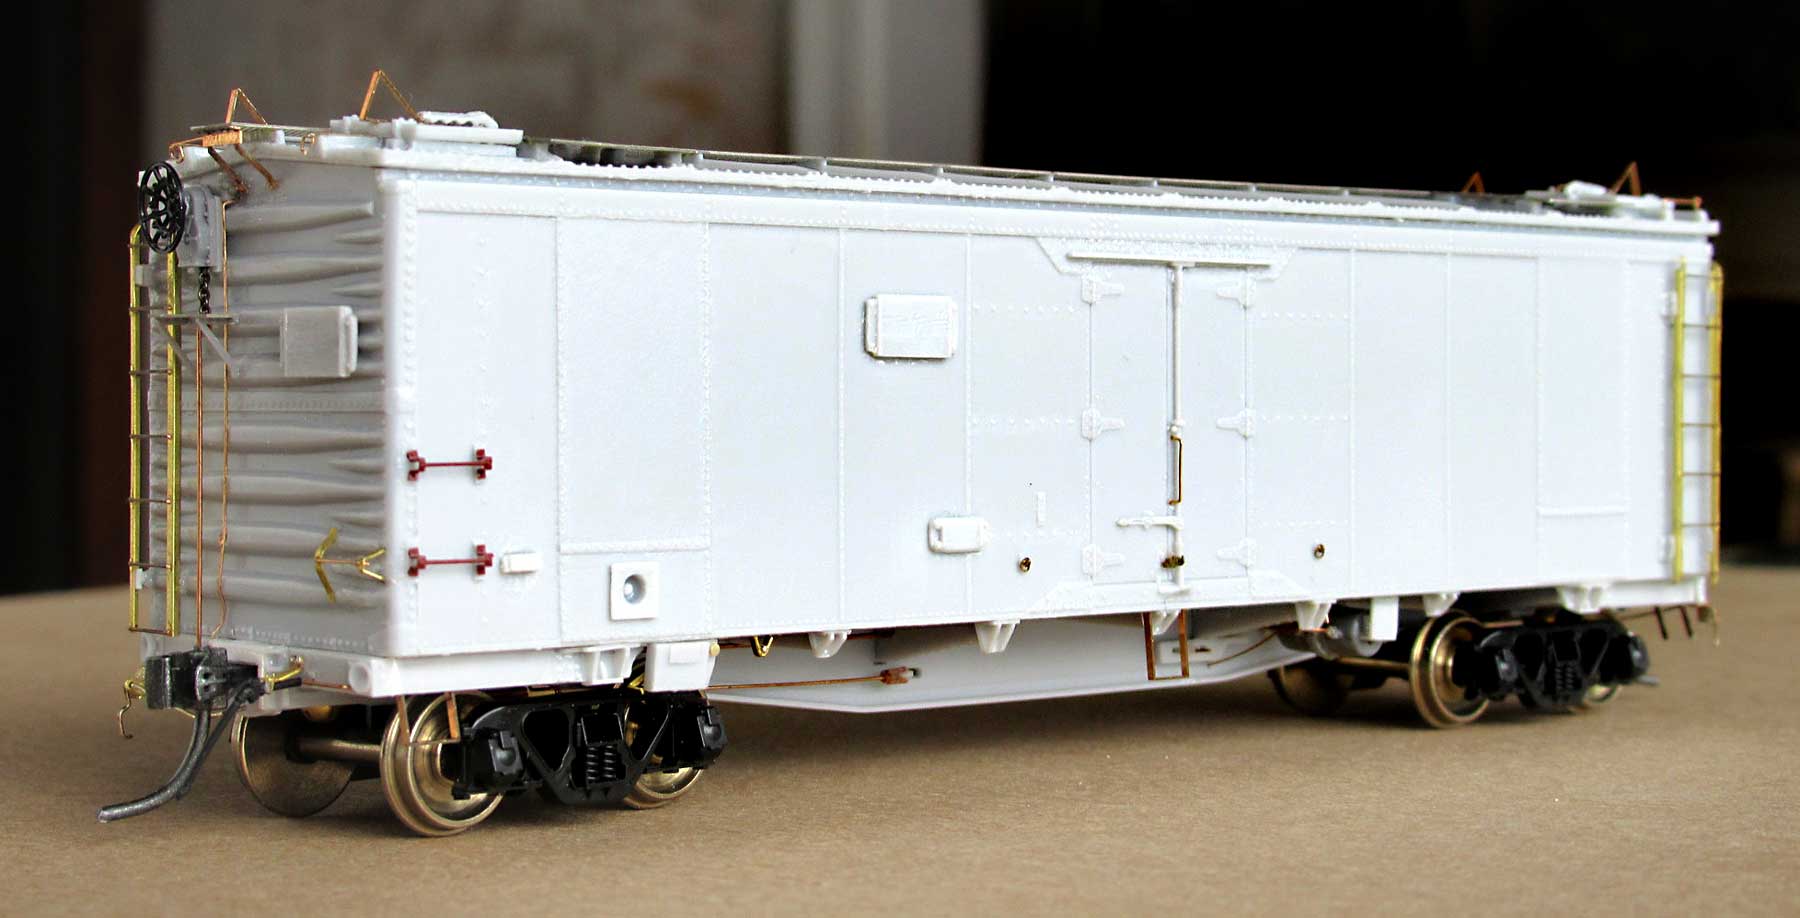
These Resin Car Works kits are very handsome cars, with a lot of characteristic Santa Fe detail. The kit’s master patterns are excellent, and the new one-piece body casting is equally superb. I thought I’d try adding a few details based on information in the Santa Fe Railway Historical and Modeling Society’s SFRD ice reefer reference book.
Briefly, here’s a summary of what I chose to do, not necessarily in this order:

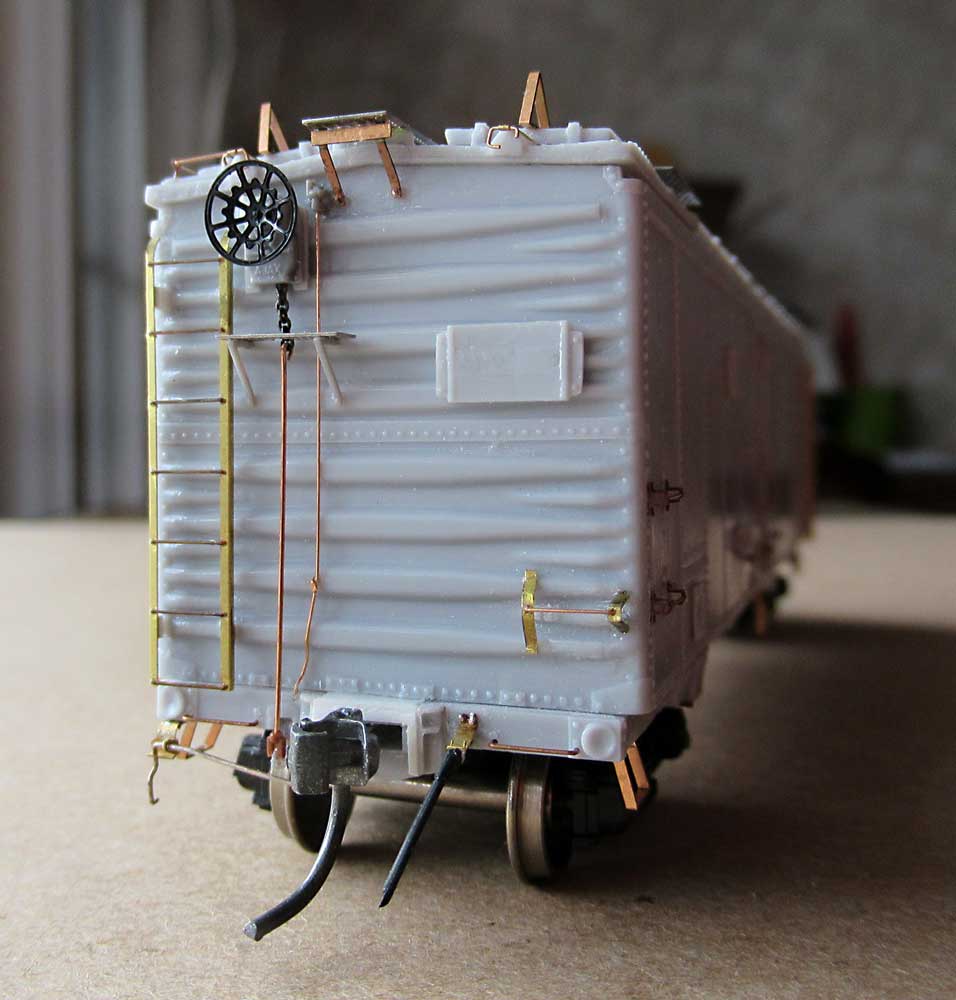
Set the end sill to project from under the Dreadnaught end sheet about two scale inches or a hair more. The coupler pocket was built up with styrene strip around both sides as well the top, trying to suggest the prototype’s fairly massive casting.
On the car side sides, Kadee bracket grabs; bits of brass strip, 0.006-inch wire, and Yarmouth Models eyebolts were installed to suggest the hardware for holding the doors open while loading or unloading. The upper right-hand end grabs are bits of brass strip with 0.008-inch wire rungs.
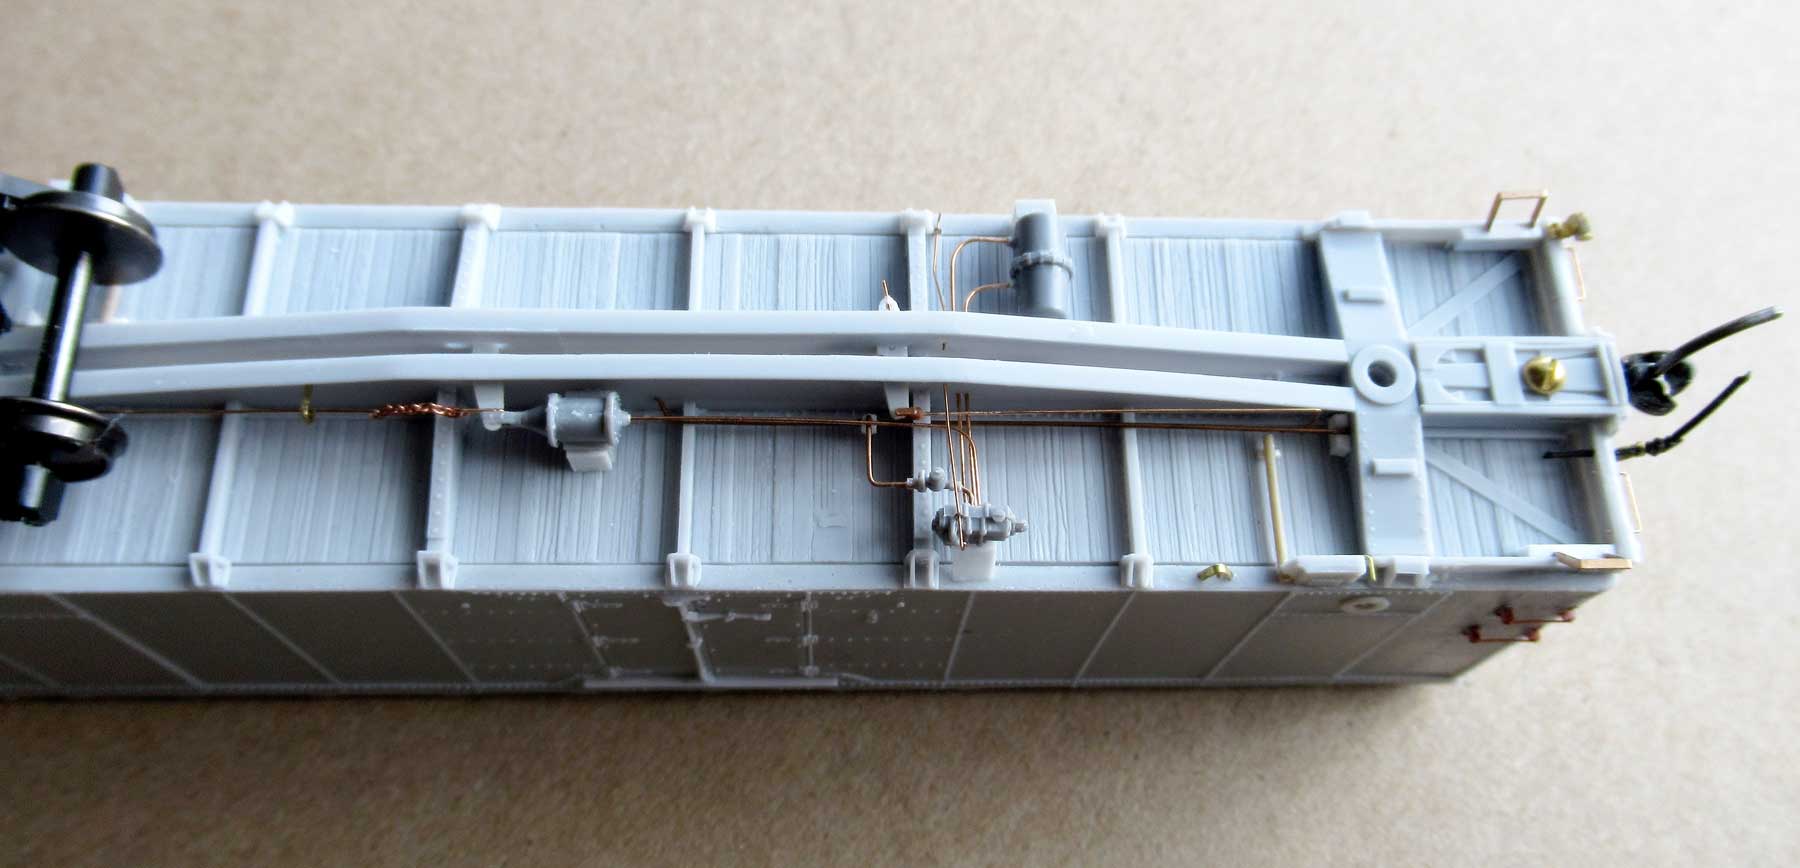
Underframe details followed the kit instructions. The train line was added, but it should have been mounted a little higher so it passed through crossties as well as the cross-bearers. An air release rod, on/off handles for the fans (brass 0.010 x 0.018-inch), and v-shaped brackets for pre-cooling motors (brass 0.010 x 0.030-inch) were added.
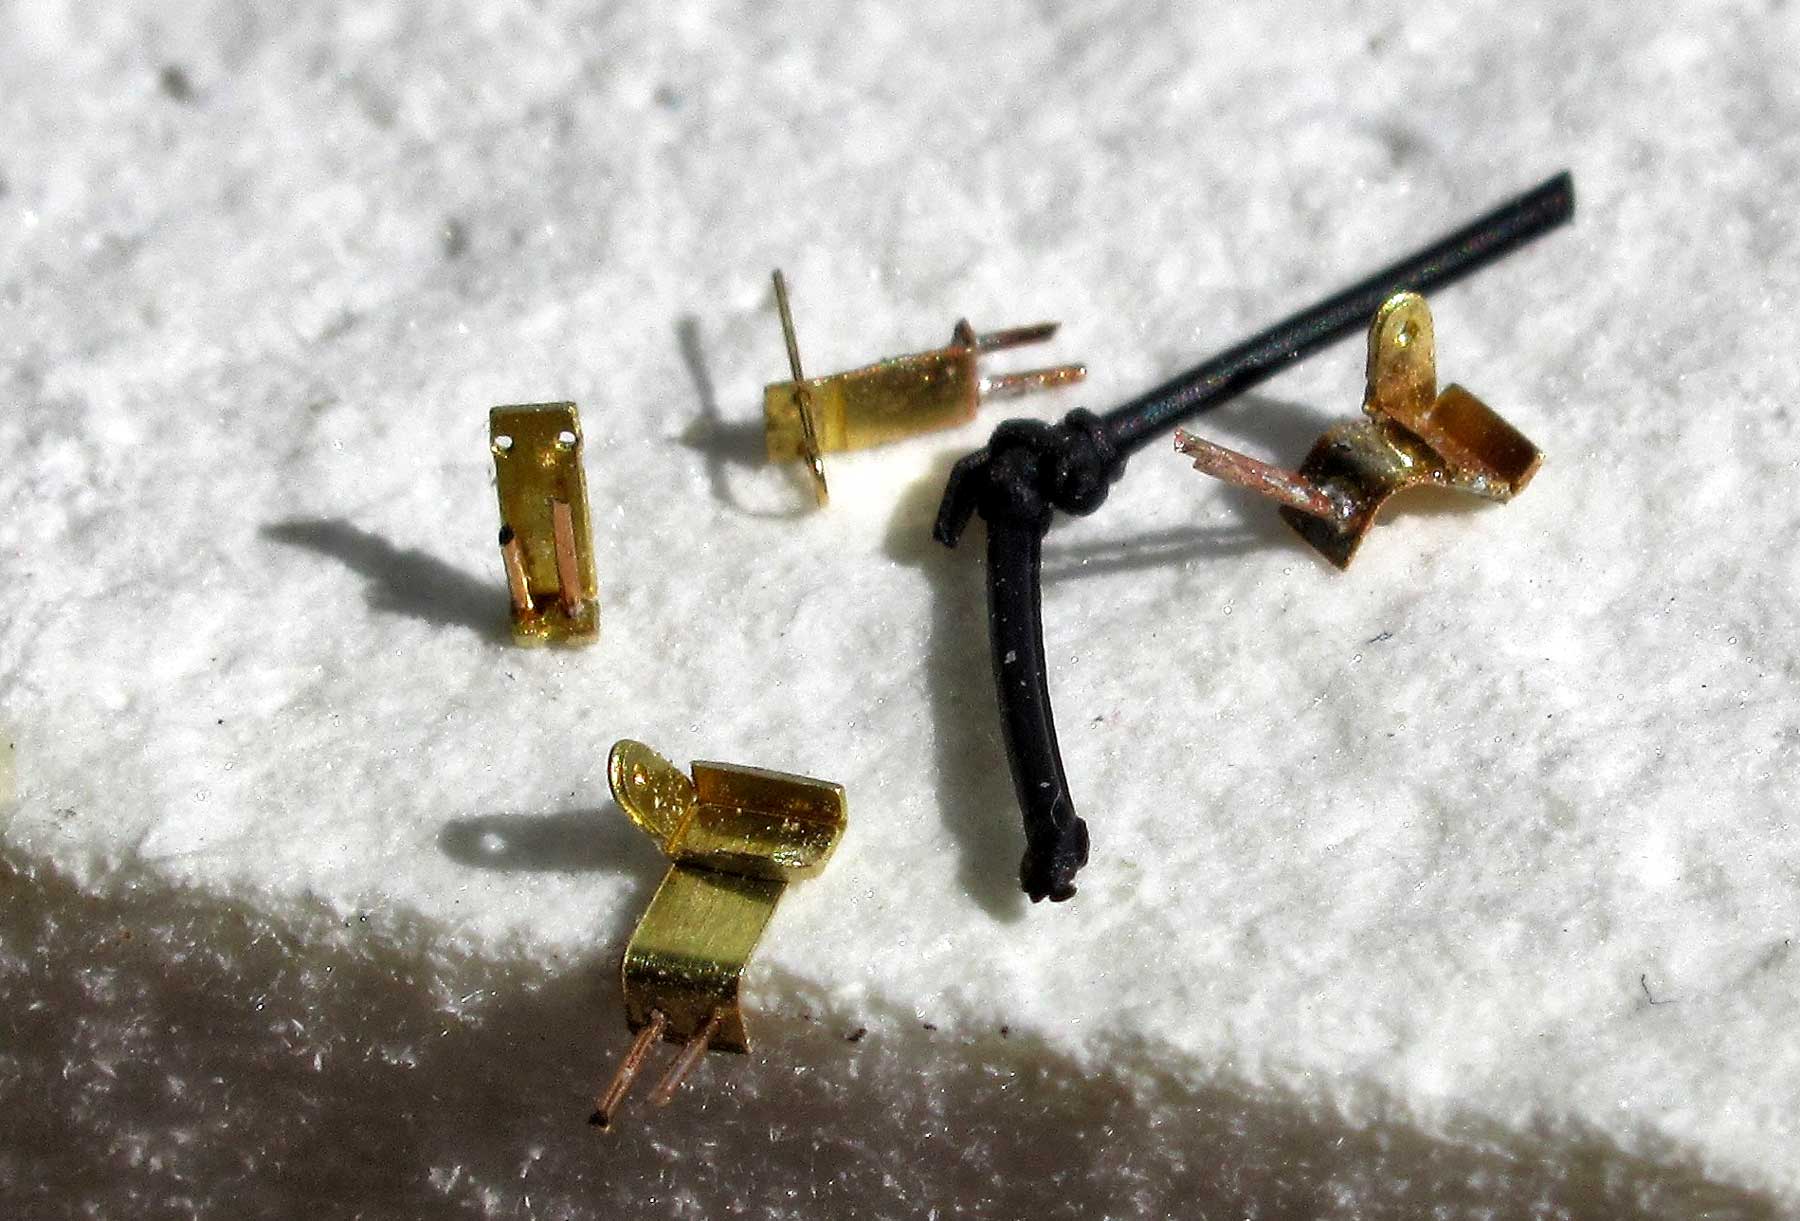
Yarmouth Models air hose brackets and uncoupling lever brackets were installed. These were slightly modified. For strength, run a little solder into the air hose bracket’s etched fold line. The finished bracket has a loop of 0.006-inch wire to hold the Hi-Tech Details air hose.
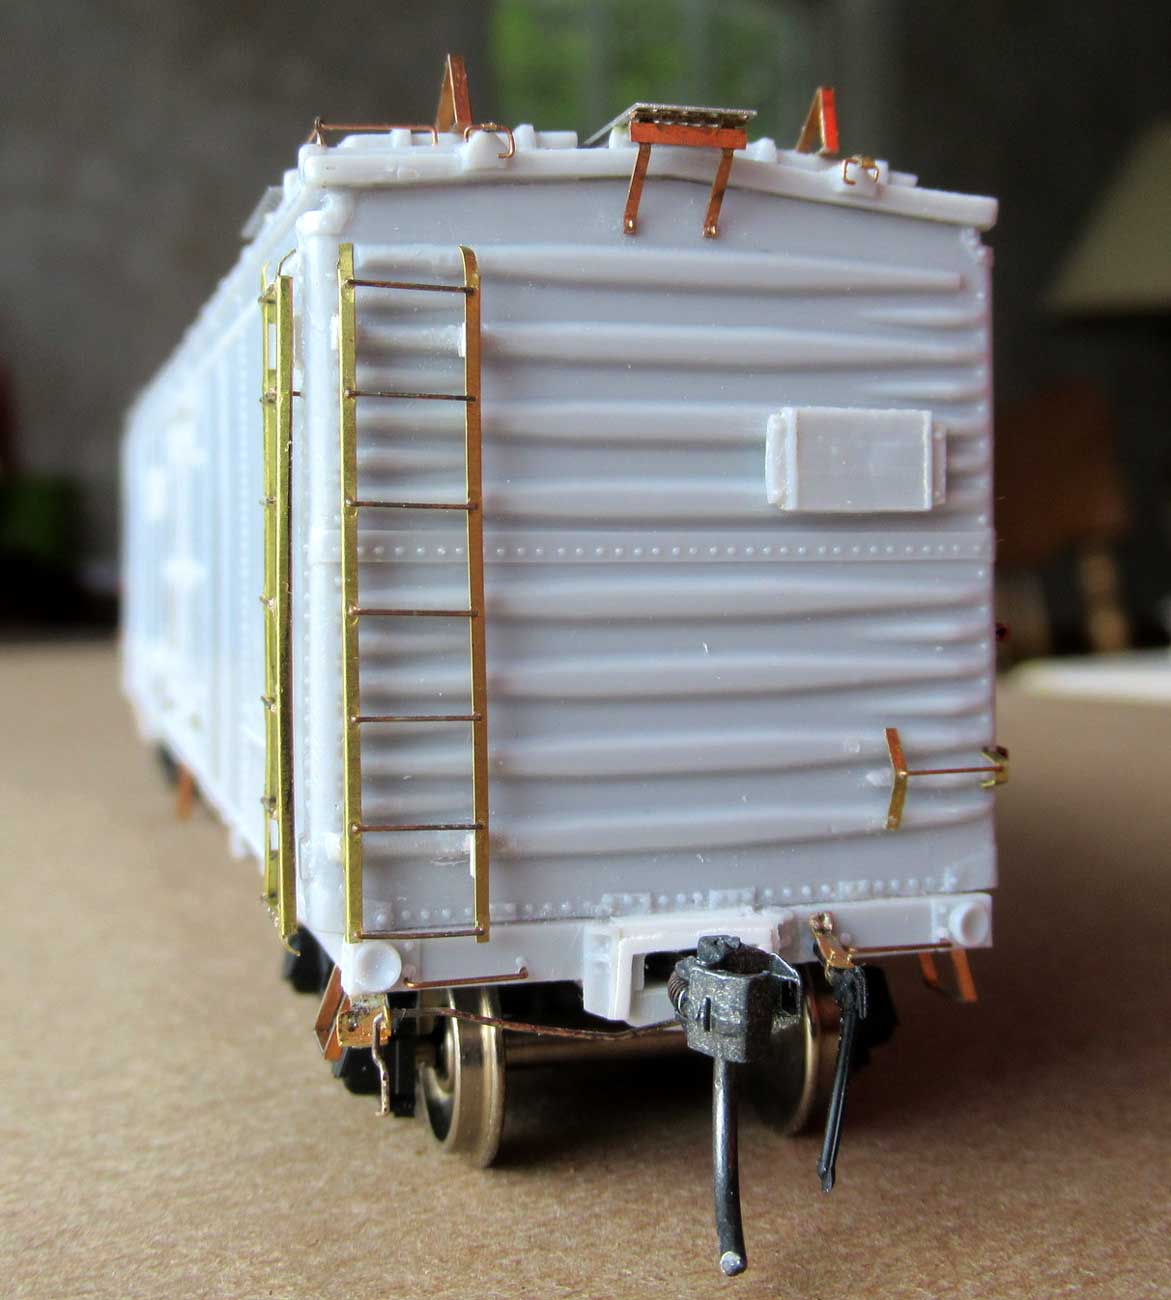
Yarmouth’s excellent ladders elevate the detail. The 15-3/8-inch rung spacing seems pretty close to exact for these cars. They have 18-inch wide rungs, though I may use 17-inch on the second car’s end ladders, to gain a little more space for B end brake detail. The stiles were trimmed down from 8 to 7 rungs, but enough metal was left at top of end ladders, top and bottom of side ladders, to bend the face of the stiles back. The side ladders are removable for painting and can be re-located with the long legs of the second from top rung.
Roof details were installed pretty much per kit instructions. Hatch cover rests set a little off the covers toward the end of the car. There’s a drawing in the reference book that show the geometry of this. The prototype design has the rests make full-length contact with the underlying supports when the covers are fully open. My details go perhaps a little too far off the covers, but there’s a little compromising needed on the model between the relative sizes of the hatch covers, the rests, and the locking bars (which need to be able to lie flat on the covers when closed).
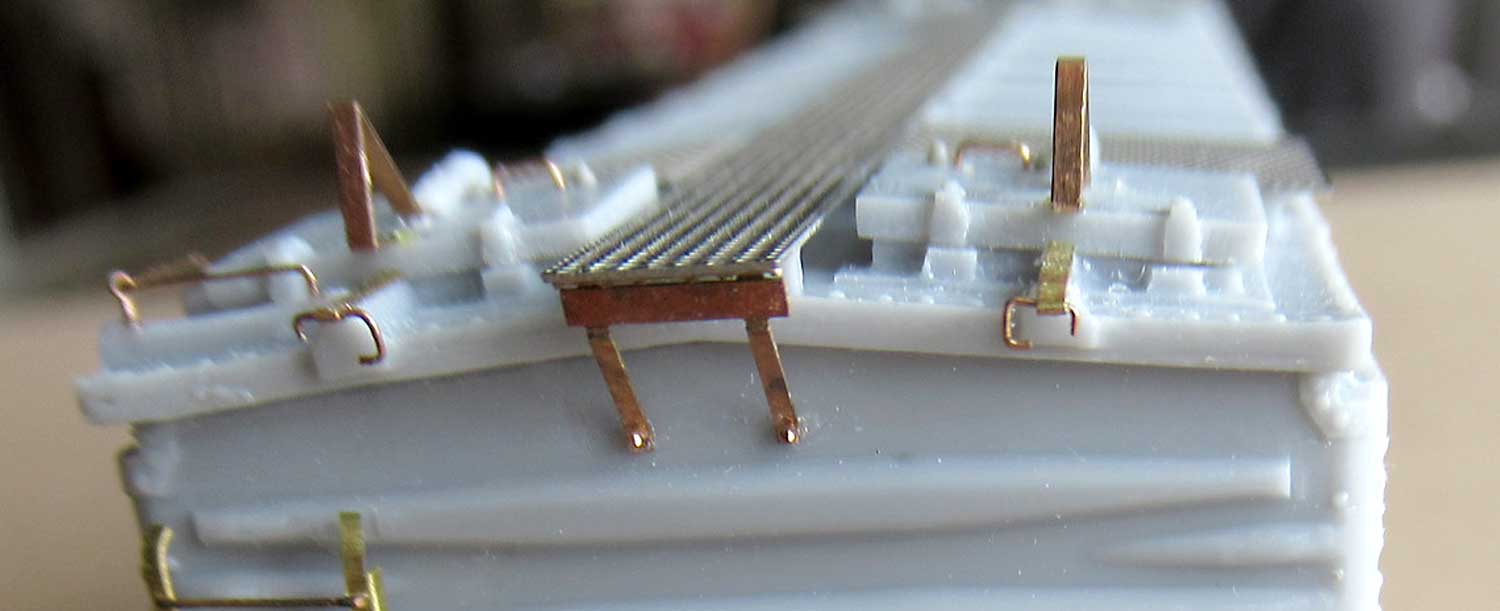
Lastly, the small links were added just off the ends of the roof. These little latches hold the hatch covers open (they seem to be called “sliding link” on one drawing in the SF Historical Society ice reefer book) are bent from 0.008-inch thick phosphor bronze. The material was bent around the tip of one of my long-nosed pliers to try to keep them uniform. The end of a small narrow strip of 0.002 or 0.003-inch brass was wrapped around the long side of the link and soldered to the link at approximate right angles to the strip. The strip was cut to fit against the hatch cover and extend the link just out over the edge of the car. This strip was glued to the cast-on resin ridge on the car roof.
On the second car, I will leave all running board pieces off (after test fitting the laterals) until after painting. A little light overspray of thinned Scalecoat I Gun Metal gets pretty close in appearance I think to galvanized.
I found this to be an excellent kit! I now have another one ready for paint and decal to represent an RR-36, and a third one well on its way to be an RR-39. – John Ritchie
Thanks to John Ritchie for sharing details on his Resin Car Works SFRD reefer kits. Questions and comments can be posted below. Please follow the instructions so your comment can be posted. All comments are reviewed and approved before they appear. To subscribe to this blog, enter your info for a comment and check the last box to notify of new posts by email. Share the blog link with other model railroaders.
These cars are real gems. Nicely done.
John,
That is excellent work on those beautiful models. Thank you, very much, for posting.
Absolutely fantastic build and thanks for sharing! Are there any of these SFRD kits available? I would really like to build a few of these reefers.
Santa Fe all the way
Tim, the casting runs sold out. Frank is working on a couple more SFRD reefers but a production date has not been set. – Eric
Thank you Eric and I’ll keep watching. I hadn’t become a subscriber to RCW until it was apparently too late. Meantime I’ll work with what I have, which is a few Sunshine kits and some scratch building for some of these cars including this one.
Cheers!
Tim
Frank ran out of decals for this particular model. He’s contemplating a more universal Santa Fe reefer decal set which would cover this reefer and others. Assuming that comes to pass, this model could be reintroduced if demand warrants.
Nicely done John. These are some very nice enhancements to an already nice model. Thanks for sharing. Now I need to add more details to my pair of kits.
George Toman
Thanks, George. Soon after the first of the year, I hope to be able to show you a couple Sunshine M-15k box cars built incorporating the information in your article on your build of the convention car.