Jim Kubanick sent details on his latest HO Scale freight car kit build. Here’s Jim with the scoop.
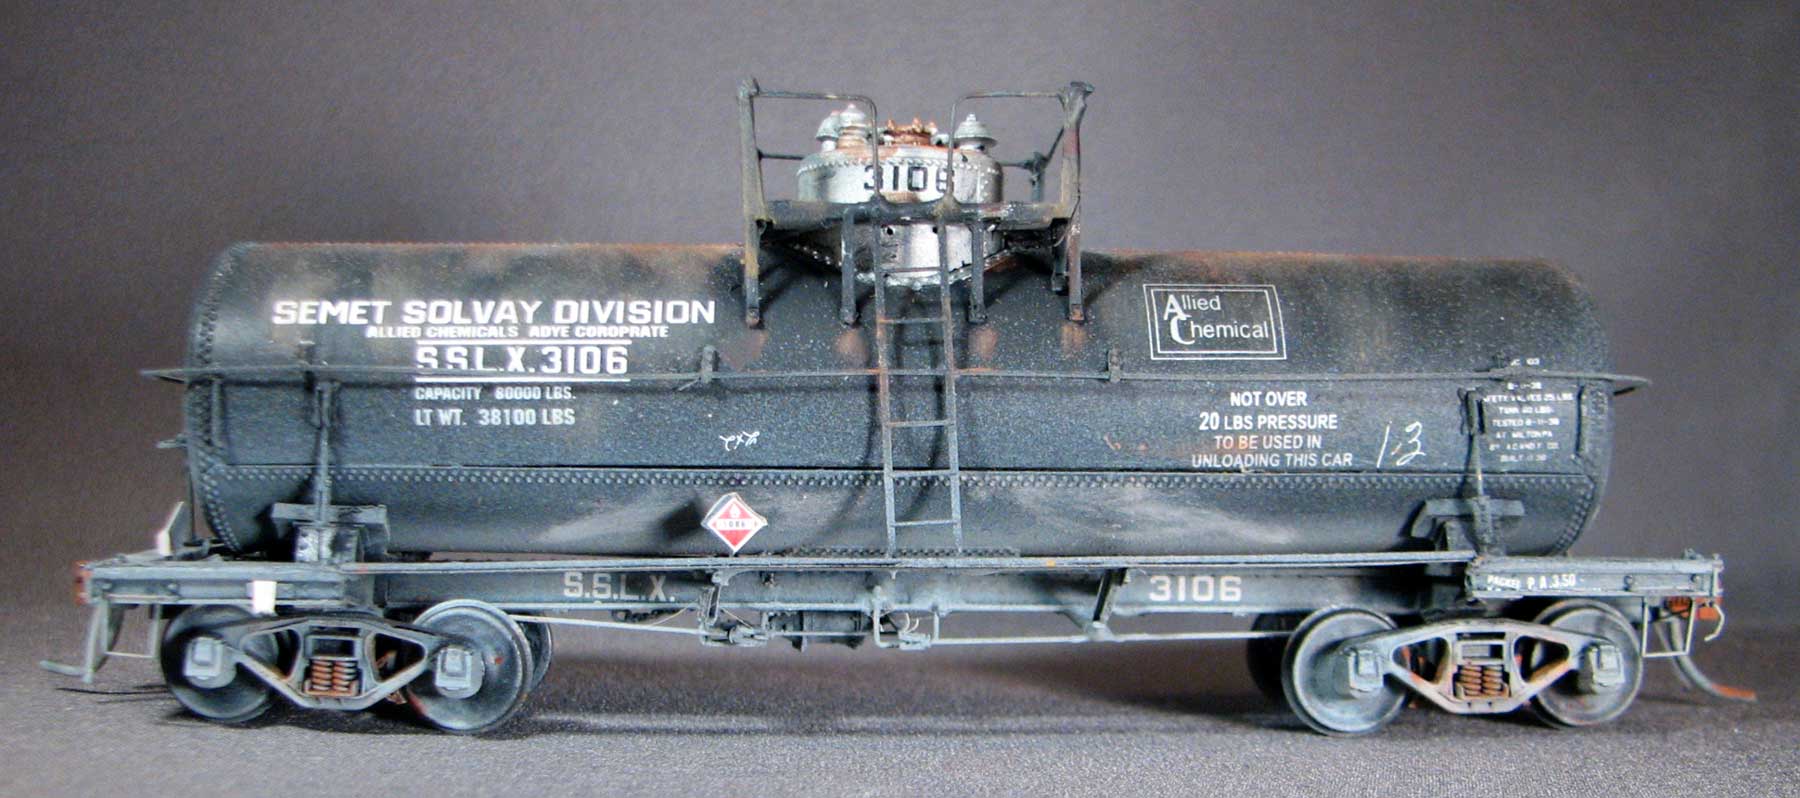
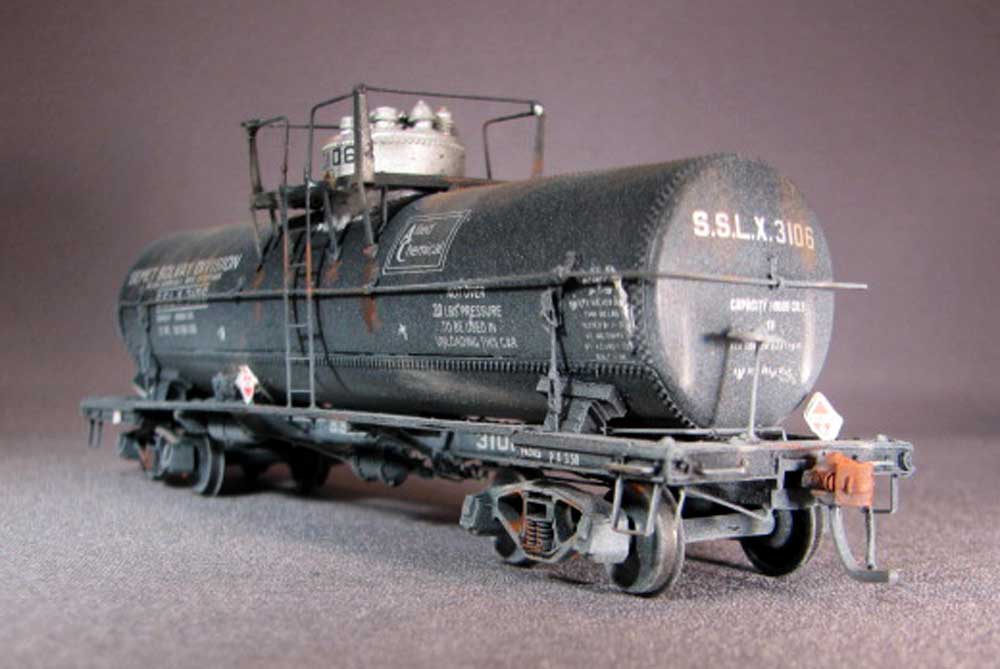
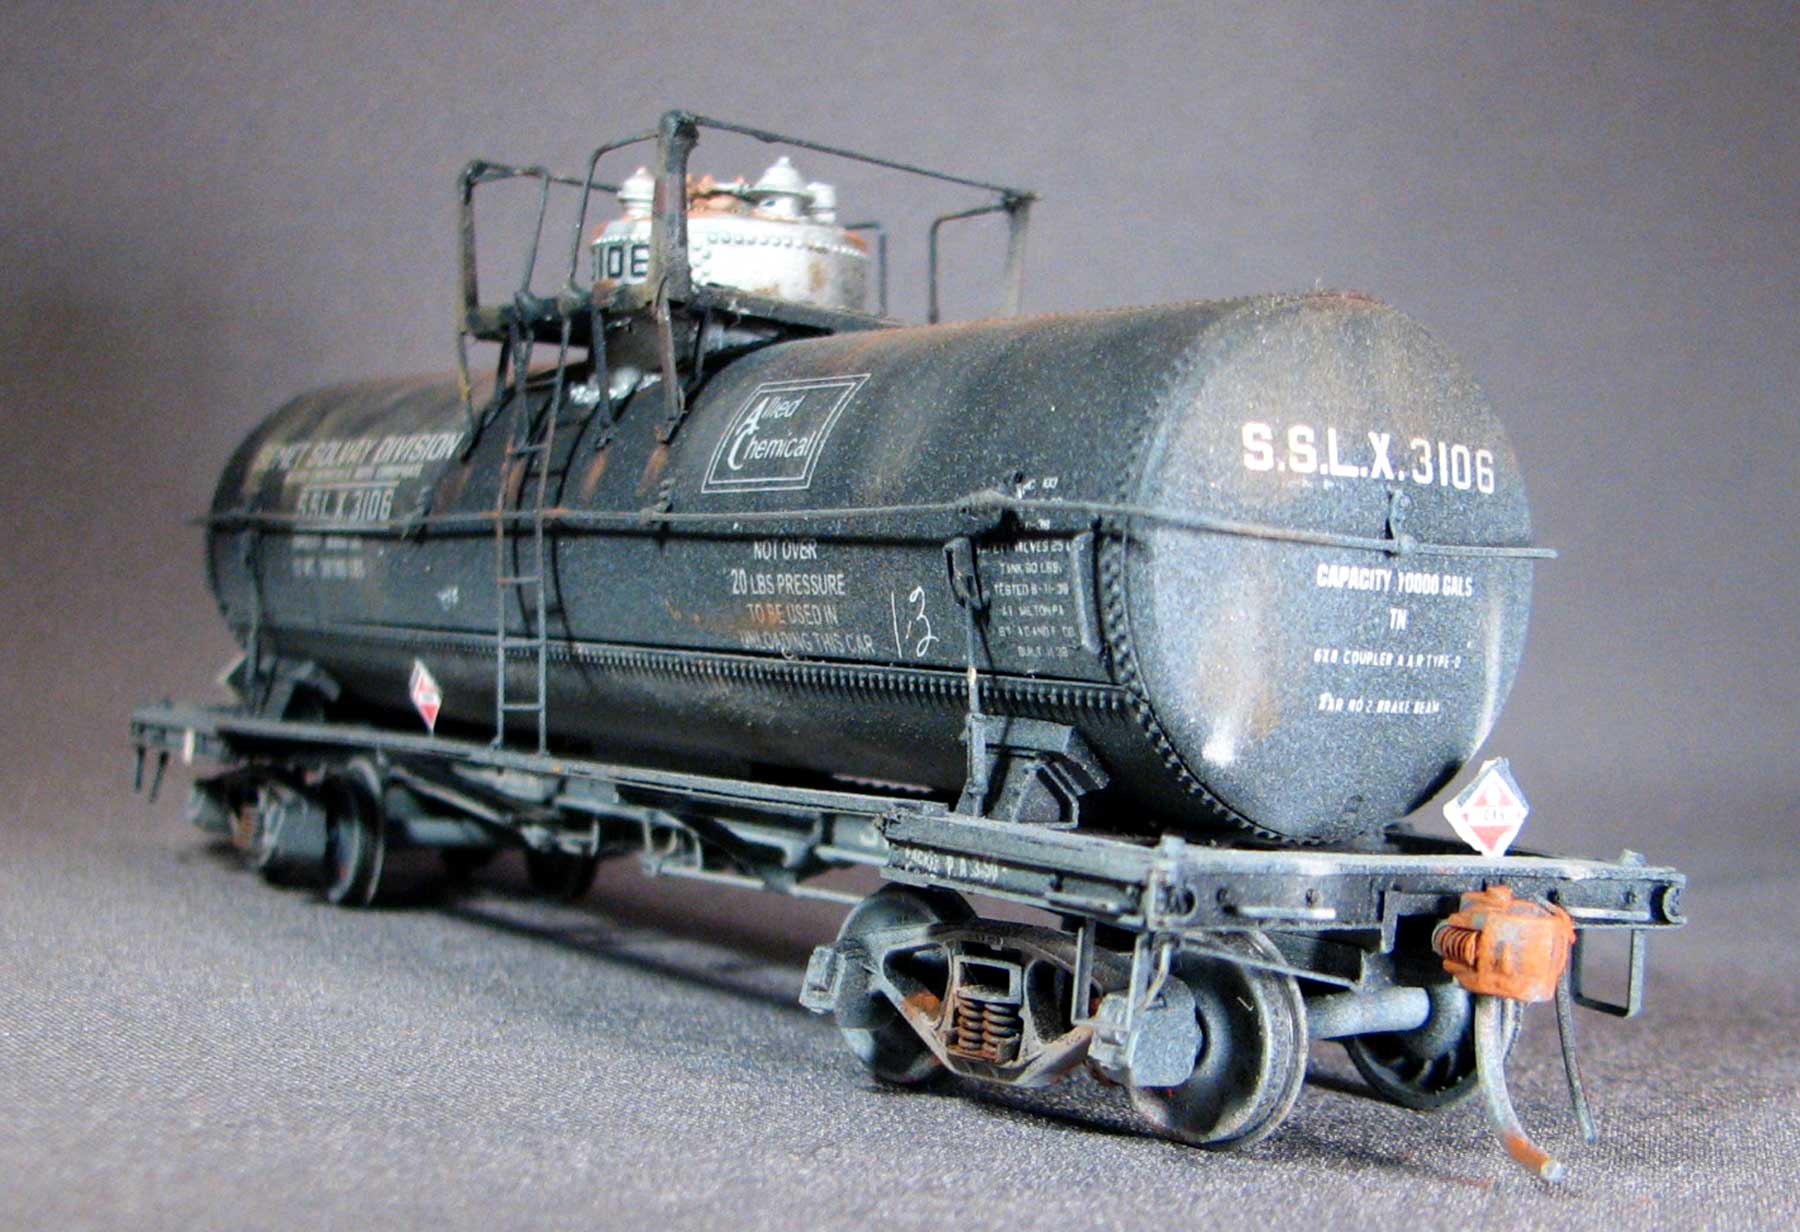
Well, I’m back to building another tank car. Semet-Solvay 3106 is a Yarmouth Model Works kit modeling a Type 27, 10,000-gallon tank car built by ACF in 1938 to transport industrial solvents. The platform surrounding the large expansion dome is unusual for this type of car and this makes it a very interesting model, in my opinion.
This is a very well designed resin kit that goes together as intended. It is not a quick assembly project as there are many steps involved, but each step is clearly explained in the excellent nine pages of instructions. Many of the assembly steps and parts locations are illustrated with very good photos in the instruction sheet. I built my model following the kit instructions closely (almost). There are a number of templates included in this kit to aid in assembly. There is even a mask to aid in the painting of the dome. Excellent photo etchings are also present which make an easy build of some of the more delicate assemblies.
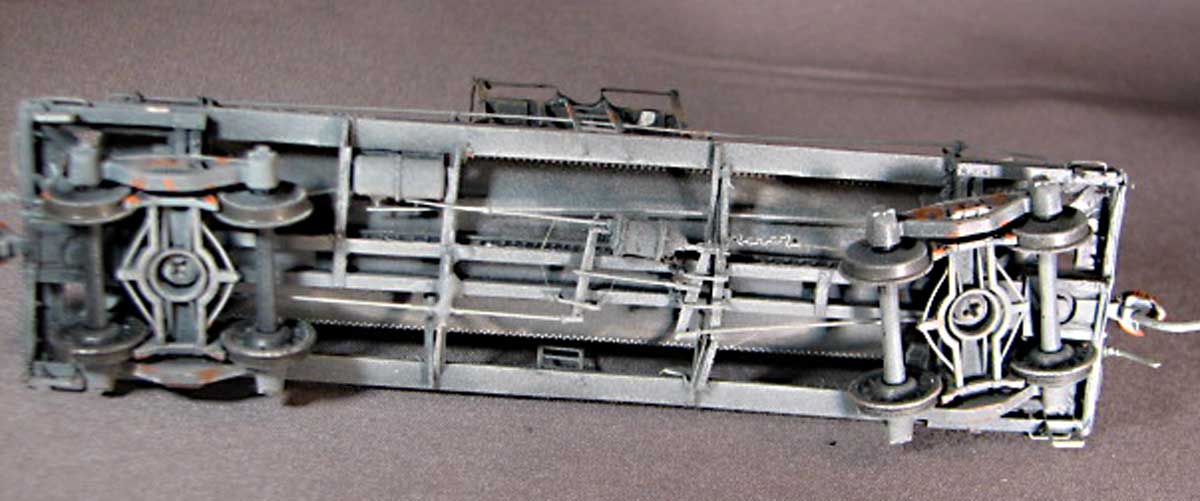
Building the underframe and adding the brake components is the most complex process in building a tank car but it is not difficult with this kit as long as the assembly instructions are followed closely. The instruction photos go a long way to guide the builder. Also, the kit is engineered so the problem of warped walkways is eliminated.
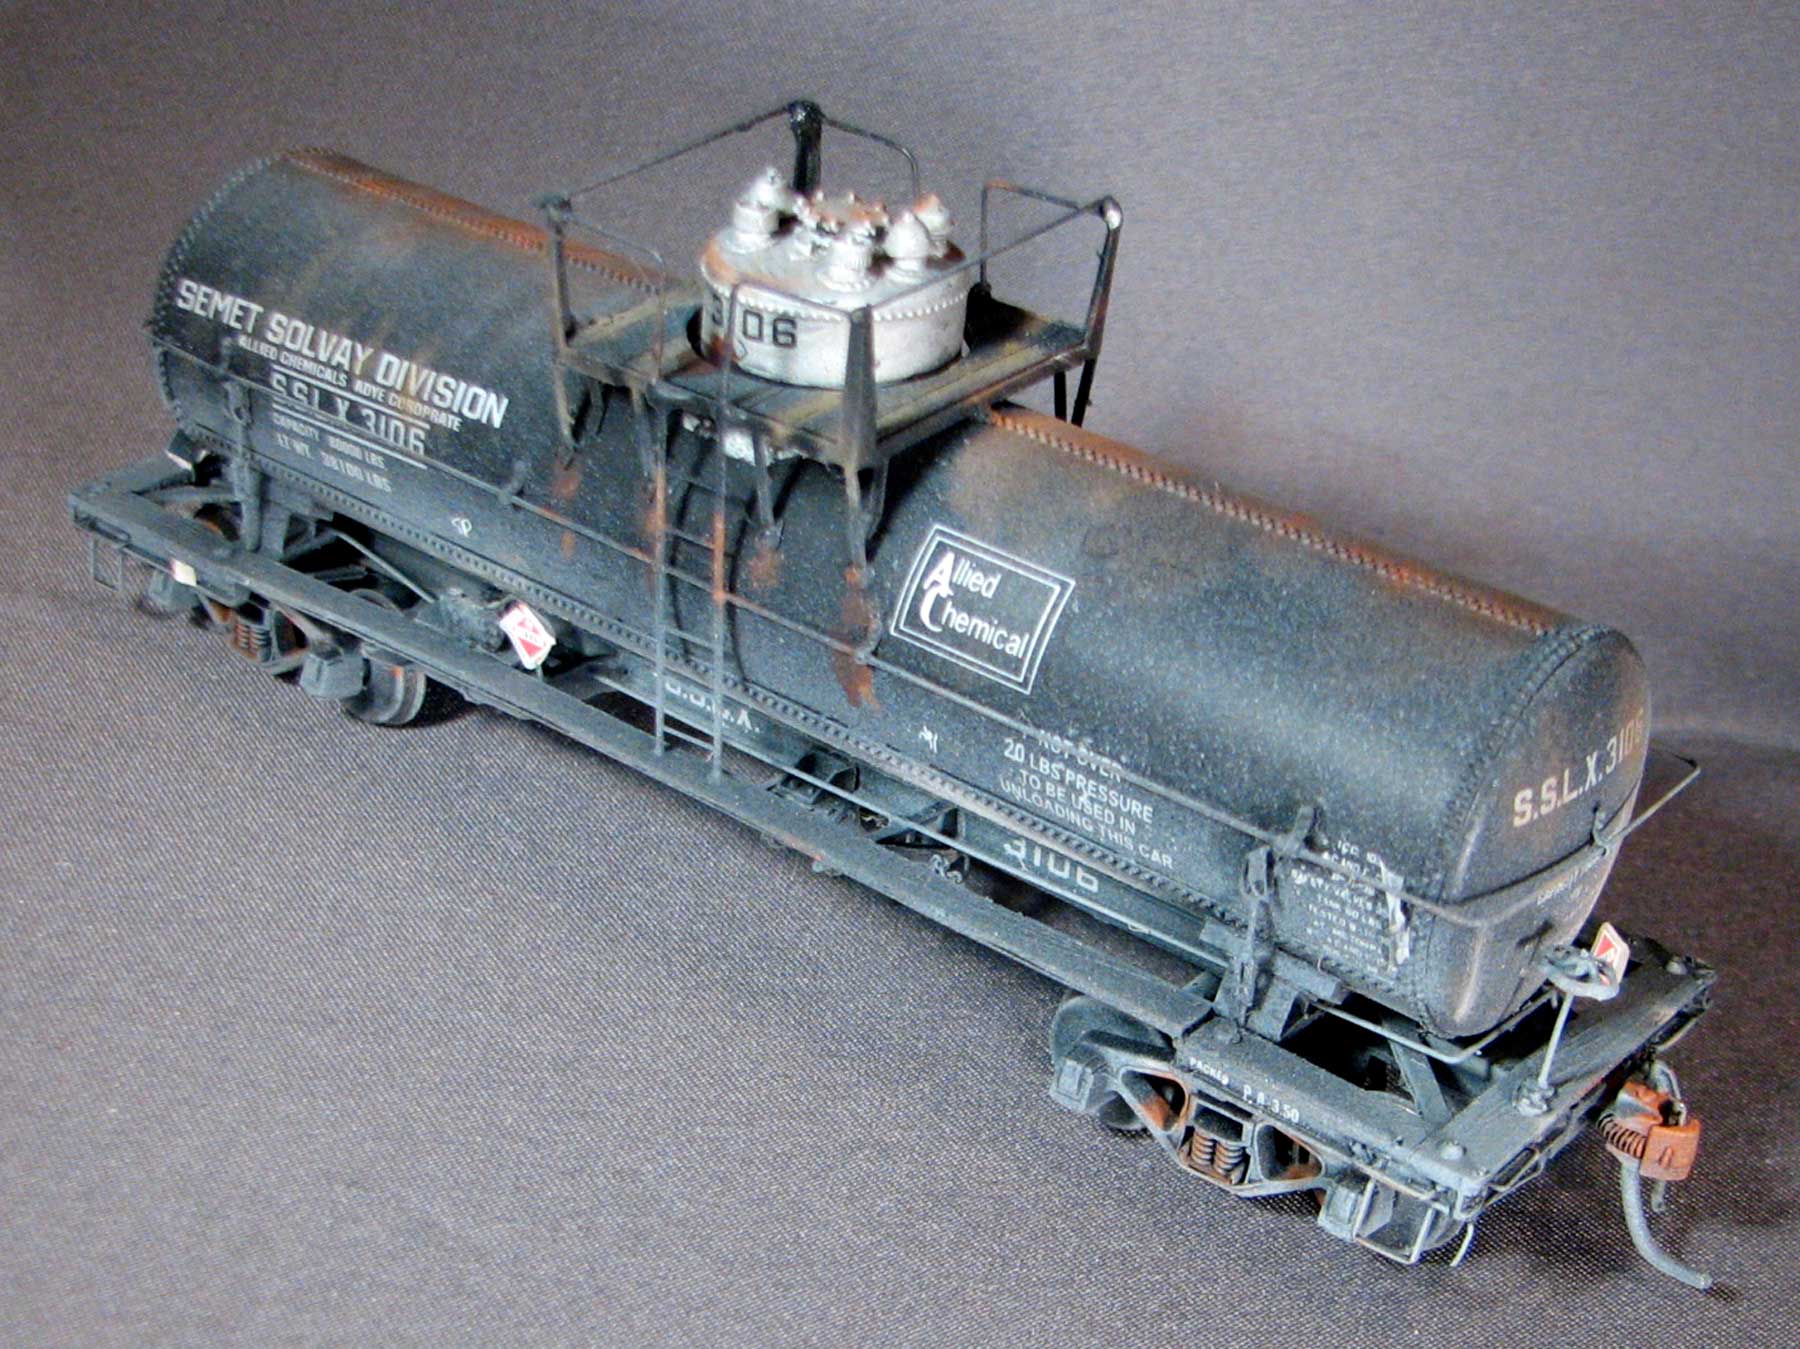
After completing the underframe assembly, I started working on the tank, as the instructions suggested. The tank has the handrail bracket holes pre-drilled, so this process is greatly simplified. The handrail brackets are brass castings. Beautiful etchings are provided for the dome platform, tank anchors, brake levers and drilling templates for the sill steps. Time was spent in assembling the dome platform and this turned out to be a beautiful model in itself.
Next, I attached the tank to the frame, as directed, and proceeded to add the tank detail. The tank itself is a beautiful resin casting. After preparing the tank saddles to properly seat the tank, I drilled and tapped through the bolsters for a long 2-56 kingpin screw that screws into the tank body. The dome is a separate casting but is keyed for proper alignment. Here is where I made the first of three errors in building my car. I guess I got caught up in the excitement of building the platform and proceeded to attach it to the tank prematurely. I elected to use five-minute epoxy to mount the platform rather than pinning the legs as directed. Having done that, I went ahead and drilled holes in the walkways for the ladders with the template provided. Then I found the ladders did not line up with the opening in the platform railing, so I had to drill additional holes in the running boards to correct the ladder alignment. I mounted the tank railing per the instructions. However, if I were to do it again, I would fall back on the hypodermic tubing approach to better keep the handrail aligned at the joints. At this point, I went ahead and completed the detailing of the car and prepped it for painting with an alcohol wash. The entire car was airbrushed with Scalecoat Engine Black and set aside to dry.
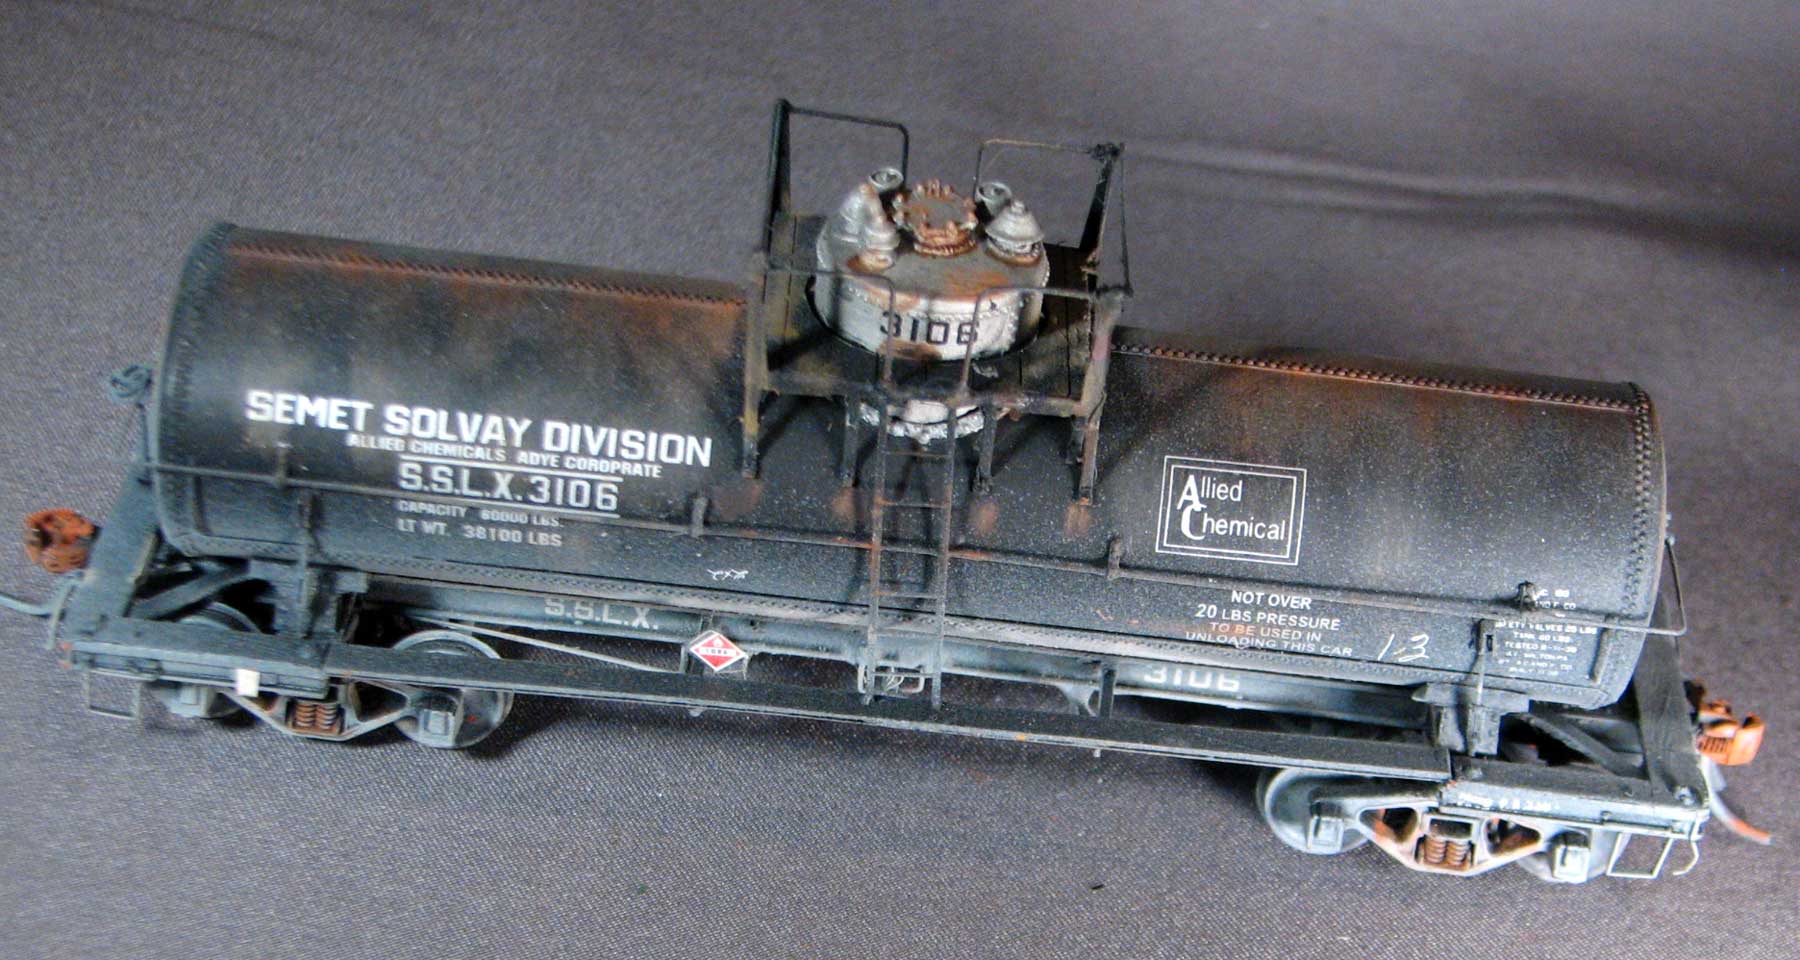
I left the car sit for a week or so to dry and turned my attention to several other projects on my workbench. When I returned to the tank car to start the decal process I found the dome decals were printed in black and realized I had forgotten to paint the dome silver. I corrected this by micro-brushing the dome with Testor’s Steel. Fortunately, this was not difficult to do. Next I found that I did not mount the tank end grabs before painting and would have to drill the mounting holes. I was lucky that the tank diameter was large enough to allow me to get my drill above the walkway to drill the holes then mount and paint the grabs.

I applied the excellent decals from Black Cat Publishing directly to the Scalecoat finish. These decals come with a diagram sheet that has numbered keys that aid in proper lettering placement. Two lettering options are included in this set. I chose the version that includes the Allied Chemical logo as I believe it is more appropriate for my era. The placard decals came from Microscale.
My standard decal approach is to first overcoat the decals with Floquil Crystal-Coat then follow with a final coat of Testor’s Dullcoat. I feel the Crystal-Coat helps hide the edges of the decals without adding significantly to the film build up. However, this is a carry-over from my days with Champ decals and is probably not necessary with today’s thin film decals.
Finally, the car was given a light airbrushing of Scalecoat II 2116 Flat Grime #1 followed by additional weathering with various colors Pan Pastels. I was a little more generous than usual with rust shades around the dome and tank top as these areas are most likely to be splashed with cargo solvents which can be quite aggressive on the car finish.
I really enjoyed building this kit. The instructions and processes have taken a giant step toward easing the assembly involved in earlier resin tank car builds. While it is a complex car, the many steps make it a long, though easy, process toward producing a really eye-catching piece of rolling stock.
Pierre Oliver indicates that this kit is a result of a team effort and credit is given in the instructions to the nine people involved. I think this is the best rail car to come out of a committee since the PCC trolley car.
Thank you Jim Kubanick for sharing your notes and photos on your tank car build. Sadly, this kit was a limited production from Yarmouth Model Works and is no longer available.
Questions and comments can be posted below. Please follow the instructions so your comment can be posted. All comments are reviewed and approved before they appear. To subscribe to this blog, enter your info for a comment and check the last box to notify of new posts by email. Share the blog link with other model railroaders.
Beautiful weathering work. Out of curiosity is the lettering supposed to read “coroprate” or should it have been “corporate”?
I suspect that it should read as “Allied Chemical & Dye Corporation”, like in this photo from Tony Thompson’s blog site:
http://modelingthesp.blogspot.com/search?q=allied+chemical
Are these kits still available from Yarmouth Models?
Charlie, as noted near the end of the article, “this kit was a limited production from Yarmouth Model Works and is no longer available.” – Eric
Very nicely done Jim! I have always enjoyed seeing your work.
I like the splash effect on the underside Jim, very effective I think.
Jim Excellent work a beautiful model.
Excellent model! I missed out on these. How long did these cars survive in revenue service?
I suspect at least some of these lasted beyond our cut-off date as the SSLX cars were built between 1938 and 1940. RP CYC’s 2 and 3 also show some very similar cars built for DuPont. No disposal information was found, however.
Jim