George Toman returns with a technique to build fairly common underframe details. Here’s George with the scoop. Click on any image here to review a larger size.
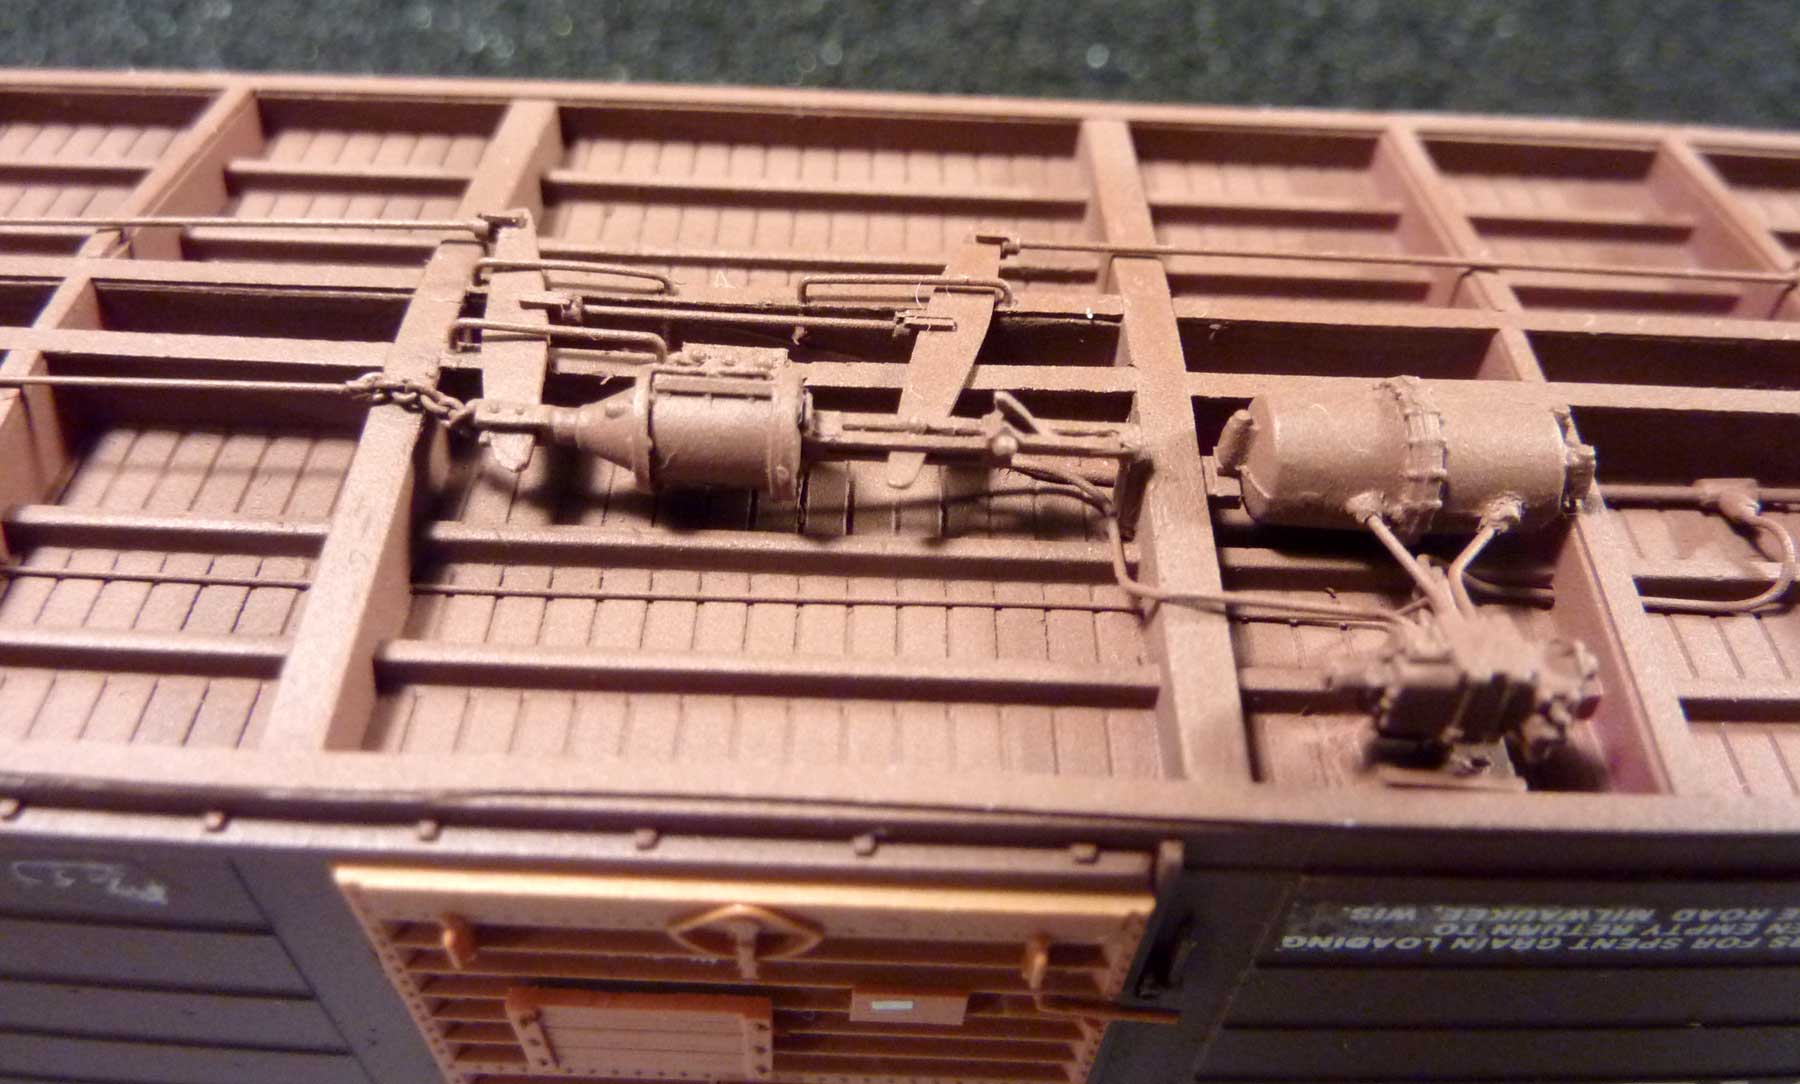
Detailing freight car underframes has always been a high priority with me. A couple of common slack adjusters are the Royal F Type and Universal Type. I found these fairly easy to replicate using styrene. My goal was to develop a method to accurately construct these parts using common tools. One can be seen in the lead image mounted behind to the brake cylinder on a Milwaukee Road ribside box car.
Here’s a Universal Slack Adjuster installed on a Milwaukee Road GATC double door box car.
What follows is an illustrated tutorial on my process to make these detail parts. I have used simple tools and Evergreen styrene.
Universal Slack Adjuster

Pictured above are the tools I used to punch holes in 0.005-inch thick styrene. I mounted a #78 drill bit with the blunt side out to punch of holes in the thin styrene. A piece of Basswood was used as a backing to offer a softer surface to punch of holes. You may want to experiment with different hardness of wood for the punch backing to determine what works best for you. Slightly sharpening the blunt end of the drill bit on a honing stone may ease this process. I make my Universal adjusters about 0.060-inches wide by about 0.25-inches in length. I punch the offset holes by eye. You may elect to mark the punch locations. I have also used a self-healing cutting mat instead of the basswood.
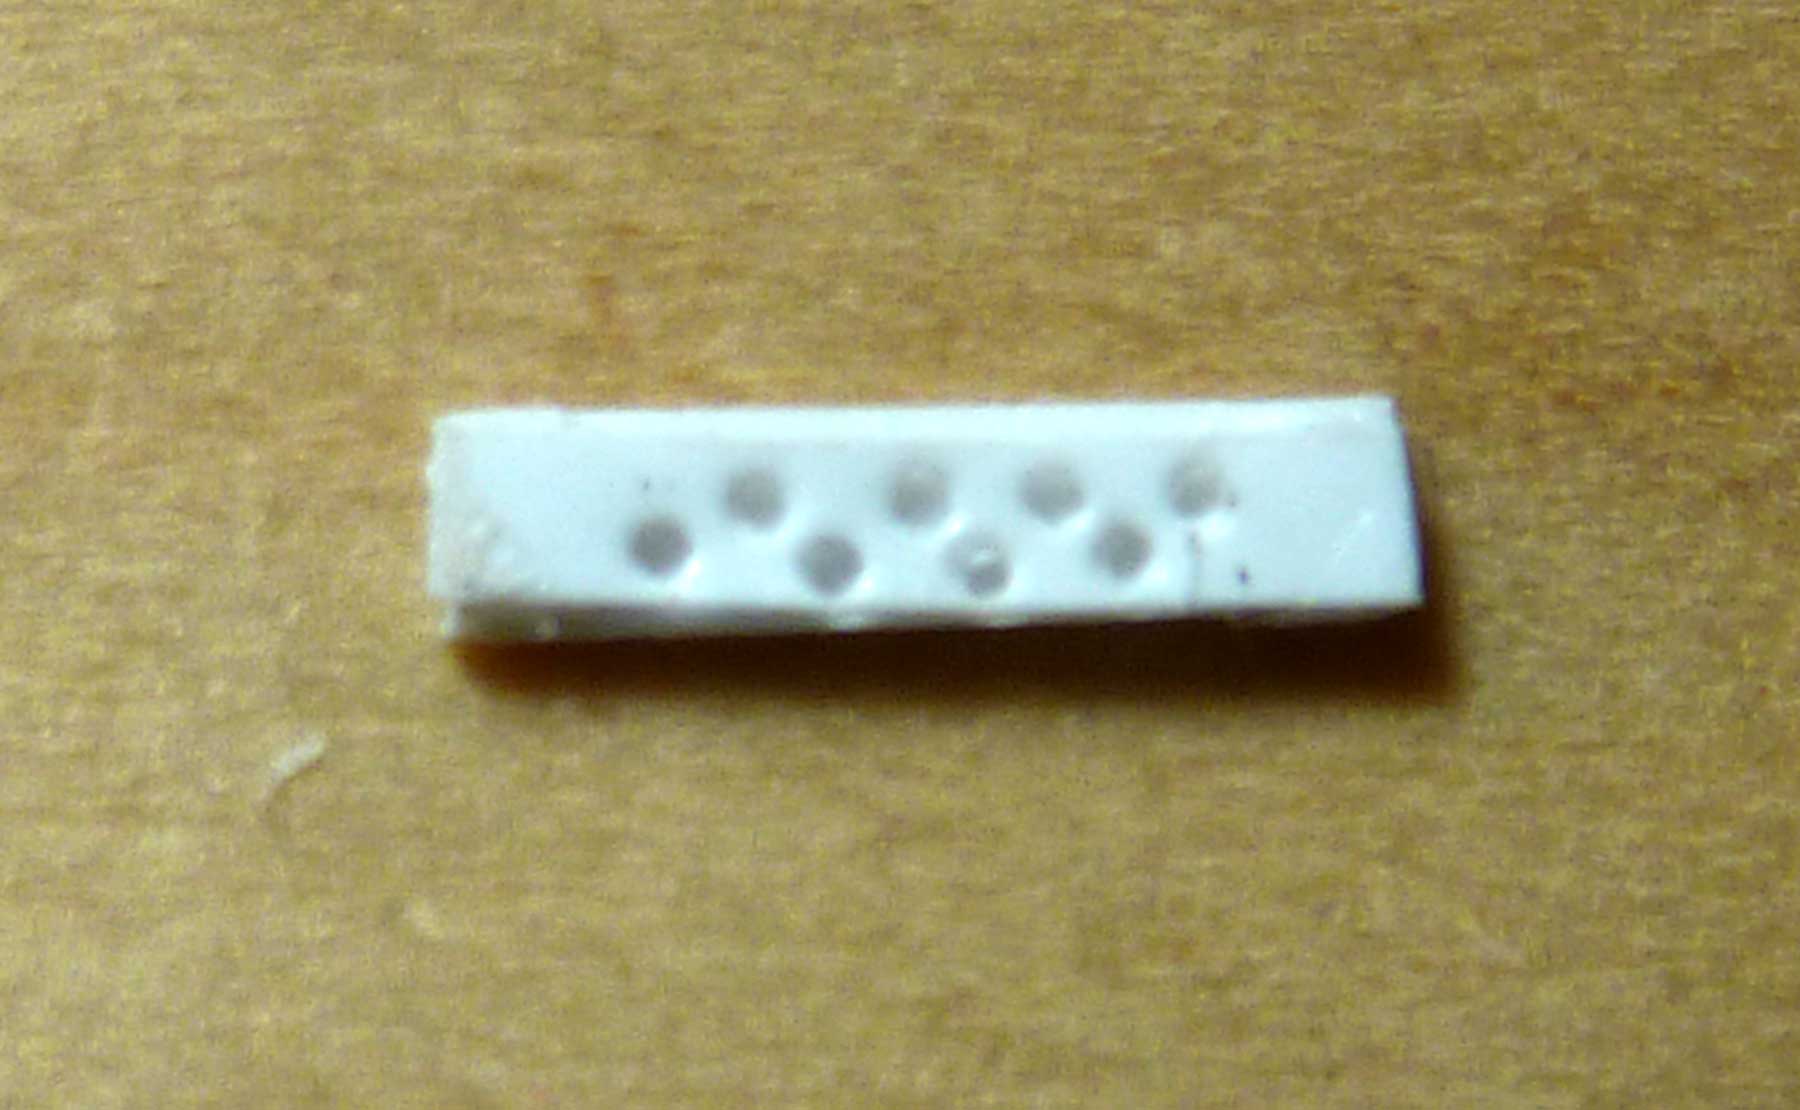
Above is pictured the Universal Type with the punched sheet mounted on top of a plain strip of styrene. 0.015 x 0.020-inch styrene strips were attached as spacers between the two sheets to create a gap for the brake lever. The bottom sheet is a similar sized piece of 0.010-inch thick material for strength. After the glue is dry, you may clean these up with sanding boards or files. I use 320 grit sanding sticks (emery boards) from Stevens International .
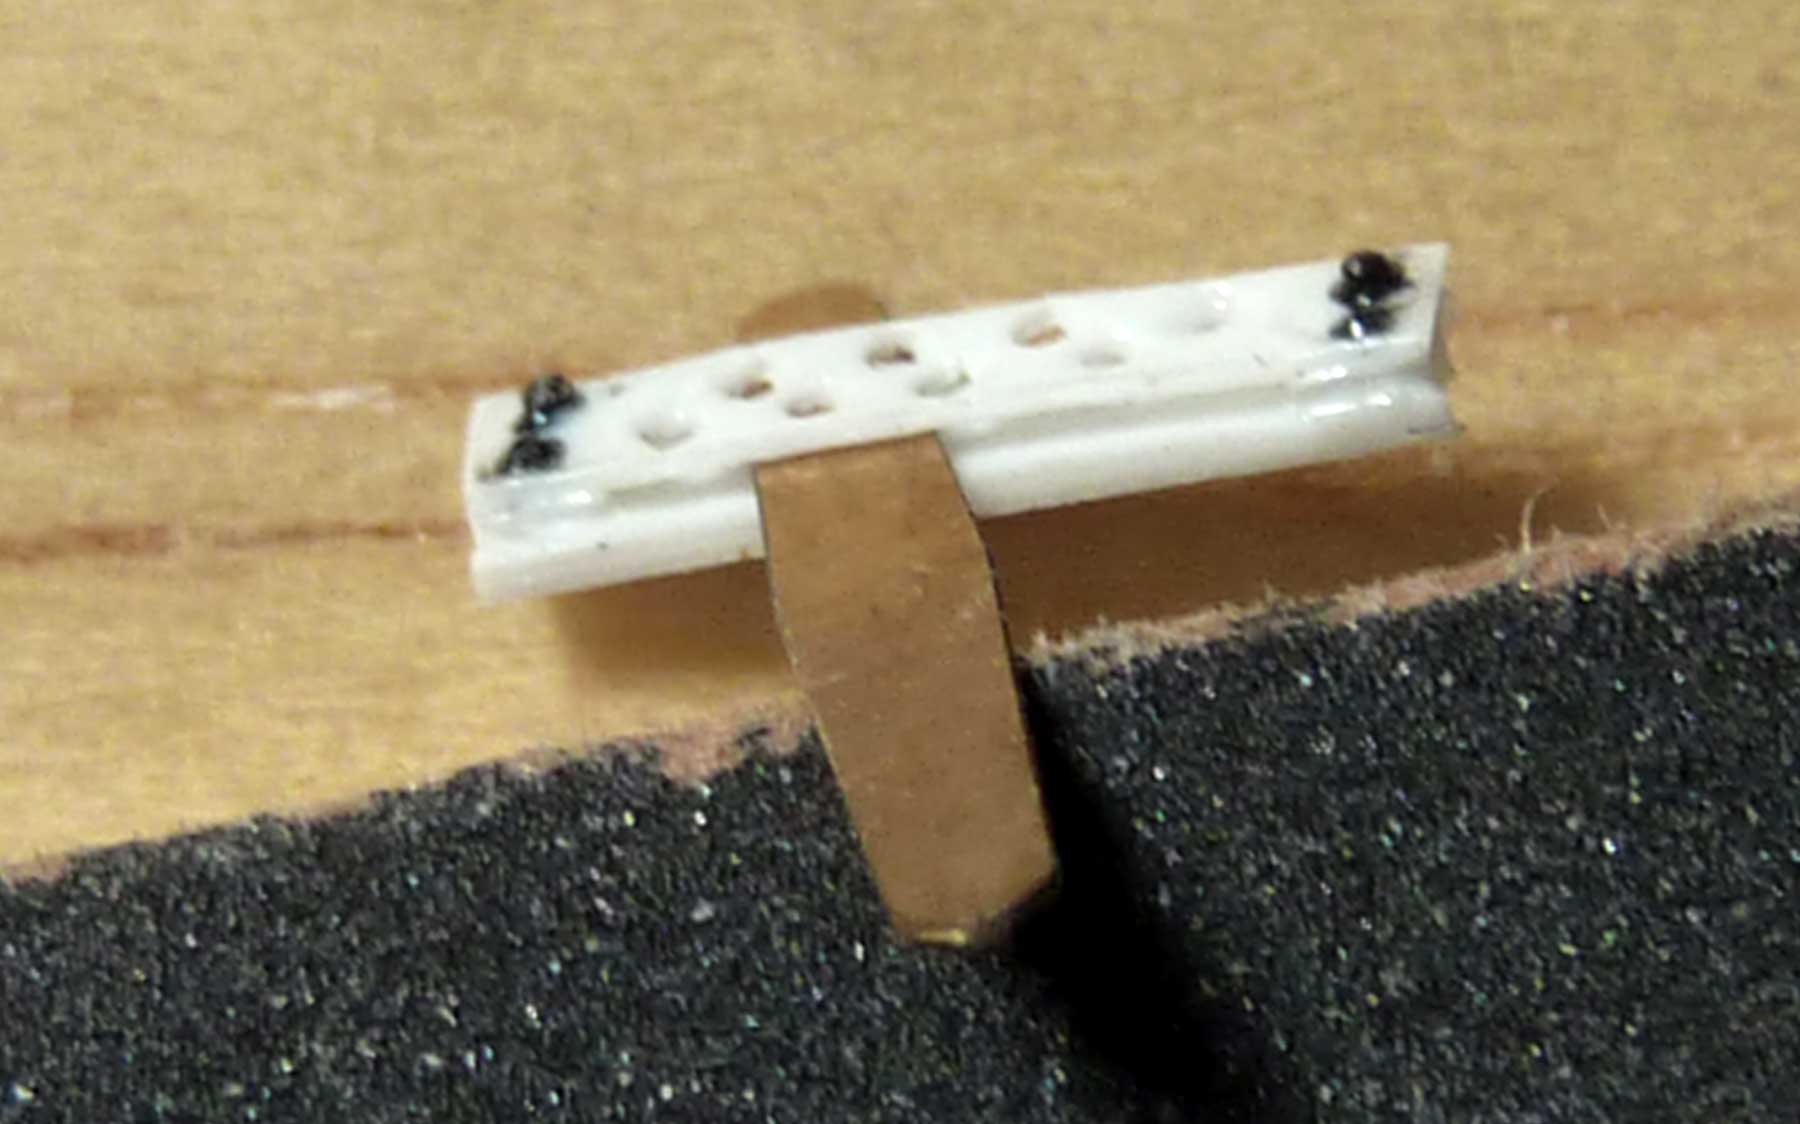
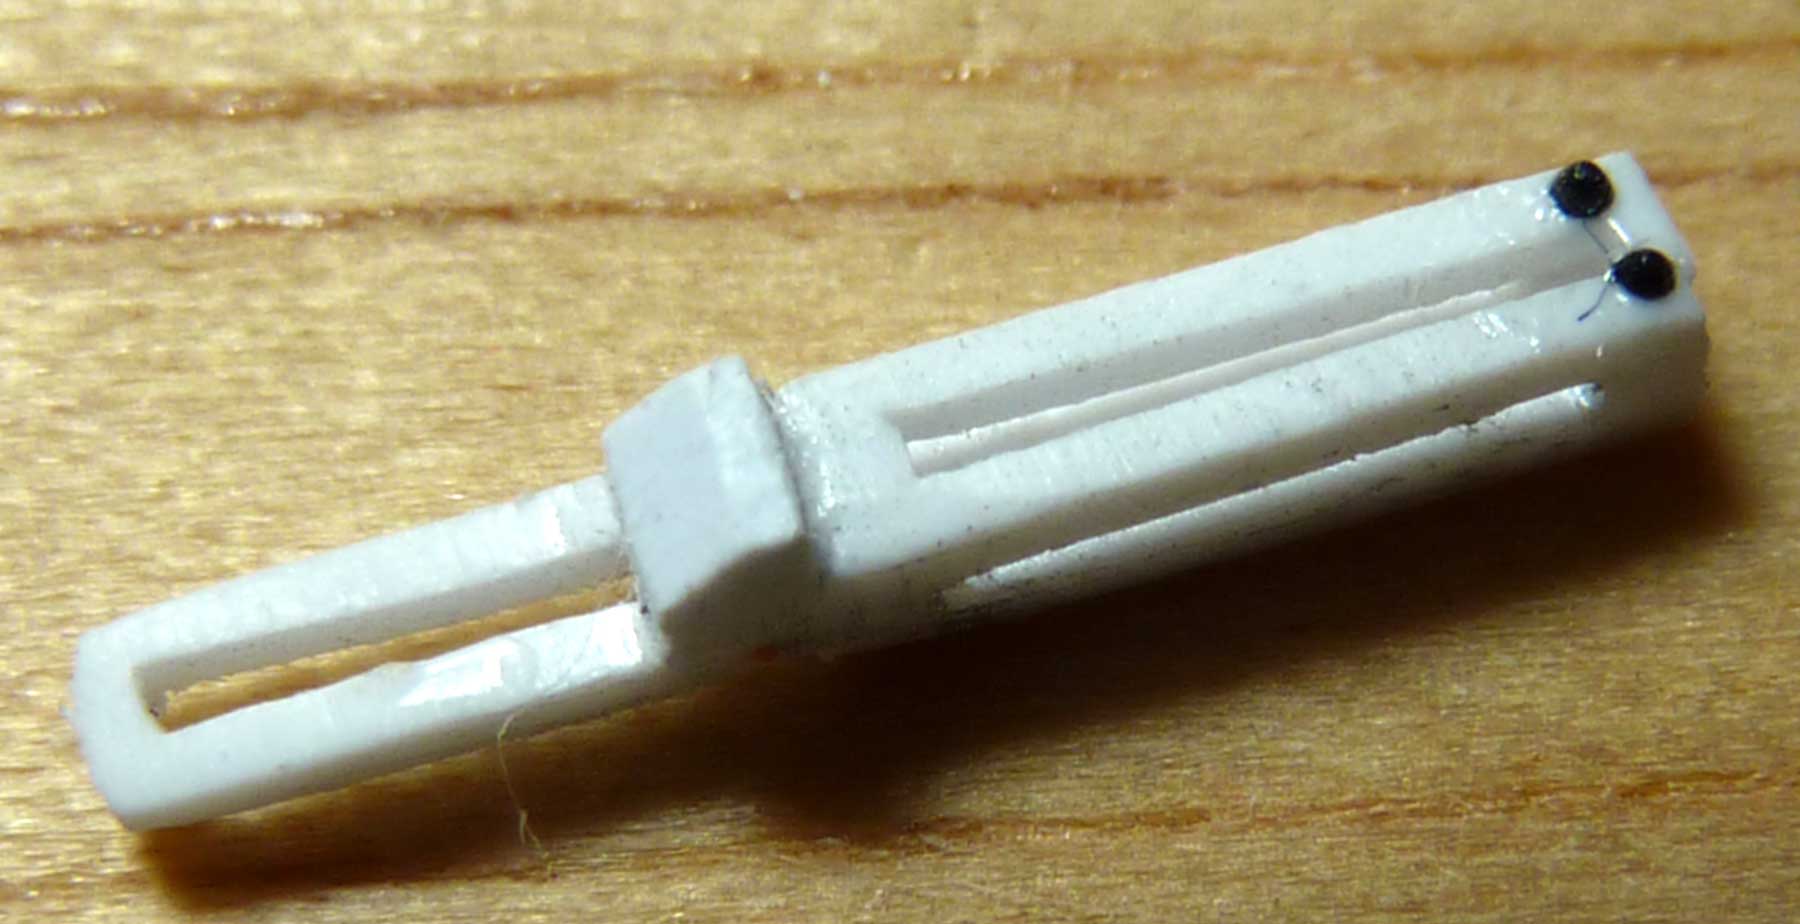
I added rivets harvested from an old Athearn car kit at each end as seen above. These rivets are easy to harvest from an old kit by carefully slicing them from the car body with a fresh single-edge razor blade or scalpel.
Royal F Type Slack Adjuster
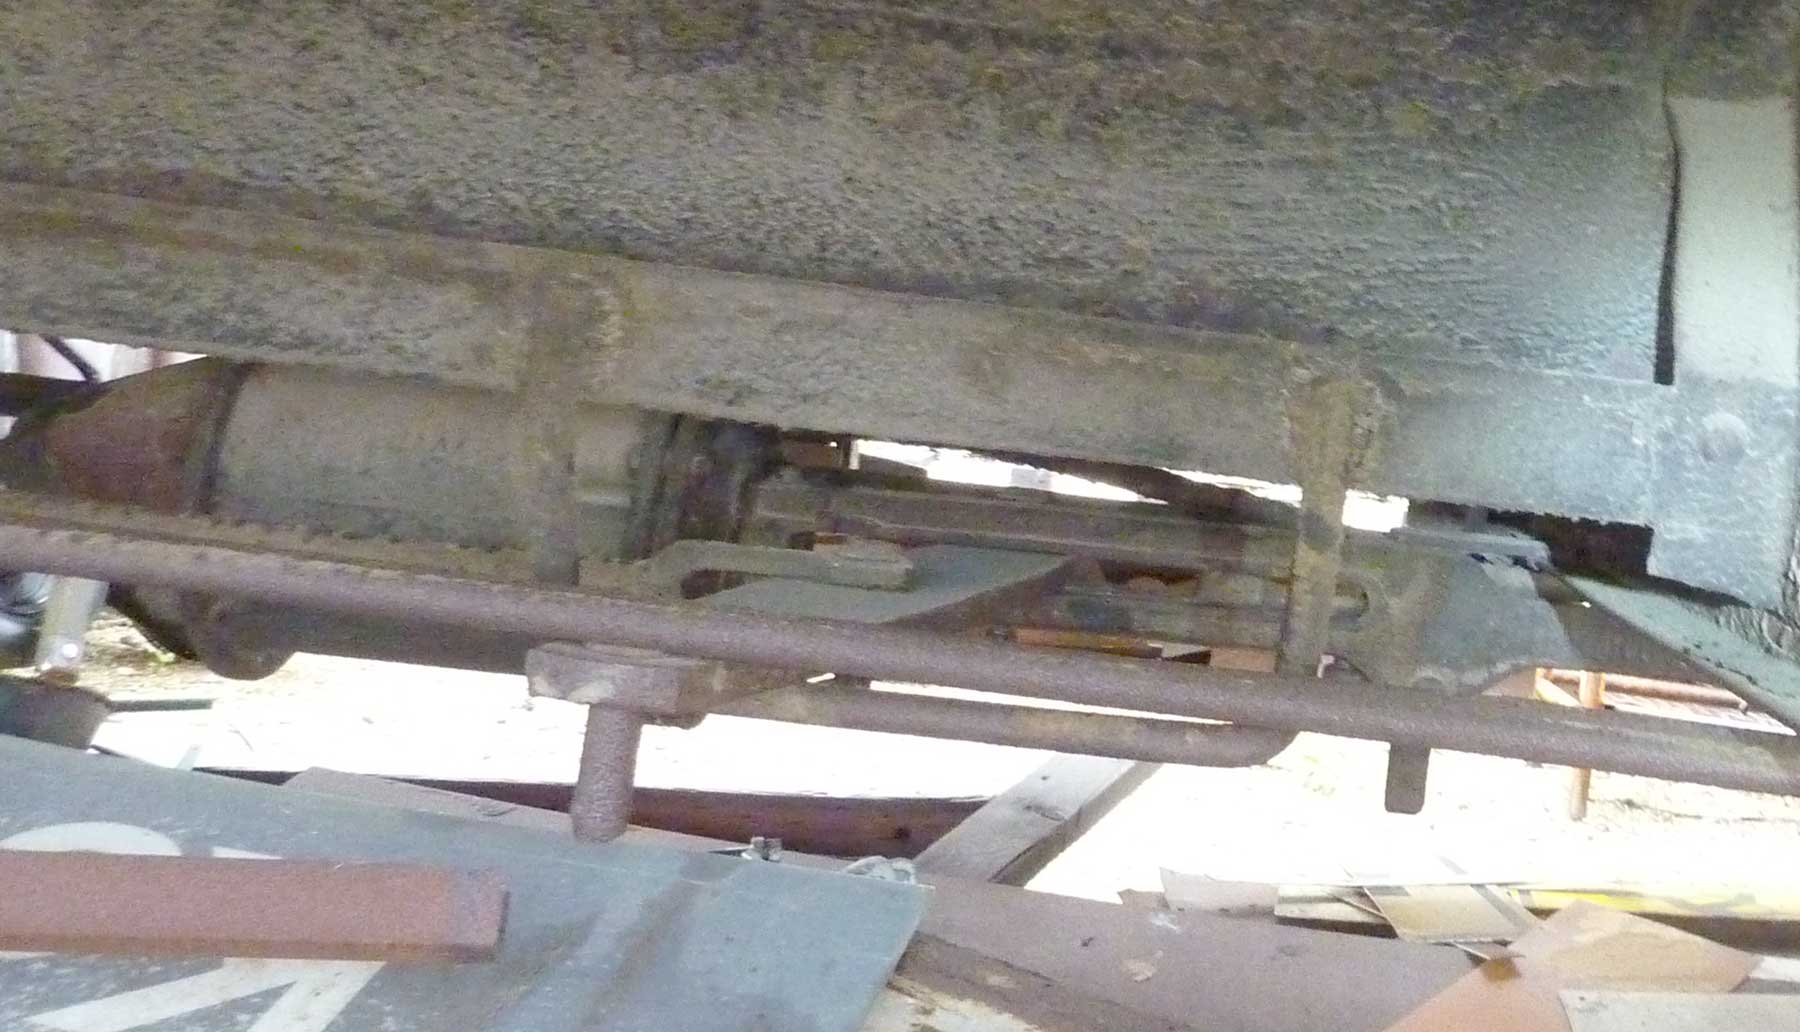
On a visit to the Illinois Railway Museum, I took some photos of a Milwaukee Road URTX horizontal seam reefer for another project. I was able to grab this fairly good shot of the cylinder mounted Royal F Type slack adjuster. The car was used for storage and had a lot of junk under it, but was happy to get a picture of an actual Royal F Type.
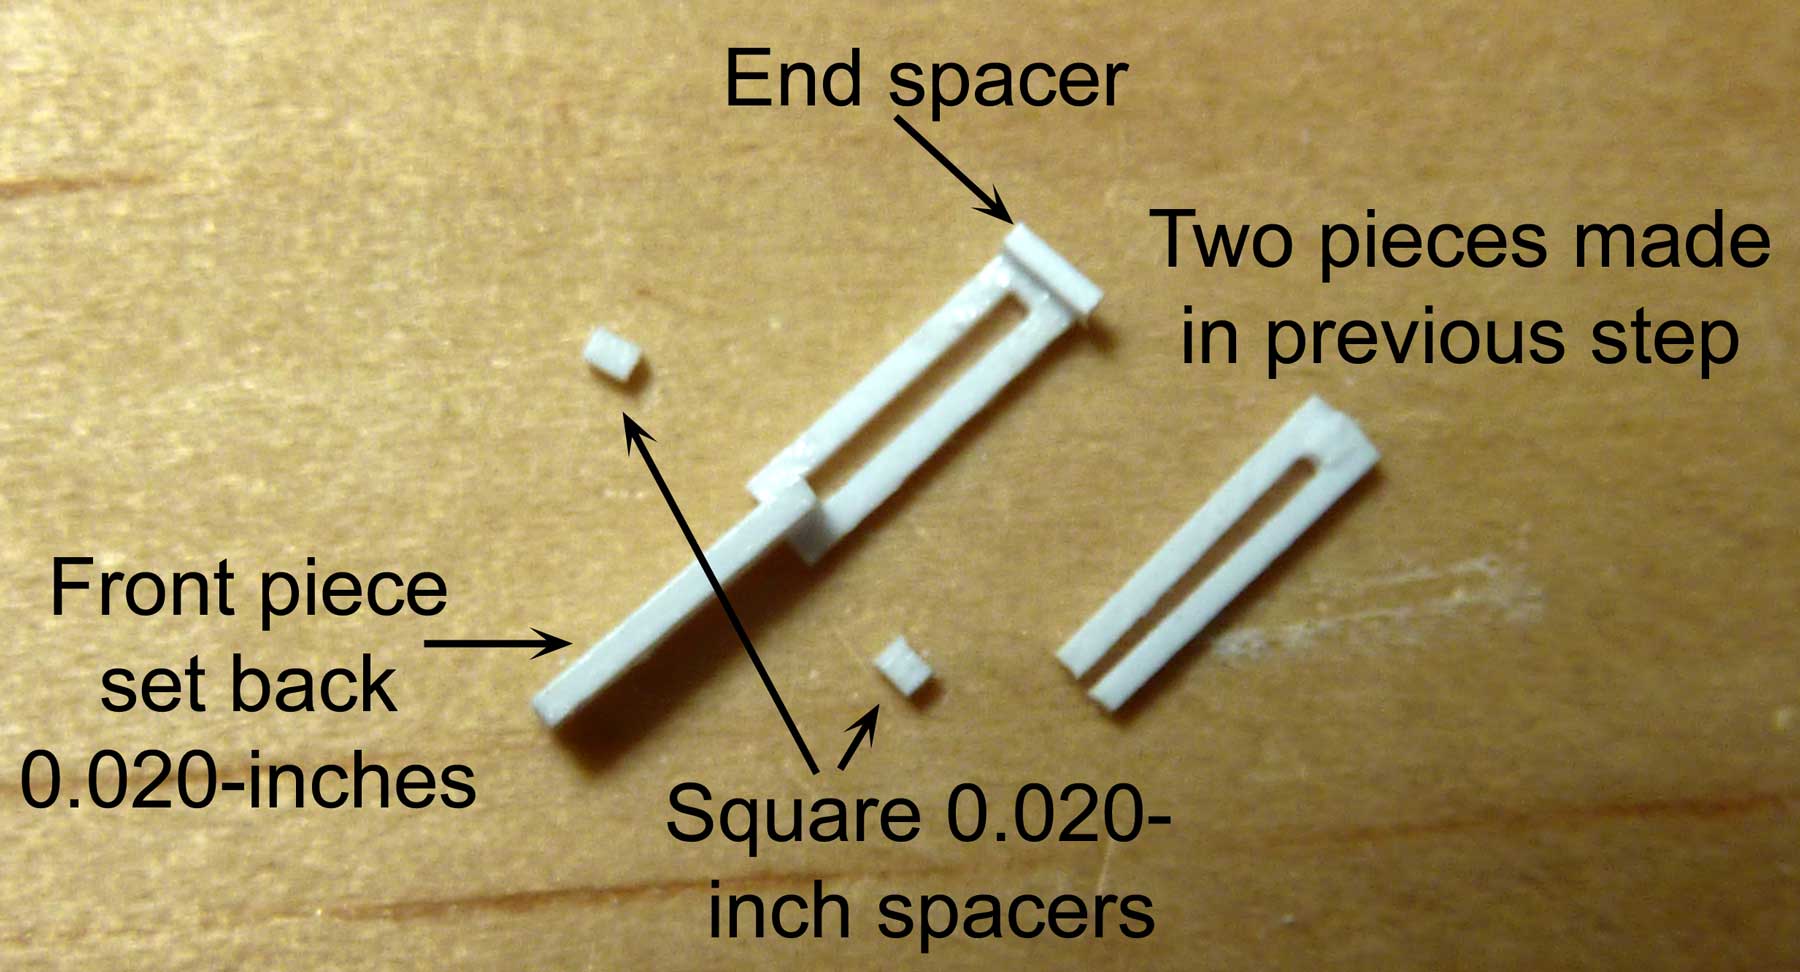
For the Royal F Type I uses 0.020 x 0.020-inch styrene strips cut and glued. I make these in assemblies and let them thoroughly dry between steps before cleaning them up with 180 and 320 grit sanding sticks.

Pictured above are the assemblies used to make the Royal F slack adjuster. I make the spacers longer than necessary and put and place then glue and trim after the glue dries. The 0.040 x 0.060-inch styrene piece on the left will be used to help give the pawl area the proper shape. The piece on the far right will be installed as a spacer on the end. It is 0.020-inch square styrene stock cut to 0.060-inch length.
As the subassemblies are glued together, note the front piece is rotated 90 degrees and spaces the two rear pieces. We only glue the one front piece to one rear piece and the 0.020 x 0.020 x 0.060-inch end spacer in this step.
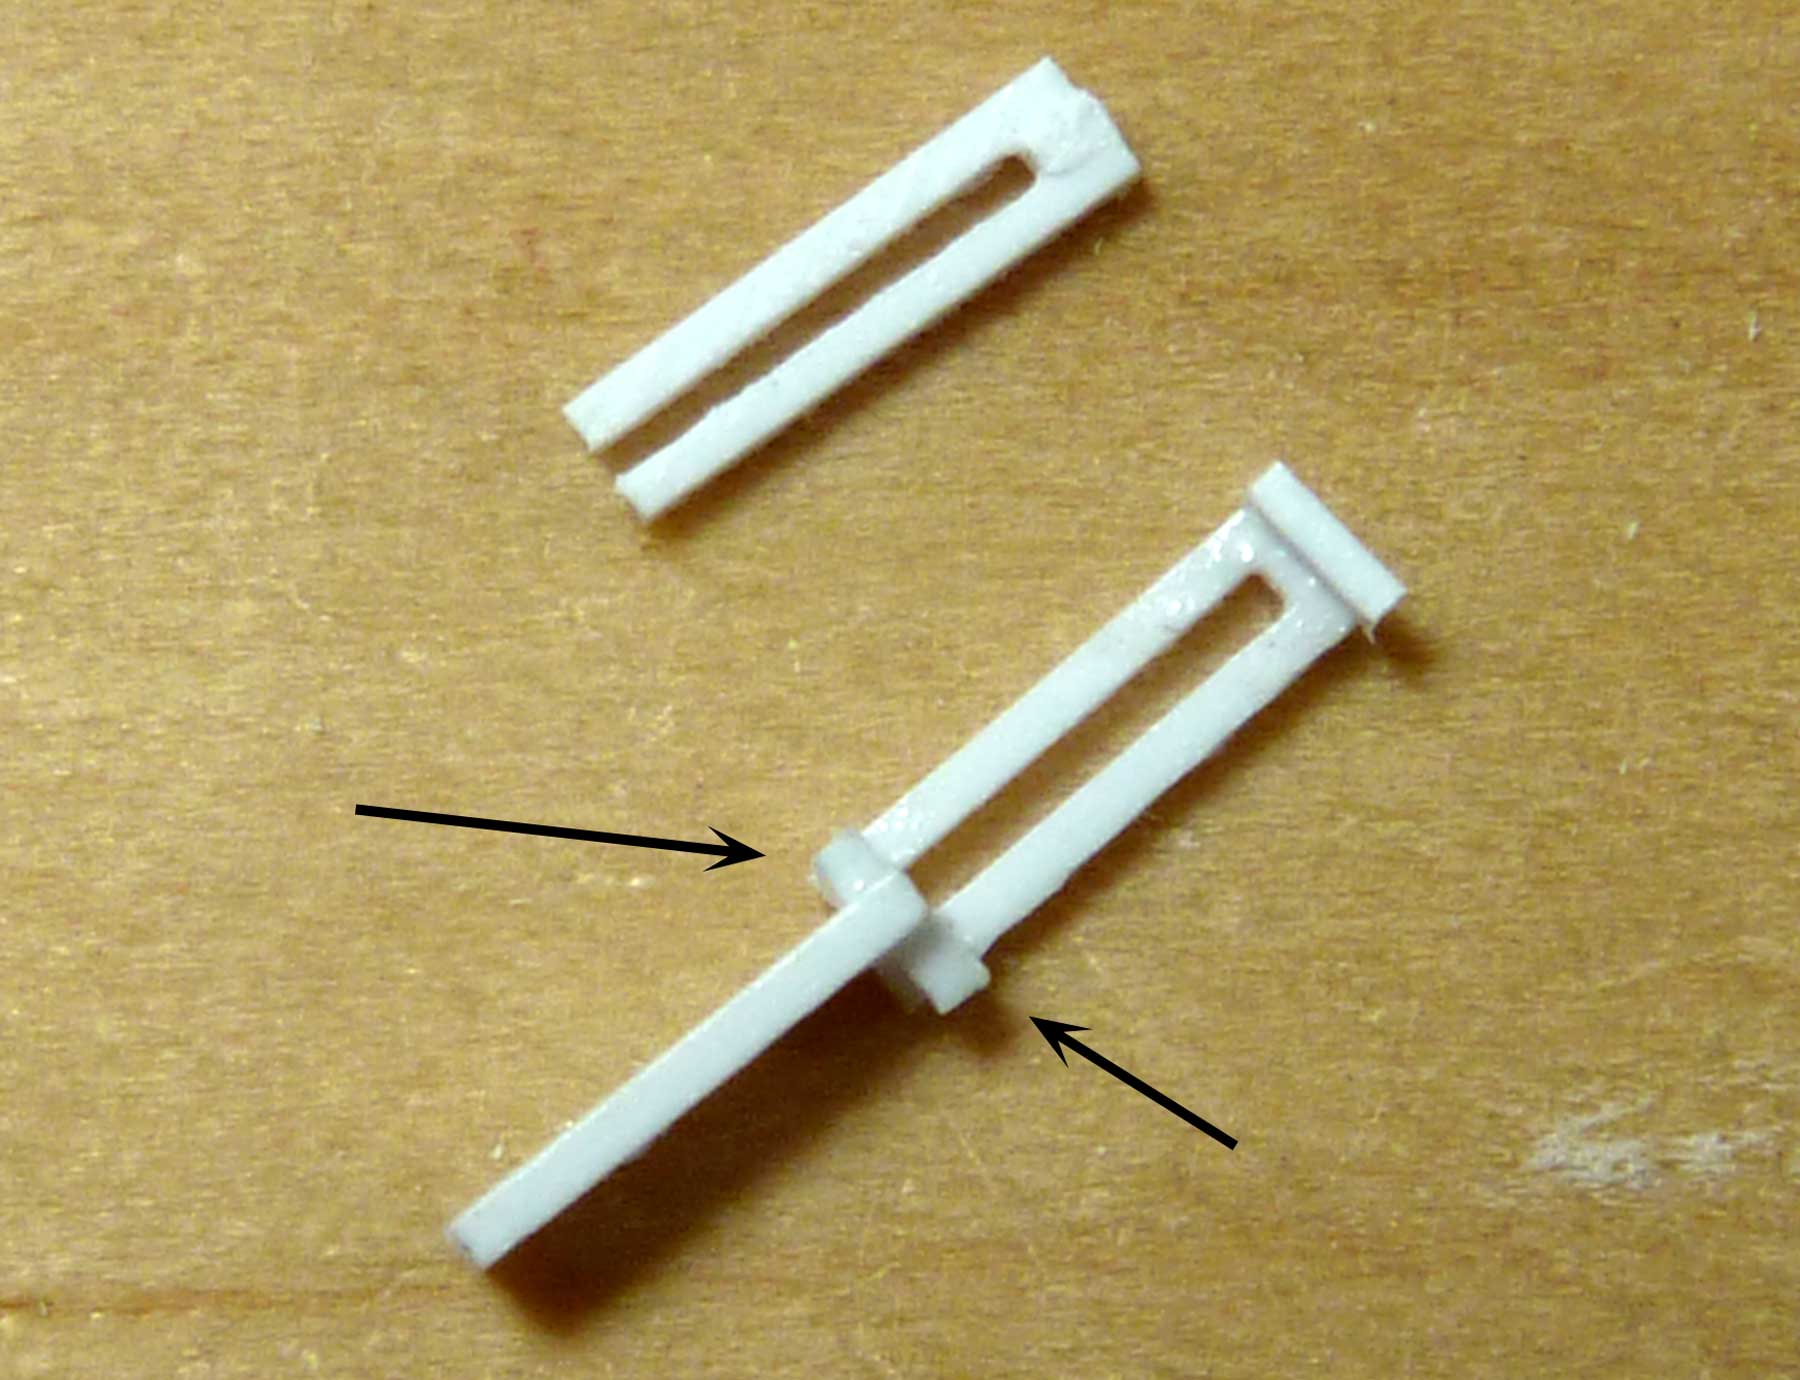
The two 0.020-inch square styrene spacers are glued in place.
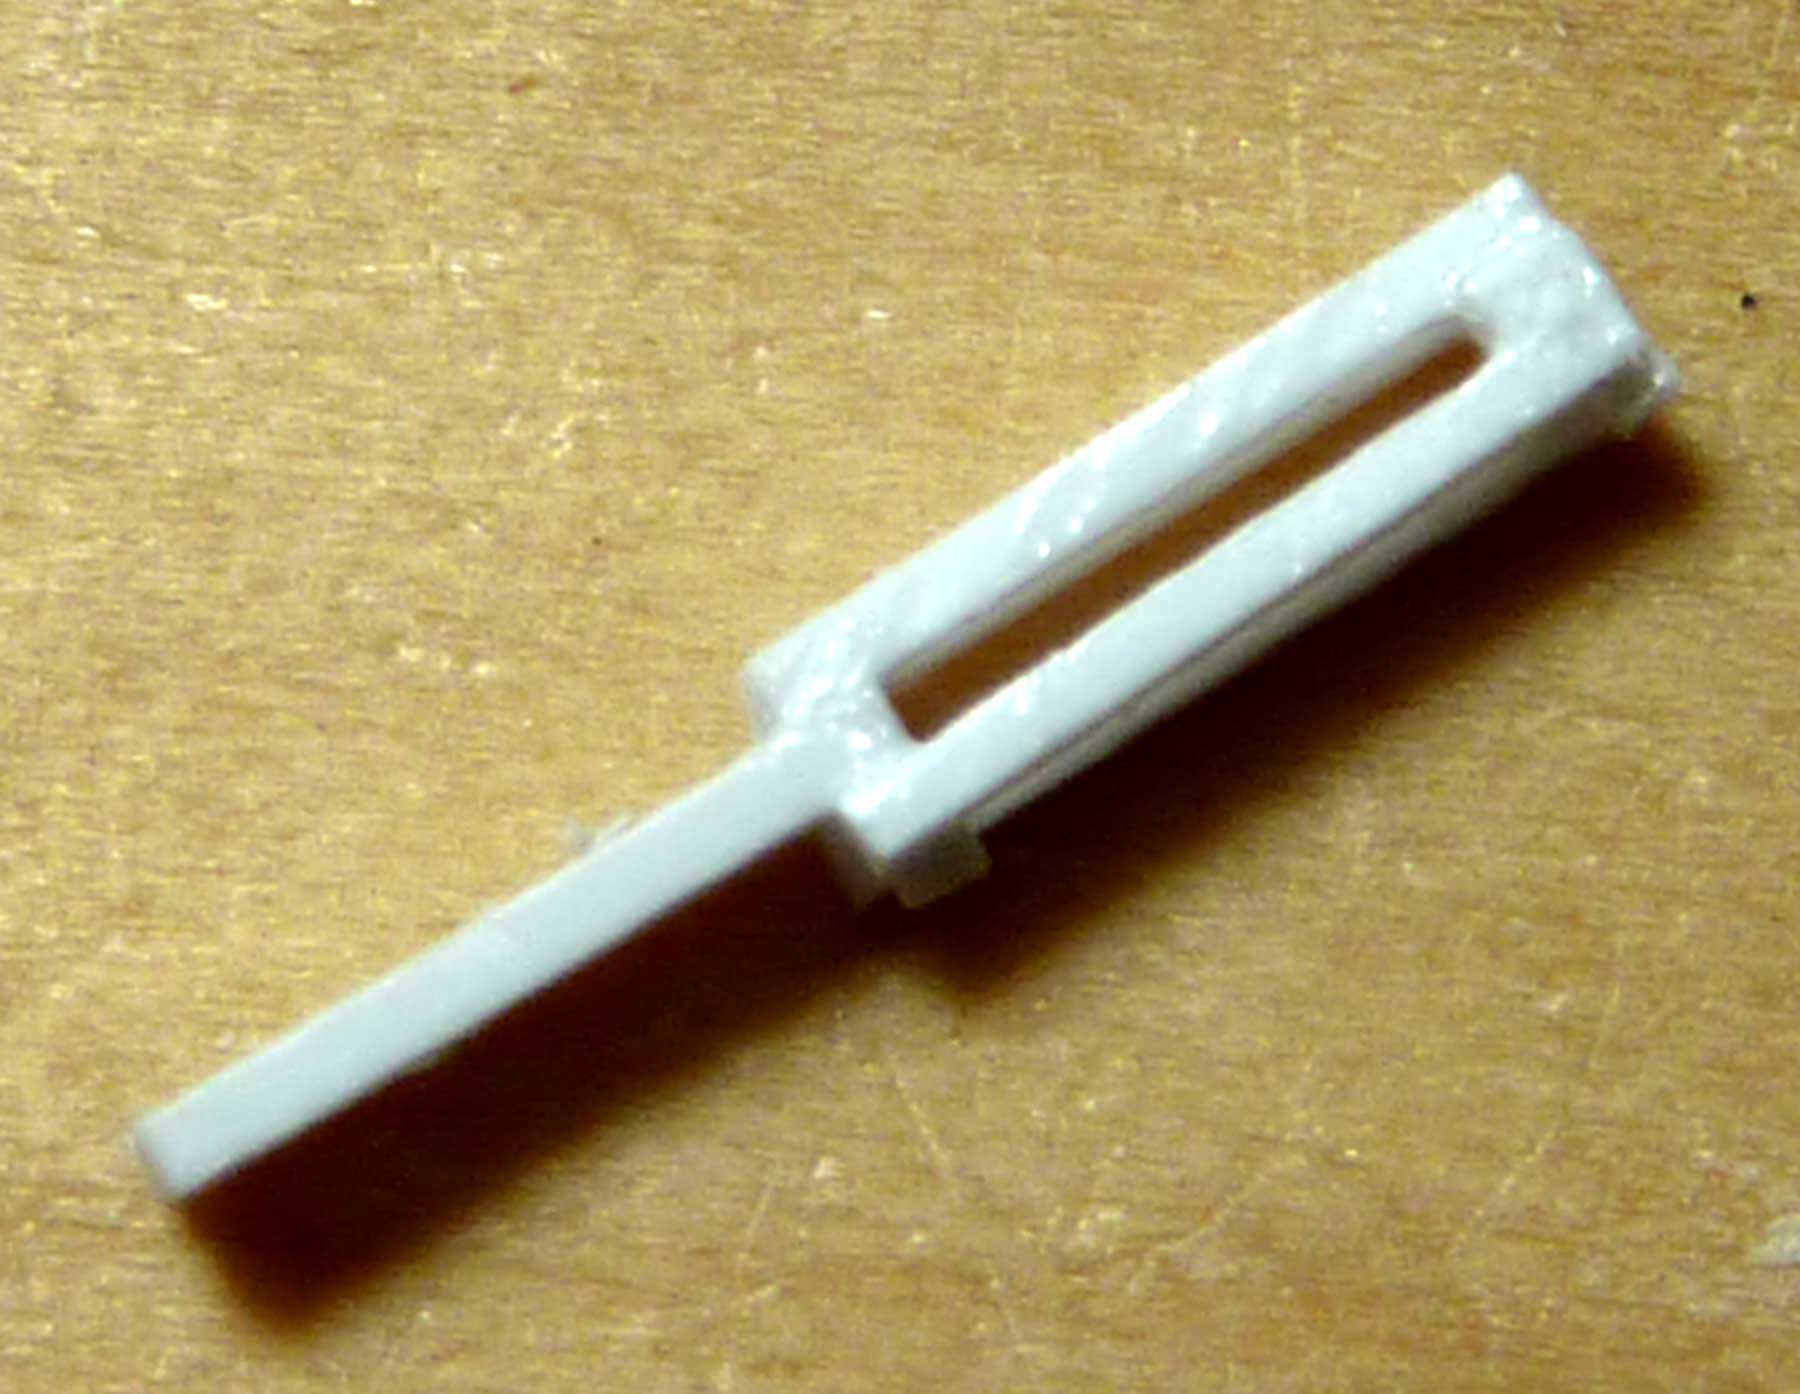
The subassemblies are glued together in a sort of box shape to finish the unit. After the assembly is completely dry, use a sanding stick to cleanup excess glue. At this point, you can carefully thin the sides down to make the part look more delicate. I used the 320 grit sanding stick mentioned earlier.
A 0.040 x 0.060-inch styrene piece is hand-shaped and glued into place. A set of harvested rivets from an old Athearn kit are installed.
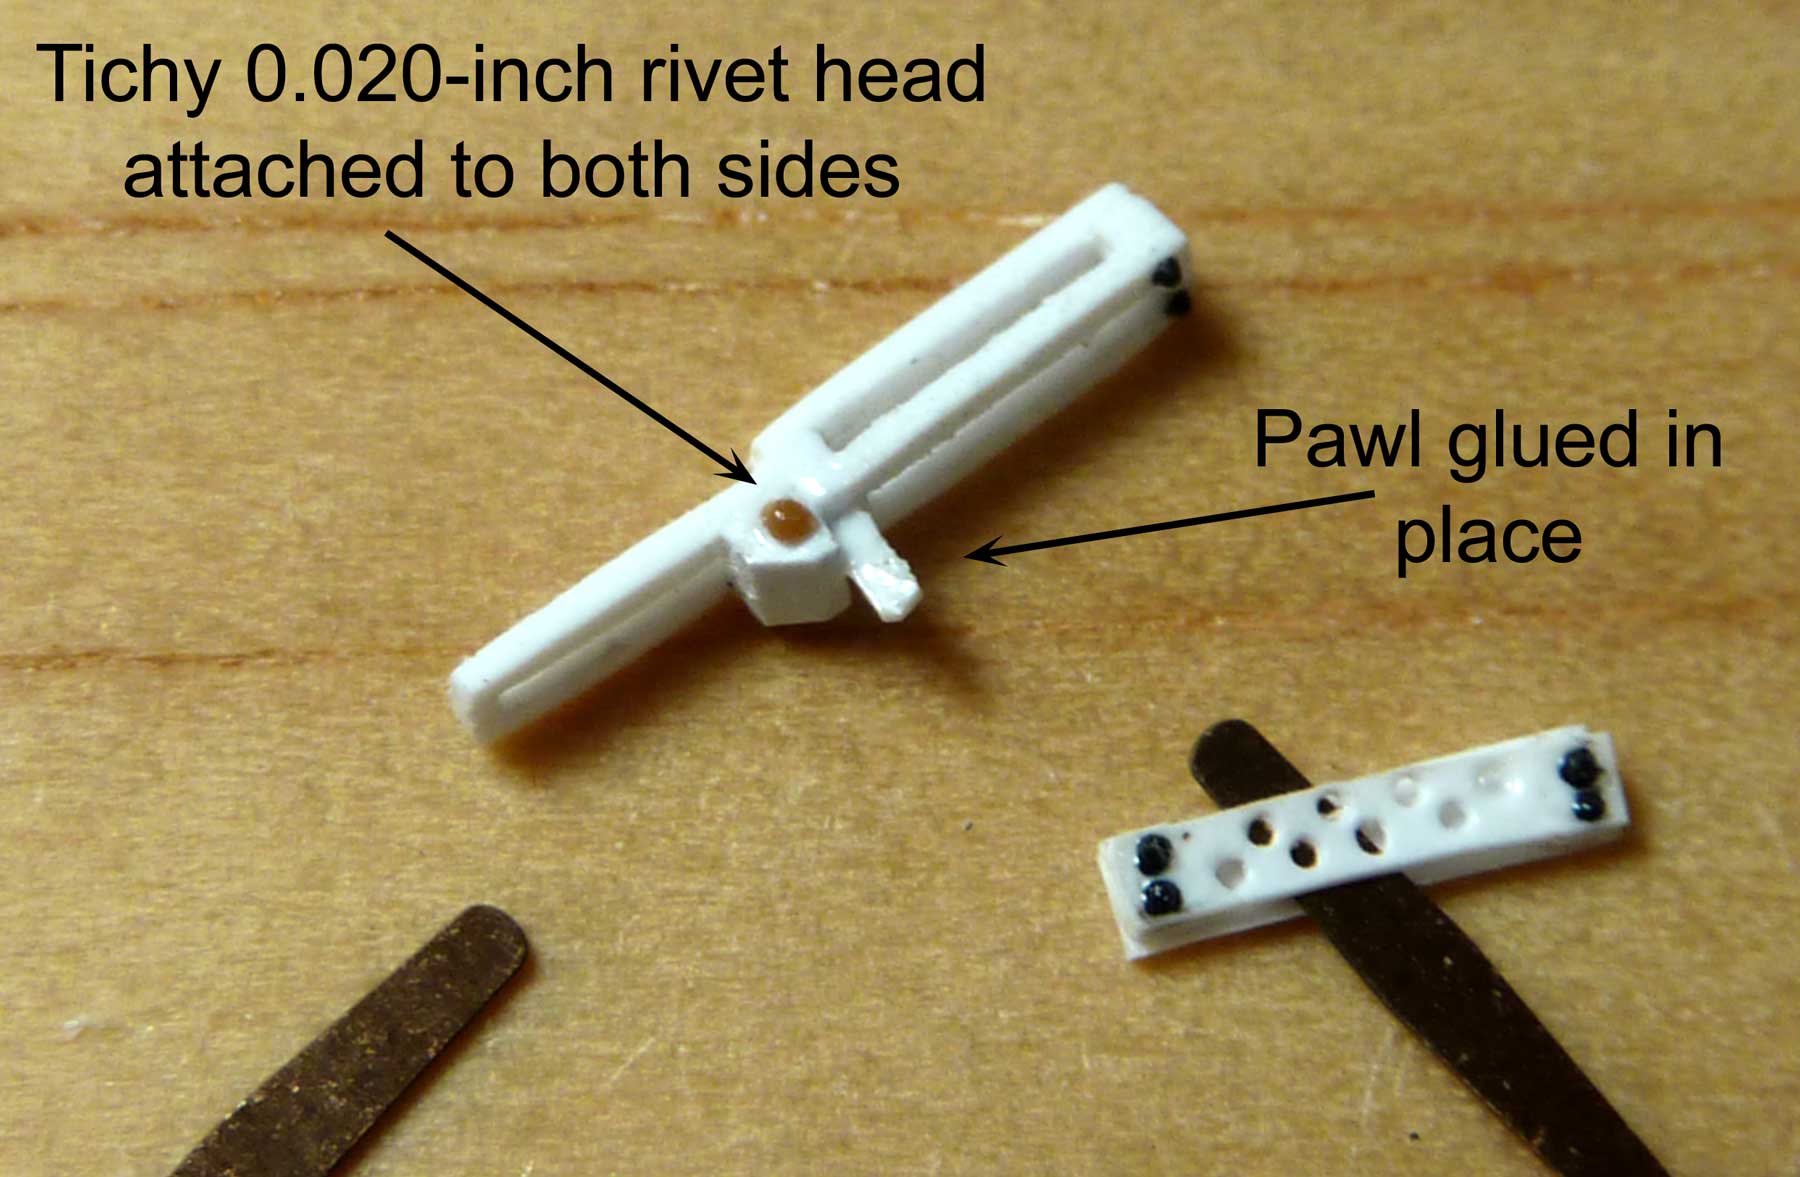
Here’s a side view to show how the hand-shaped styrene piece fits onto the Royal F TYPE slack adjuster. A pawl made from HO scale 1×2 styrene is also attached. Note the size is similar to the Universal slack adjuster in the lower right corner of the image.

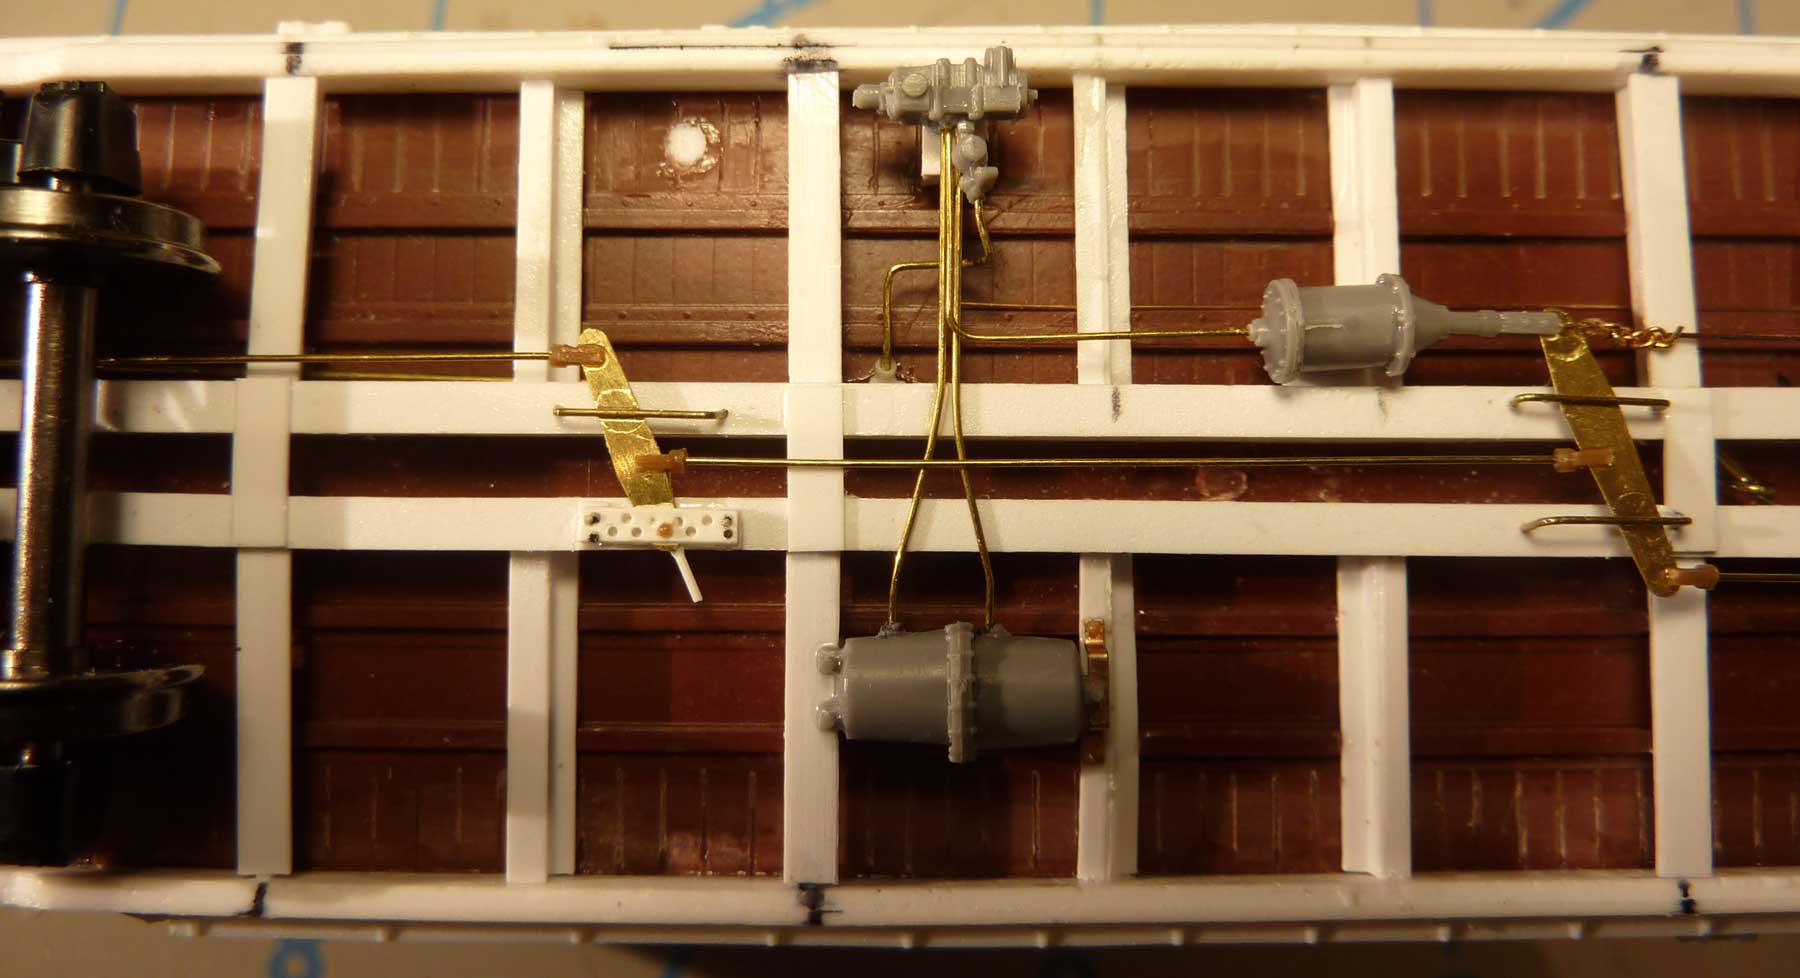
The Royal F Type and Universal slack adjusters ready for installation. After installing on the car, I will locate and drill the brake lever and insert a Tichy 0.020 styrene rivet.
Of course, after all of this effort I now find the simplest way to make these is to buy them. 3D printed Royal F Type slack adjusters are available at Shapeways that appear to be very nice. You can see them here. You will still need to build your own Universal slack adjusters, but those are easy in comparison.
Thank you, George, for sharing your techniques to create interesting HO scale underframe details. We look forward to seeing your next project here on the RCW blog.
Questions and comments can be posted below. Please follow the instructions so your comment can be posted. All comments are reviewed and approved before they appear. To subscribe to this blog, enter your info for a comment and check the last box to notify of new posts by email. Share the blog link with other model railroaders.
Thanks for sharing your methods to produce the brake slack adjusters. Currently working on a SANTA FE Rr-44 which has the Royal Type F as a nice resin casting.
These Xxtreme Modelers are making me crazy. I cannot keep up.
Really well done George!