Blog manager Eric Hansmann steps in to share his latest build.
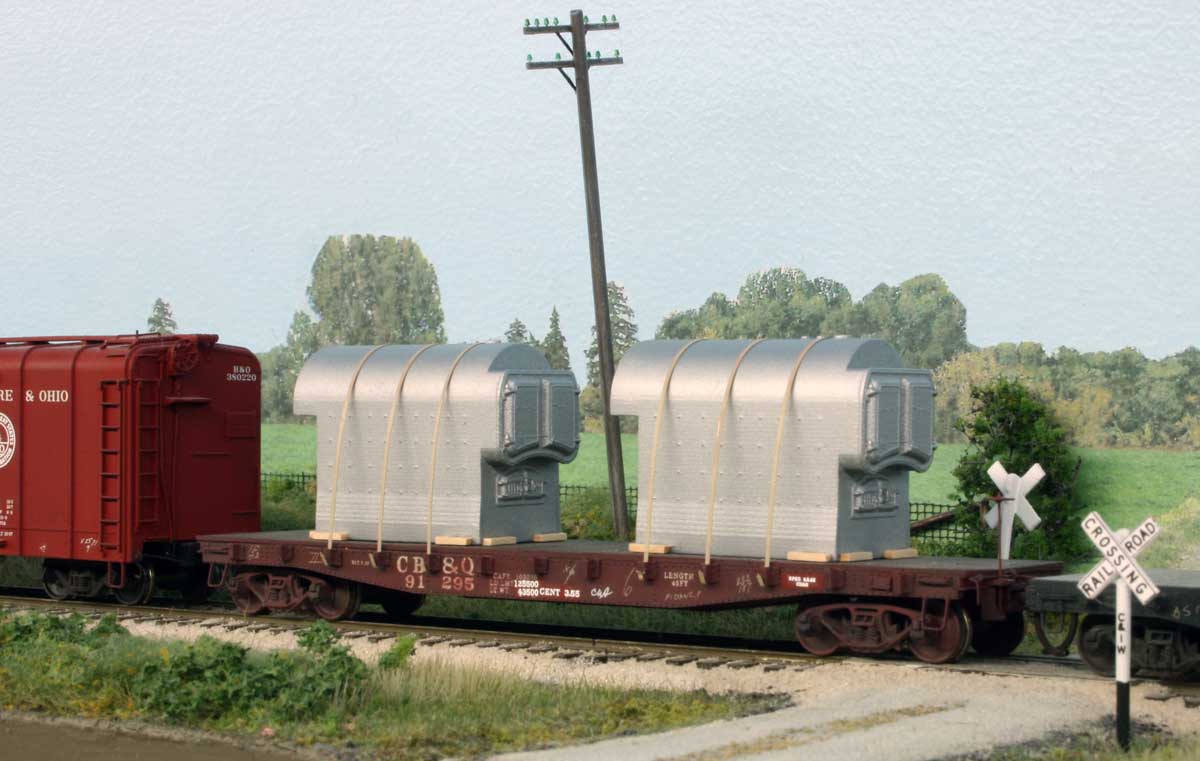
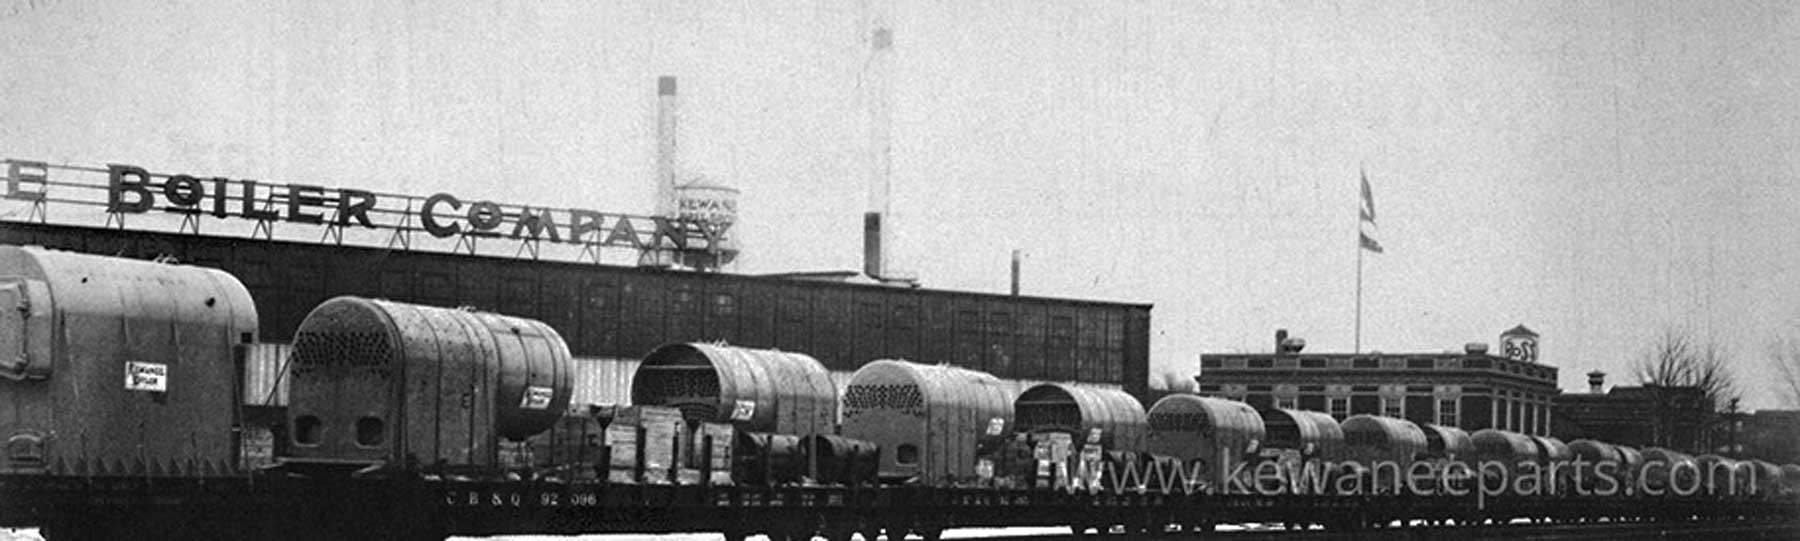
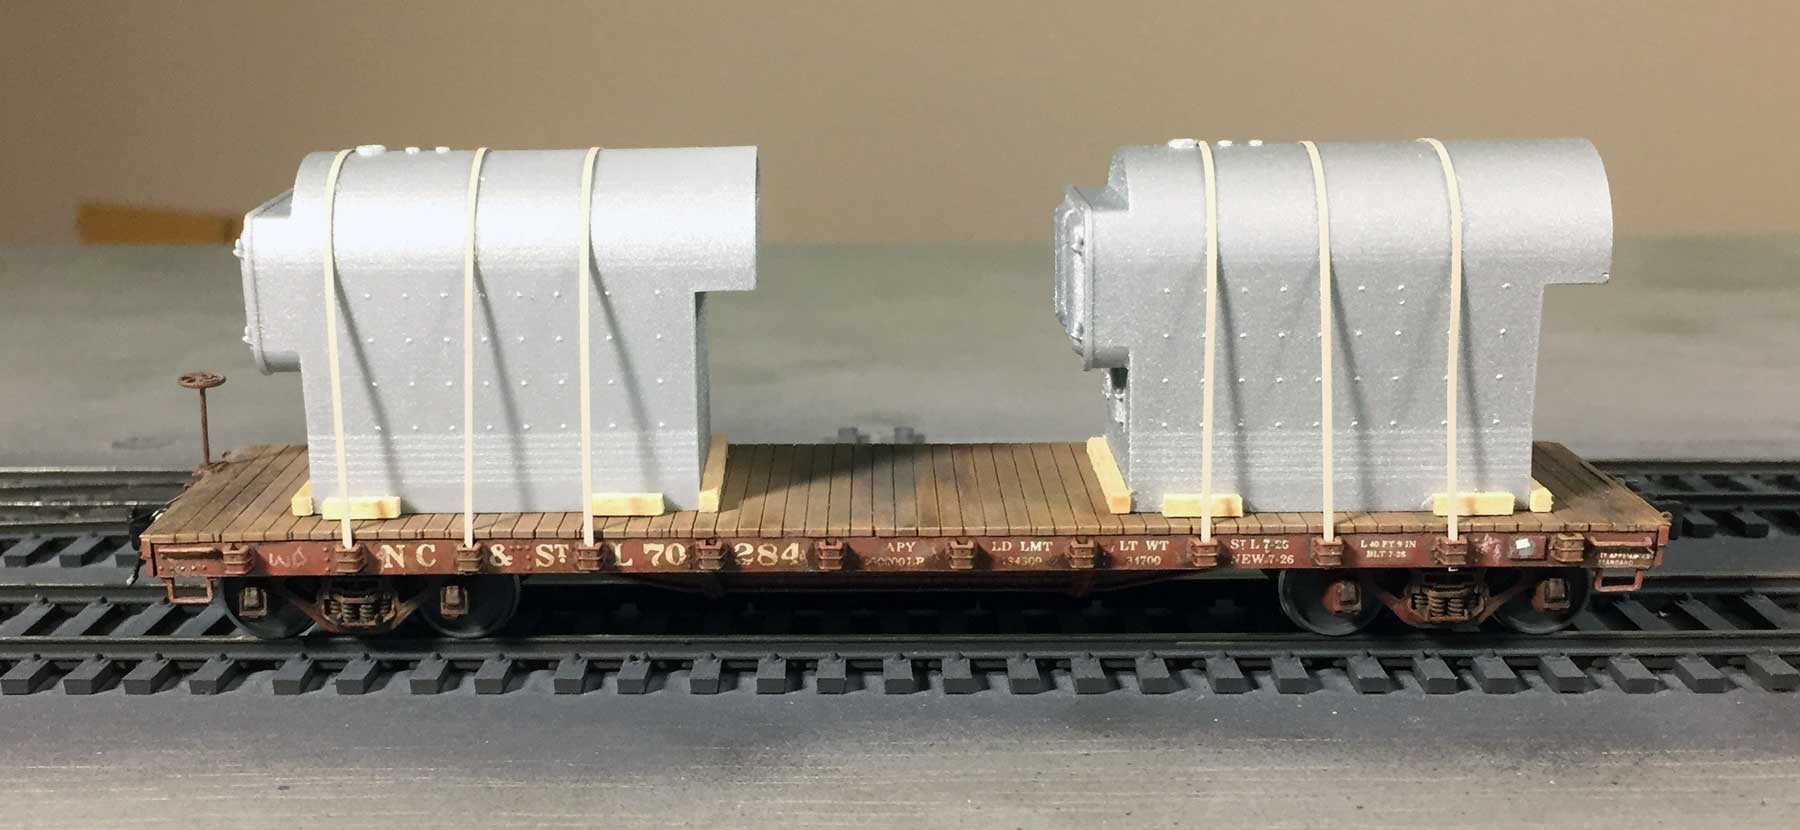
I picked up a Resin Car Works HO scale boiler load recently and decided it would look great on a Tichy Train Group flat car in service on my Wheeling Freight Terminal. The boiler castings follow a prototype Kewanee stationary heating boiler design that was produced for a few decades.
The kit includes two resin boiler castings, etched metal tie down bands, and instructions. The castings are pretty sweet and need little work to remove some flash around the bottom of the castings. A few easy passes on some 400 grit emery paper and the flash falls away.
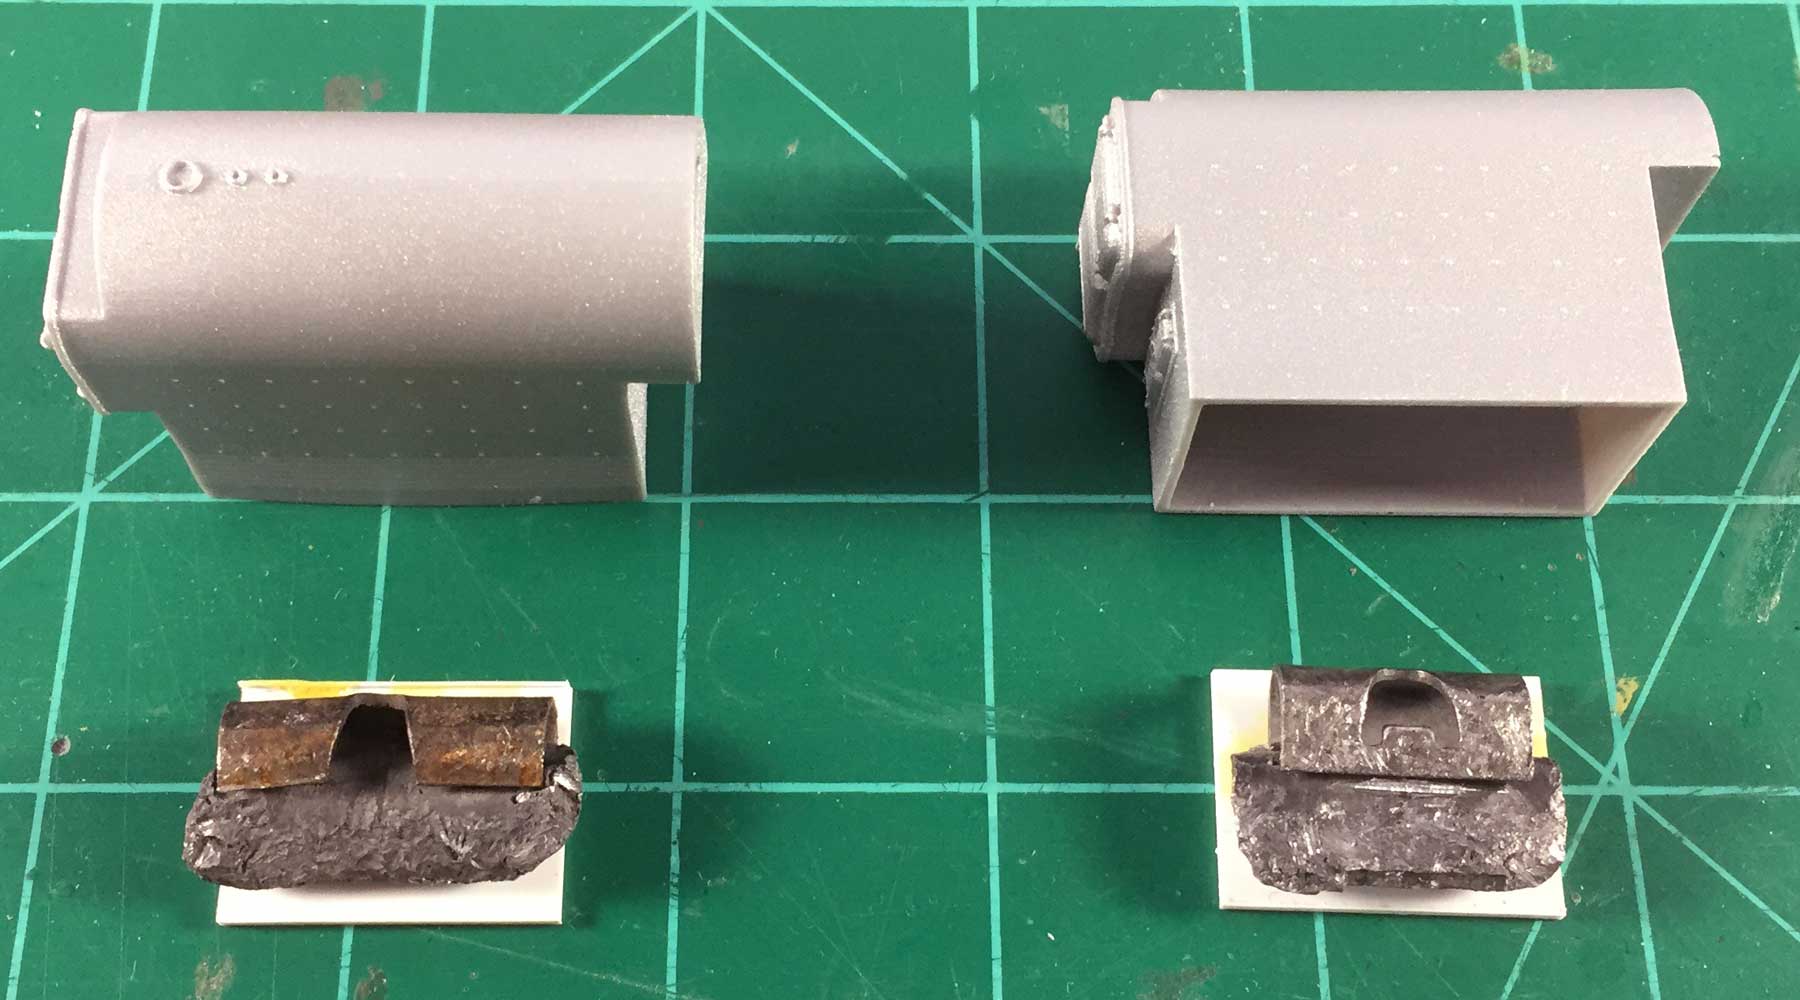
If you have a Tichy flat car, you know it is pretty light on the rails and the model has little room for extra weight. These boiler loads are mostly hollow inside and lend an opportunity to add extra weight. The kit instructions recommend installing a square of 0.040-inch thick styrene in the bottom as a connection point to secure the load. I thought this would be a good spot to add the weight. A collection of tire weights is at hand and two were about a half an ounce each. They fit into the space easily, so they were glued onto the styrene squares using Barge contact cement. These will be installed after the boilers are painted.
While the contact cement set up, the etched metal tie downs were cleaned using a paper towel and 91% isopropyl alcohol. A Krylon rattle can of satin pebble color was on hand, so the etched parts were sprayed while they remained on the fret.
While the etched parts were drying, the boilers were prepped and painted. The castings were washed using Dawn dishwashing detergent, warm water, and a soft, old toothbrush. After drying, they went right to the paint booth for an airbrush application of Tamiya acrylic flat aluminum. The kit instructions have a recommendation but I happened to have this paint on hand.
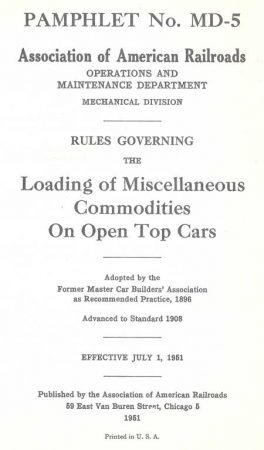
As the parts dried, I searched for prototype load blocking diagrams. Railroad Prototype Cyclopedia (RPCyc) Volume 20 featured 85 pages of flat car loading practices, including many pages of loading diagrams from AAR publications. Page 31 features a diagram for large stationary and locomotive type boilers. While the boiler in the diagram is larger than these Kewanee boilers, I used the blocking details as inspiration for this model load. A PDF featuring 1938 and 1951 loading diagrams and details is provided to help you finish your open load model. Just click on the image below to access the file and download.
The loading diagram in the RPCyc called out 2×4 and 4×4 lumber for the boiler blocking. I had an excess of 6×6 strip wood on hand, so I used that for my blocking. It is a little larger than the recommendation. Using 2×4 and 4×4 lumber would make the blocking detail look finer.
As the boiler castings were dry and the weight was secured to the styrene squares, it was time to glue these squares into place in the open cavity on the bottom of the castings. Make sure the squares fit snugly into the bottom opening. They only need to fit side-to-side and not a complete coverage of the opening. A dab or two of cyanoacrylate (CA) glue on the seam between the casting and styrene square is all that is needed. I usually put a drop or two of the CA onto an old plastic parts envelope and dip a length of 0.015-inch wire into the CA to apply a small amount to the needed point on the model.
While the glue set up on the styrene squares, the wood blocking was cut to size. I used similar lengths for both boilers. These were attached to the base of the boilers with canopy glue. Work on a piece of plastic bag so you don’t glue the model to your workbench. Excess glue will seep out at the bottom and it will be easier to pull back the plastic bag from the model than to chisel your model off of the workbench.
These are now starting to look like they are ready for prime time! I placed a short piece of double stick tape to the bottom of each boiler so they stay in place on the flat car. If you want to add a little weathering to the blocking, this is a good time to do it. A simple, light pass with the side of a pencil should be enough. Blocking was installed from new stock so it would not be as heavily weathered as the flat car deck.
I had been mulling over how to glue the tie down bands. Here’s a technique to try before removing any from the fret. First, mark the center point across all of the bands. Then make a mark about three-eights an inch on each side of the center point mark. It should look like the following graphic.
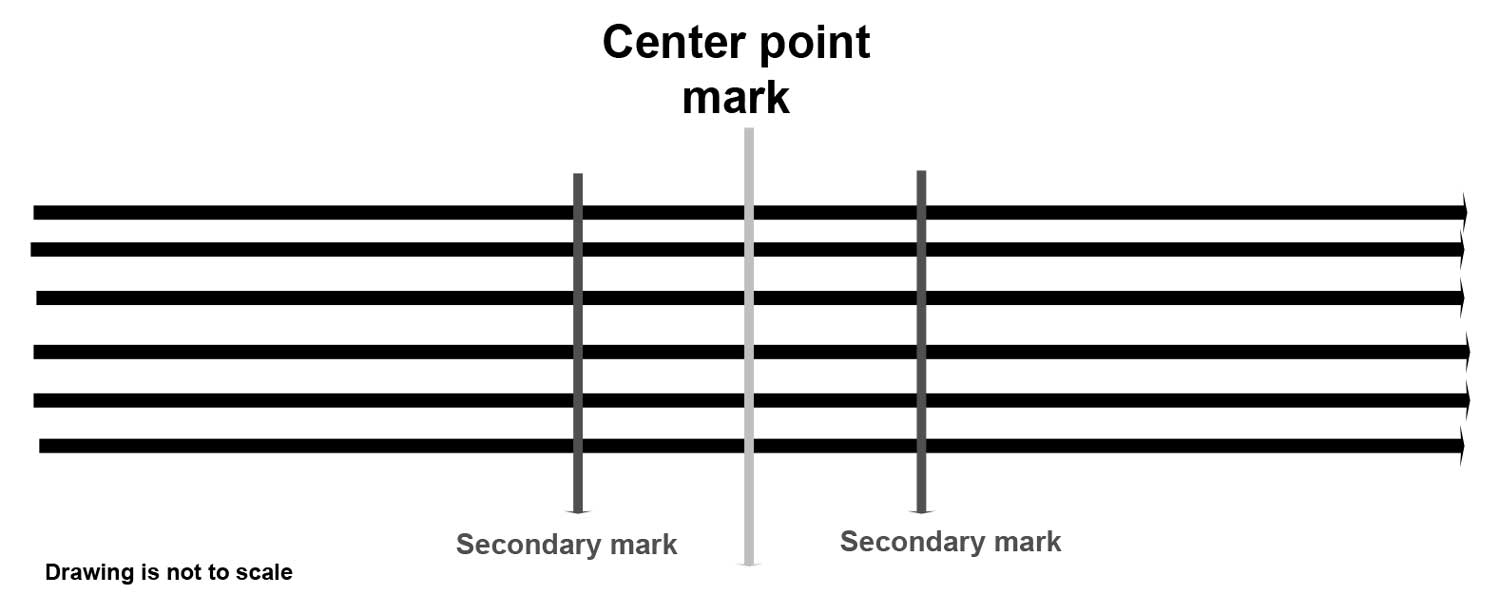
That marked space is about where the bands interface with the boiler. The marks will be on the underside and not be seen. Remove a band from the fret and use the handle of an X-Acto knife to bend the material. Place the band center point on the handle and wrap both ends of the band around the handle so they cross. This will give you a smooth starting curve to fit the boiler.
I found it easiest to attach the bands with the boilers on the flat car. The castings were positioned and a pencil mark was made near the top of the boiler that was in line with a stake pocket for the center band. A small square is helpful in setting the mark. Check the fit of the center band on the boiler over the mark. Adjust the curve a bit and make sure the band is perpendicular to the car deck. Once it looks good, remove the band, apply canopy glue with a fine wire to the space between the marks on the underside then install the band. The ends of the band will protrude below the stake pockets. The excess length will be trimmed later. Use a wood toothpick to remove any excess glue that has seeped out from under the band. The toothpick can be used to apply pressure to keep the band tight against the top of the boiler.
It does take a couple of minutes for the canopy glue to set up and I did not figure out any way to clamp this in place. Installing these bands takes the most time in building this kit, but it is worth it. Once the first band is set in place, install the next in a similar manner. After all of the bands are installed, enjoy a cold beverage.
With the bands installed, the excess length below the stake pockets can be trimmed. I marked a dot with a fine marker on each band just below the stake pocket. One boiler was lifted from the car and side cutters were used to trim at the mark. The boiler was placed back onto the car at a slight angle to align the bands into the stake pockets on one side of the car. Once those are set, carefully line up the bands with the stake pockets on the other side of the car and allow the boiler to rest flat on the deck. The same steps can be followed for the other boiler.
Once in place, the boilers can receive a very light dusting of road grime and/or soot to represent road weathering. I like how the boiler load has turned out, and it fits my 1926 modeling era. This summary has been a bit lengthy, but these processes completed quickly. It just takes longer to explain some things than to actually do them. I hope you share a photo of your Resin Car Works boiler load so we can post it here on the blog.
If you are attending the upcoming RPM Chicagoland event please stop by our vendor booth and say hello. We will have these boiler loads for sale, in addition to limited quantities of the new UTLX X-3 tank car and the Missouri Pacific 50-foot box car. We should have plenty of grain bins and decals on hand, too. We will see you there!
Questions and comments can be posted below. Please follow the instructions so your comment can be posted. All comments are reviewed and approved before they appear. To subscribe to this blog, enter your info for a comment and check the last box to notify of new posts by email. Share the blog link with other model railroaders.
Eric,
Thanks for posting the scan. Very useful information there. I will use it and RPCYC 20 when I get to loading my flat car.
Do you know when these boilers went out of production? I may have to weather these as a scrap load for my early ’50s era.
Jim, the kit instructions note the Kewanee Boiler Corporation offered this boiler design in various types and sizes until the late 1950s. I hope that works for you! – Eric
they look great need to get a set. will you every make a hollywood way car A.T.S.F type?
Thanks, John. These have been a popular kit in the RCW line and it takes little effort to put them into service. As for the AT&SF Hollywood way car, I don’t think that is on the production radar. – Eric
Eric nice work. Fine load for the Tichy flat car.
Thanks, Lester!
Eric, Great job on your boiler loads and thanks for the detailed post on Blocking and Securing the loads. I appreciate your PDF file from RPC 20 that I do not have. Also that weathering on the flat is very well done.
Thanks, George! The PDF is not from RPCyc 20. Those details were scanned from original loading documents from 1938 and 1951. – Eric