Extending the scene

Clark Propst had a well attended presentation at RPM Chicagoland covering many aspects of his latest layout. He sent details on his layout backdrop work for the latest blog post. Here’s Clark with the scoop.
Mountainous terrain has always been appealing to modelers interested in scenery. Mountains are easily made with the hardshell method or stacking insulating foam board. The basic form is then covered with rock castings, trees, or a combination of both. Modeling the flatlands of America is more difficult. Horizontal scenes look bare when pushed up against a vertical backdrop painted sky blue.
Several years ago Jim Six owned a YahooGroup where he posted his layout progress. Joining his submissions was his friend Tom Johnson. Both of them explored adding landscape photos to their backdrops to gain scene depth to their flat land based layouts. I had hand painted my layout backdrops, but after seeing their results I thought I’d try my hand at photo backdrops.
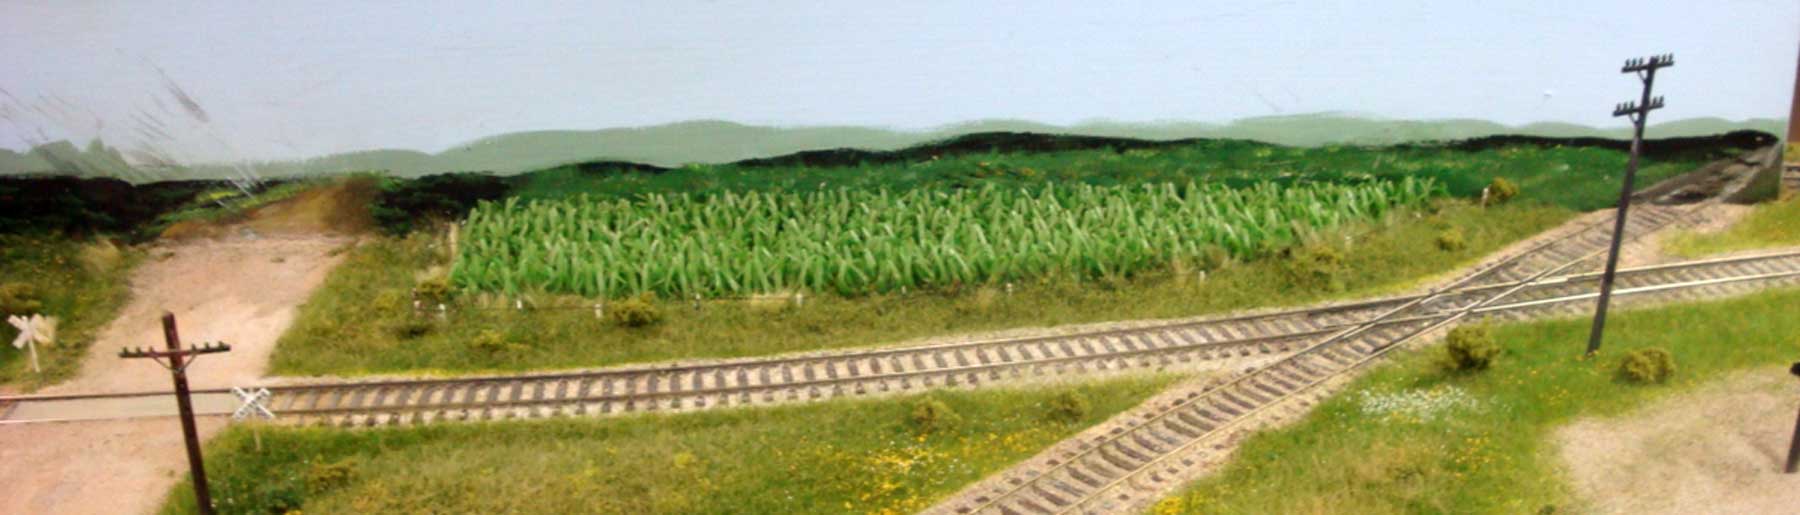
Above is an early layout view before one of my first attempts at replacing my painted backdrop with photos.
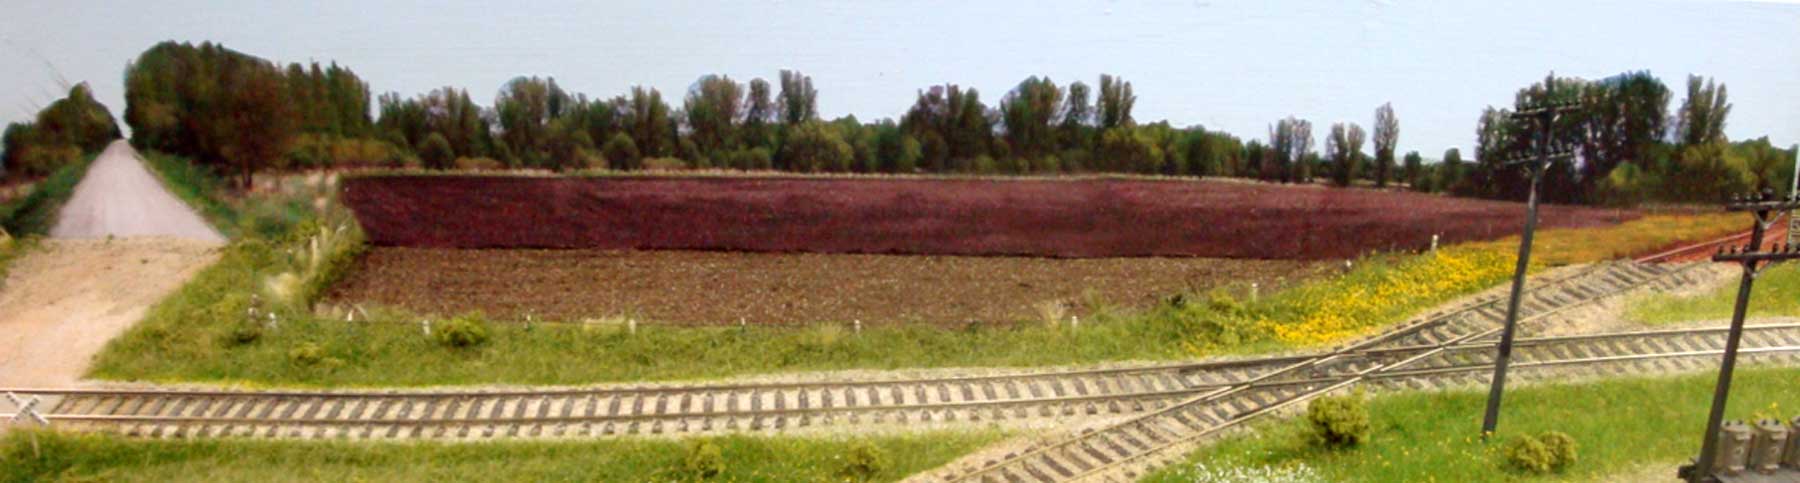
And here’s a later view of that scene after I transformed my layout from summer to spring when adding the photo backdrops. I still had a defining line between horizontal and vertical. I’ve since learned of several ways to overcome this which I’ll leave for another discussion.
Over time, I’ve managed to refine my layout vision and my computer skills, though still terribly lacking. I started a new layout a couple years ago with a shelf width averaging sixteen inches at its widest points, mainly in towns. With only a few inches between the tracks and the backdrop it is imperative to stretch each scene into the backdrop. I’m modeling a granger branch serving small rural communities so there’s no need to paste elaborate photos on the backdrop.
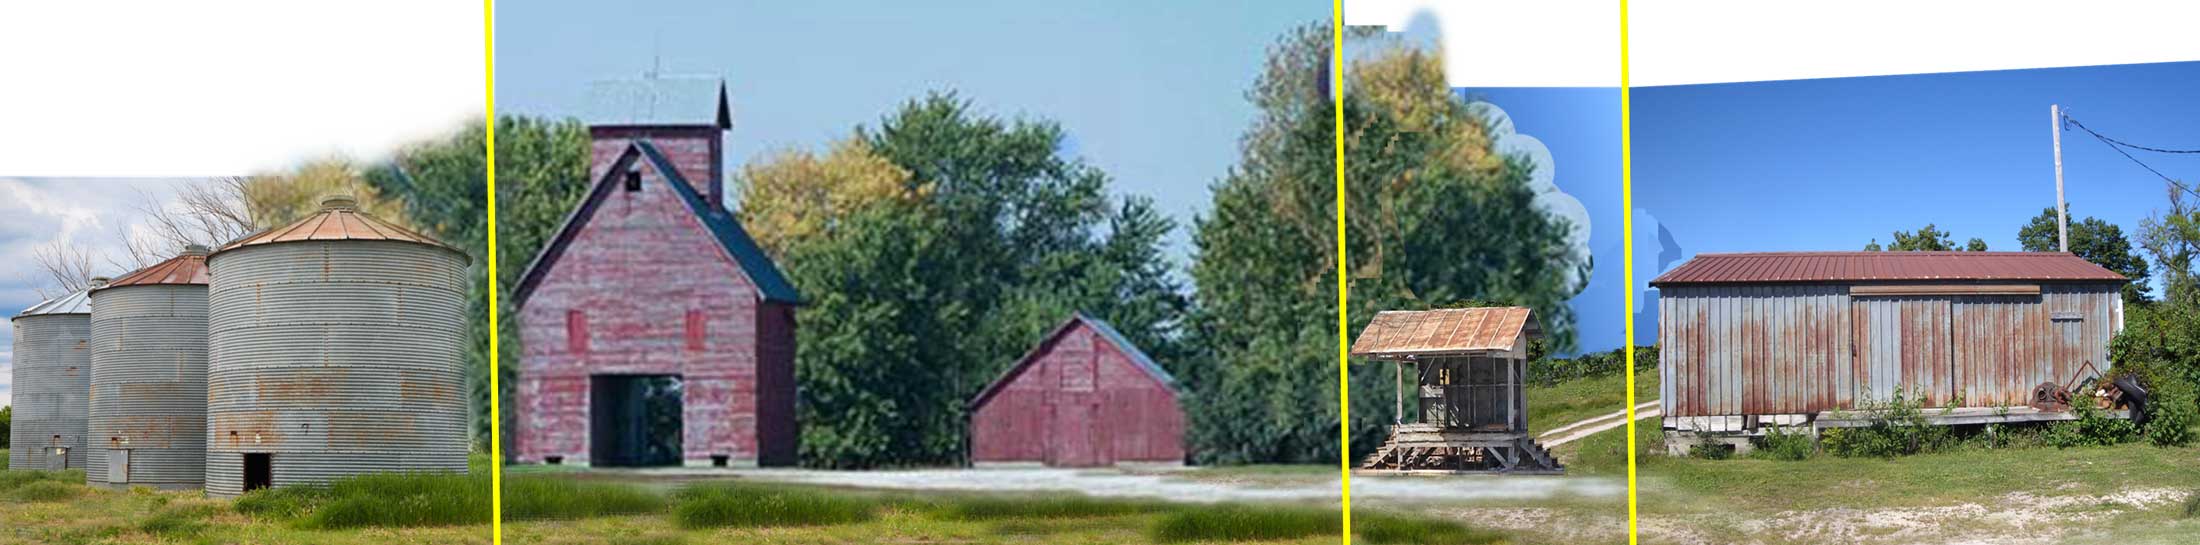
The above photo is a mural made from four photos grouped in PowerPoint. The photo edges were blended together using the clone stamp tool in Photo Shop Elements. The sky will be cut off the printed photo before applying it to the layout backdrop so no effort was spent trying to blend it.
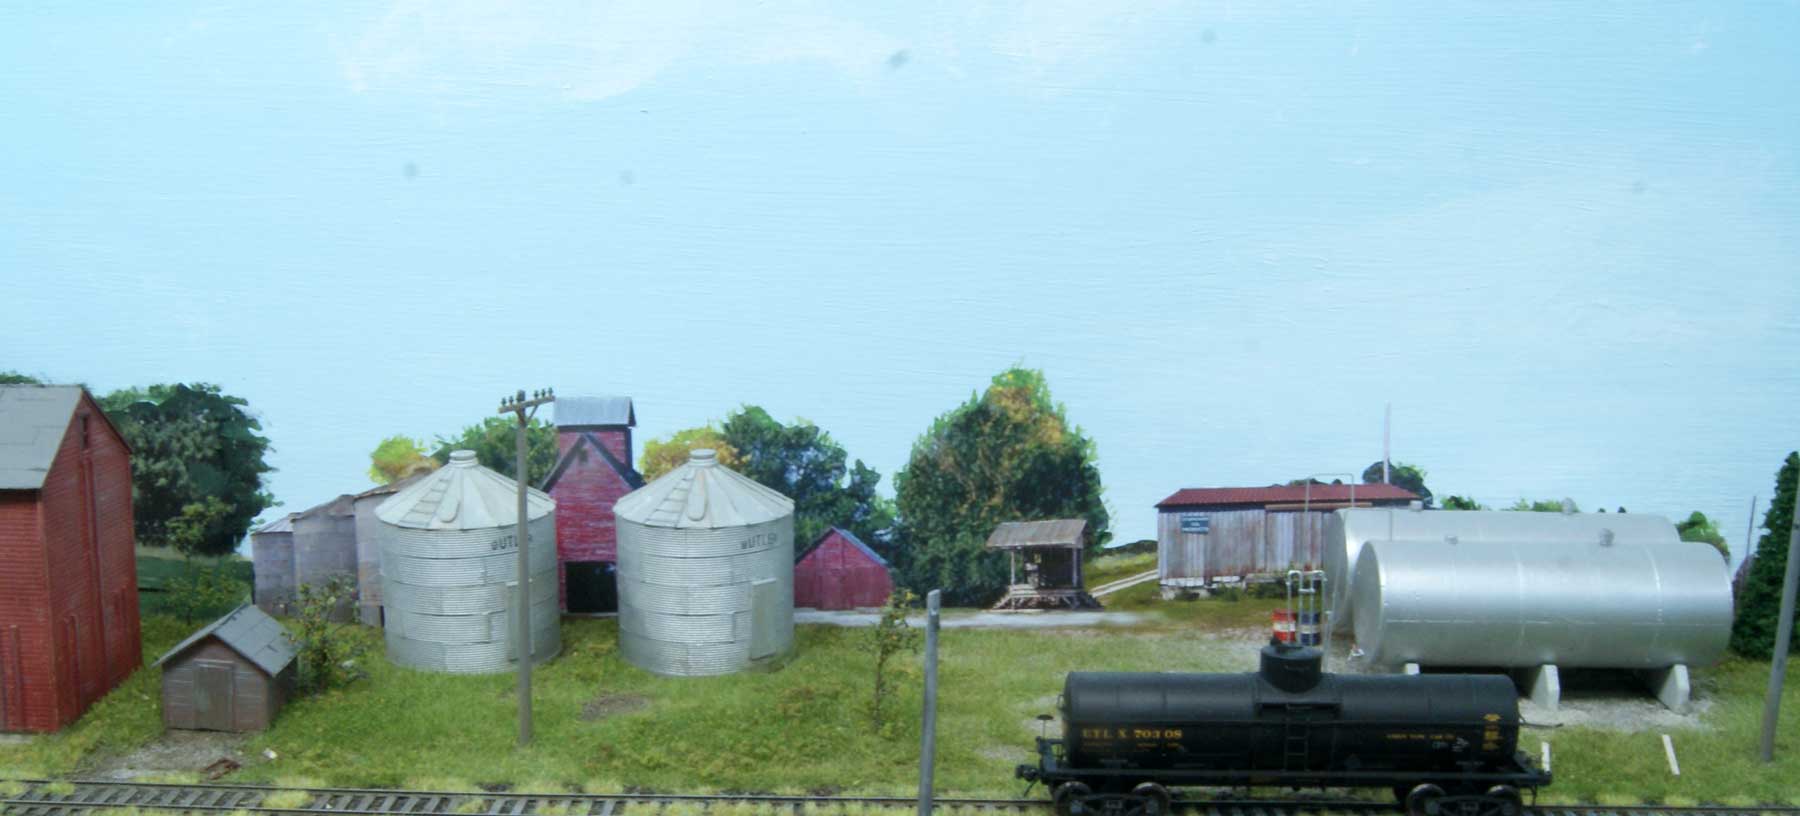
Here’s the scene with the backdrop mural glued in place. I had the 18-inch long photo printed at Staples and then sprayed the back of the photo with 3M Super 77 Multipurpose Spray Adhesive before applying. I chose the four mural photos after studying prototype photos of this area. This mural, if you will, not only extends the scene, but blends the different foreground elements together into a cohesive scene based on reality.
Clark Propst
Thanks to Clark for sharing his backdrop techniques that improve the depth of our scenes. I’m sure many modelers will now be taking prototype building and scenery photos with an eye toward backdrop use. Clark’s layout will be featured in the upcoming 2018 Model Railroad Planning.
Questions and comments can be posted below. Please follow the instructions so your comment can be posted. All comments are reviewed and approved before they appear. To subscribe to this blog, enter your info for a comment and check the last box to notify of new posts by email. Share the blog link with other model railroaders.
Really enjoyed this post – Very timely considering I’m starting photo backdrops myself…Thanks for posting!
Clark,
Nice quick tutorial on the use of photos on backdrops. Really makes things come to life. You make it look all too easy. Thanks for sharing your techniques
George Toman
I would like to have this become a series based on layout backdrops with only a
few inches of spacing between track and wall. This is most difficult no matter
the locale.
Joel,
Google Tom Johnson, Lake Bruce, IN or go to this link: http://www.railroad-line.com/forum/pop_printer_friendly.asp?TOPIC_ID=33352
Mr Johnson is a master at narrow shelf layouts , photo backgrounds and blending it all together. Regards….Jerry Albin