
Lester Breuer has been busy building more freight cars. He shares his latest work for today’s blog post.
For my unbuilt Sunshine Models kits inventory to someday reach zero, I need to continue to have fun building. Therefore, I pulled this Milwaukee Road single-sheathed box car (Kit 47.3), series 711000 to 711999, for building. The prototype information and photos of this car are in the Prototype Data Sheet #47A provided in the kit which contains the only good photo of the “B” end I could find. Additional prototype images were found in the Steam Era Freight Cars Reference Manual, Vol. 1 (pages 70 and 71), and several color photos are in the Milwaukee Road Color Guide, Vol. 2 (page 7). A diagram of the car is in The Milwaukee Road Freight Cars – Official Employees’ Shop Diagrams for 1937 book (page 16).
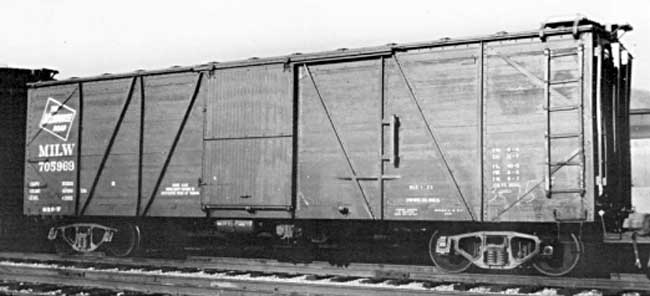
The Milwaukee added 9000 box cars built to a similar design between 1922 and 1925. These two number series show a slight interior length difference.
705000-708499 (3500 cars)
- 8-foot, 7-inch interior height
- 40-foot interior length
- 2930 cubic capacity
708500-713999 (5500 cars)
- 8-foot, 7-inch interior height
- 40-foot, 3-inch interior length
- 2955 cubic capacity
- Truck centers were increased 5.5-inches for these cars.
Prototype cars were built by the Bettendorf Company, Haskell & Barker, Pullman, and Western Steel Car & Foundry. These box cars were the Milwaukee’s largest block of cars built to a common design and many were in service well into the diesel era.
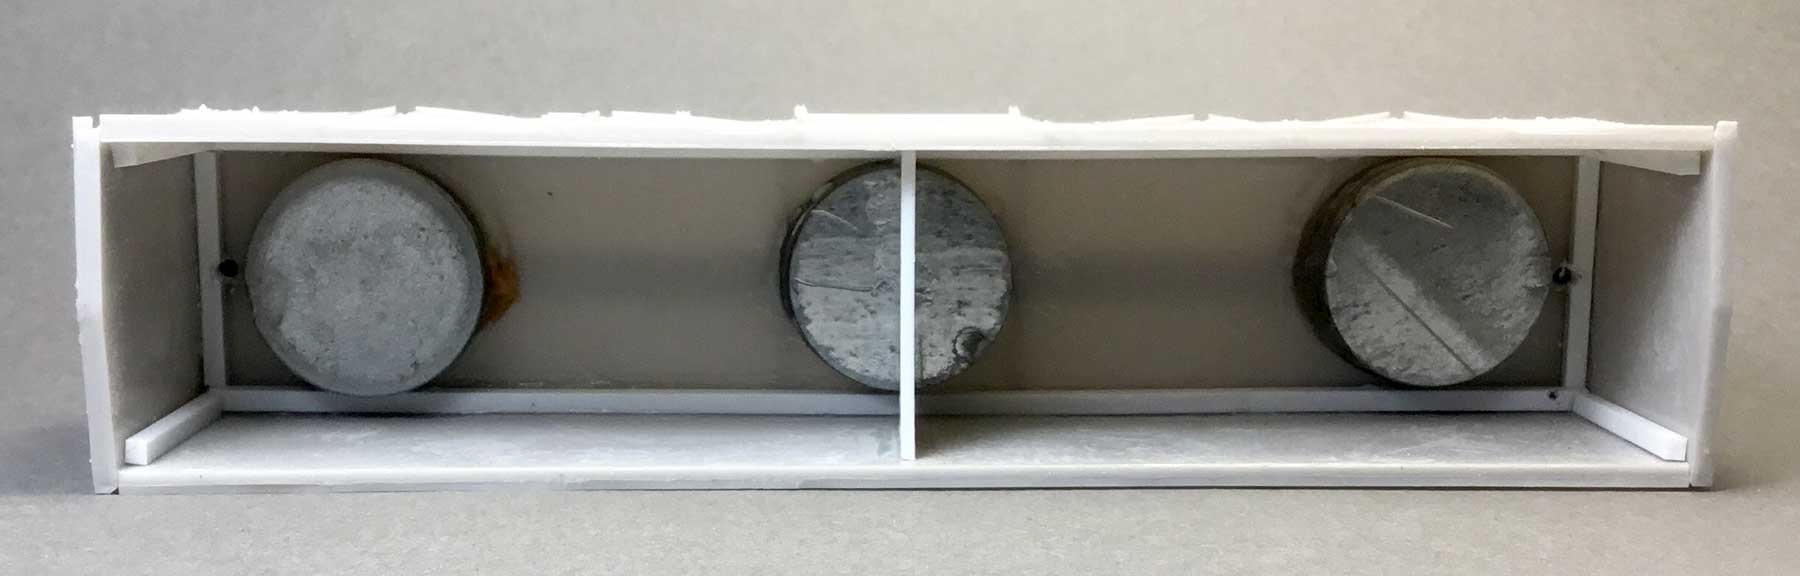
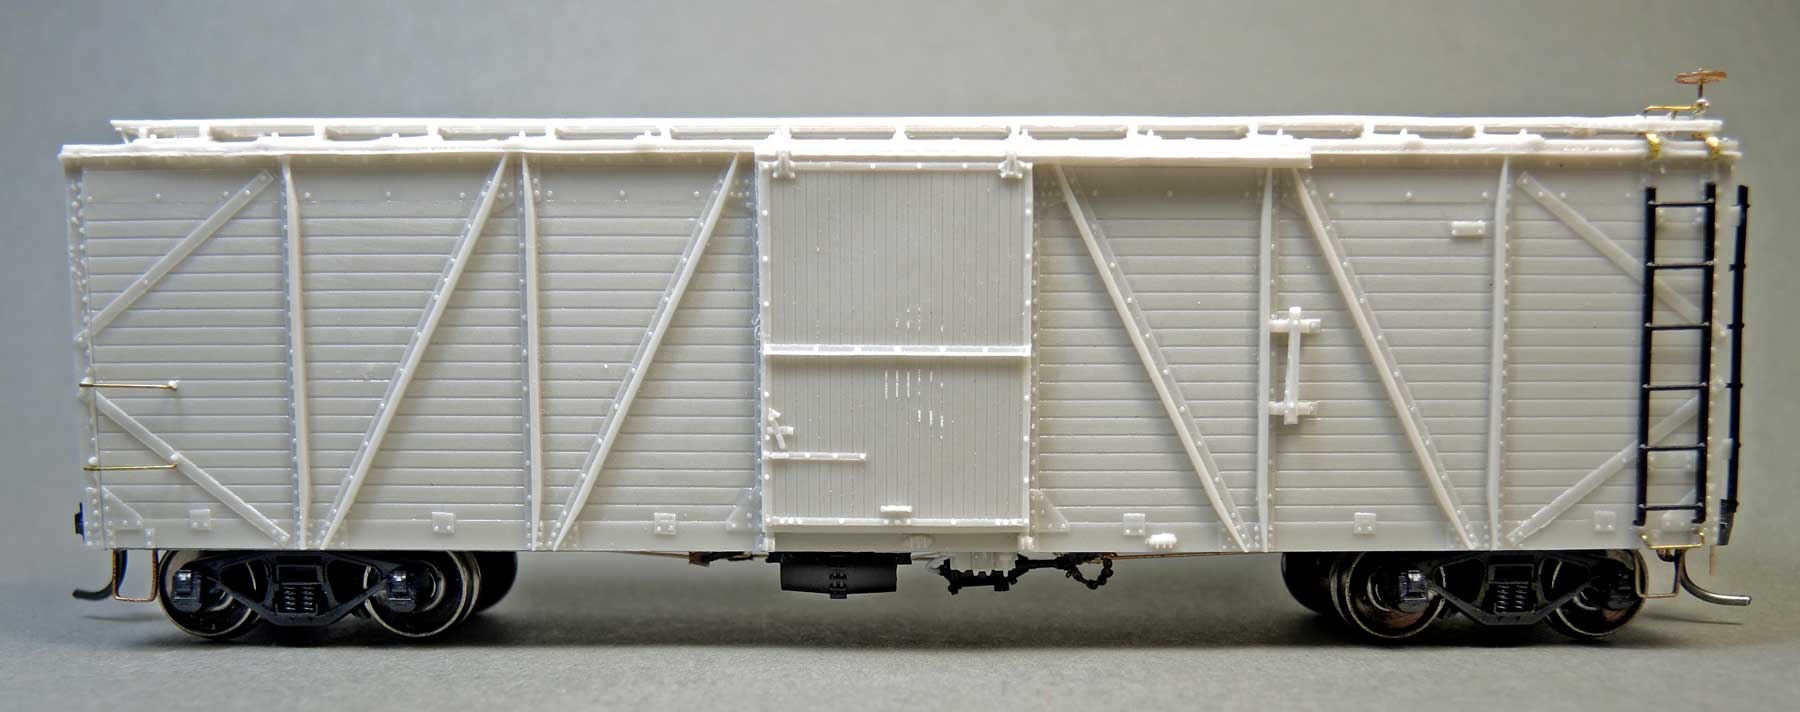
I began building this flat kit by gluing an end to a side to create an “L” and repeated the process for the other end and side. The two “L” units are glued together to create the basic box. The underbody was cemented in place next. Car body inside corners and sides were reinforced with Evergreen #164 0.080 x 0.080-inch strip styrene. Kadee #262 coupler pockets were installed with super glue to hold them for drilling. The coupler pockets and bolsters were drilled to accept 2-56 screws. I like to complete this step before adding weight to the interior of the car body so I do not cover the holes with weights, in this case electrical outlet box punchouts, used to weight the car to 3.8 ounces.
With the weights in place I cut a baffle from Evergreen Scale Models 0.040-inch sheet styrene and installed it in the center of the car body to prevent sides from bowing in. A Hutchins all steel roof resin casting was installed to complete the car body. Returning to the underbody, Kadee #148 “whisker” couplers and Tahoe Model Works Buckeye ARA trucks (TMW-006) with InterMountain 33” metal wheel sets were installed.
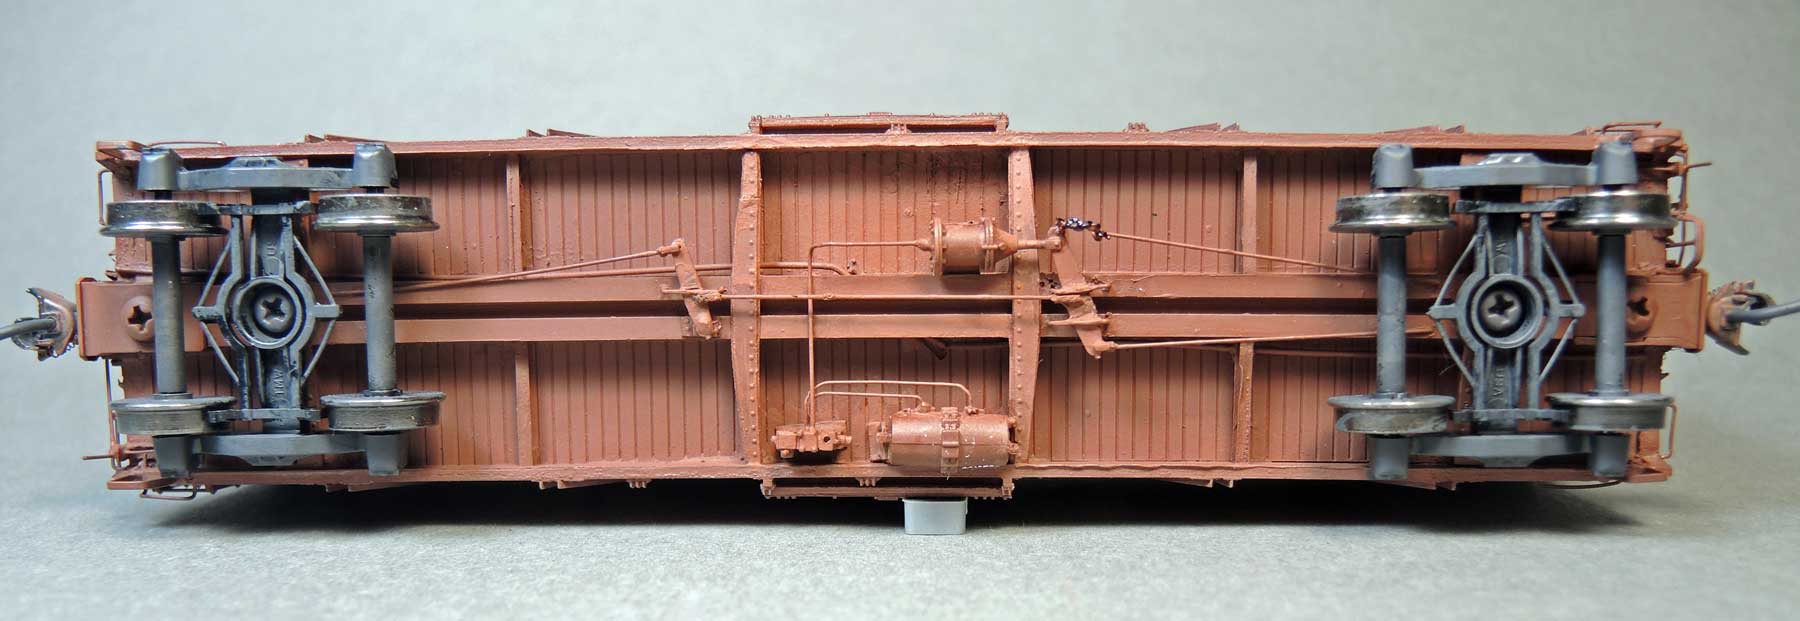
Underbody work was now completed per the kit instructions with the following changes. I used Detail Associates #2503 0.010-inch brass wire for the piping from the air reservoir to the control valve and Tichy Train Group #1106 0.0125-inch diameter phosphor bronze wire for the pipe from the back of the brake cylinder to the control valve. Tichy #1106 0.0125-inch phosphor bronze wire was used to make the brake rods which were attached to brake levers with clevises made by cutting Tichy # 8021 turnbuckles in half. The chain between the brake cylinder lever and brake rod is Campbell 42-links-per-inch black chain.
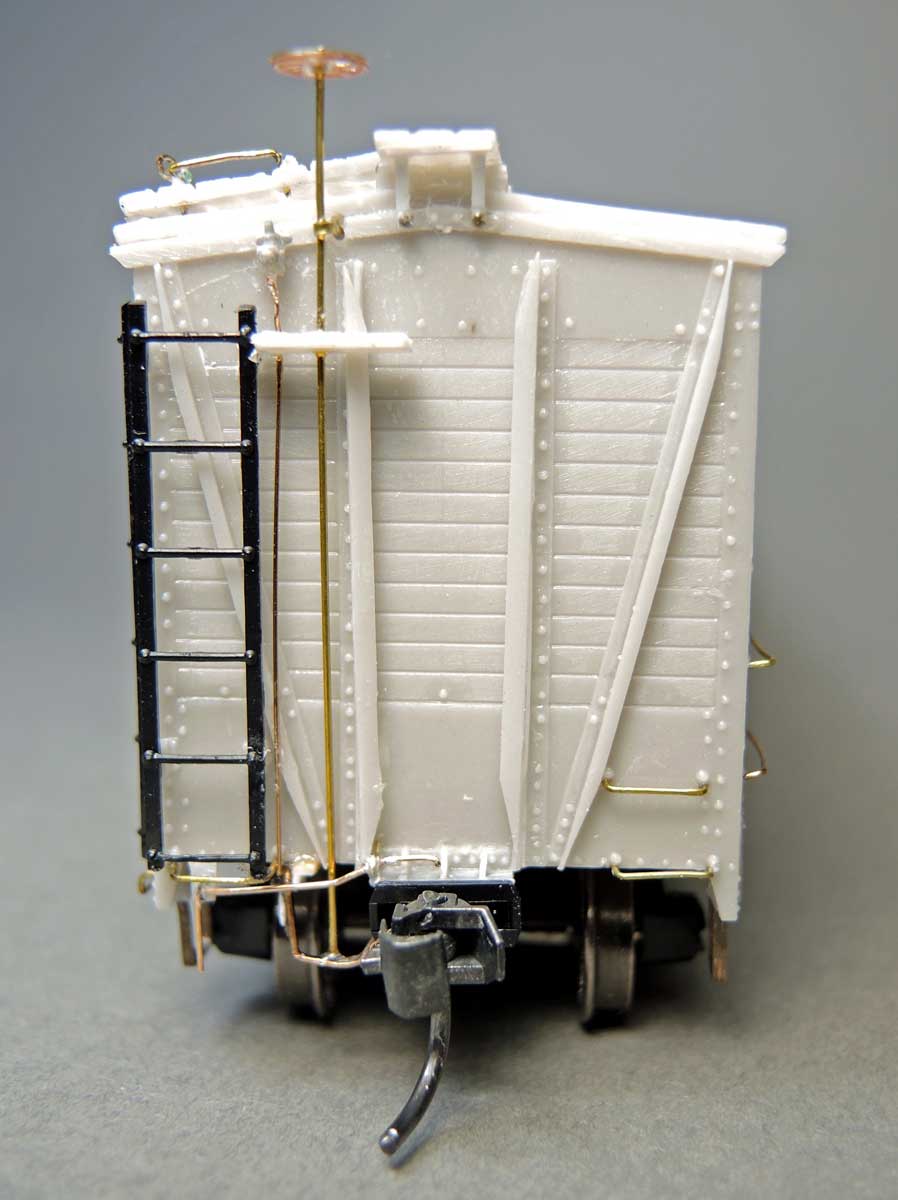
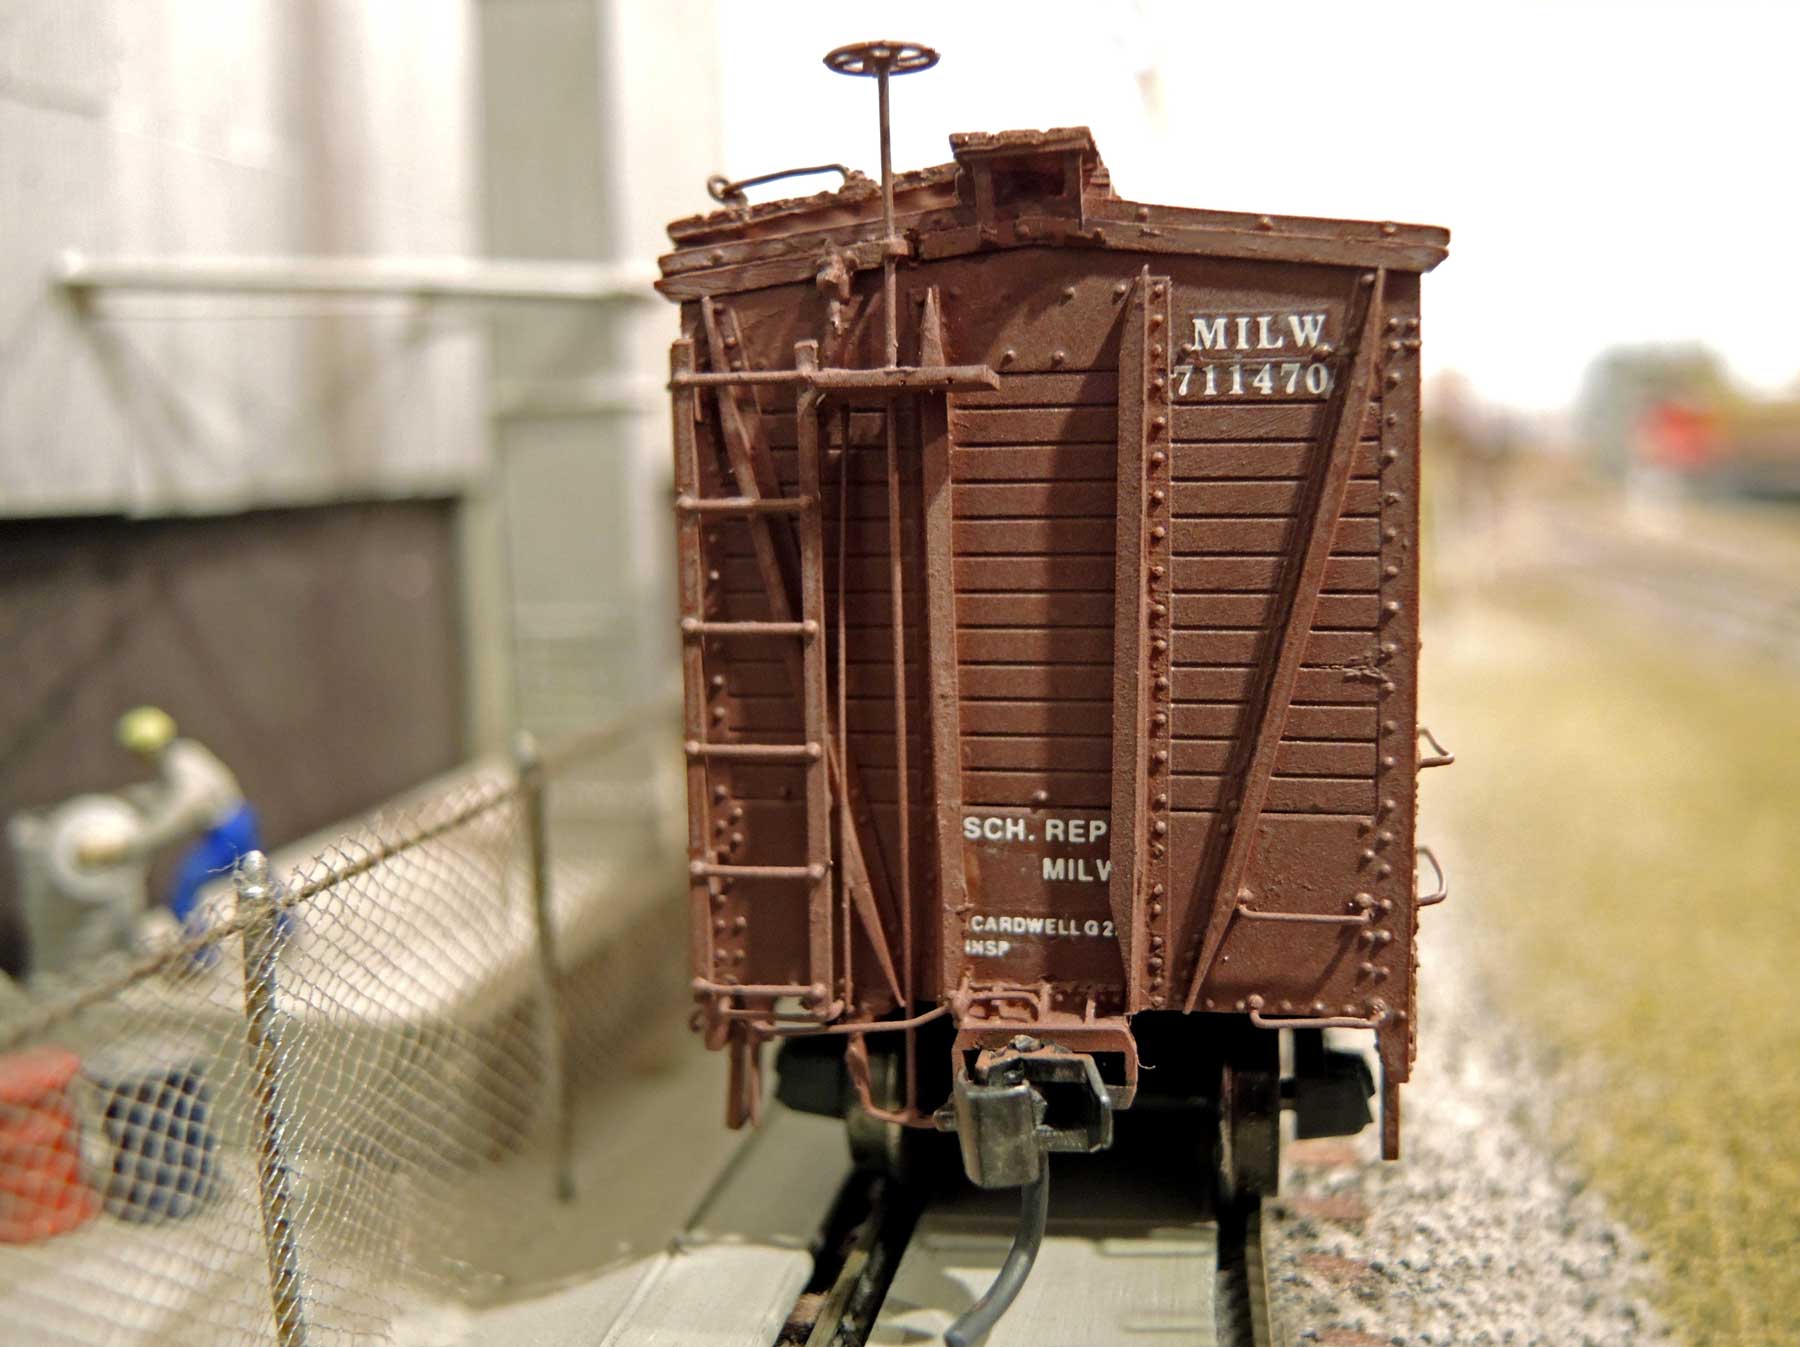
With the underbody complete, details can be added to the car body. As with the underbody, I deviated from the kit instructions. The running board brackets were made from Evergreen #8102 1 x 2-inch strip styrene with fasteners made using a homemade MEK “Goop”, which is styrene plastic melted in MEK. On the “B” end of the car, the brake shaft step was fabricated using an A-Line #29000 sill step shaped per prototype photo. To install the A-Line brake shaft step the top mounting pins were bent back ninety degrees and then half of that bend was again bent back up ninety degrees which when installed moved the brake shaft step forward from the underbody to enable the 0.015-inch brass wire brake shaft to rest on it. To complete the brake shaft step to look like the prototype in photos, additional parts of the brake shaft step such as the angle brace from the side to the underbody were made using Evergreen strip styrene. A Precision Scale #31796 retainer valve was used and a retainer line fabricated from Tichy # 1100, 0.008-inch phosphor bronze wire. A bracket for the brake shaft was made using the kit provided shim brass.
The uncoupling lever brackets were made by cutting one of the spare resin mounting “L” brackets in half and attaching it to the underbody under the left side of the end ladder. Yarmouth Model Works #355 eyebolts were installed in the resin “L” bracket to complete the detail. The uncoupling levers were bent from Tichy # 1106 0.0125-inch phosphor bronze wire and installed in the fabricated resin mounting brackets and the Detail Associates #2206 eyebolts provided in the kit for the mounting brackets above the coupler pocket.
On the car body sides the grab irons for the left side in the kit were not the correct length so new left side grab irons were bent from Tichy # 1106 0.0125-inch phosphor bronze wire and installed.
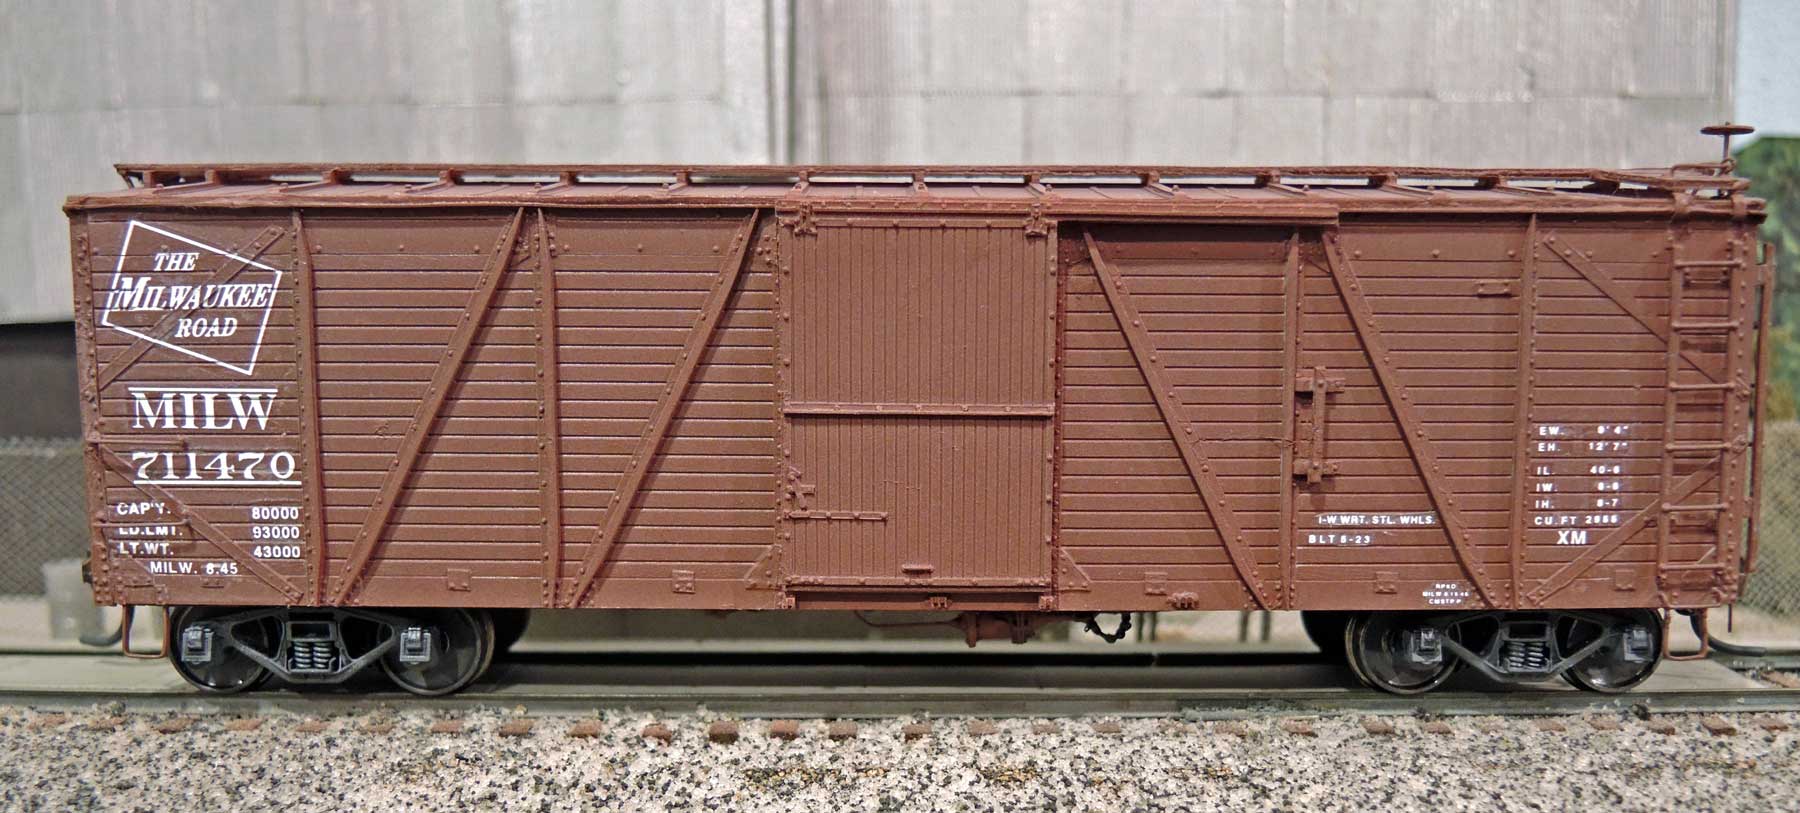
With car body detailing complete paint and lettering were applied. The model as washed with an all-cotton cosmetic applicator dipped in 91% Isopropyl alcohol. After this dried thoroughly, PollyScale Box Car Red, F414281, was sprayed on all surfaces. After drying, the car body was sprayed with Model Master 4638 Gloss Clear Acryl for a decal base. The paint and gloss for spraying were thinned, 2 parts paint 1 part thinner, with a custom thinner mix of distilled water, Vallejo Airbrush thinner and airbrush flow improver were mixed per the formula found in Guide to Acrylic Painting by Joe Fugate. A Paasche Talon airbrush was used for the work with the compressor set at at 28 psi. The kit provided decals were applied using Microscale Micro Sol. Rail Graphics printed the original decals for this Sunshine Models kit. Photos from various sources were used to position the lettering. Once the decals were dry, the car body was sprayed with Model Master 4636 Flat Clear Acryl and the trucks were painted with PollyScale Tarnished Black, F414140.
Building this kit provided me with many fun filled hours. The fun will continue when the card car is made to put Milwaukee 711470 into operation on my Minneapolis & Northland Railroad Company. I wish to thank Frank Hodina who created the original Sunshine masters for this kit, and Eric Hansmann for his help editing this for you to enjoy on the Resin Car Works blog.
Thanks to Lester Breuer for sharing his build notes on a classic Sunshine Models box car kit.
Questions and comments can be posted below. Please follow the instructions so your comment can be posted. All comments are reviewed and approved before they appear. To subscribe to this blog, enter your info for a comment and check the last box to notify of new posts by email. Share the blog link with other model railroaders.
Brian I appreciate your suggestion. I have two packages of the Tahoe Model Works suggested truck type in my truck inventory. I will compare them and change them.
Thank You.
Lester
Thank you for your mention of Tahoe Model Works Buckeye trucks. May I suggest a better pick–the Tahoe 40-ton ARA truck, TMW-115/215. I feel the outline of this truck’s side frame and bolster end are a better match to the Milwaukee’s truck. When I build my kit for this car, this is the truck I’ll use.
Brian Leppert
Tahoe Model Works
Carson City, NV
Lester, thanks for sharing your techniques on a very neatly constructed and finely detailed Milw Road SS Boxcar. I have one of these waiting to be assembled and your tips should help me get it started.