George Toman shares his work updating a couple HO scale reefer kits. George has some cool techniques in this post.
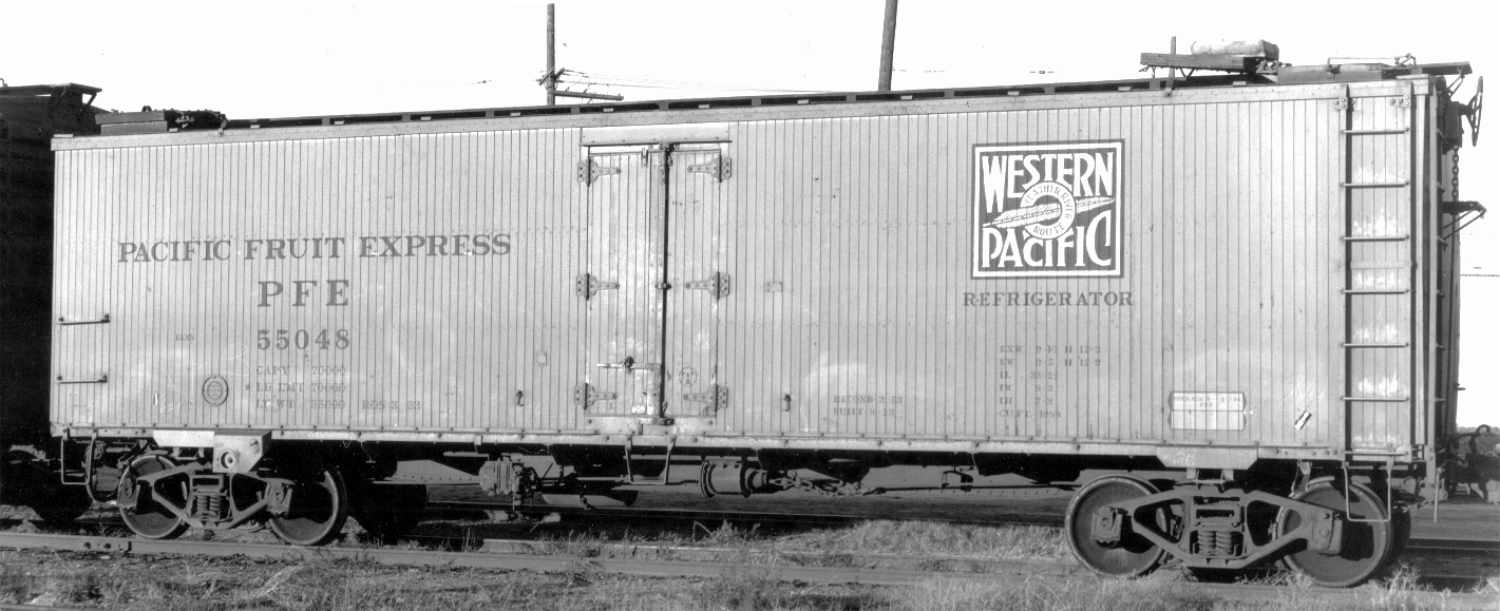
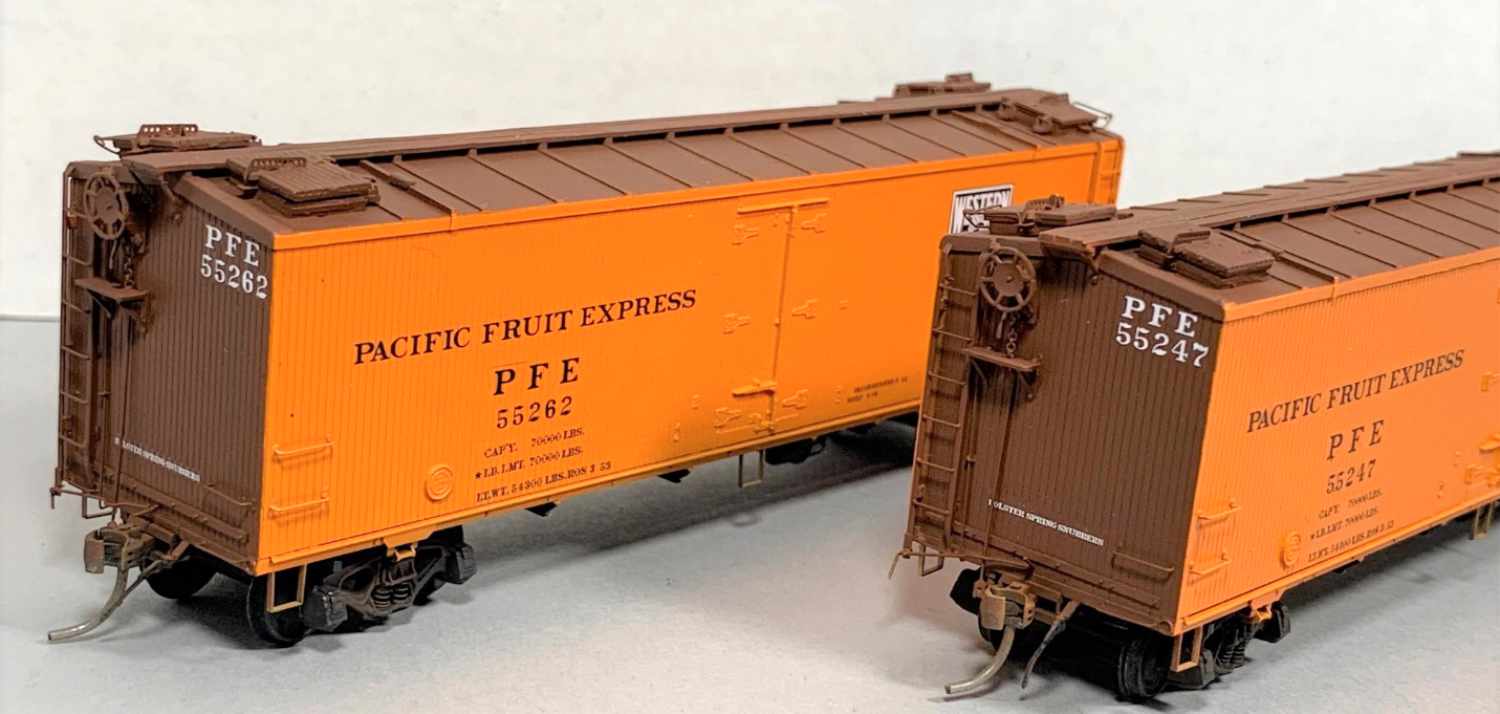
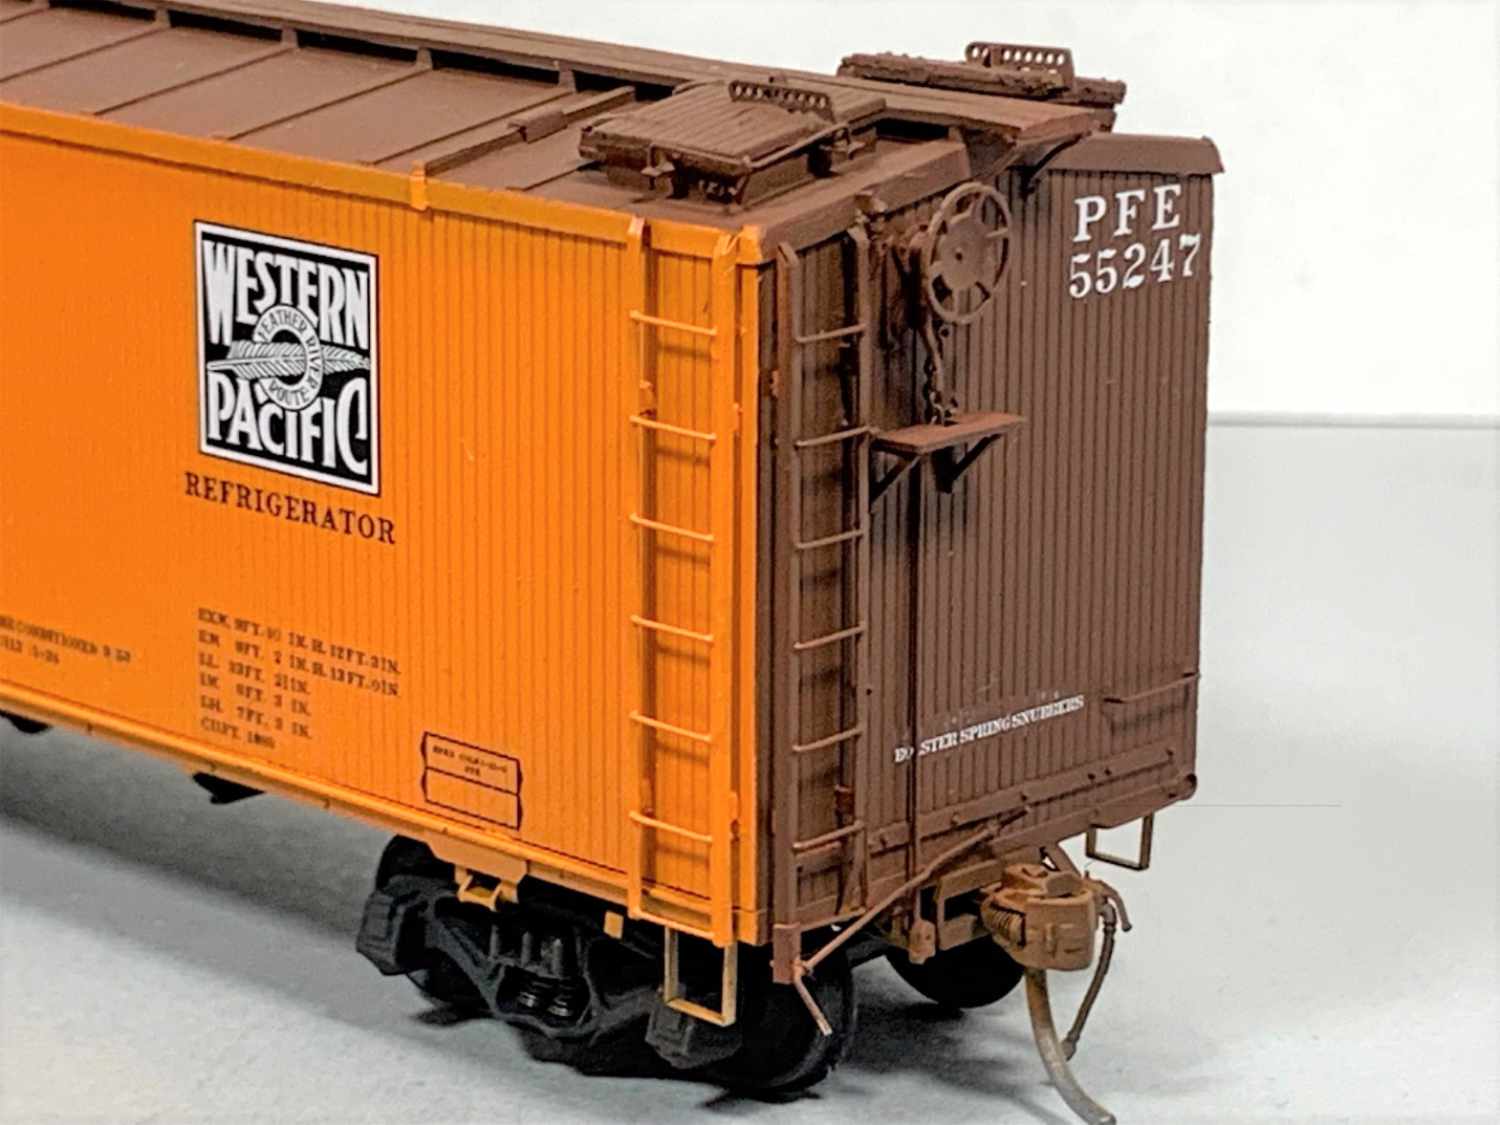
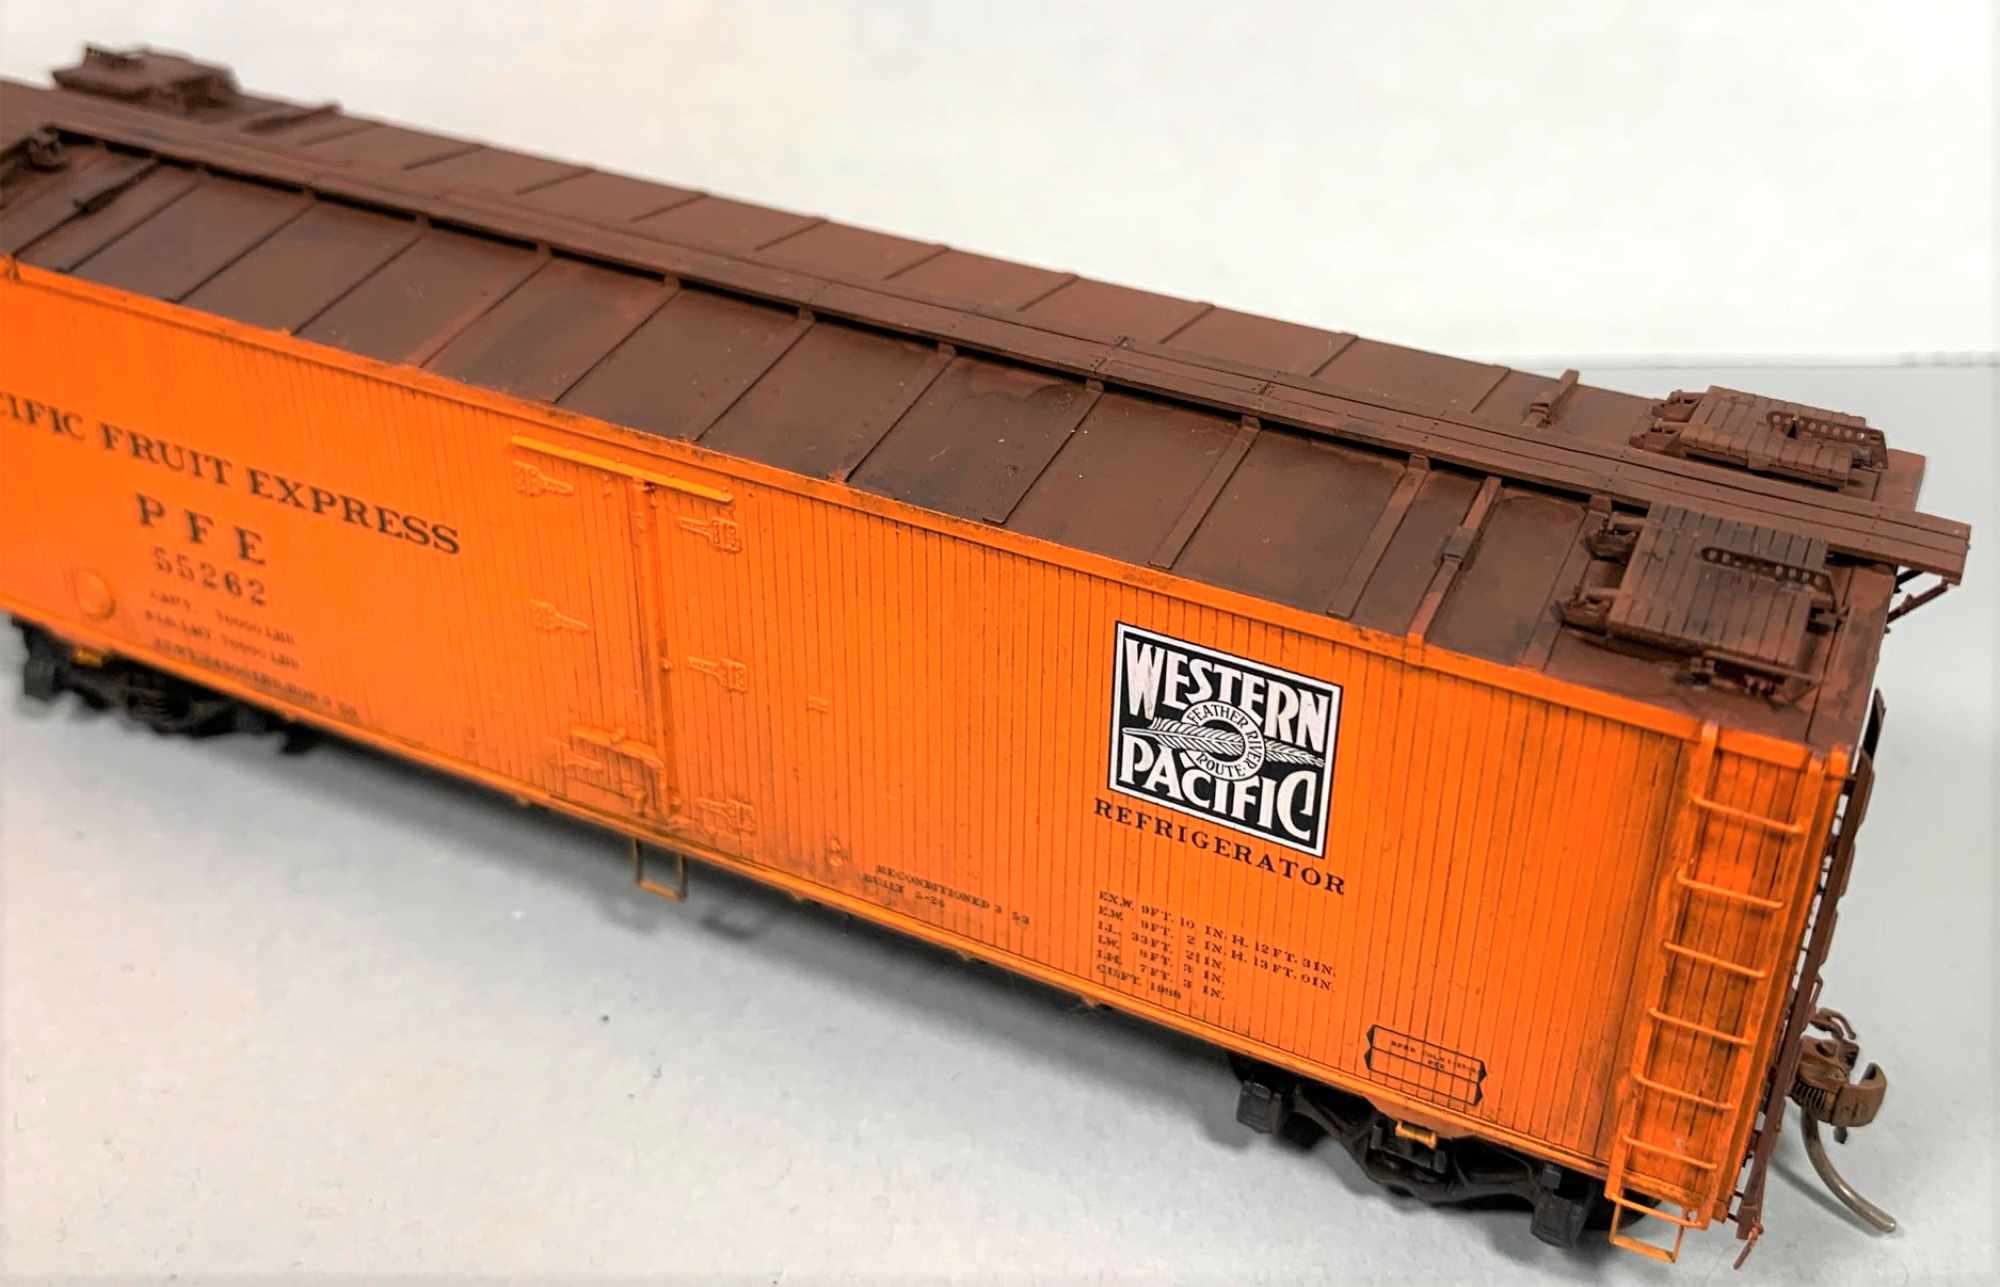
In 1923, the Western Pacific joined Pacific Fruit Express (PFE) and added a number of cars to the PFE fleet. The cars were built to current PFE standards and designs. They featured a WP herald on the right side. Although owned by the WP, were part of the general PFE fleet.
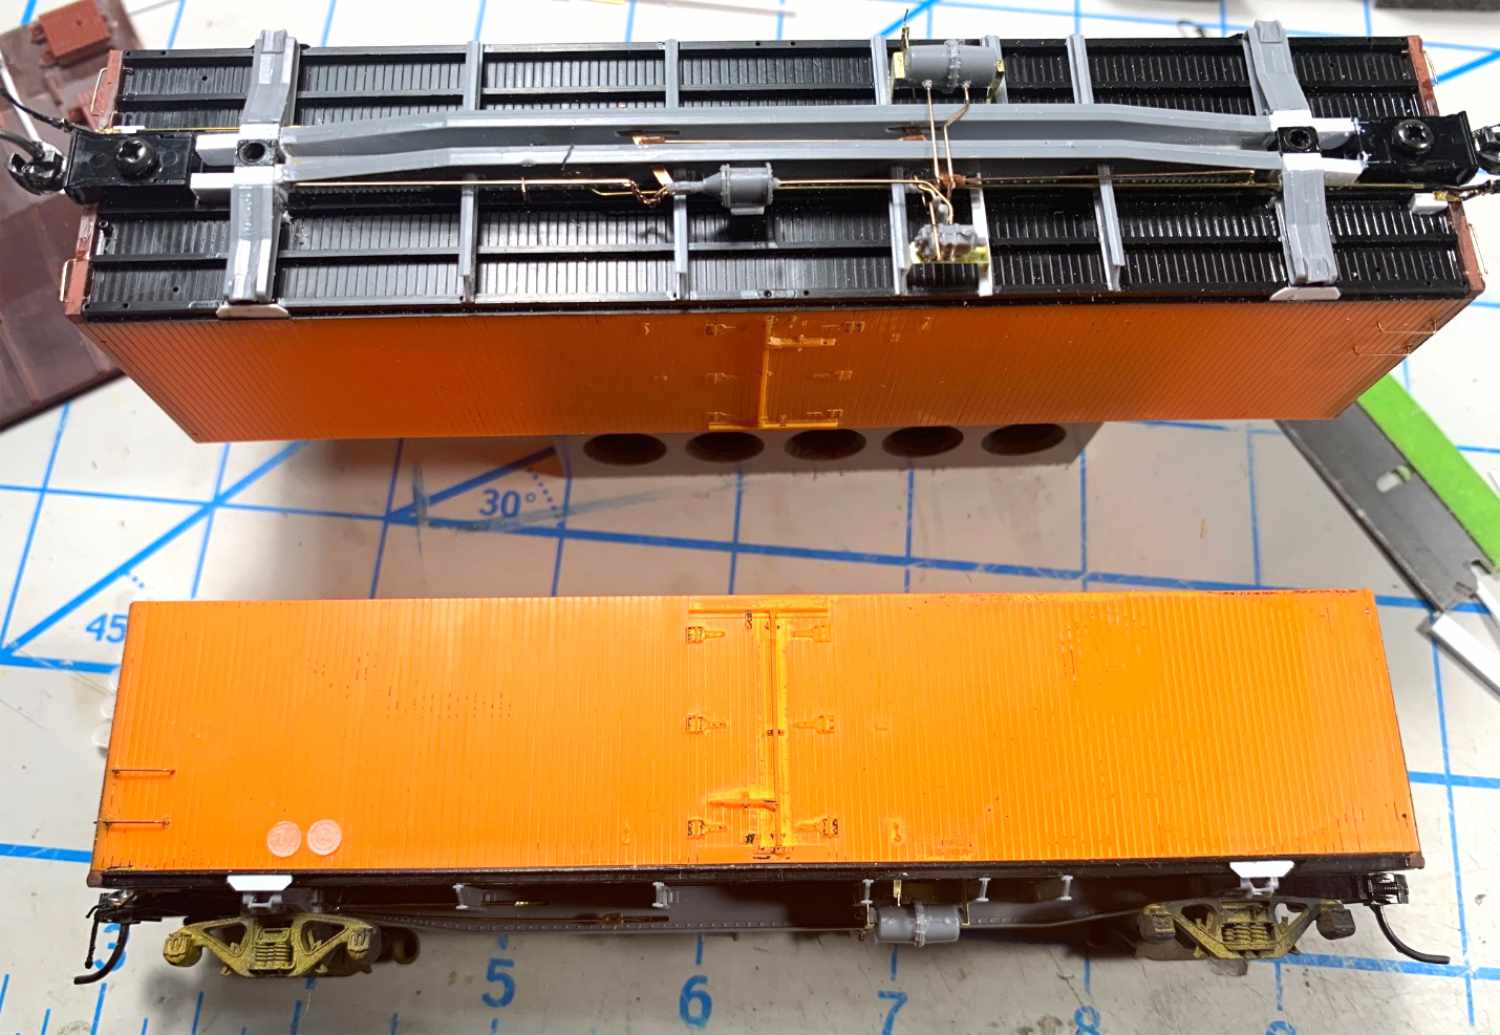
I chose to build two cars from WP/PFE 55001-55899 number series. These R-30-9 clones were rebuilt and modified in 1953. These cars had a built-up underframe and AB brake components. The frame was different from the Bettendorf underframe used on many PFE cars.
These rebuilds also used Preco electric fans and generators that are nicely represented with 3D printed fan plates from Resin Car Works. Many thanks to Dick Harley for info on building these reefer models. Dick’s SmugMug site feature modeling information on the PFE wood sheathed ice reefers. Dick recommends using a Red Caboose tall side wood PFE R-30 series as a starting point. To represent the built-up underframe, a Tichy 3030 kit was used.
The Red Caboose model is a nice starting point but will need modifications to the ice hatches and ladders. I used WP and PFE reefer photos as I built these models. I was well along in the construction, when I discovered that these WP 55000 series were very close to the PFE plywood cars Ted Culotta covered in his Hindsight 20/20 presentations. These are available as PDF downloads.
My first step was to fit the Tichy underframe to the Red Caboose underframe. I modified the Red Caboose bolster by squaring up the slightly tapered sides and then modified the Tichy centersills as shown in the next three photos.
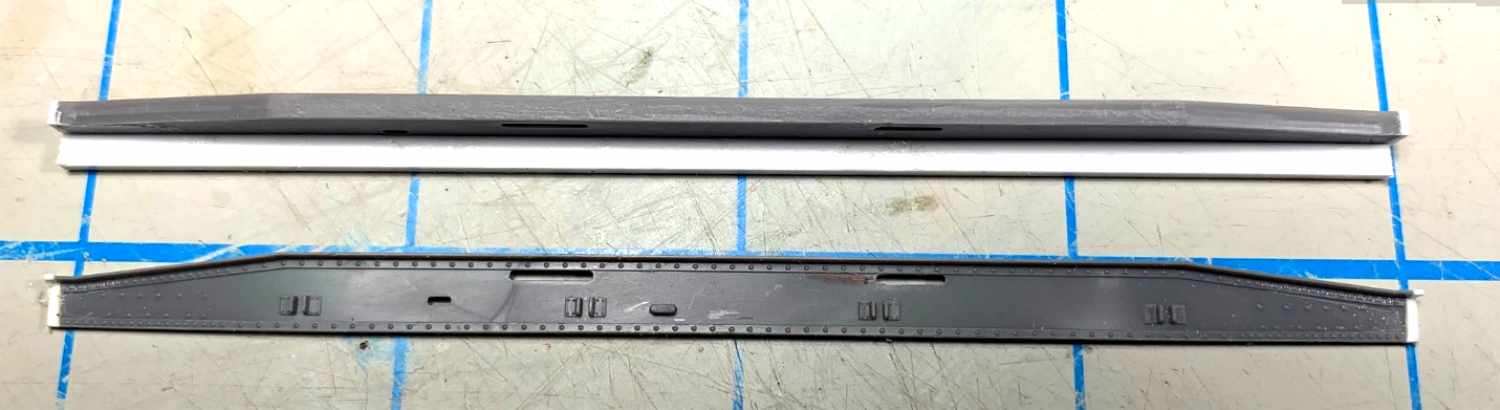

Bolster reinforcement plates were cut from 0.010-inch thick styrene and glued in place as seen above. Magic marker was used to darken the styrene and scribe light cut lines for the proper shape.
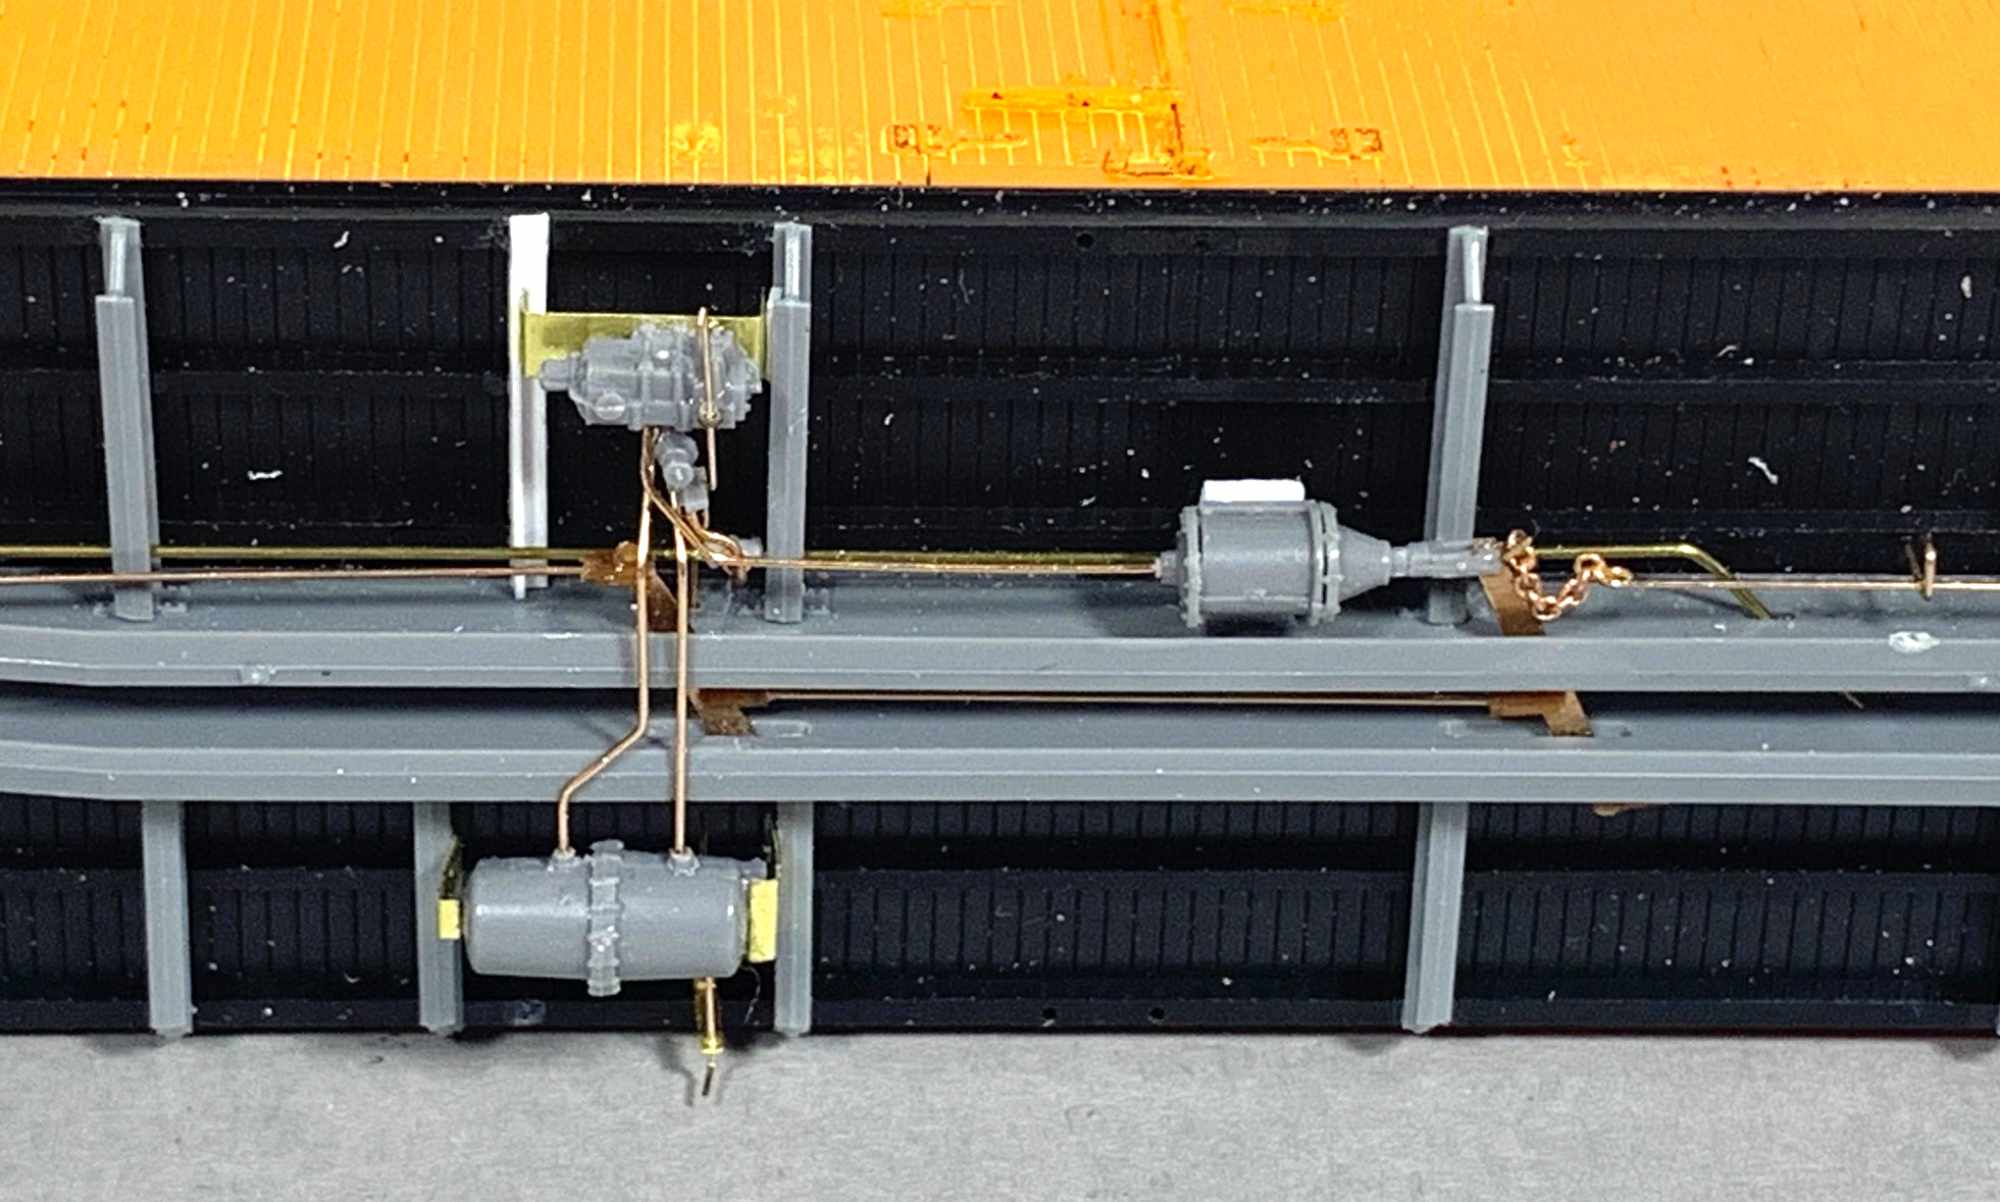
I used styrene and 0.005-inch brass to make the AB component mountings.
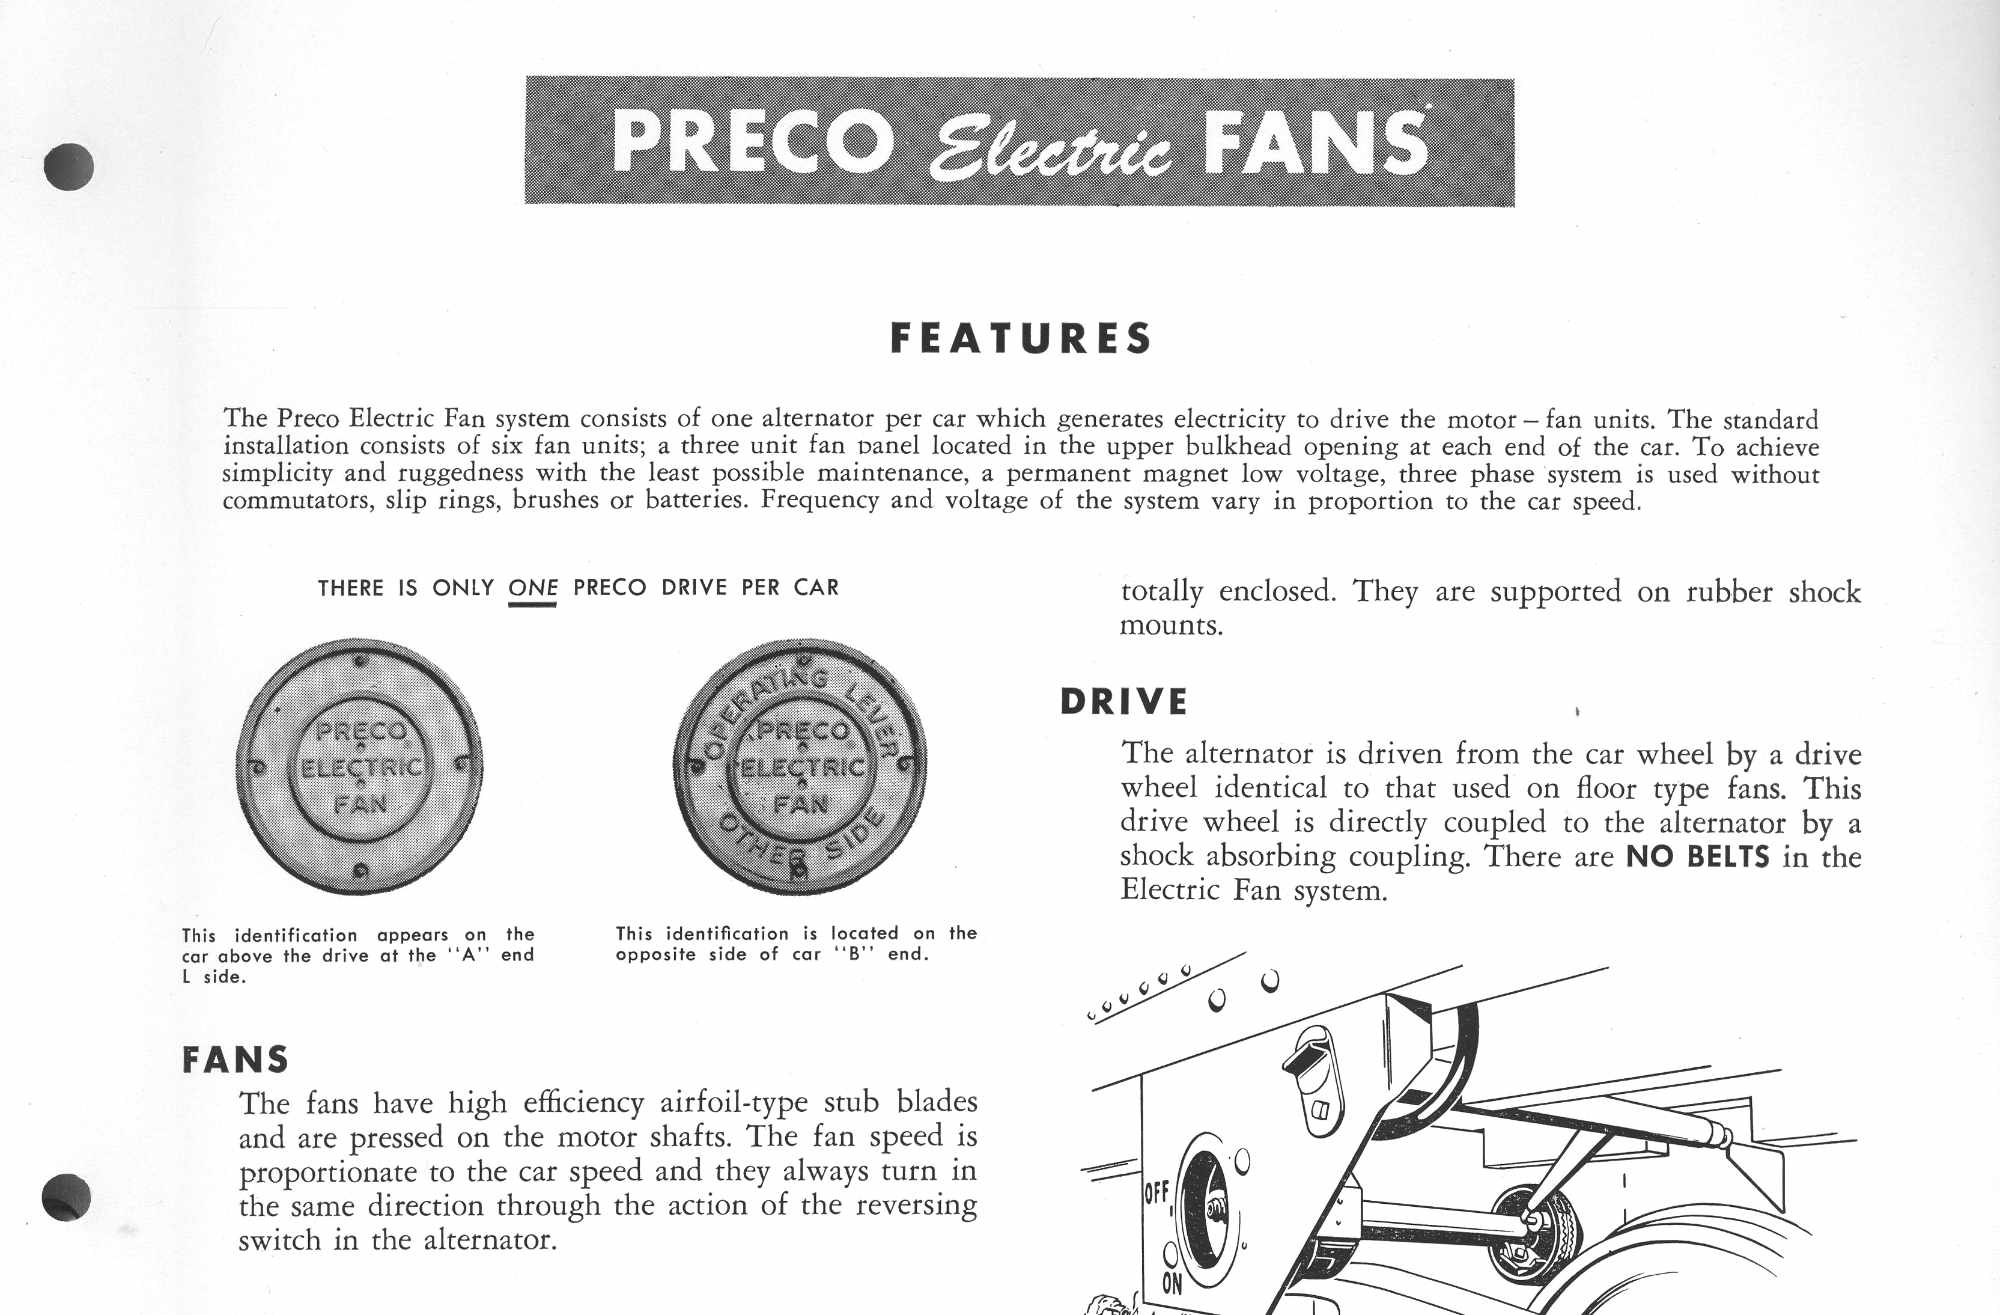
Here’s an ad for the Preco fans which were installed on these prototypes. One alternator was driven by a wheel only on one side of the car. However, the round fan plates were on each side.
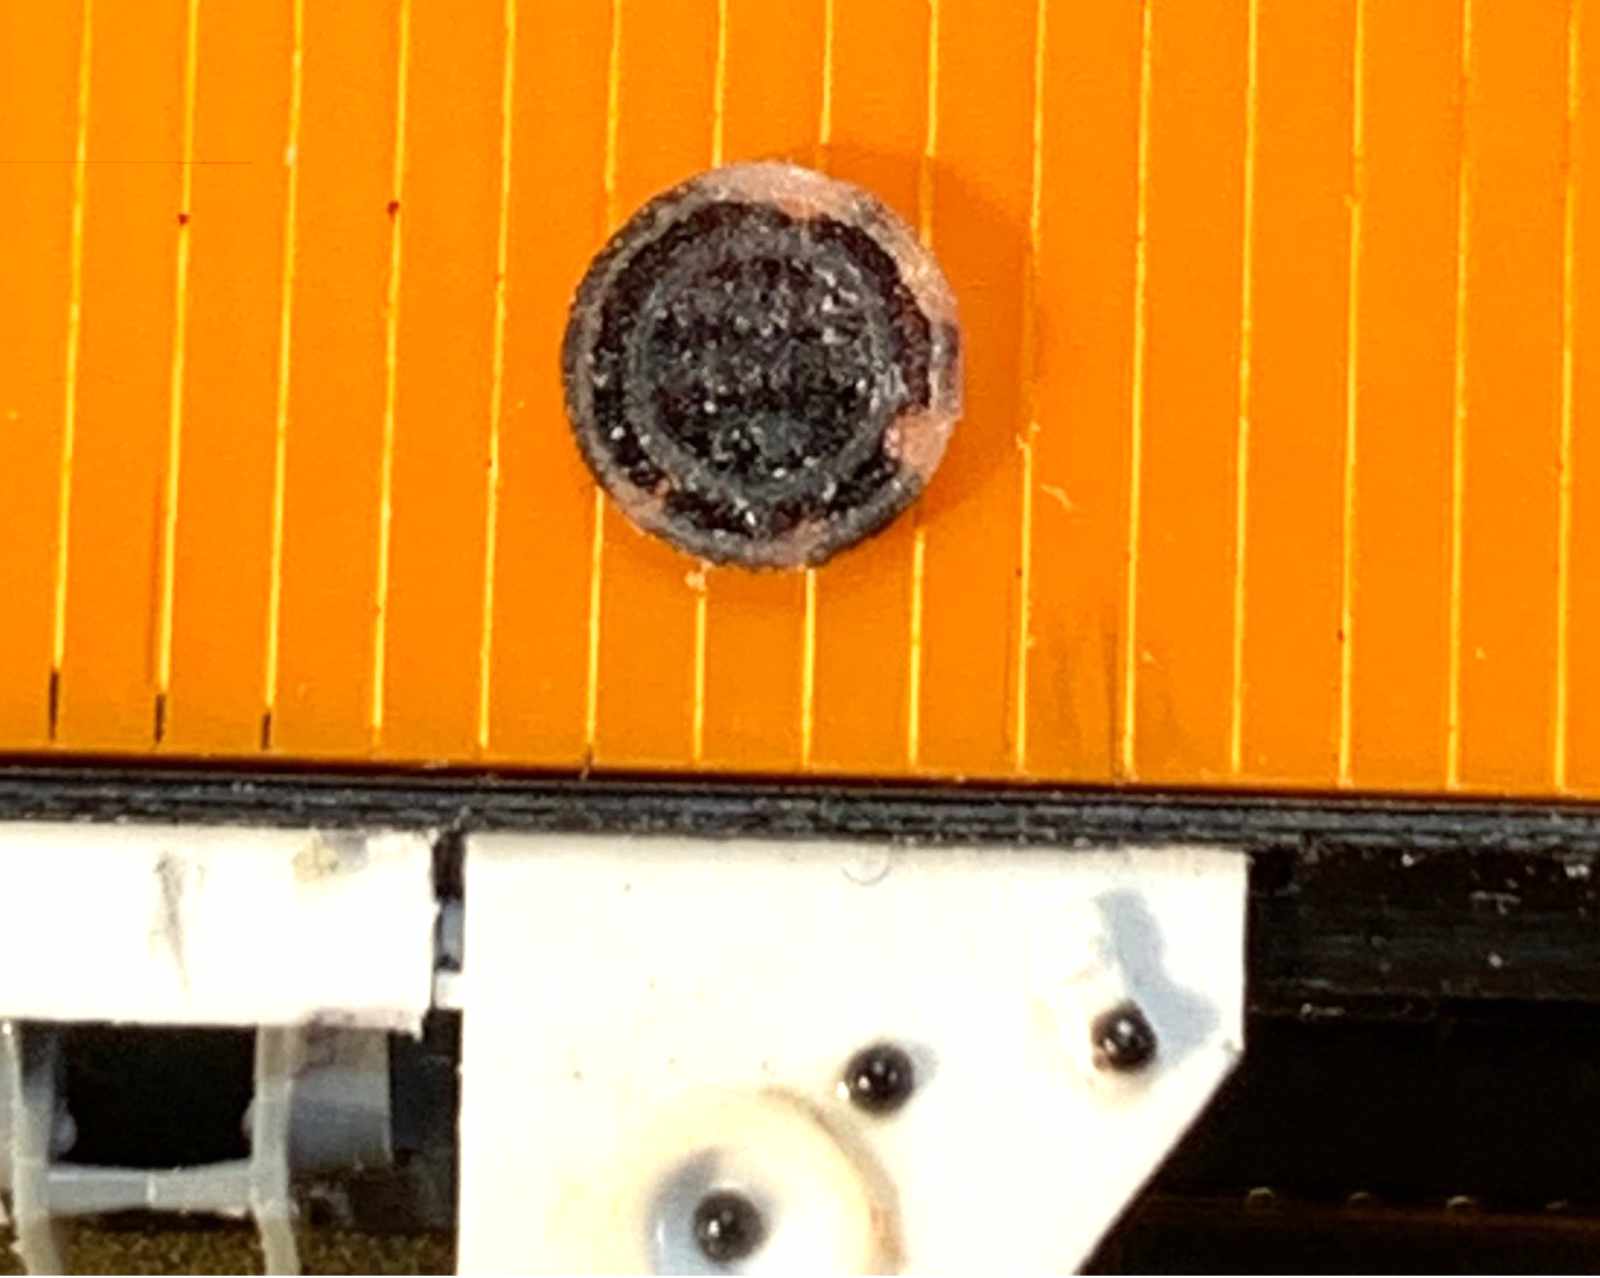
The Resin Car Works fan plate sanded to about 0.007-inches. I made the Preco mechanical alternator drive from scrap styrene, tubing, and rivets harvested from an Athearn model. I used Magic Maker to color/highlight the fan plate to make it more visible and read the lettering
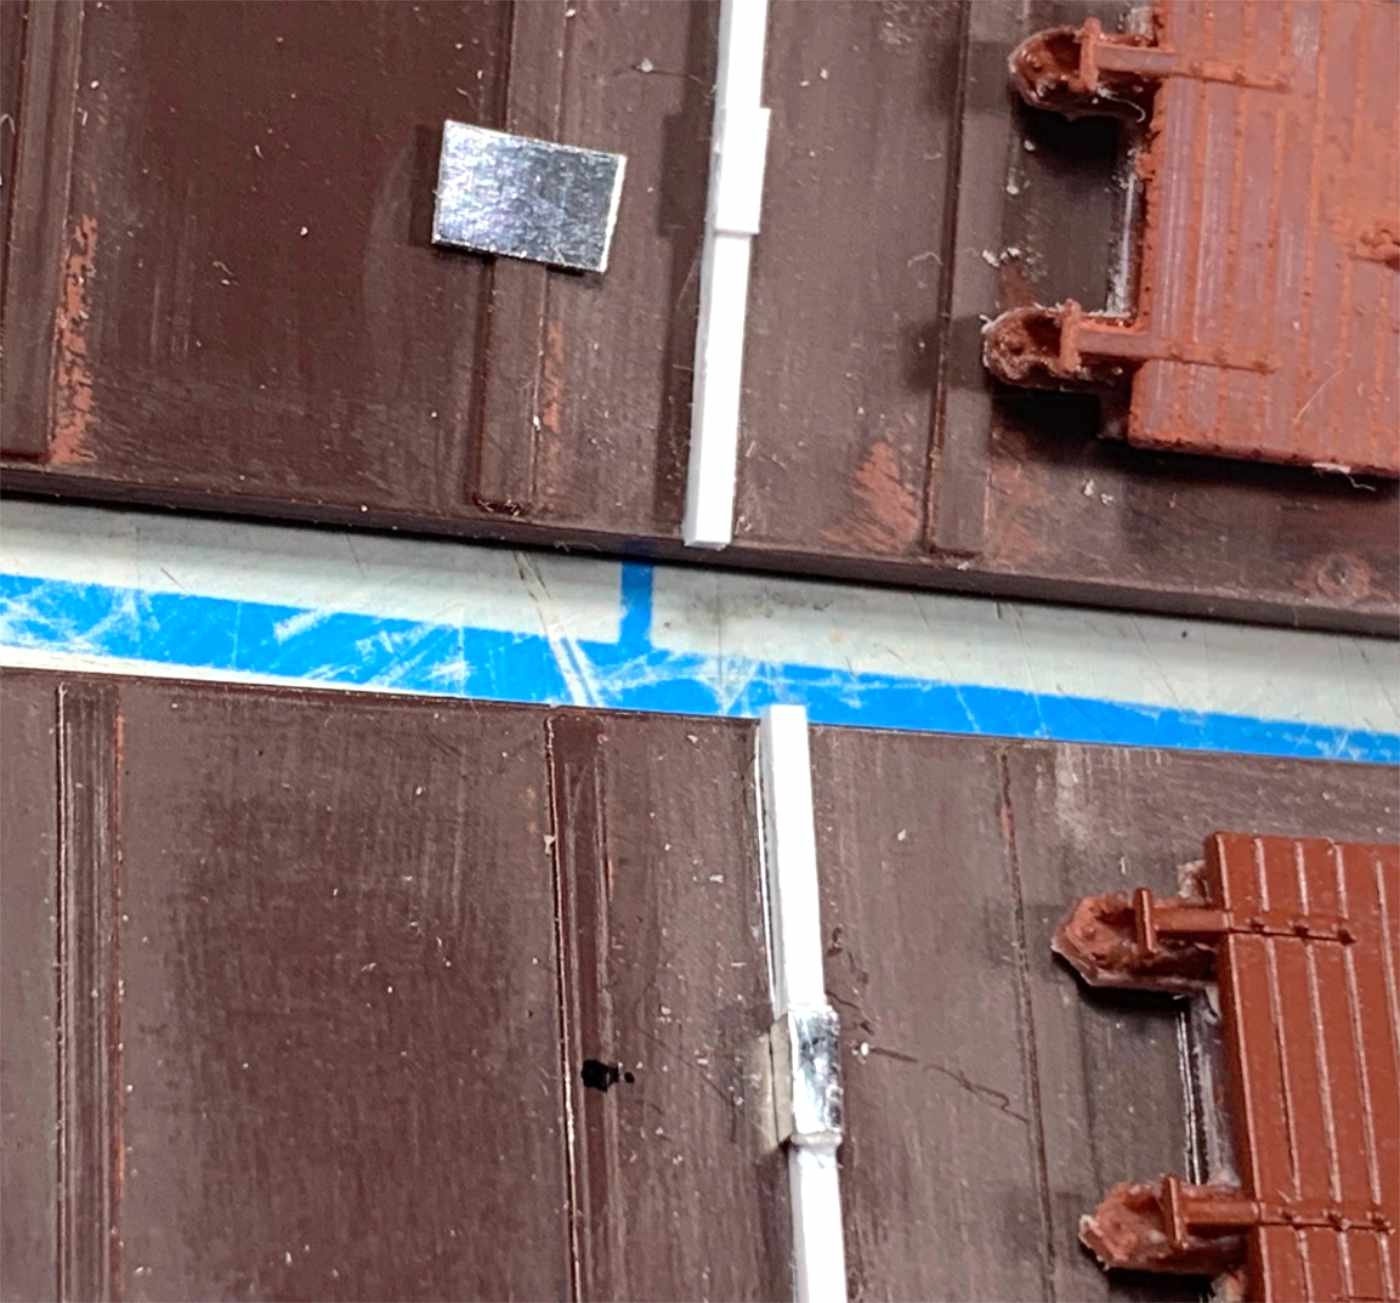
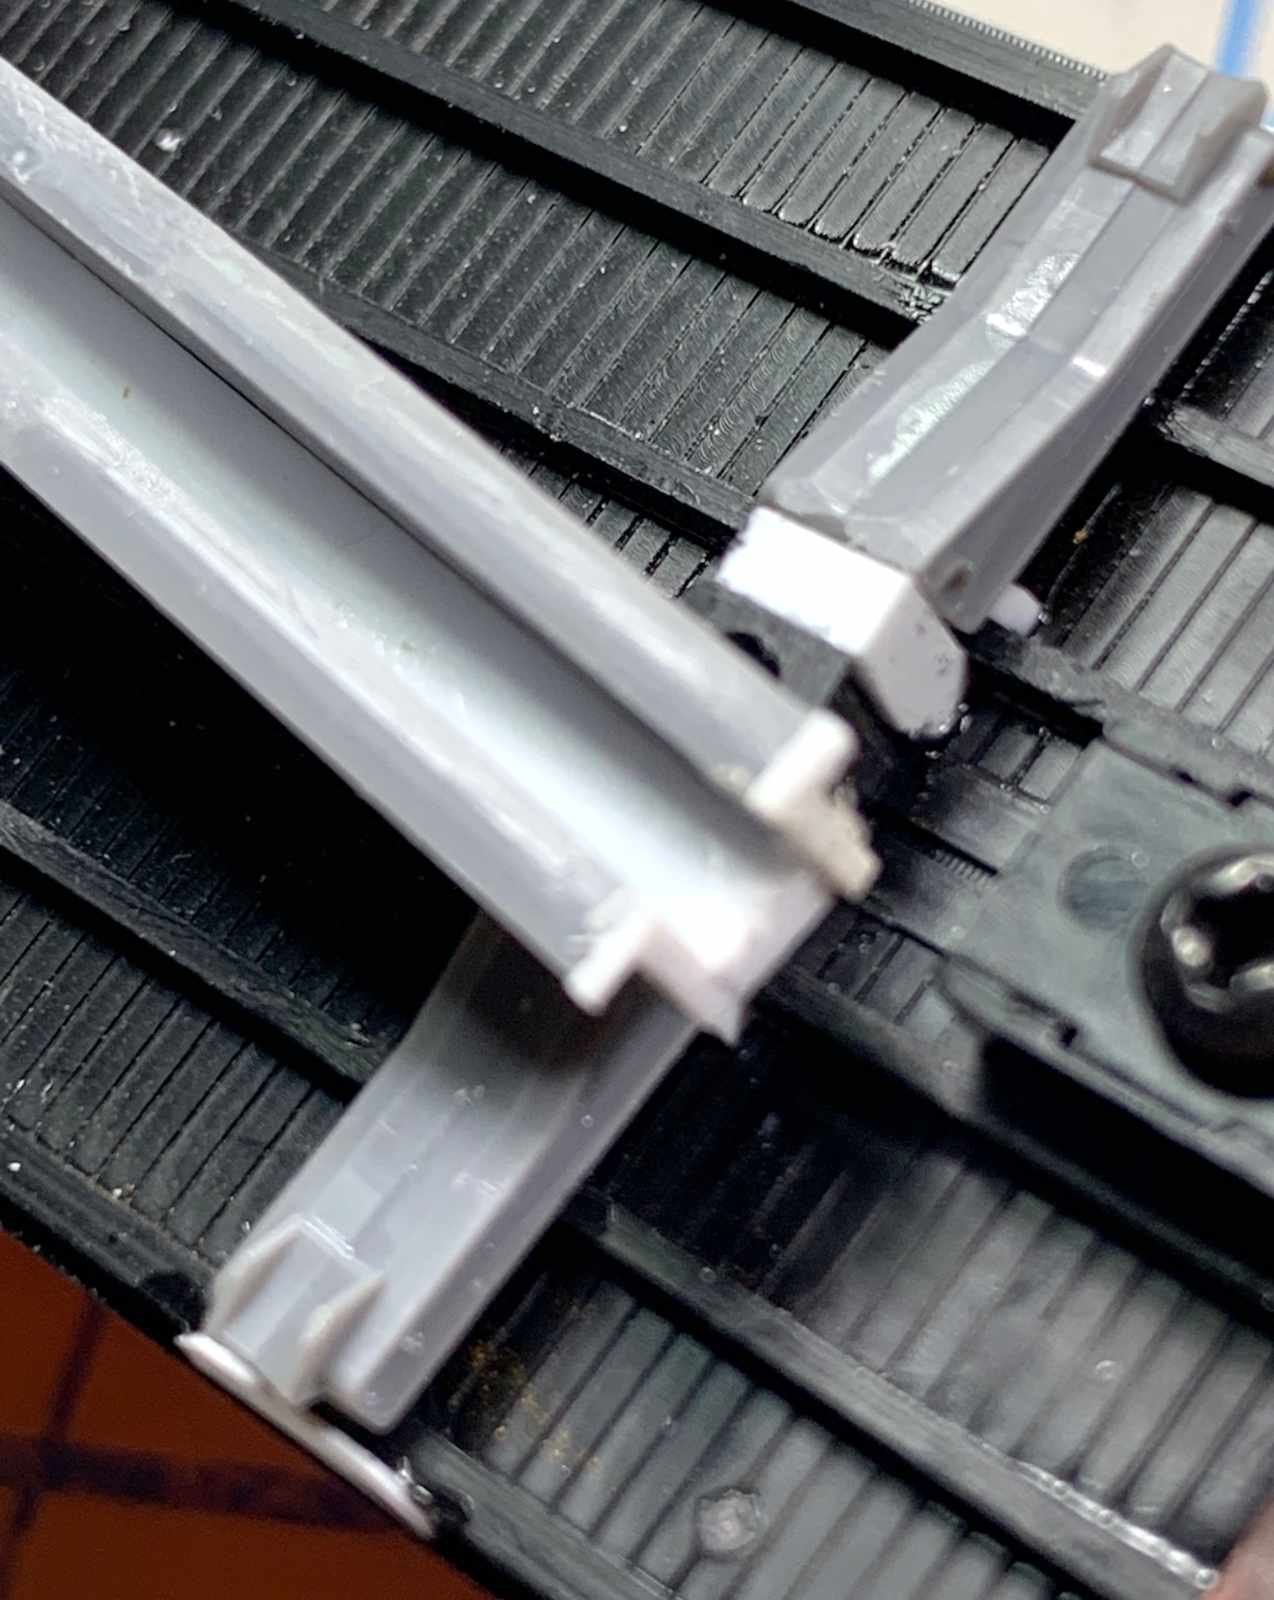
The roof hatch frames were carefully cut from the stock Red Caboose platforms leaving the square frame and the hinge for the hatch. The hinges were attached to the frame and were not secured to the roof giving the appearance they are floating. Hatch stops were constructed from 0.030 x 0.030-inch styrene. The small, raised stops were covered with 0.003-inch Vintage Reproductions foil. (No longer in production)
Kadee scale coupler boxes were added and the underframe work finished up with Yarmouth Model Works air hose brackets, and Moloco air hoses.
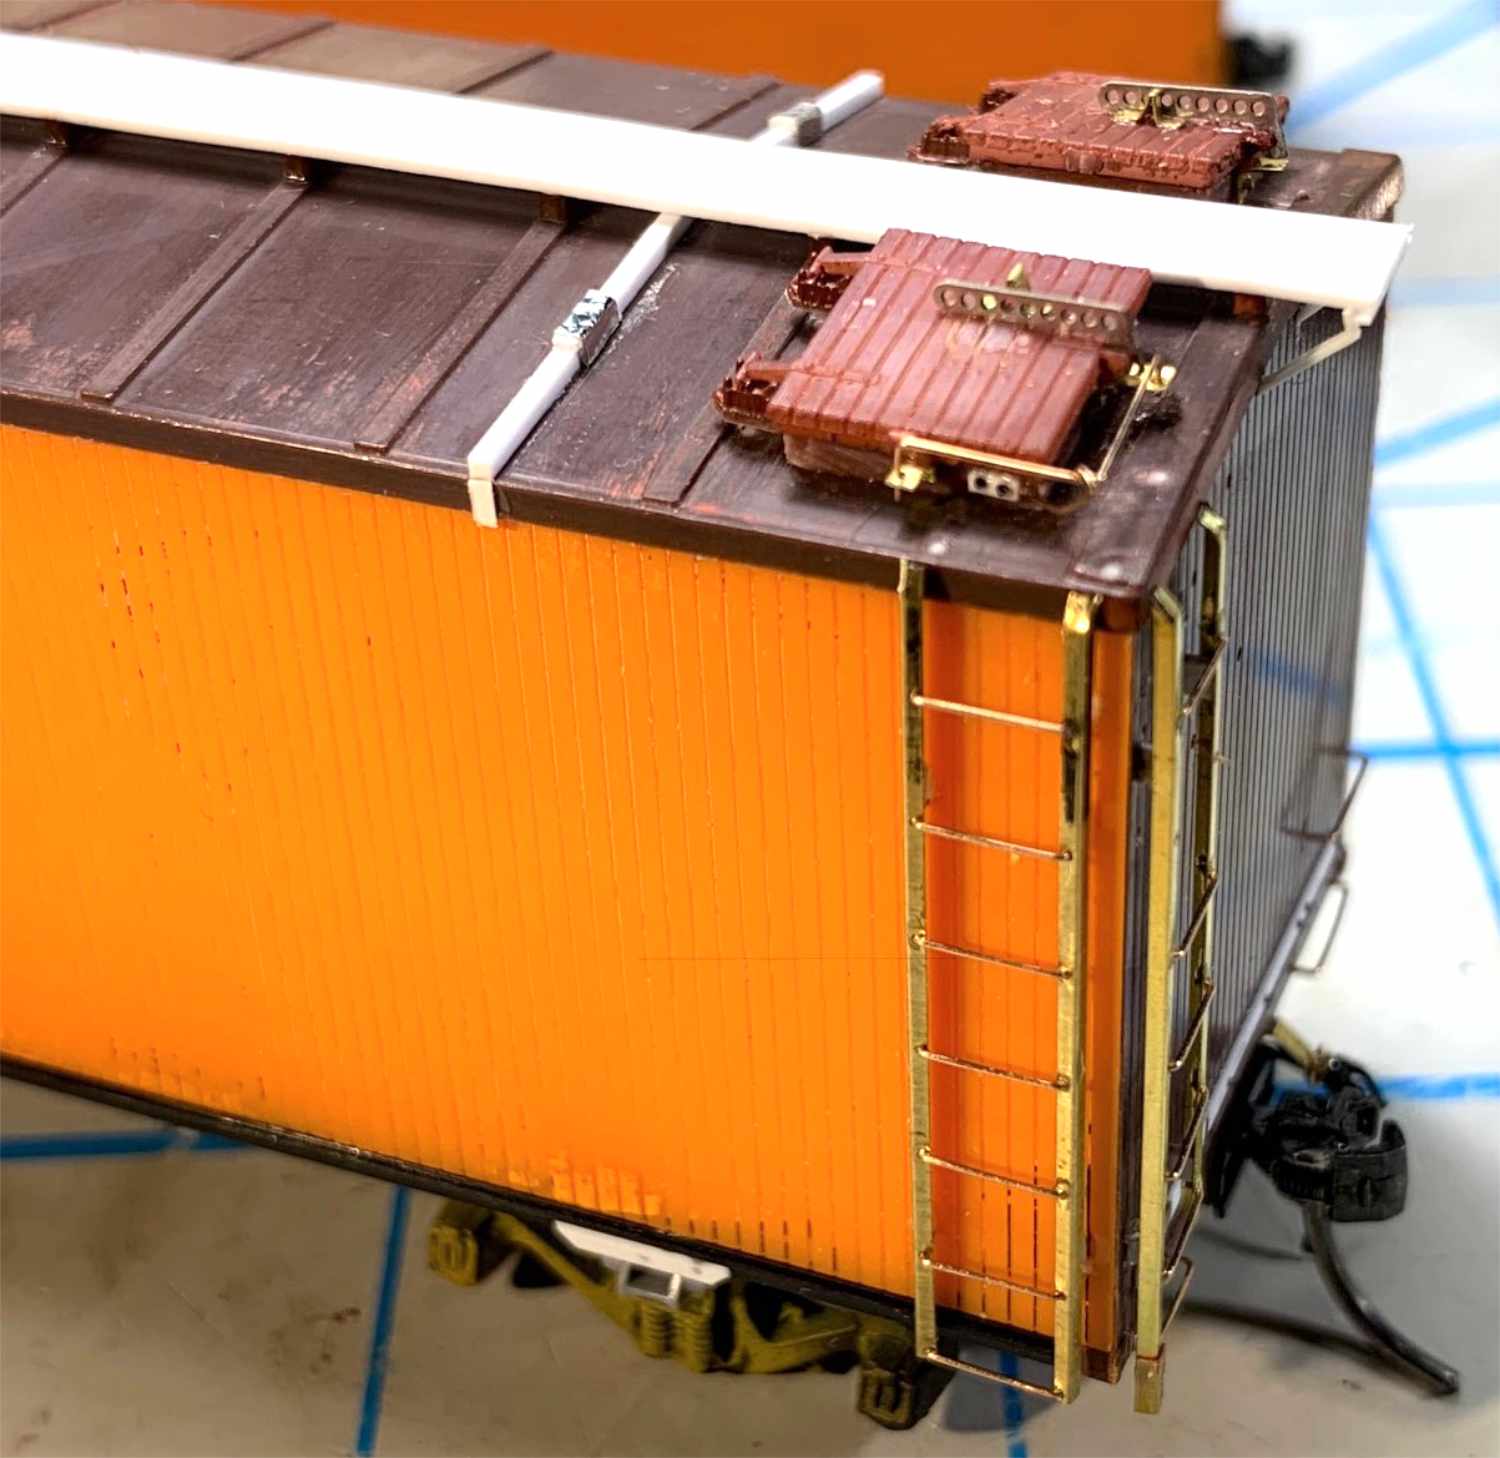
The mounting brackets for the L-shaped grabs by the hatches and above the ladders were cut from 0.005 x 0.030-inch sheet brass and drilled to accept 0.010-inch Tichy wire. The angled corner grab was fashioned from 0.008-inch wire and 0.005-inch thick styrene bits, with Athearn rivets. I made the running board from 0.020 x 0.060-inch thick styrene that was lightly scribed for wood grain. Bolt impressions were embossed where it is secured onto the supports. The custom bent Yarmouth ladders are easy to spot in the above photo.
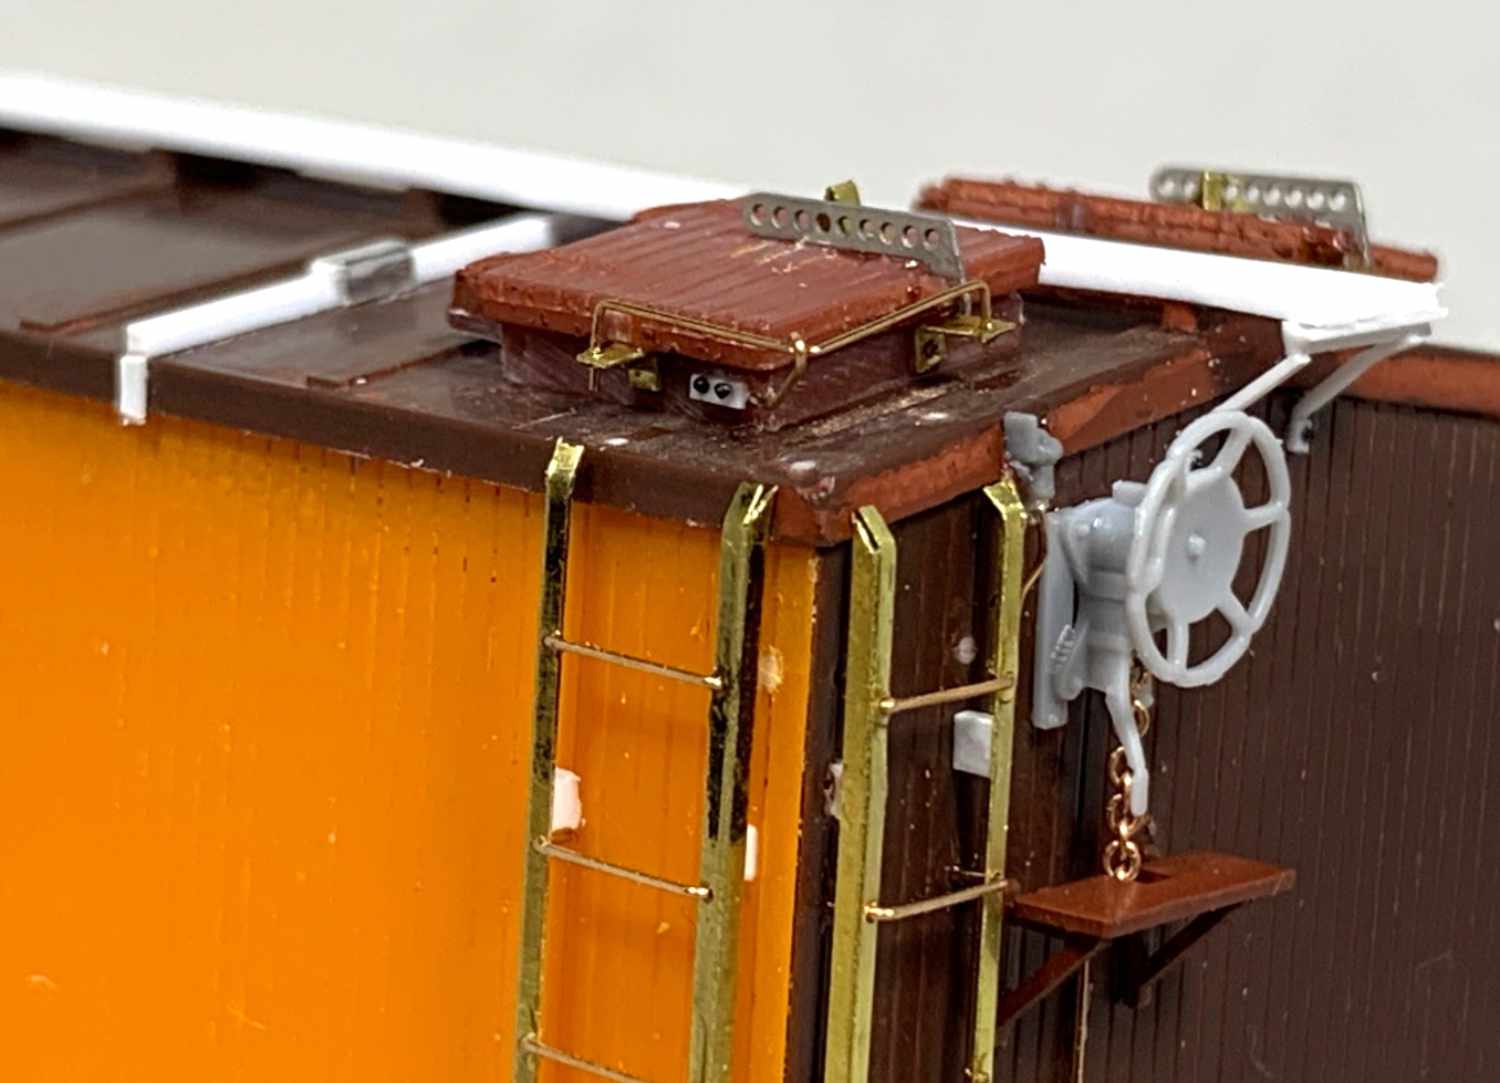
Here’s a close-up of B-end. I installed Plano Model Products photo-etched latches, a Tangent Scale Models Miner brake housing and wheel set, and custom bent V-shaped hatch rests made from 0.005 x 0.030-inch brass.
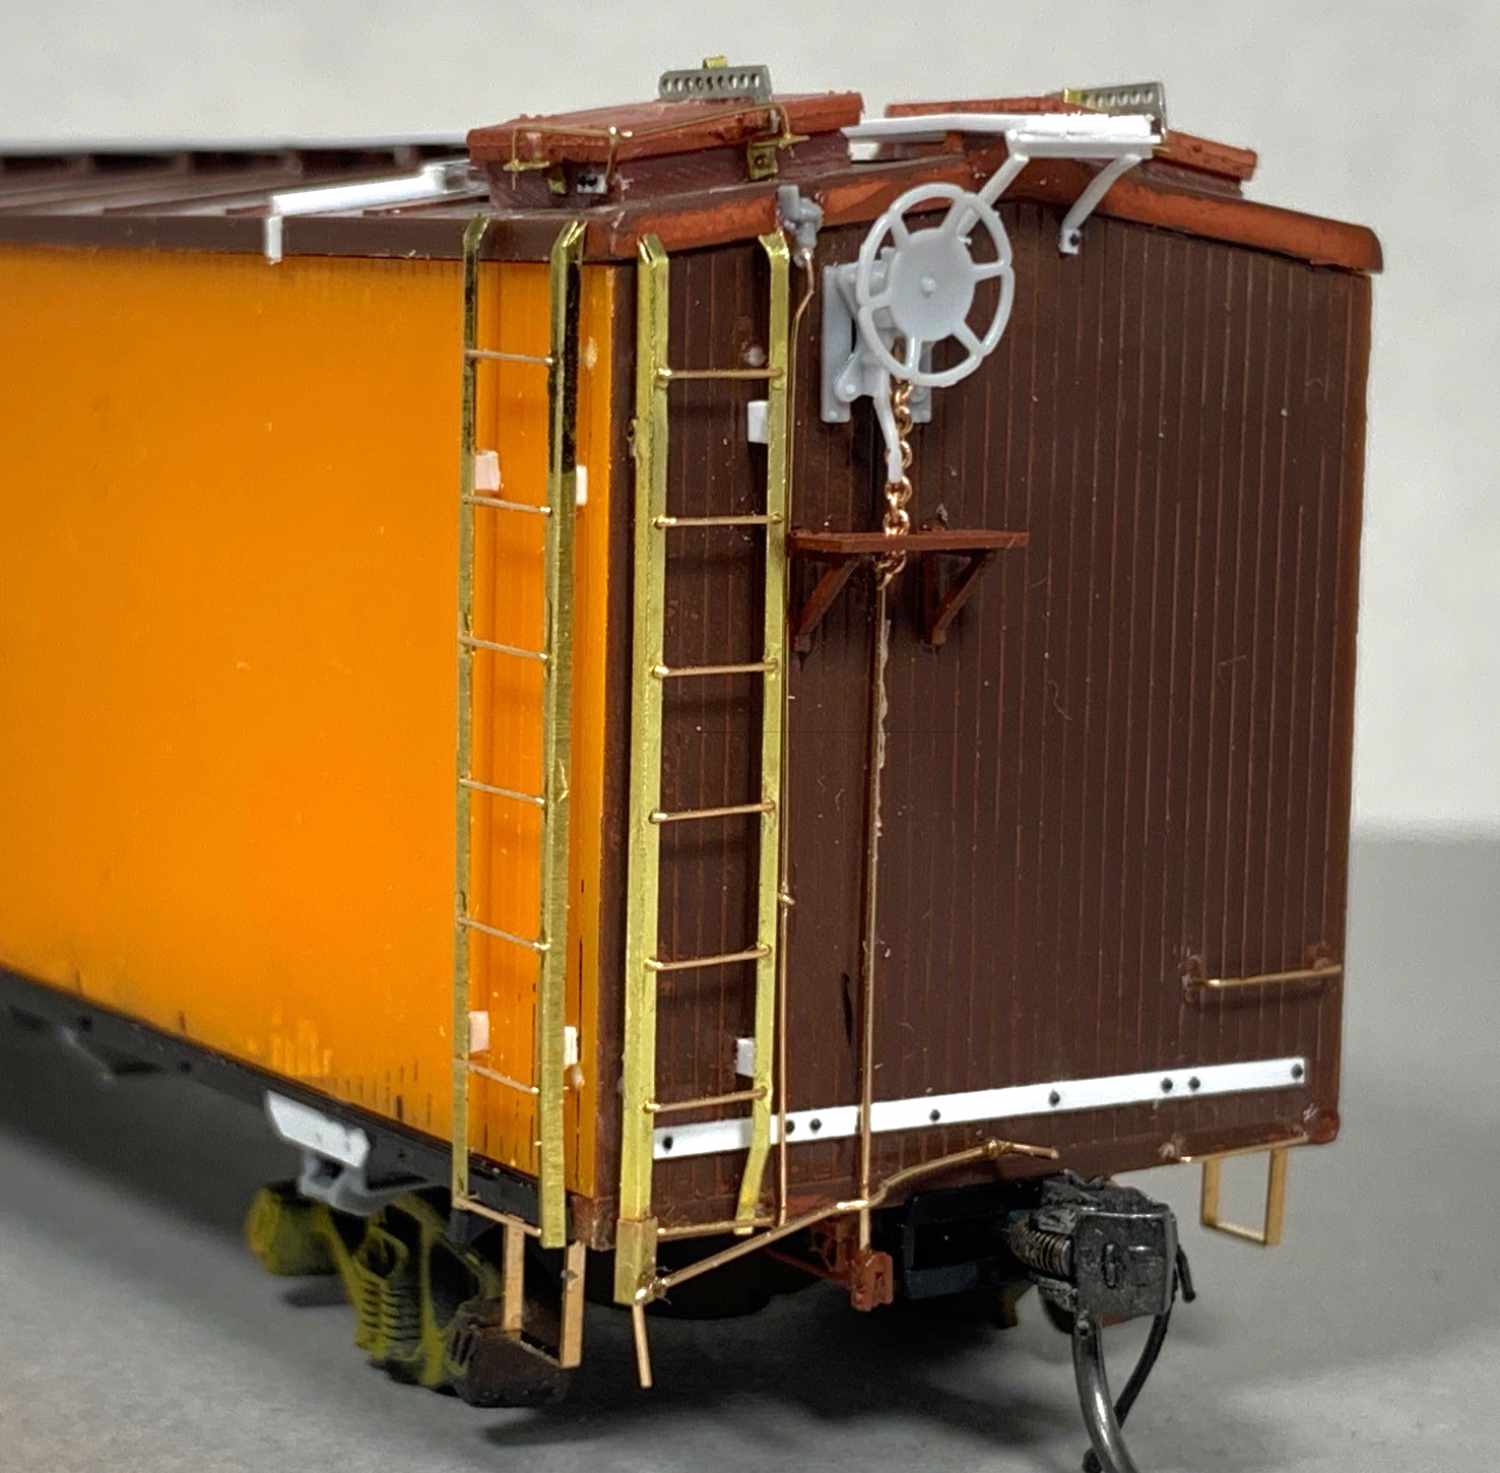
Here’s a full view of the B-end detail. Note how the inboard side of the ladder stile is trimmed and fits under the end sill grab. Also added is a flat plate at the bottom of the end with Athearn rivets

This side view shows the model is ready to be cleaned, primed, and painted
The cars were primed with Badger Light Gray Stynlrez. I painted the sides with AK interactive Light Rust #11105. I liked the appearance for the orange sides. Vallejo Black #70.862 was used on the underframe and Vallejo Panzer Aces Shadows Flesh #343 was sprayed onto the ends and roof. Before decals were applied, I sprayed the body with Vallejo Mecha Gloss #26.701.
National Scale Car WP/PFE Decals were modified for the 55000 series and installed on both of the cars.
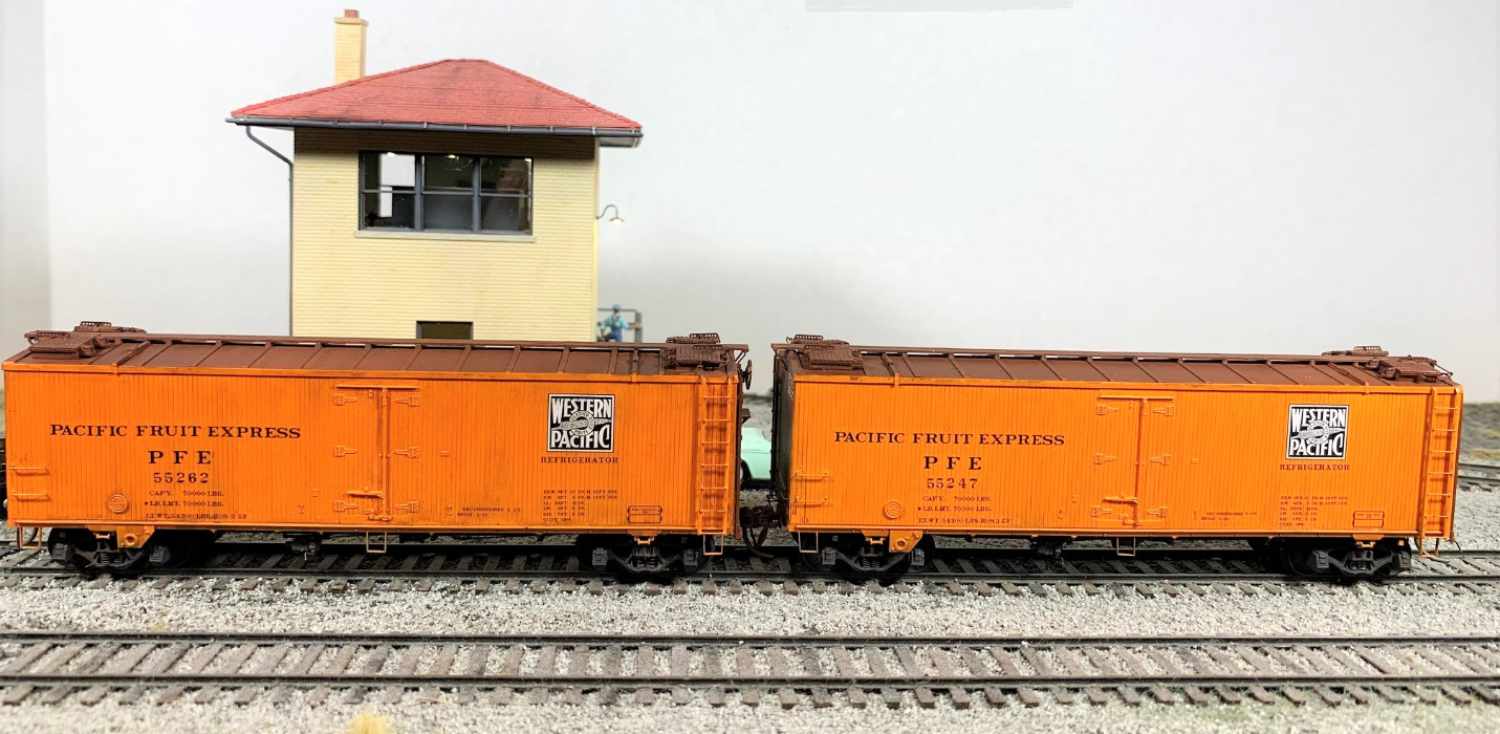
The two cars were given a bit of weathering using a black pin wash and some Pan Pastels.
Overall, this was a fun project building these two cars. I hope you find this information useful.
George Toman
Thank you George for sharing another pair of fine freight car models on the RCW blog!
Questions and comments can be posted below. Please follow the instructions so your comment can be posted. All comments are reviewed and approved before they appear. To subscribe to this blog, add your email address to the function at the bottom of the right column on the main page. Share the blog link with other model railroaders.
Beautiful as always
Beautiful models, as always.