George Toman sent photos and information on his latest model. Here’s George with the story.
While attending the 2019 RPM Chicagoland, I caught up with Jerry Hamsmith who showed me the latest resin kit he and Ed Rethwisch produced. I was fortunate to get one of the three kits remaining for sale at the RPM Meet. Ed Rethwisch made the gorgeous patterns and the parts were cast by Westerfield.
Prototype
The FM-11 cars were built in 1928 and 1929 by the Galesburg CB&Q shops in car series 91000-91249. The FM-11A class followed in 1930. These were also built in Galesburg and numbered 91250-91849. These flat cars were 45-feet long and 8-feet, 10-inches wide. The car deck did not extend over the stake pockets.
Building the kit
My assembly began as usual with cleaning up the flash from the resin parts. Next, I washed all the parts using a soft toothbrush and Dawn dishwashing detergent. While the parts dried, I cut some 1/32nd-inch thick lead sheet to fit the opening in the outer frame assembly. Once the lead fit the space, I set it aside.
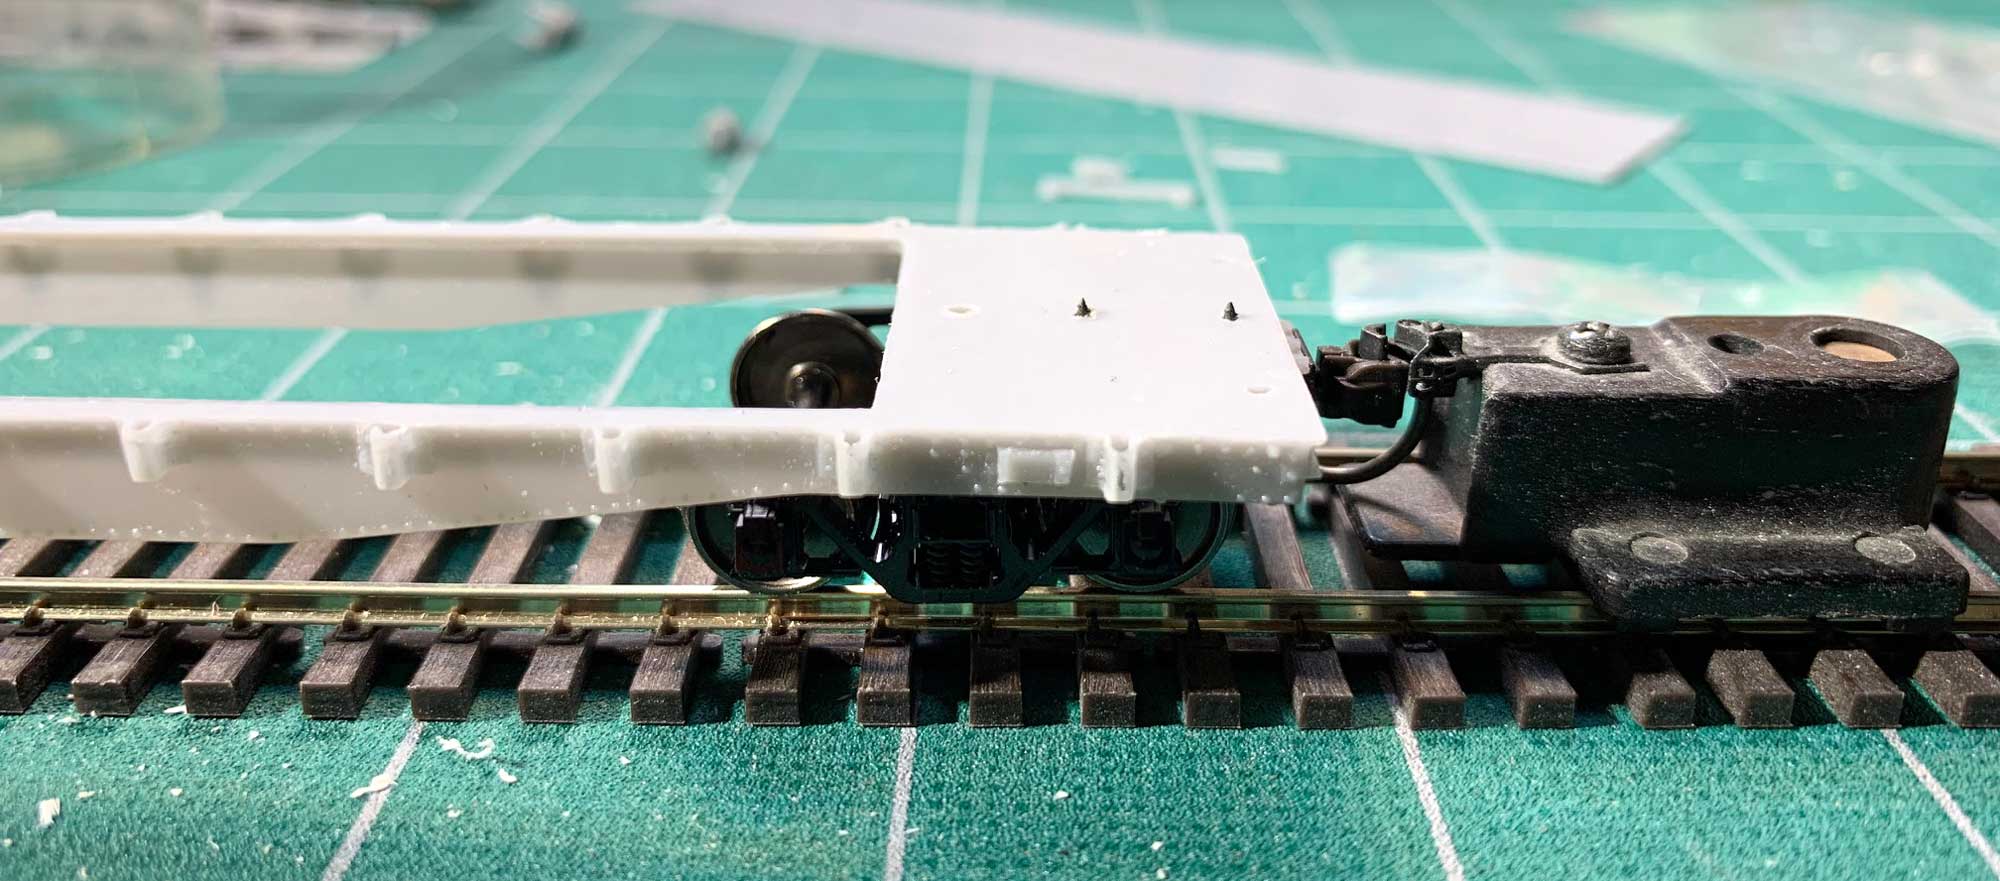
At this point I added my draft gear and couplers of choice and a pair of Tahoe Model Works Andrews trucks (TMW 112). I checked the car height and adjusted as necessary to make corrections.
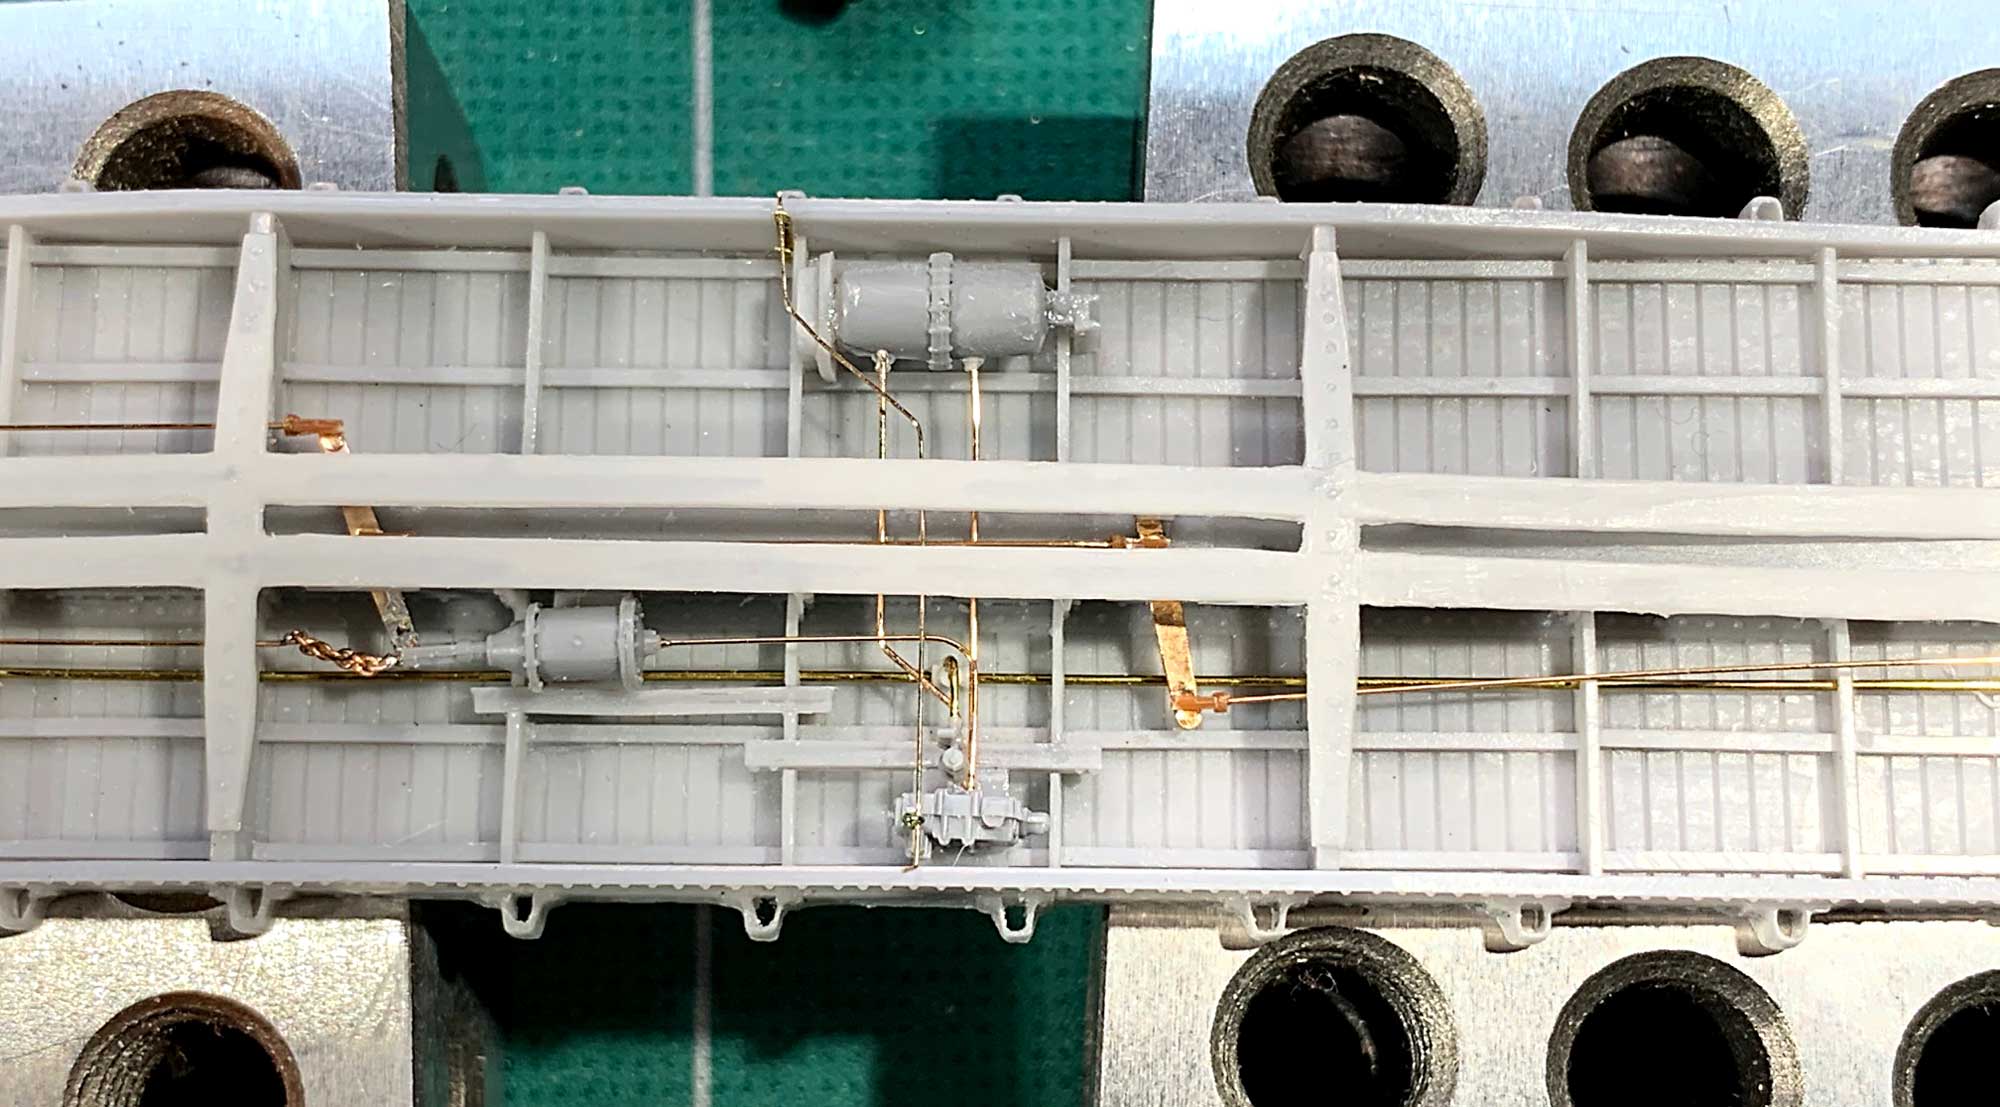
Carefully read the instructions for notes and correct placement of the resin mounting brackets and parts. The brackets support the brake components. Make sure all the holes are cleaned out for the brake piping, the clevises, and related piping.
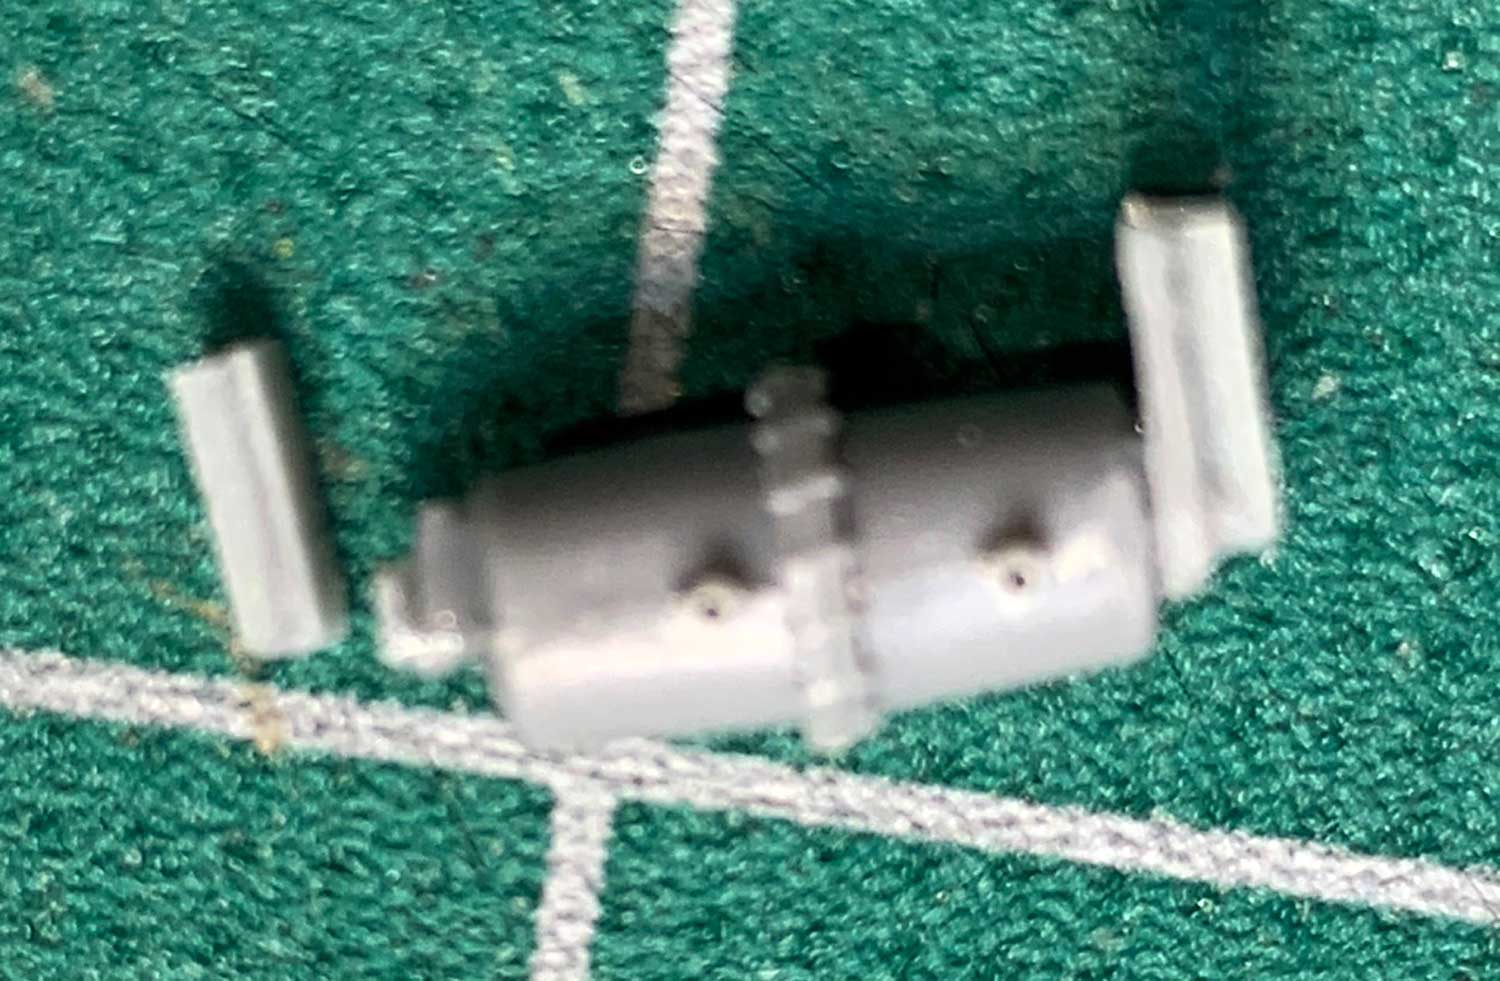
Here’s the air reservoir and the orientation of the resin mounting brackets.

It doesn’t take long to install most of the brake components.
Here’s the underframe ready for a final wash and a trip to the paint booth.

Here’s an end view to show the grab locations, the Precision Scale airhose bracket, and Moloco rubber airhose. These parts are not yet secured with CA.

Major assemblies have been prepped and ready for final assembly. I glued the inner underframe into the recessed area of the outer underframe, then let the joint dry before installing the lead weight. I used 1/32nd-inch thick (0.031) lead sheet to fit the opening. The deck will be installed after the car is decaled.
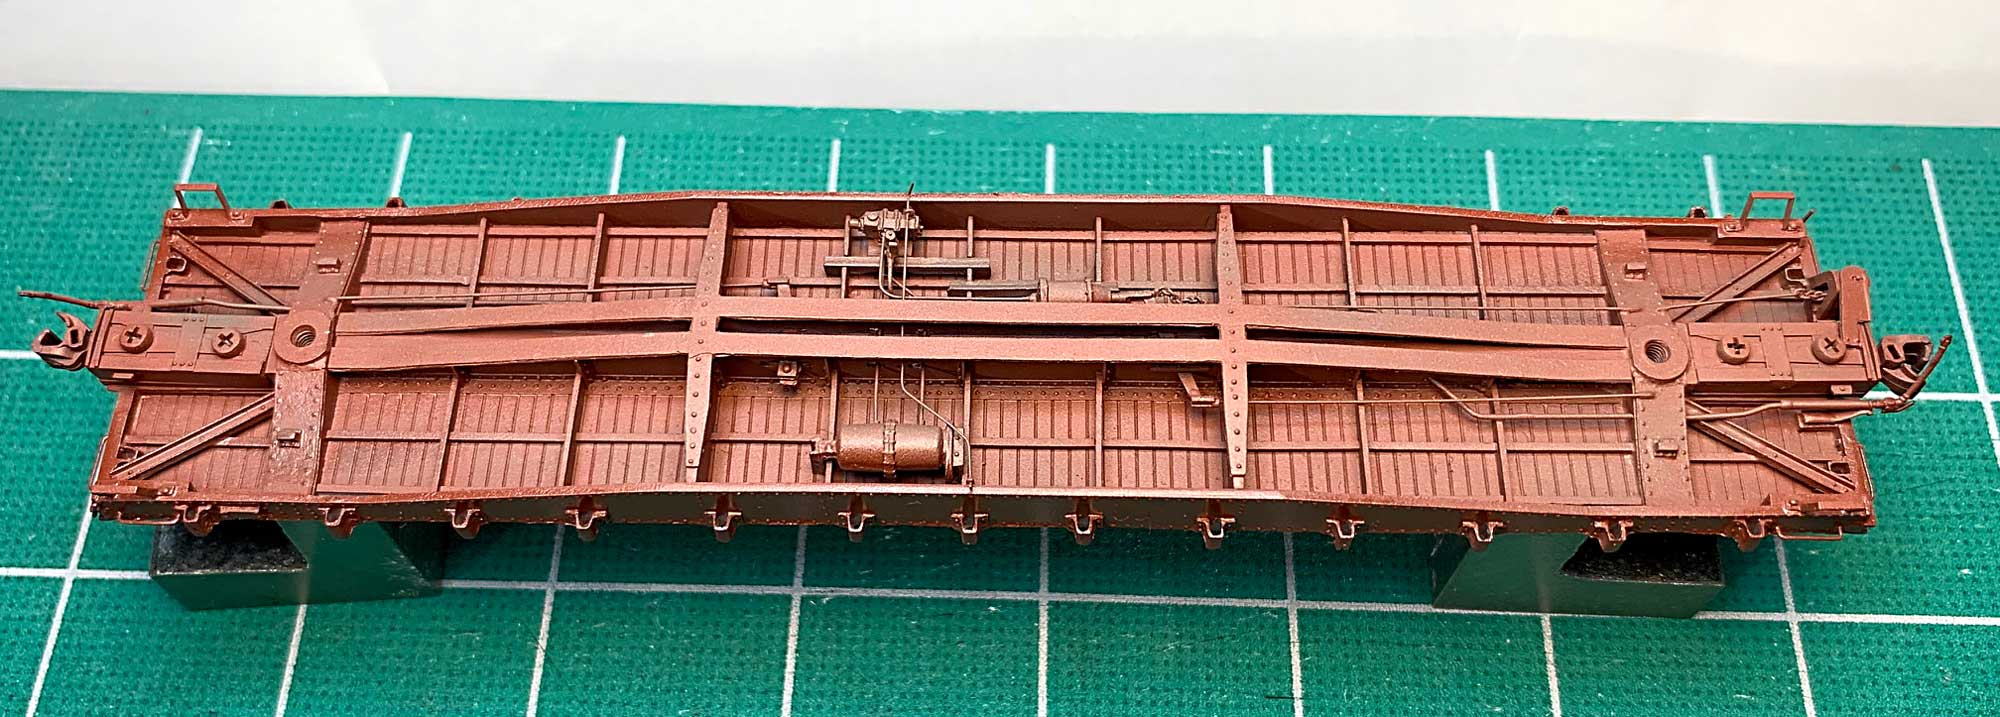
A coat of Floquil Mineral Red has been applied. I spray a touch of mud and dust on brake components.
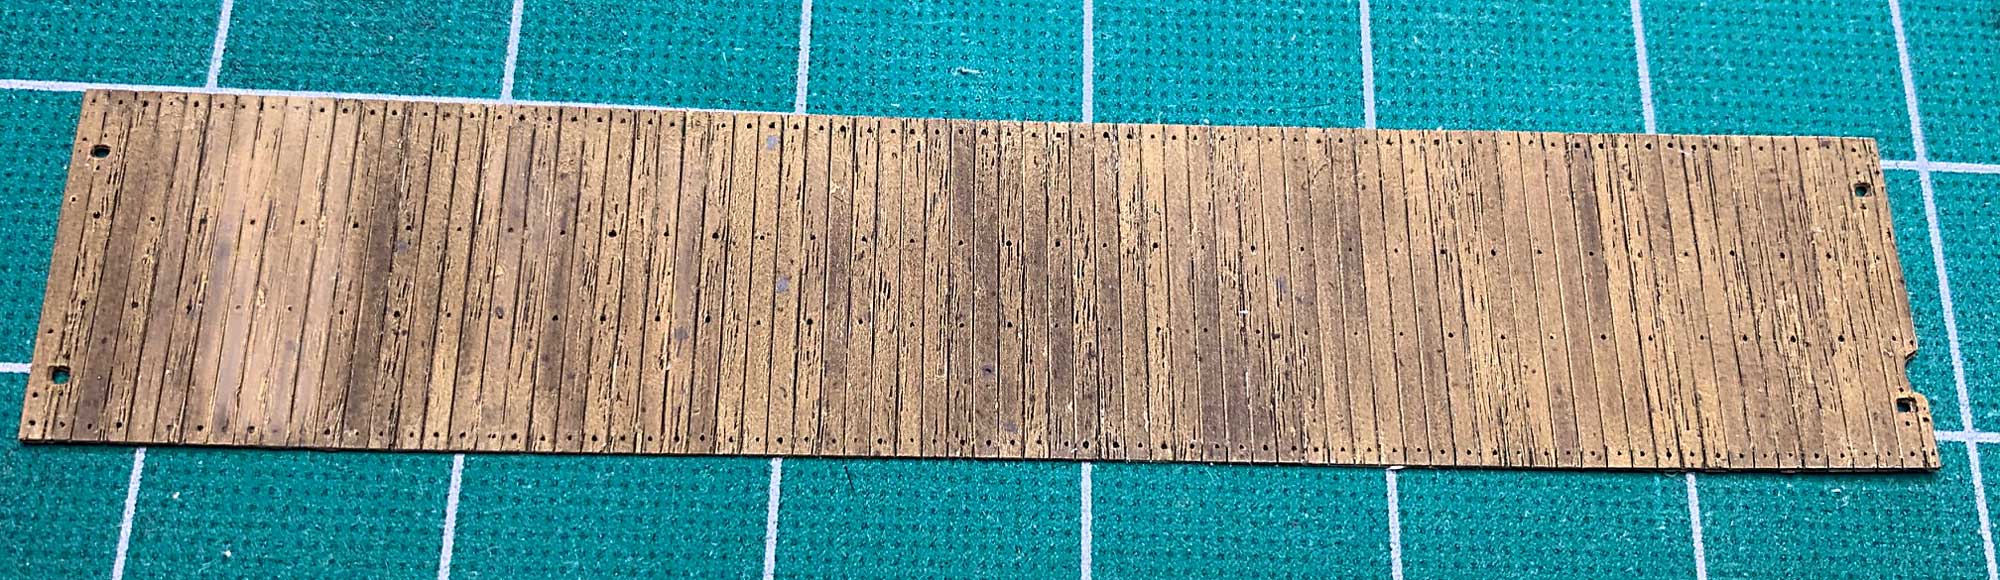
I sprayed the deck with a mix of Floquil earth, mud, and D&RGW building cream. After that is dry, I wash the deck with dark brown AK Interactive enamel wash, then a light dust.

I sprayed Pledge Future (now Pledge Revive It Floor Gloss) onto the car sides to prep for the decals. You can see the lead weight in the recessed area. The deck will be attached with canopy glue.
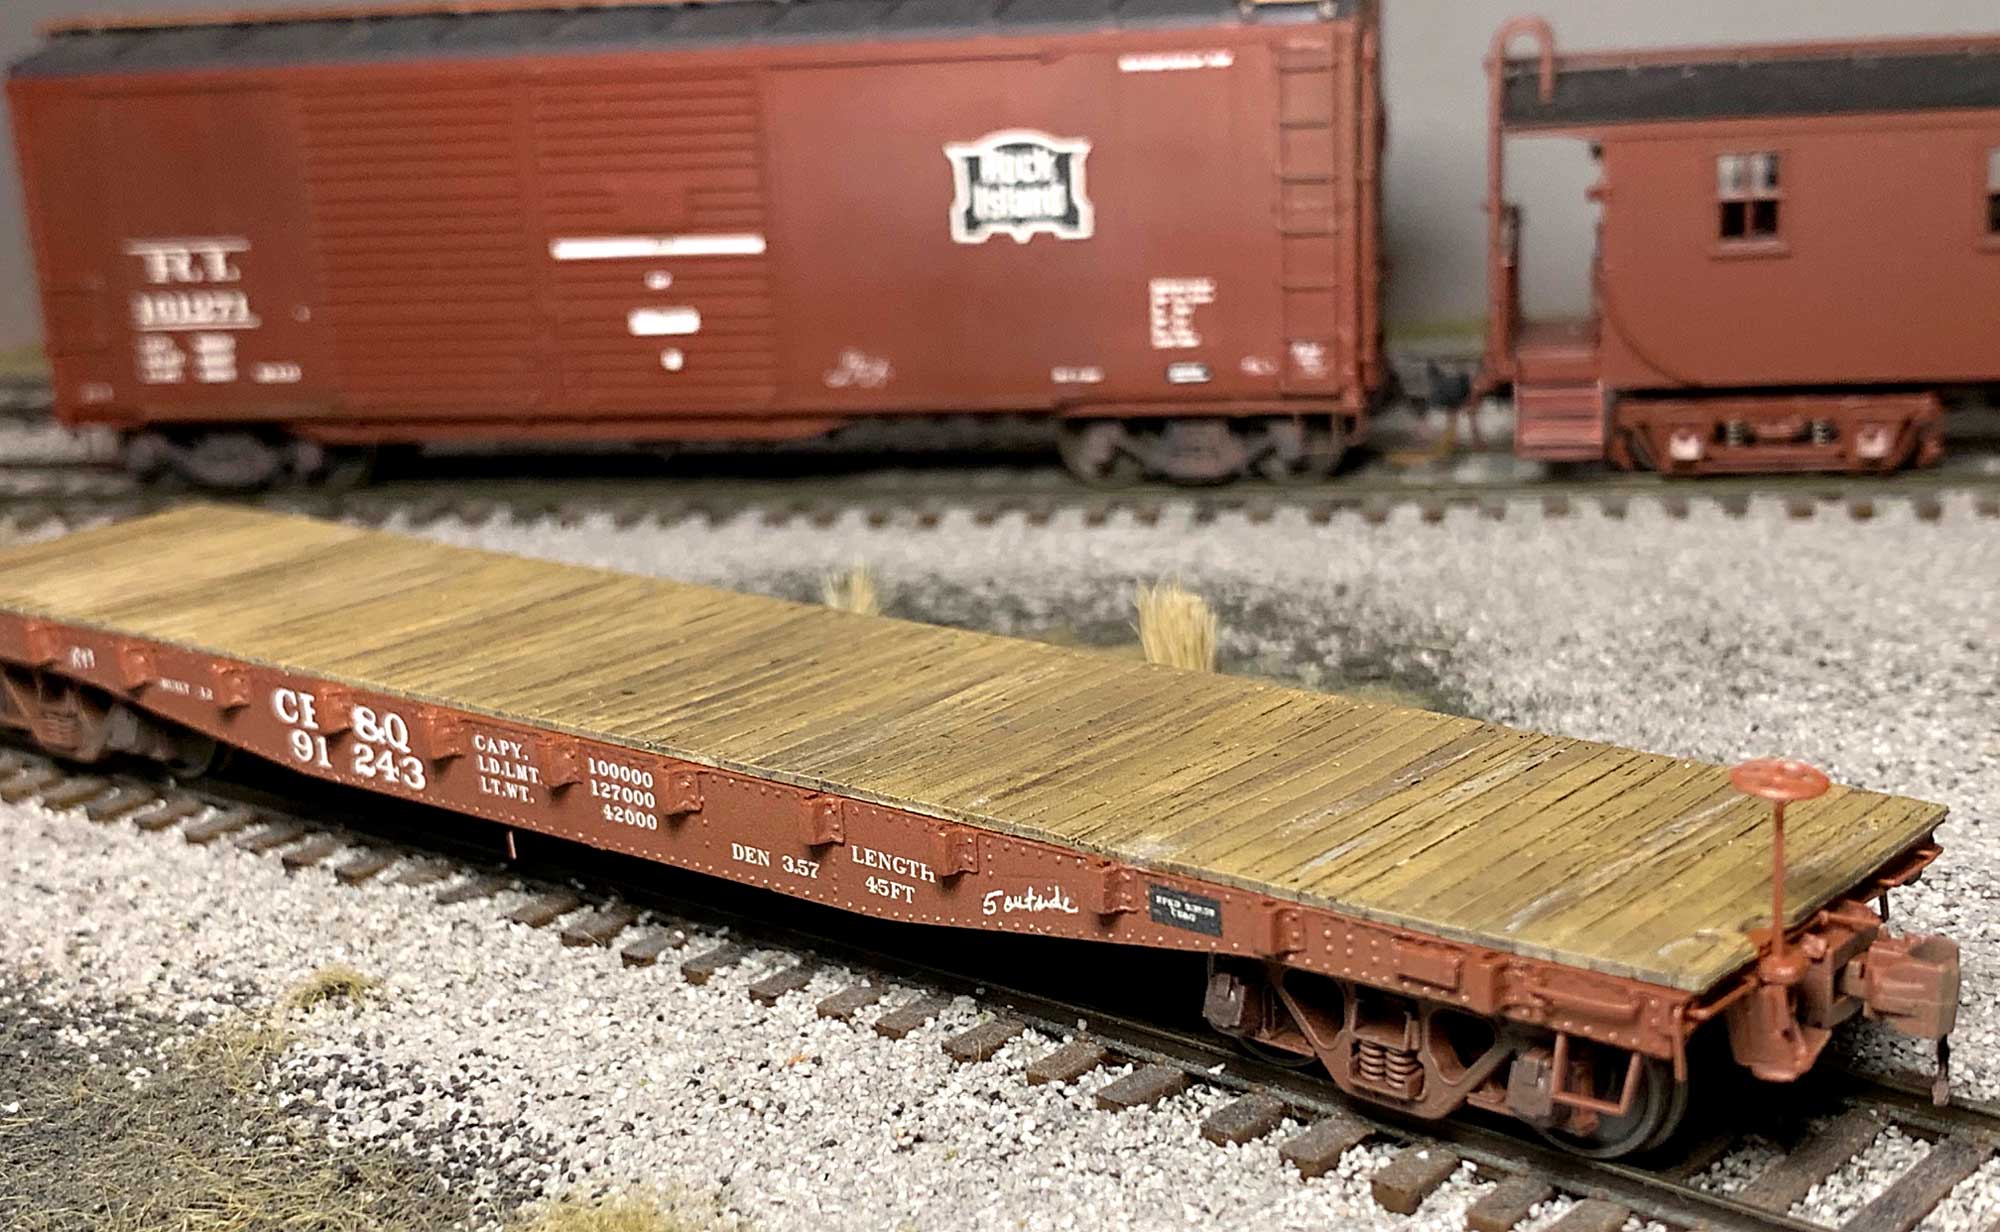
Here is my CB&Q FM-11 flat car ready for service. I sprayed a coat of Model Masters flat over the decals before installing the deck. Then some light weathering was applied with an airbrush. I cut the floor decking at each board using a UUM-USA Micro Saw to bring out the individual boards. The square brake staff made of 0.015-inch square wire supplied by a friend.

This was a fun, well thought-out, easy to build resin kit. My thanks to Jerry and Ed for producing a fine model kit.
Jerry has sold out of his first run of these kits. Look for an announcement on the Resin Car Works blog when they are available again. Also, Jerry and Ed are looking for drawings (plans) of the TOFC version of the FM-11 for resin kit production. Post a note in the comments here if you can provide these plans.
Thank you, George Toman, for sharing your work on a very nice model. Flat car resin kits are a good choice for a first time resin kit build. George has shown you the steps to take after you open the box. Don’t forget the Resin Kit Primer available as a downloadable PDF on our Helpful Links page.
Questions and comments can be posted below. Please follow the instructions so your comment can be posted. All comments are reviewed and approved before they appear. To subscribe to this blog, add your email address to the function at the bottom of the right column on the main page. Share the blog link with other model railroaders.
Where’s the retainer valve?
Jared, Its’s located on the B end of the car between the stack pocket and side grab. I should drybrush with a bit of neutral gray to highlight it
Very nice. Are these flatcars available online?
Ryan, kits are currently unavailable but Jerry Hamsmith hopes to have new stock soon. Availability will be announced on the blog. – Eric H.
Thanks for sharing your build, George. These are indeed very well designed kits, and they are a pleasure to build. I have four kits built to the priming stage (priming is necessary since I use Tru Color paint). For new modelers, cleaning out the stake packets is the hardest step in the build. I used a #11 Xacto blade, then a needle file. I have enough stripwood on hand to build three decks board by board, and I’ll use the deck casting for the fourth car. I’m glad to hear that the TOFC modification is under consideration. Another modification of note is the conversion of 100 cars into wedge push-plows beginning in 1948. I’m in communication with a gentleman who does CAD drawings for 3D printing, and hopefully, we will have the option to buy the snowplow blade from Shapeways at some point in the future. The snowplow conversion would be somewhat challenging unless Ed and Jerry offer a modified car body that is ready to accept the blade, should it be produced.
Excellent article! I’m the Editor for the Burlington Route Historical Society and would like to know if I may reproduce it in one of our Zephyr newsletters?
Hello David,
Yes you have my permission
Jim Singer has my email if you would like to contact me
George Toman
George,
Thanks so much. I’ll get you email from Jim.
Dave
George has produced another beautiful model. Excellent finish and construction.
I didn’t see how much the model weighed with the sheet lead installed
Fenton
Weights in at just over 2 oz. I will put a heavier load on this car to bring the wight up.