
Schuyler Larrabee recently shared interesting photos of a tool he built to help him with model building. We asked Schuyler to share more details and he sent the following notes.
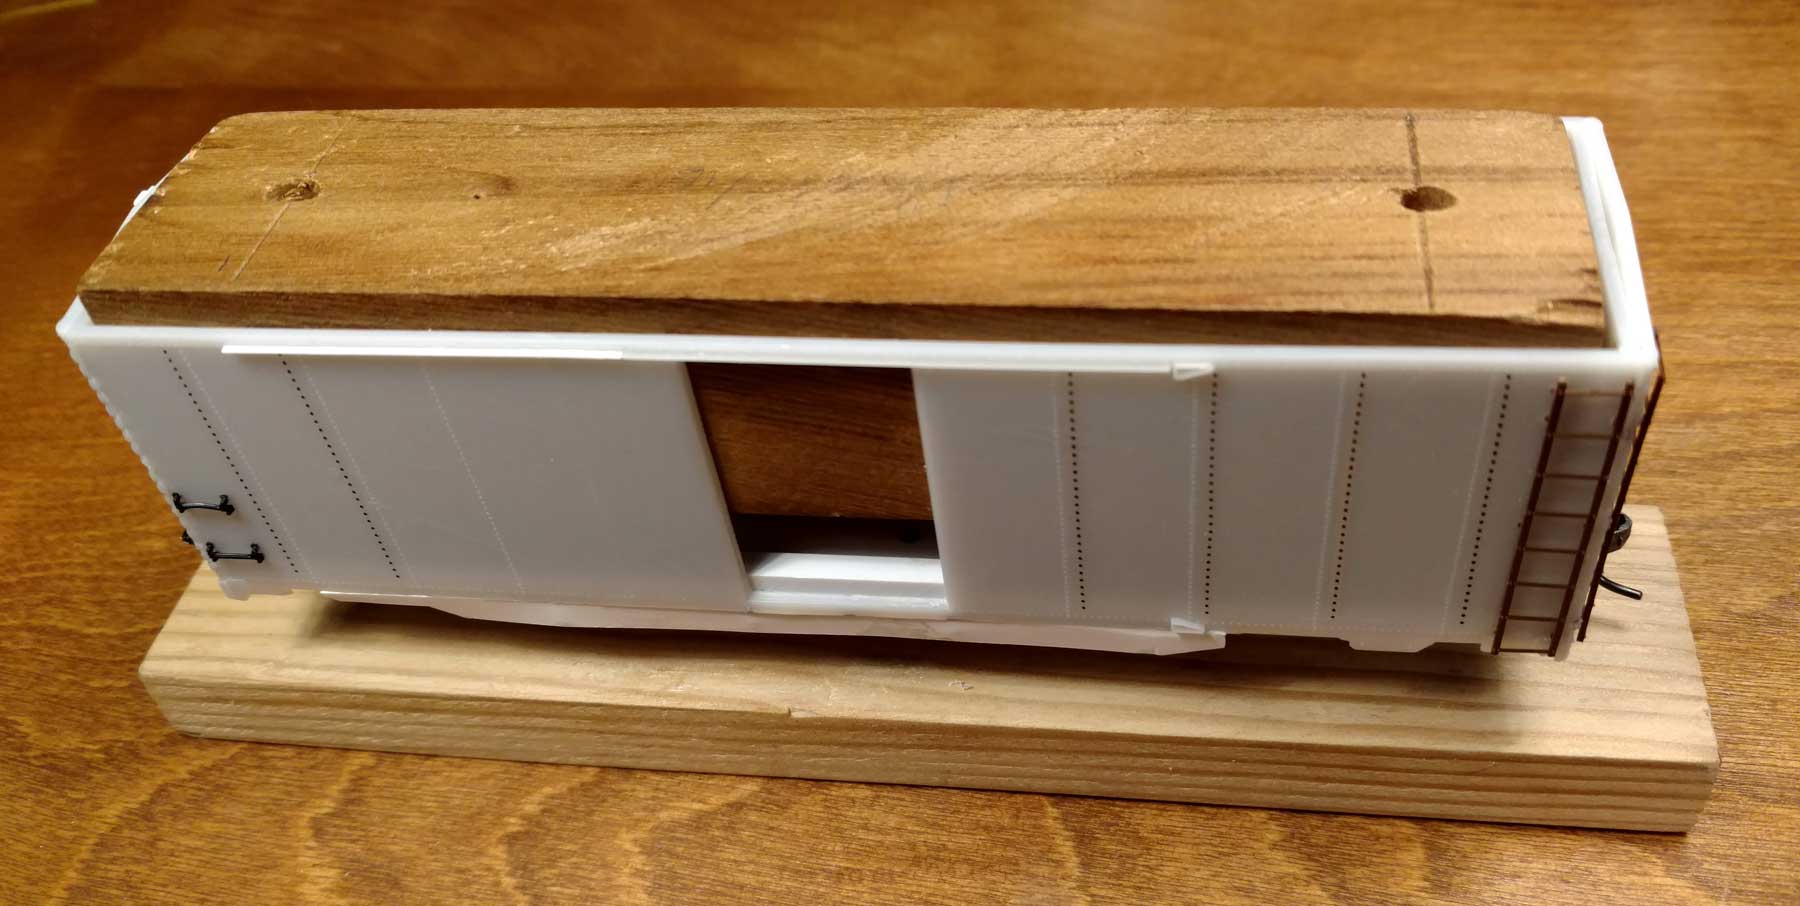
I did a lot of complicated and fairly delicate work on the underframe and brake gear on this model. It is the 2018 Shake’n’Take project; an ERIE double-door, 40-foot boxcar. Based on prior experience, I was concerned that I’d damage the installed details while I worked on detailing the upper parts of the car. I wanted a way to be able to put the model down on the bench other than installing trucks, temporary or otherwise.
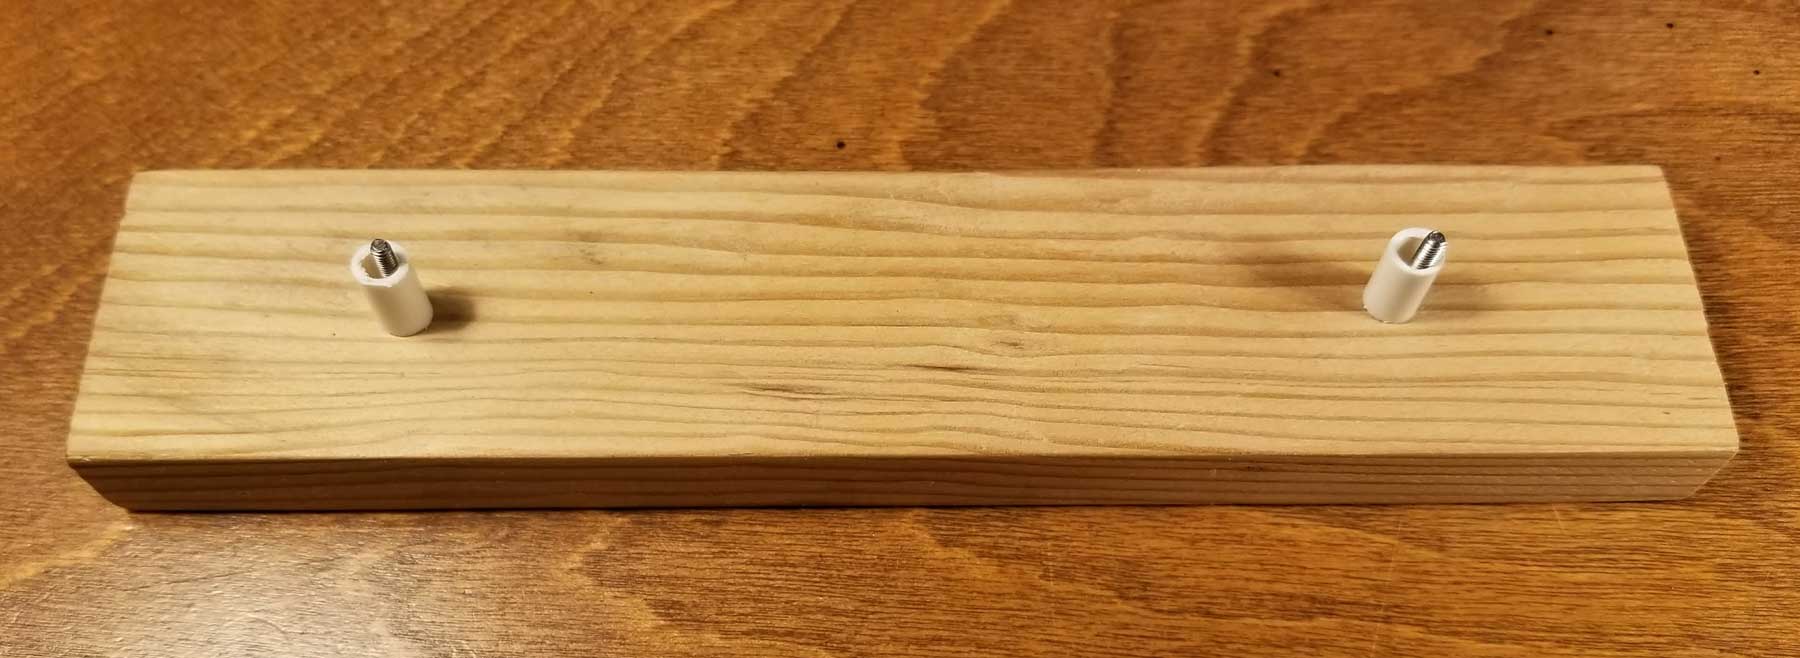
I happened to have a conveniently-sized strip of wood, about 1½ x ½-inch (window molding, I think) and I cut off a piece about 7-inches long so it would protect the couplers as well as the ends of the car. I drilled two #44 holes spaced to match the car’s truck bolsters in order to clear a 2-56 screw. Two pieces of .030” plastic tube (Evergreen) cut to 3/8”long provided the stand-offs and cleared all the underbody detail. With 1” long screws, slightly countersunk into the bottom of the wood, I had a good solid base for the model.
As Greg Martin points out with Shake ’n’ Take projects, a block of wood inside the car body gives the plastic body some strength when you are scraping off rivets or making other modifications to the sides of the car. I found that when I put a spacer block underneath that wood block, I could then pick up the model in one hand and completely avoid actually touching the model at all. The wood pieces inside the car are not anchored.

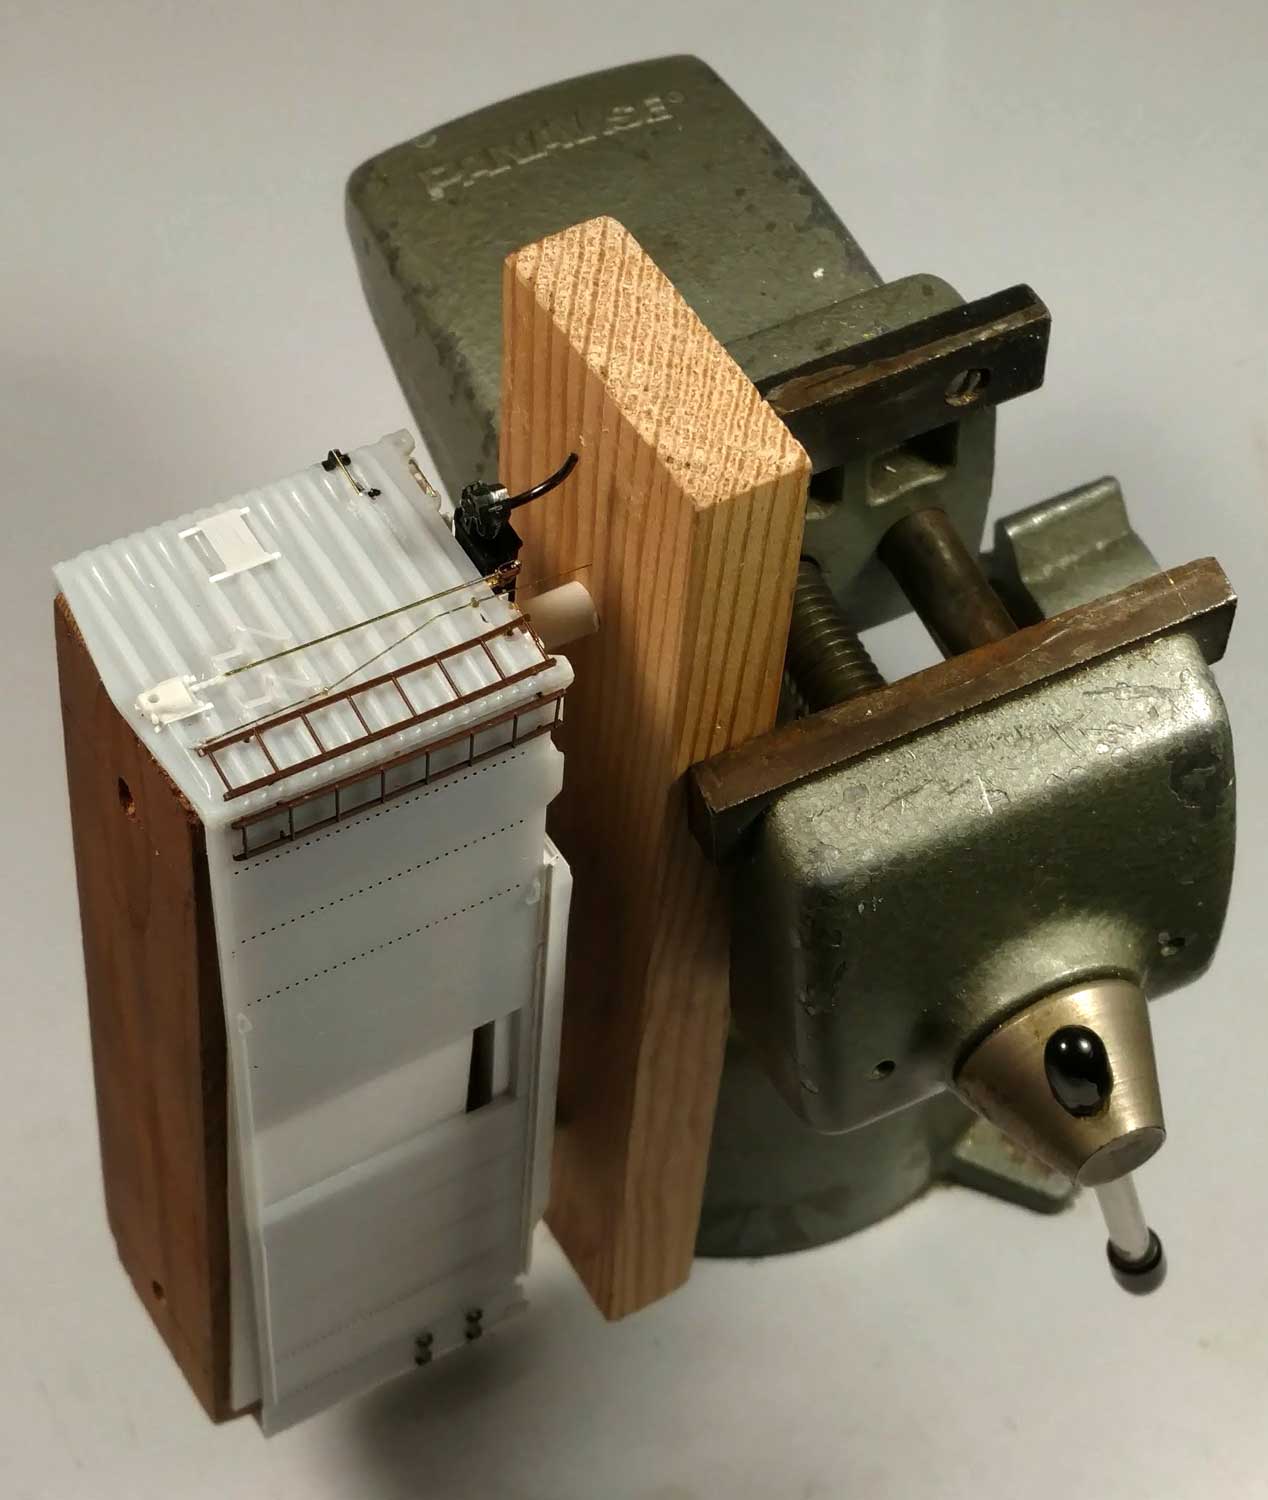
I could also, as shown in the photos, stand the model on end, and could also chuck the wood in my Panavise when I needed to have it stable in an odd attitude.
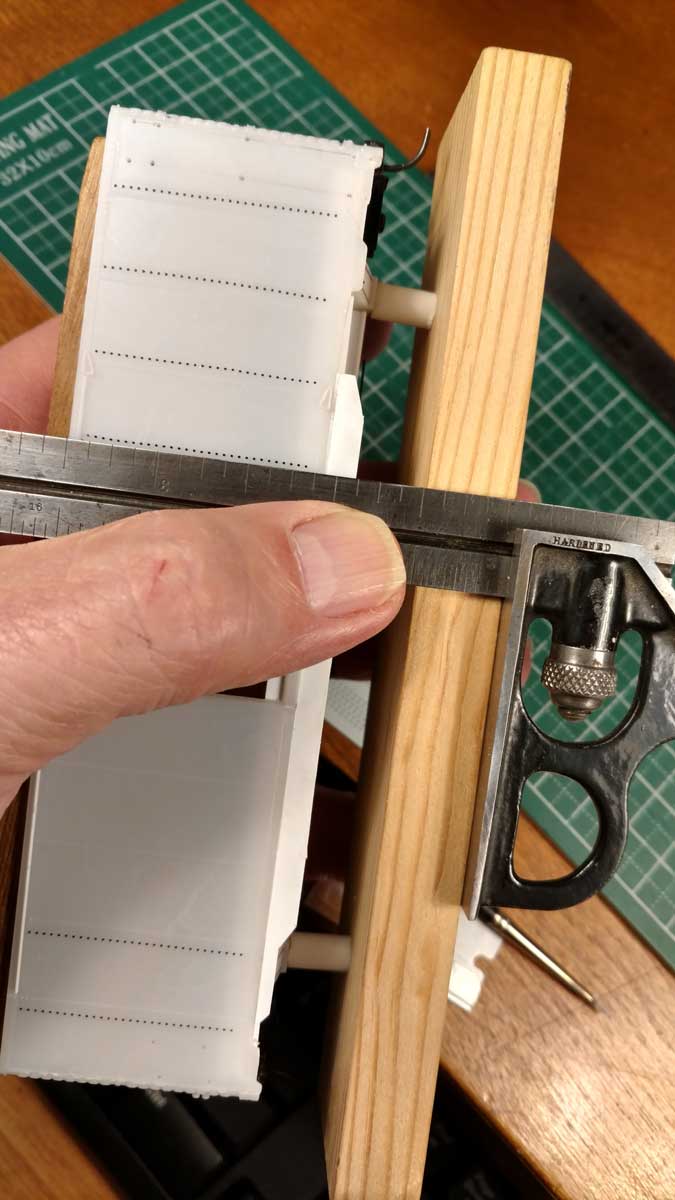
An unanticipated benefit was revealed when I began to apply strips of Archer rivets directly adjacent to the molded rivets to create the ACR pattern for this car. Since the standoffs were exactly the same length, I could use my small adjustable square against the bottom of the wood base to get a perfect vertical alignment parallel to the seams molded into the model, and a good reference line to make sure those rivet strips were straight. Worked for the ladders too, which were a substitute for the kit’s ladders, and will improve my alignment of grab iron ladders in the future (a chore I have a very hard time accomplishing!)
Since the truck spacing for this model is pretty conventional, I expect this new tool will come in handy for future projects. I plan to make additional holders for those models with different bolster distances in the future.
Schuyler
We thank Schuyler for sharing his cool tool idea. I’m sure a few of us will be making something similar to ease upcoming freight car kit construction.
Questions and comments can be posted below. Please follow the instructions so your comment can be posted. All comments are reviewed and approved before they appear. To subscribe to this blog, enter your info for a comment and check the last box to notify of new posts by email. Share the blog link with other model railroaders.
Great idea . I look forward to working with it. Thanks!
Thanks, guys. Good ideas about making one of the holes a slot . . . if necessary. But until I come across a situation that requires that, I’ll stick with what I’ve got, since the center to center spacing for a 40′ box car is pretty standard. Certainly I’ll need a separate one for a 50′ car, since I want to have the protection of the couplers, too. And it’s not a big deal to make another one for a custom fit.
Maybe there’s a way to make one of the mounting holes a slot so that the distance between the supports can be adjusted from car to car.
How about making one hole a slot. That way it can be adjustable.
Nice idea. I like that you could hold the car in the Pana vice to work on the ends.
Thanks for sharing
George Toman
Schuyler,
Great idea, one with lots of application. Rather than a fixed bolster spacing and multiple fixtures, what about cutting slots rather than fixed holes for the hold down screws? You could route it out with your countersink bit. That would allow you to adjust the distance between the supports for even slight variation of bolster spacing.
John