Bill Welch returns to the RCW blog with a beginner perspective on Pan Pastels for weathering freight cars.
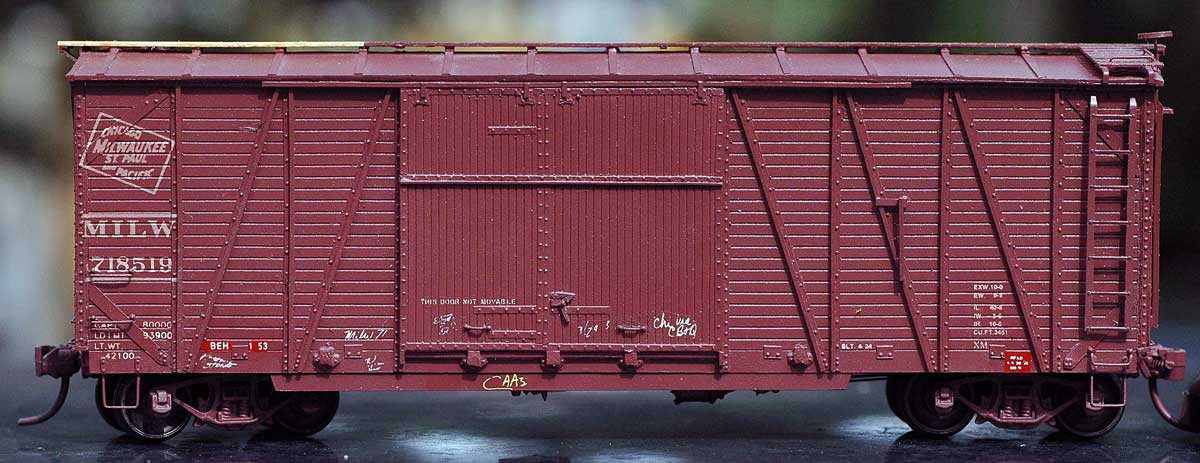
I thought I would describe my first weathering experience primarily using PanPastels (PP) with a little assist from Prismacolor Colored pencils. The subject model was built 19 to 20 years ago from a Funaro & Camerlengo kit, probably purchased from The RPI Hobby Shop in Troy, NY. I used a photo from “The Bob Charles Collection” at the NMRA Library to guide me in detailing and decaling. It is painted with Accuflex paint using my Binks “Wren” airbrush. The decals I am pretty sure are Champ and I very likely pieced together the Dimensional Data with individual numbers to match this car.
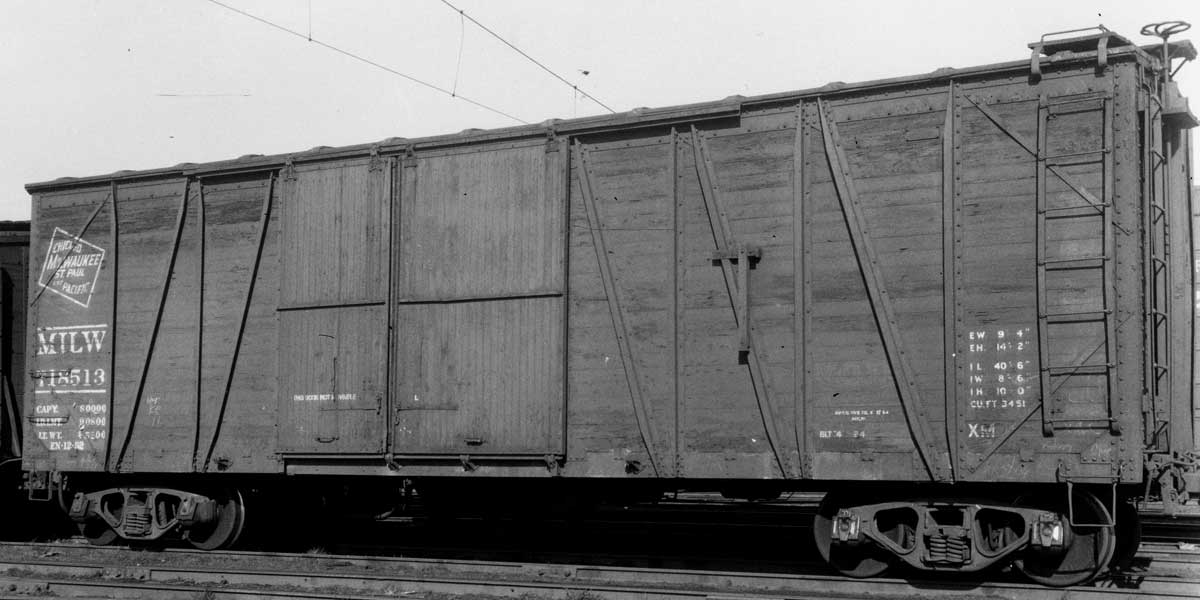
Once I was finished decaling I gave it a wash using the Accuflex paint thinned with ten parts of water to one part paint to gently fade the decals. As I began the decaling process the first of two issues with this kit revealed itself. First, the Dimensional Data actually belongs next to the ladder on the car’s right most end panel, meaning that somewhere the kit’s car sides are off dimensionally. Second, after accumulating more photos of these cars over the years I discovered that instead of a Murphy XLA roof it should have a Hutchins roof. Ouch! I thought about carving off the roof ribs and scratch building new Hutchins components but since the car is already not correct, I decided to use it for weathering practice. The kit has been unavailable for several years.
As I revisited the model I decided to add some more chalk marks and used Box Car Red decals (Sunshine Models) to cover the original decals used for reweigh and lube stenciling. My intent is to have the new stenciling look brighter and hence newer than the older lettering applied perhaps in the late 1930’s or early 1940’s.

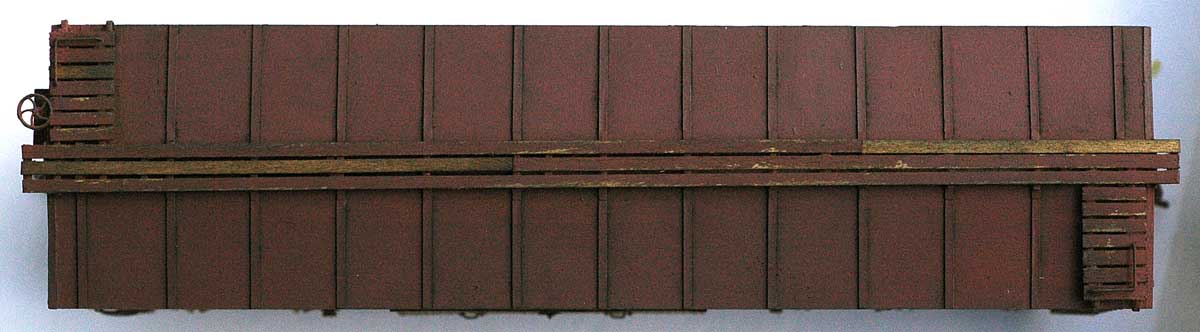
Then I used #320 or #400 sand paper to slightly sand the running board system to remove some of the paint to mimic paint chipping off. Next I gave the superstructure a good flat overcoat using Microscale’s acrylic “Micro Flat” finish and retrofitted it with the correct Tahoe trucks after I had painted them. Prismacolor Colored pencils were used on the sides and ends. Expresso (#1099), Mahogany Red (#1029), and Tuscan Red (#937) were used to darken some of the boards and Sandbar Brown (#1094) was applied to lighten a few. Then I shifted and applied PP Neutral Gray Extra Dark #820.1 to the roof and wood running board system. I have to admit both how subtle and how great the change was.
After looking at it for a few moments, I applied a coat of PP #740.1 Burnt Sienna Extra Dark followed by another coat of the Neutral Gray Extra Dark. I used the PanPastels’ triangular shaped “Sofft” Art Sponge for this part. I wanted to work the boards on the side horizontally between the steel bracing, so I used a PP Sofft knife with its foam cover to work the Burnt Sienna Extra Dark onto the boards. This color was dark enough to cover the marks I had made with Sandbar Brown colored pencil. To compensate, I applied PP #780.5 Raw Umber to lighten a few boards with a pointed hard rubber tipped tool called a “Colour Shaper” and manufactured by Royal Sovereign Ltd. in the UK.

I used the triangular tool to sponge the doors with Burnt Sienna Extra Dark. I then dabbed some Burnt Sienna Tint (#740.8) along the lower sides and then wiped most of it off attempting to replicate dust. It looks a little too even or artificial so I am going to work on it some more. I used a Q-Tip (or cotton “Bud” for our UK modelers) moistened with water to remove any of the PP on the on the reweigh and lube stenciling. Using the rubber tipped tool again I applied some more Burnt Sienna Tint on the boards just above each ladder rung and the wiggled the tip until the effect was more faint. This models the effect left by the boots and shoes scrapping the side of the car as the yard workers climbed onto roof. I lightly applied some Raw Umber to the wood doorstop to help it visually pop as it is one of the more unique details of these cars.
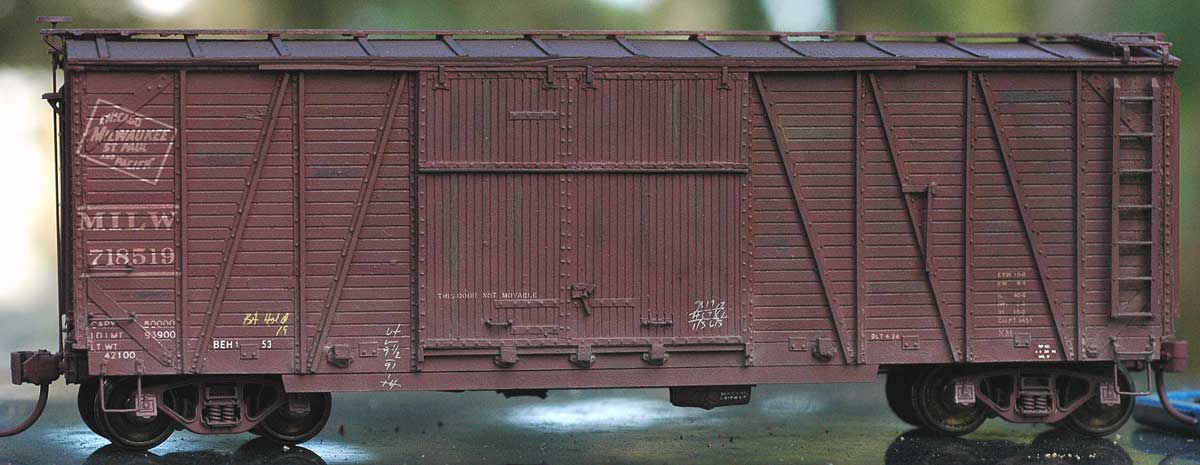
All and all, I am very happy with my results so far. Even though the car is not exactly correct, it is still a neat looking car. The ends are also wood with bracing and while I worked them the same way as I did the sides, I am going to use an airbrush to apply paint to mimic the wheel spray. I will use either an acrylic or oil wash to weather the trucks while the wheel faces will be flat black.
The only negative concerns the rubber tips for the PP Knife as they shred easily as they scrub the PP material into place. The residue from this is easy to blow off but it means the little covers are going to wear out fairly quickly I think.
Because I am colorblind I tried to stick with colors I think are safe in term of representing what actually occurs in the real world. One of the reason I gave the stock numbers for everything is to make it easier to remember what I did and serve as references for those following along on what I am doing. Comments about my color selections will be very much appreciated.
I was surprised that I only had the Burnt Sienna Extra Dark and not the regular version, #740.5 Burnt Sienna. I need to make a list of what I have and compare it to what is available. For sure I also want to add Burnt Sienna Shade #740.3. I seems to me that by having three variations of Burnt Sienna it will add to variety to the way the cars look. The Dick Blick website has a very helpful color chart and a complete listing of the PanPastel colors.
I would be remiss if I did not thank Rob Manley for bringing PanPastels to my attention at the annual Lisle, IL Prototype Modelers event one year. I just wish I jumped into weathering sooner but I am here now. Make sure you visit Rob’s weathering blog for more PanPastel weathering tips.
To those still hanging back, come on in!
Bill Welch
a.k.a. The Reluctant Weatherer
Thank you Bill for sharing your weathering experiences. Questions and comments can be posted below. Please follow the instructions so your comment can be posted. All comments are reviewed and approved before they appear.
Bill the colors looks very good.
Bill