Adding uncoupling devices (cut levers) to plastic freight cars
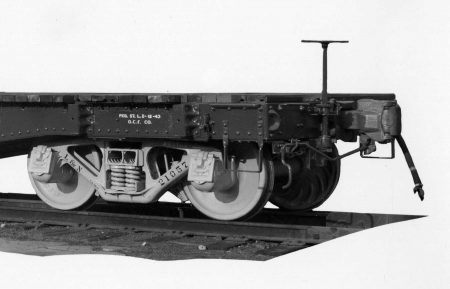
Peter Hall recently sent details on adding a simple detail to box car ends. Here are Pete’s tips and techniques.
An increasing number of today’s excellent plastic injection-molded HO scale models come with uncoupling devices (cut levers), but we still have all those great models that need them. This article shows how to make simple attachment points and wire cut levers for those cars that need bottom-operated uncoupling devices.
As far as I can see from studying photos in Speedwitch Media’s “Focus on Freight Cars” series, and other sources, many of these uncoupling devices were mounted using a complex casting attached to the car adjacent to the poling pocket. From the photos, I concluded that an ELL shape, with a couple of cuts, would be a good way to model this casting.
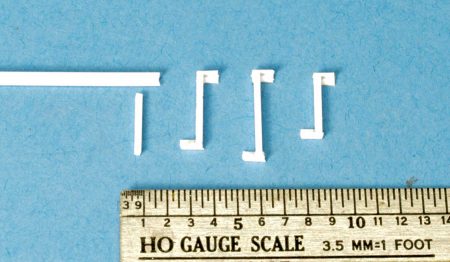
I started with Evergreen Styrene in two sizes: 0.060-inch ELL angle, and scale 4 x 4-inch bar strip. The inside depth of one side of the ELL is 0.045-inch, and the 4 x 4 bar measures 0.044-inch thickness, so it’s a good match to the inside of the angle. For each car, I cut two pieces of angle with sharp nippers to a length of 0.125-inch, and glued them to a single piece of the 4 x 4. The length of the 4 x 4 is any convenient length. This is an easy operation, so I made several of these assemblies.
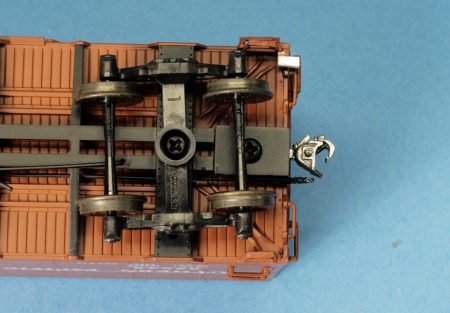
I cleaned the back side of the poling pocket to make sure it was flat. Then I cut off one ELL-bar assembly to a bar length of 0.090-inch and glued it to the underside of the car behind the poling pocket. The bar stock provides backing for the ELL so it will mount properly and project outward from the car. I’ve been using MEK to glue plastic for some time, and it works well for me. It’s clear, flows into crevices easily and dries fast, and usually does not mar the paint.
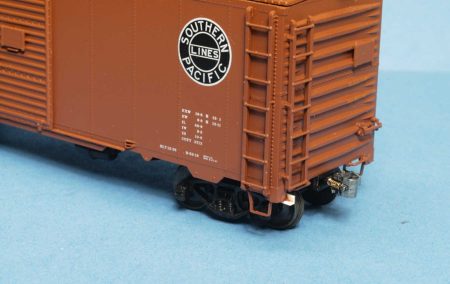
Here’s another view of the end. The ELL projects outward from the poling pocket. I made sure it was mounted straight and level.
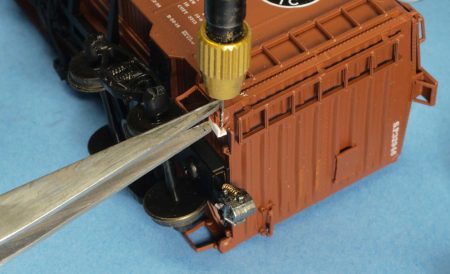
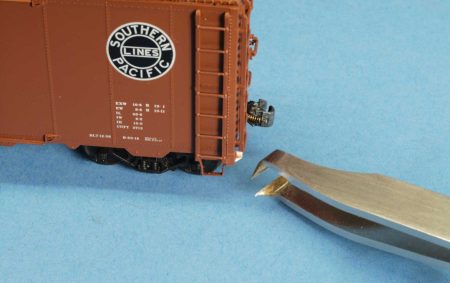
I found that I needed to let the glue dry thoroughly before starting this step, so that the glue bond was strong enough to resist the drill. However, it’s also a good idea to grip the ELL and poling pocket with tweezers while drilling the hole, to make sure the glue bond stays intact.
With the glue dry, I use a #80 bit to drill a hole in the upright section of the ELL, about halfway between the poling pocket and the end of the ELL. This hole receives and holds the cut lever.
I could have drilled the hole before mounting the ELL to the car, but drilling after it’s in place gives me a better perspective on the placement of the hole.
Next, I cut off the lower section of the ELL at a 45-degree angle, flush with the poling pocket and the end of the ELL, and cleaned up the end with a sanding stick.
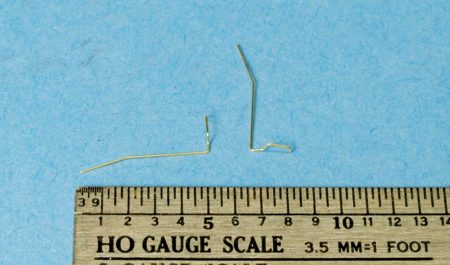
I made two cut levers from 0.010-inch wire stock. I’m aware of the commercially-made cut levers available, but it’s just as easy to bend my own. I use some standard measurements and the serrated jaws of needle-nosed pliers to create the levers.
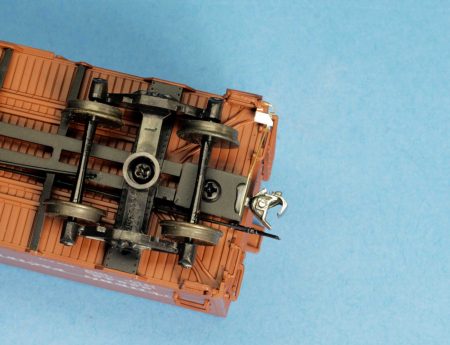
Finally, I inserted the cut levers into their ELLs and glued them to the bottom of the coupler pocket with Canopy Glue. There are many ways to attach cut levers; including using an eye in the bottom of the coupler, but this method is easy for me. I use Canopy Glue because it grips well but is removable, should that be necessary later. I’ve never broken a Kadee coupler in service, but it could happen.
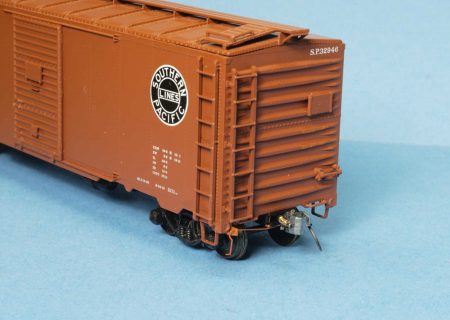
Before painting the cut lever assemblies, I straightened the handles so they hung straight down, and then painted them. I made sure to paint all surfaces of the Evergreen styrene so that no white would show. For this car, I used Polly Scale Light Freight Car Red, as it’s a good match for my Southern Pacific box cars.
The underside of the car will now receive a coat of brown-black acrylic mix with my airbrush, and then the car will be weathered. Adding the cut levers before painting assures that they will blend in with the car as the weathering progresses.
This is an easy, one-evening addition to plastic box cars and to many other varieties of rolling stock. The appearance is even better with scale couplers.
We thank Peter Hall for sharing his work on the blog. Some details can be a simple addition and can elevate the appearance of your freight car fleet.
Questions and comments can be posted below. Please follow the instructions so your comment can be posted. All comments are reviewed and approved before they appear. To subscribe to this blog, enter your info for a comment and check the last box to notify of new posts by email. Share the blog link with other model railroaders.
Eric, I’ve been wanting to add cut levers to some of my cars. Is there a standard measurement for the more modern lever with “c” bend at the end like the one Peter uses??? Thanks!
What am I missing here? What is the 4×4 for? I don’t see any 4×4 in the under car shots.
The 4×4 is the “bar” to which the Ell is glued. They are the three longer, vertical pieces of white styrene with an Ell on each end in the first photo. The purpose of the 4×4 is to provide a solid gluing surface that attaches to the inside of the plastic car, right behind the poling pocket. When I first tried using the Ell, I glued it directly to the car. However, sometimes it did not hold during construction. So, I glued the 4×4 into the Ell and then to the car, and it works better.
Some very nice modeling tips.
Thanks for sharing
George Toman