
George Toman sent a progress update on his SFRD reefer kits. His initial work was published on this Workbench Wednesday post and the lead image is where he left us. Here’s George with an update.
This is a second part of my work on the SFRD reefers. It took a bit longer to finish these up after seeing John Ritchie’s work on these reefer models. There were details on John’s wonderful models that I did not even know should have been there. I had just primed my models and shot a coat of SF Reefer Yellow and decided I needed to add these details. Armed with a couple tips from John and a hastily purchased Santa Fe Reefer book, I made modifications and snapped photos to document the work.
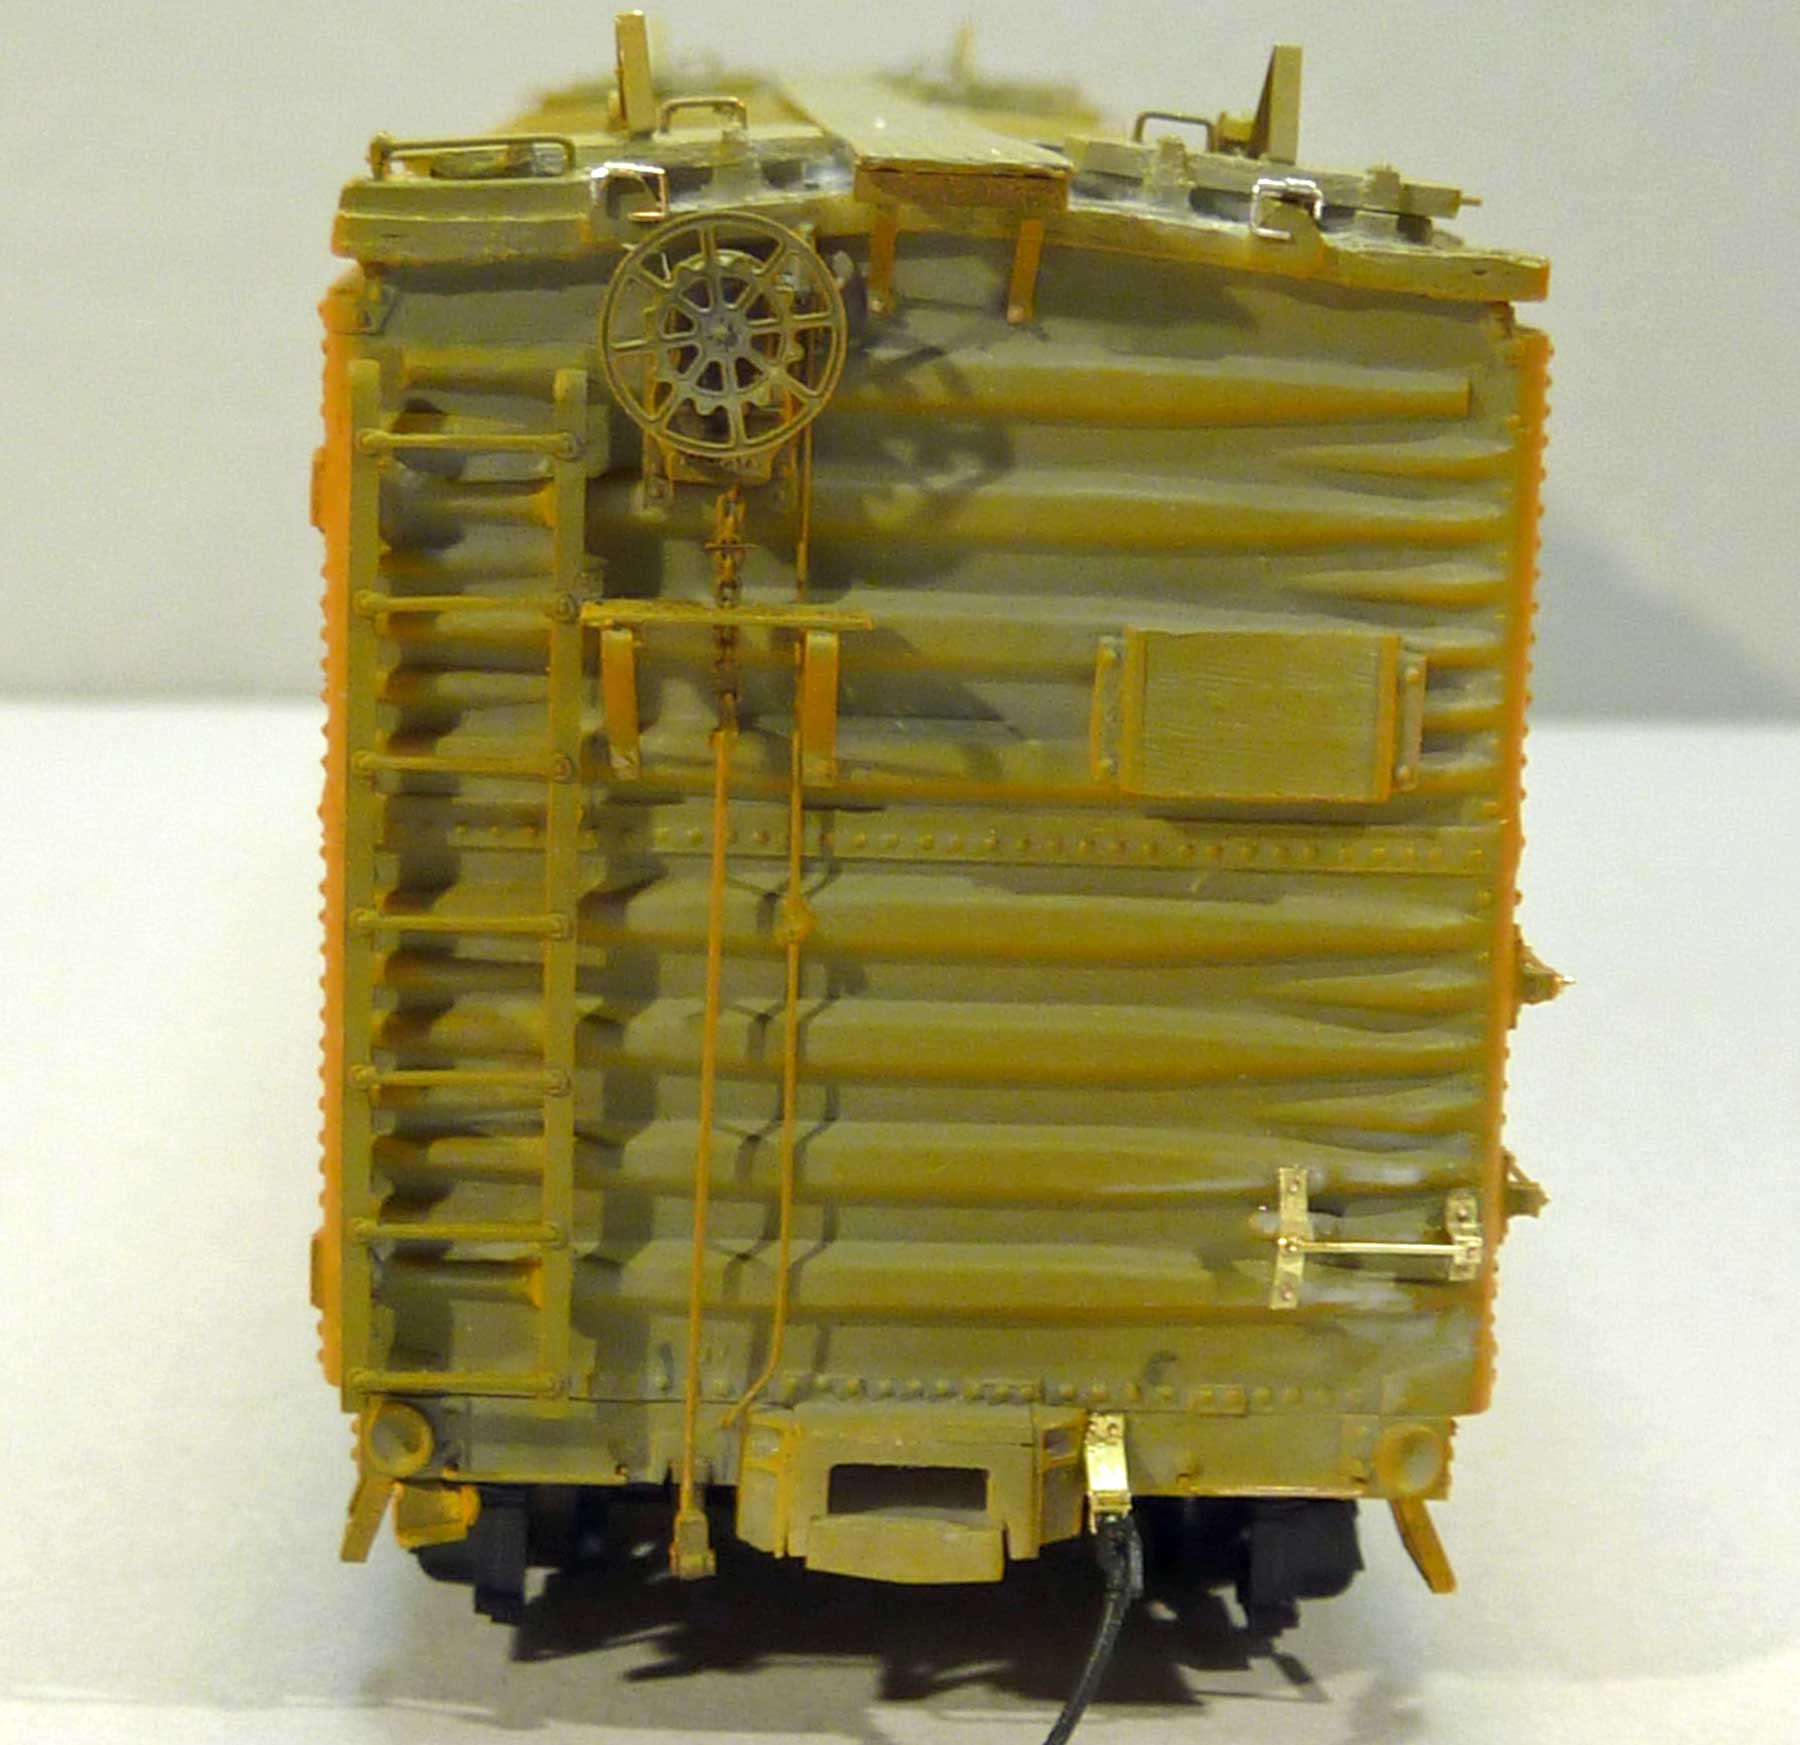
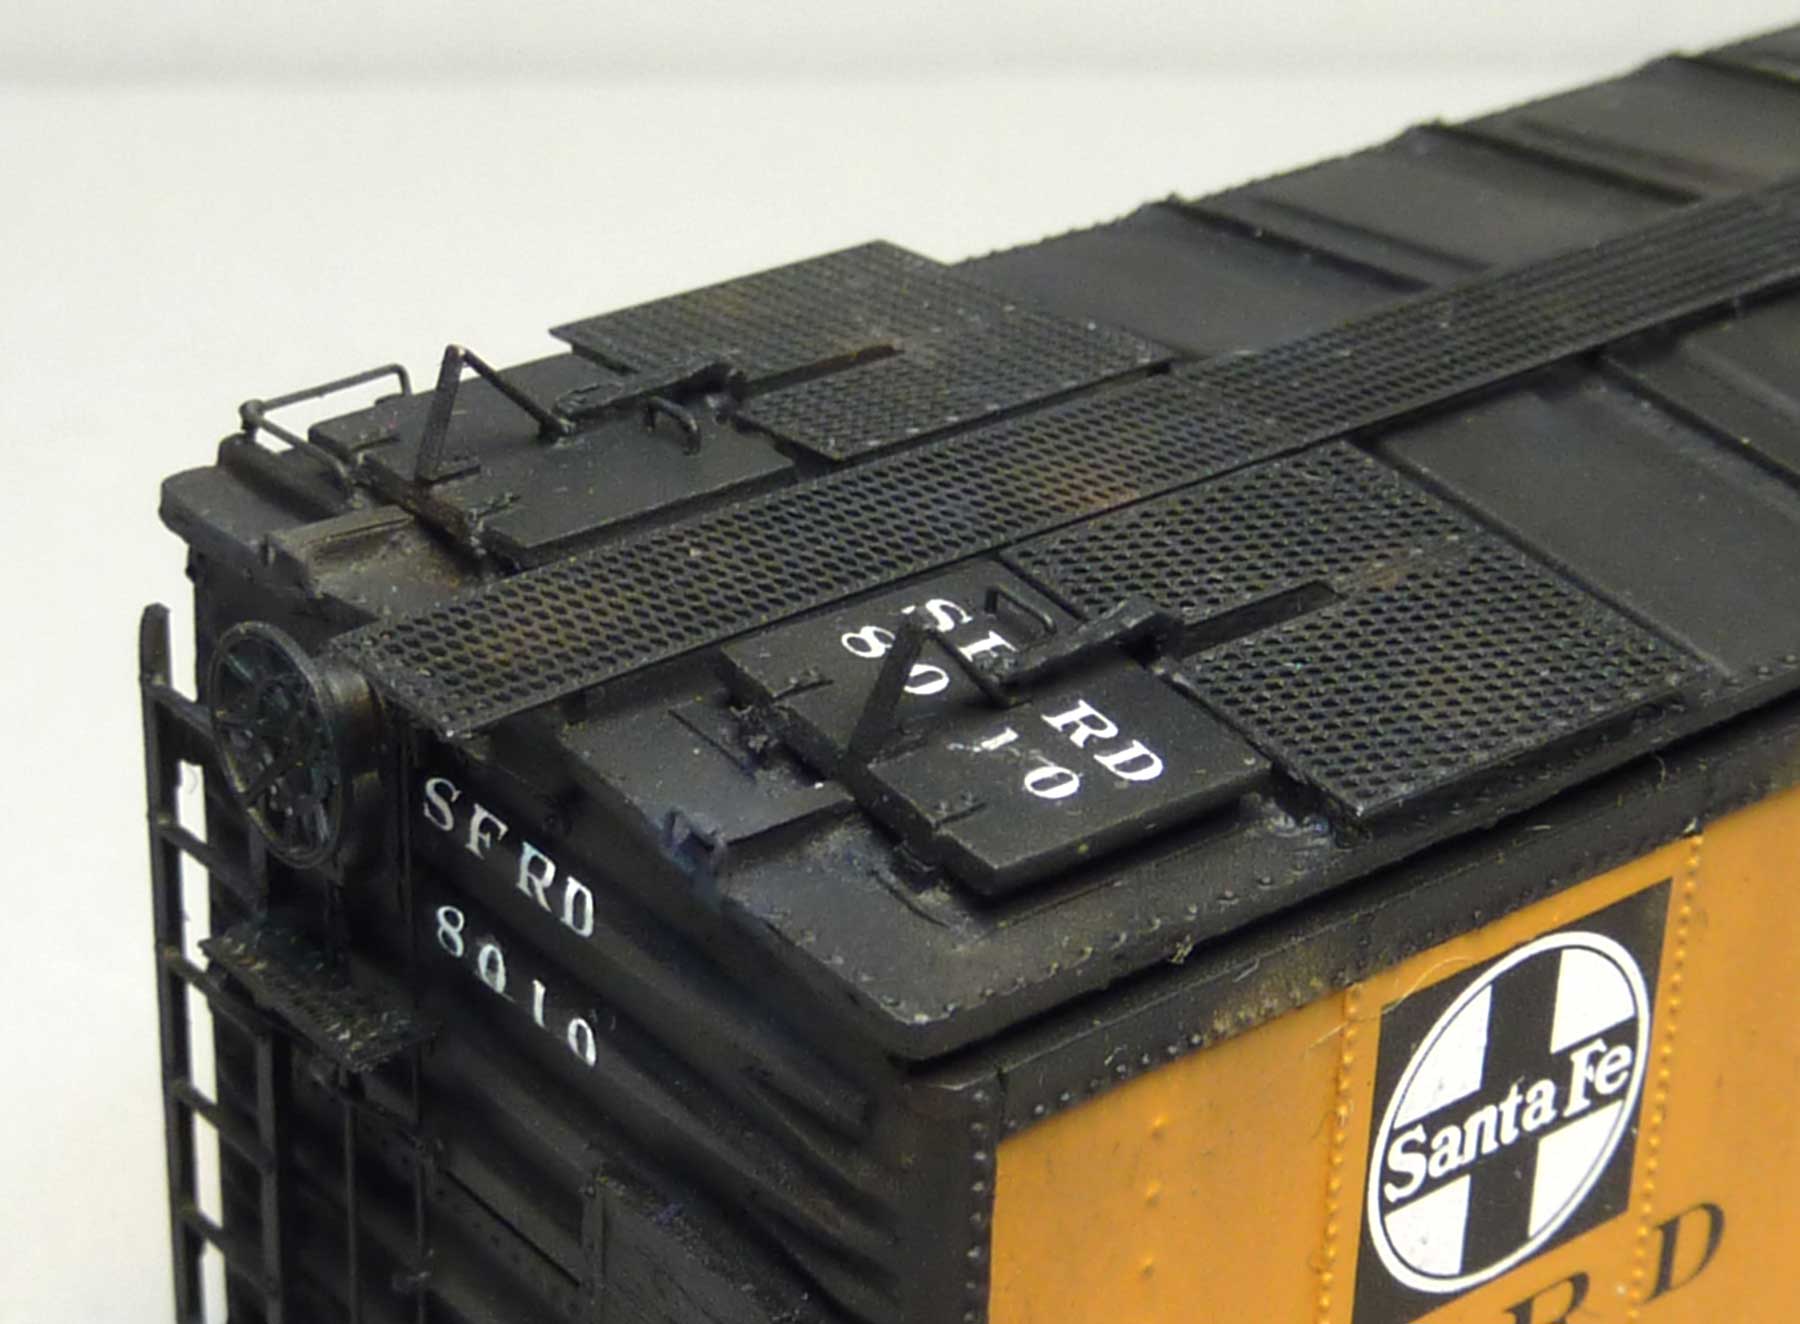
Several details were added or adjusted on the B end of the model.
- Kadee Brake Housing and Wheel and Bell Crank
- Ladder rungs were filed down to 0.011-inch thickness
- Brake step platform formed from 0.005 x 0.030-inch brass and pinned with 0.008-inch diameter wire
- The grab iron brackets were formed from 0.005 x 0.030-inch brass and pinned with 0.008-inch diameter brass rod
- Yarmouth Models photo-etched airhose bracket was cut, bent, drilled, and pinned with 0.008-inch diameter wire
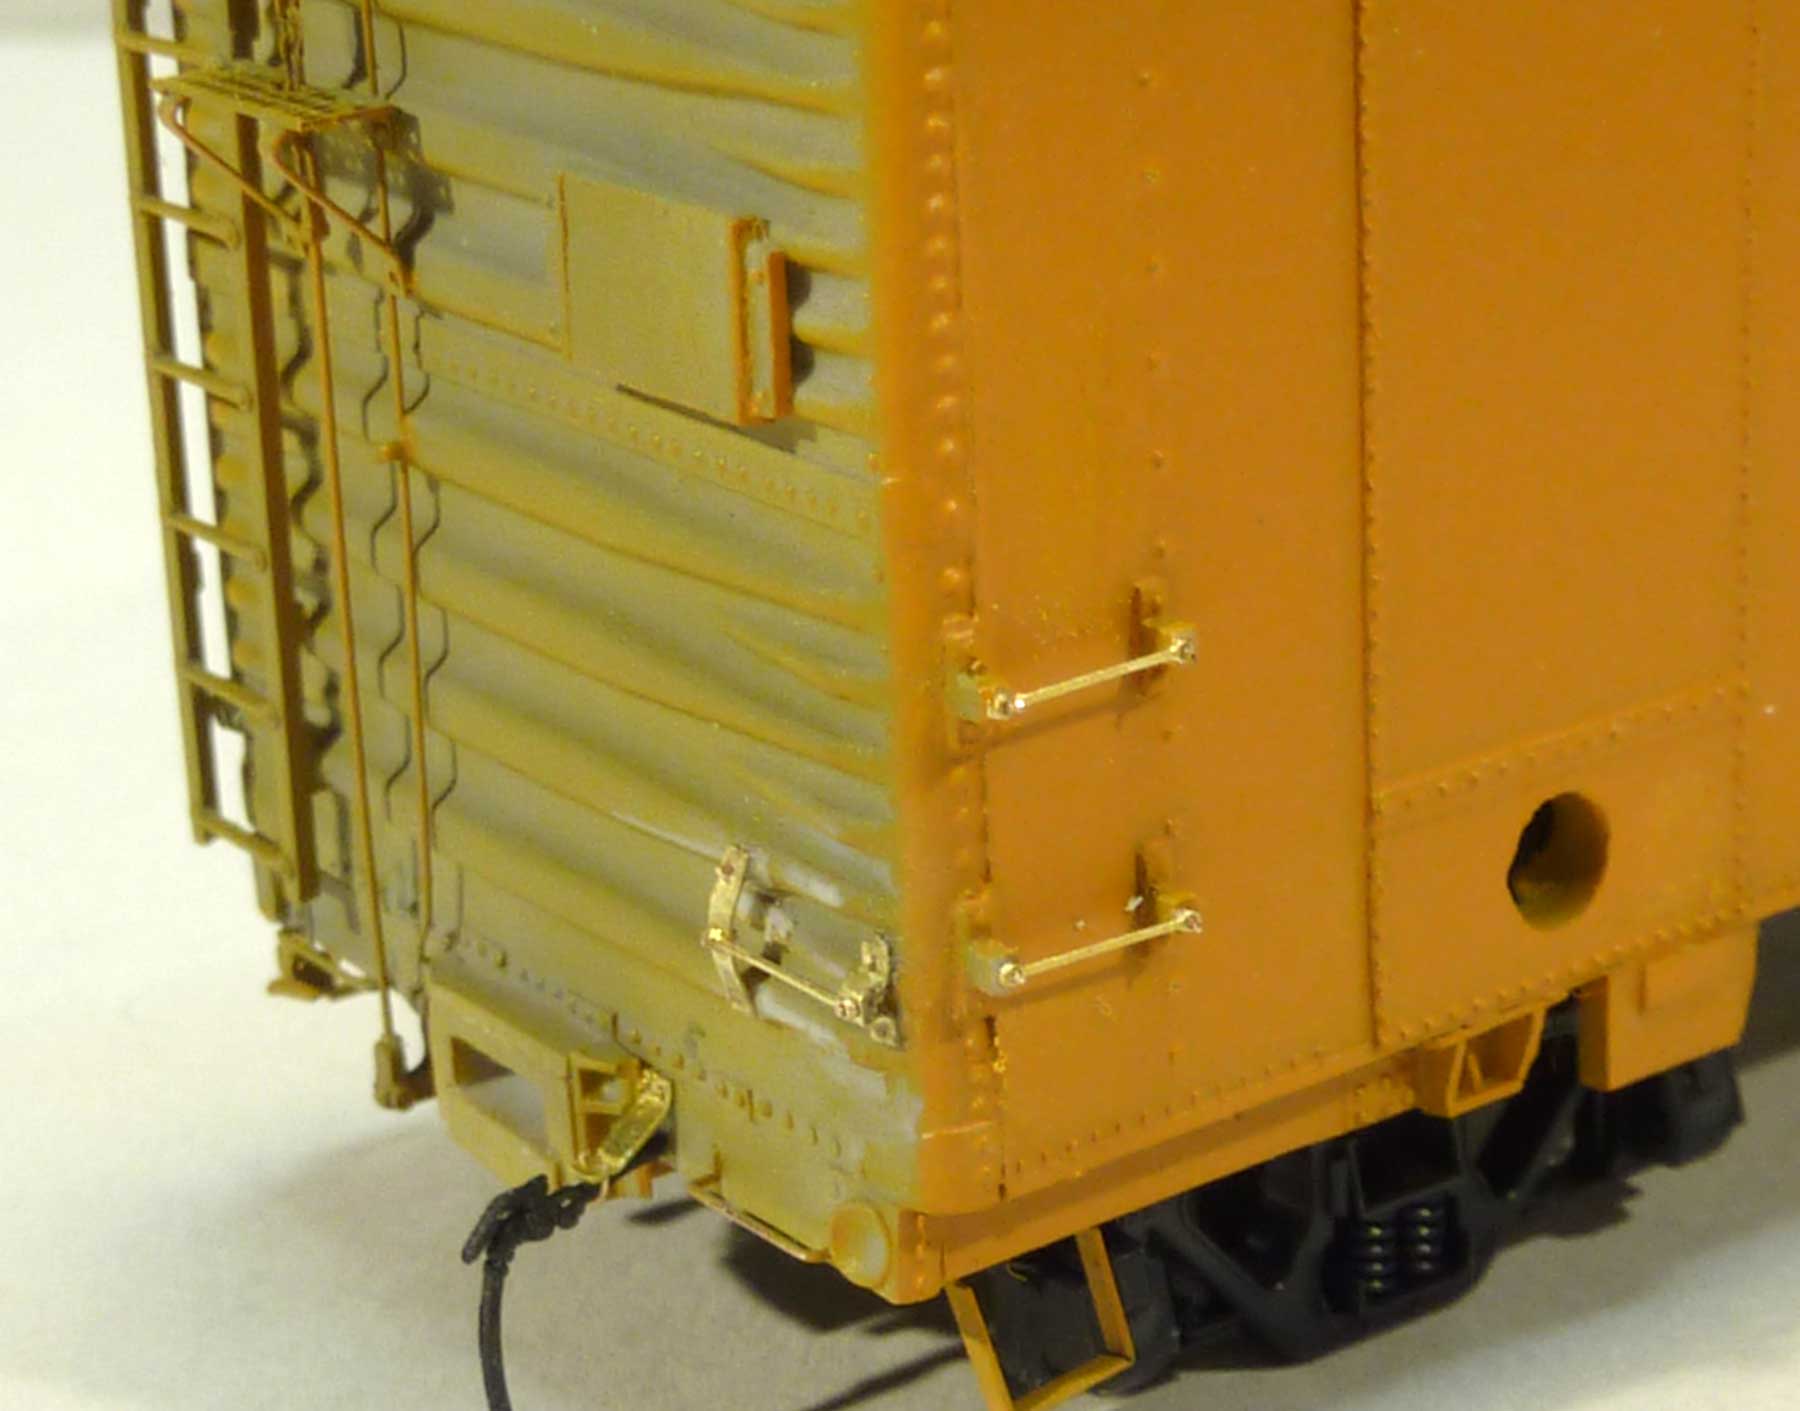
Here’s a closer look at the bracket grab irons. These are photo etched bracket grabs pinned with 0.008-inch diameter brass wire
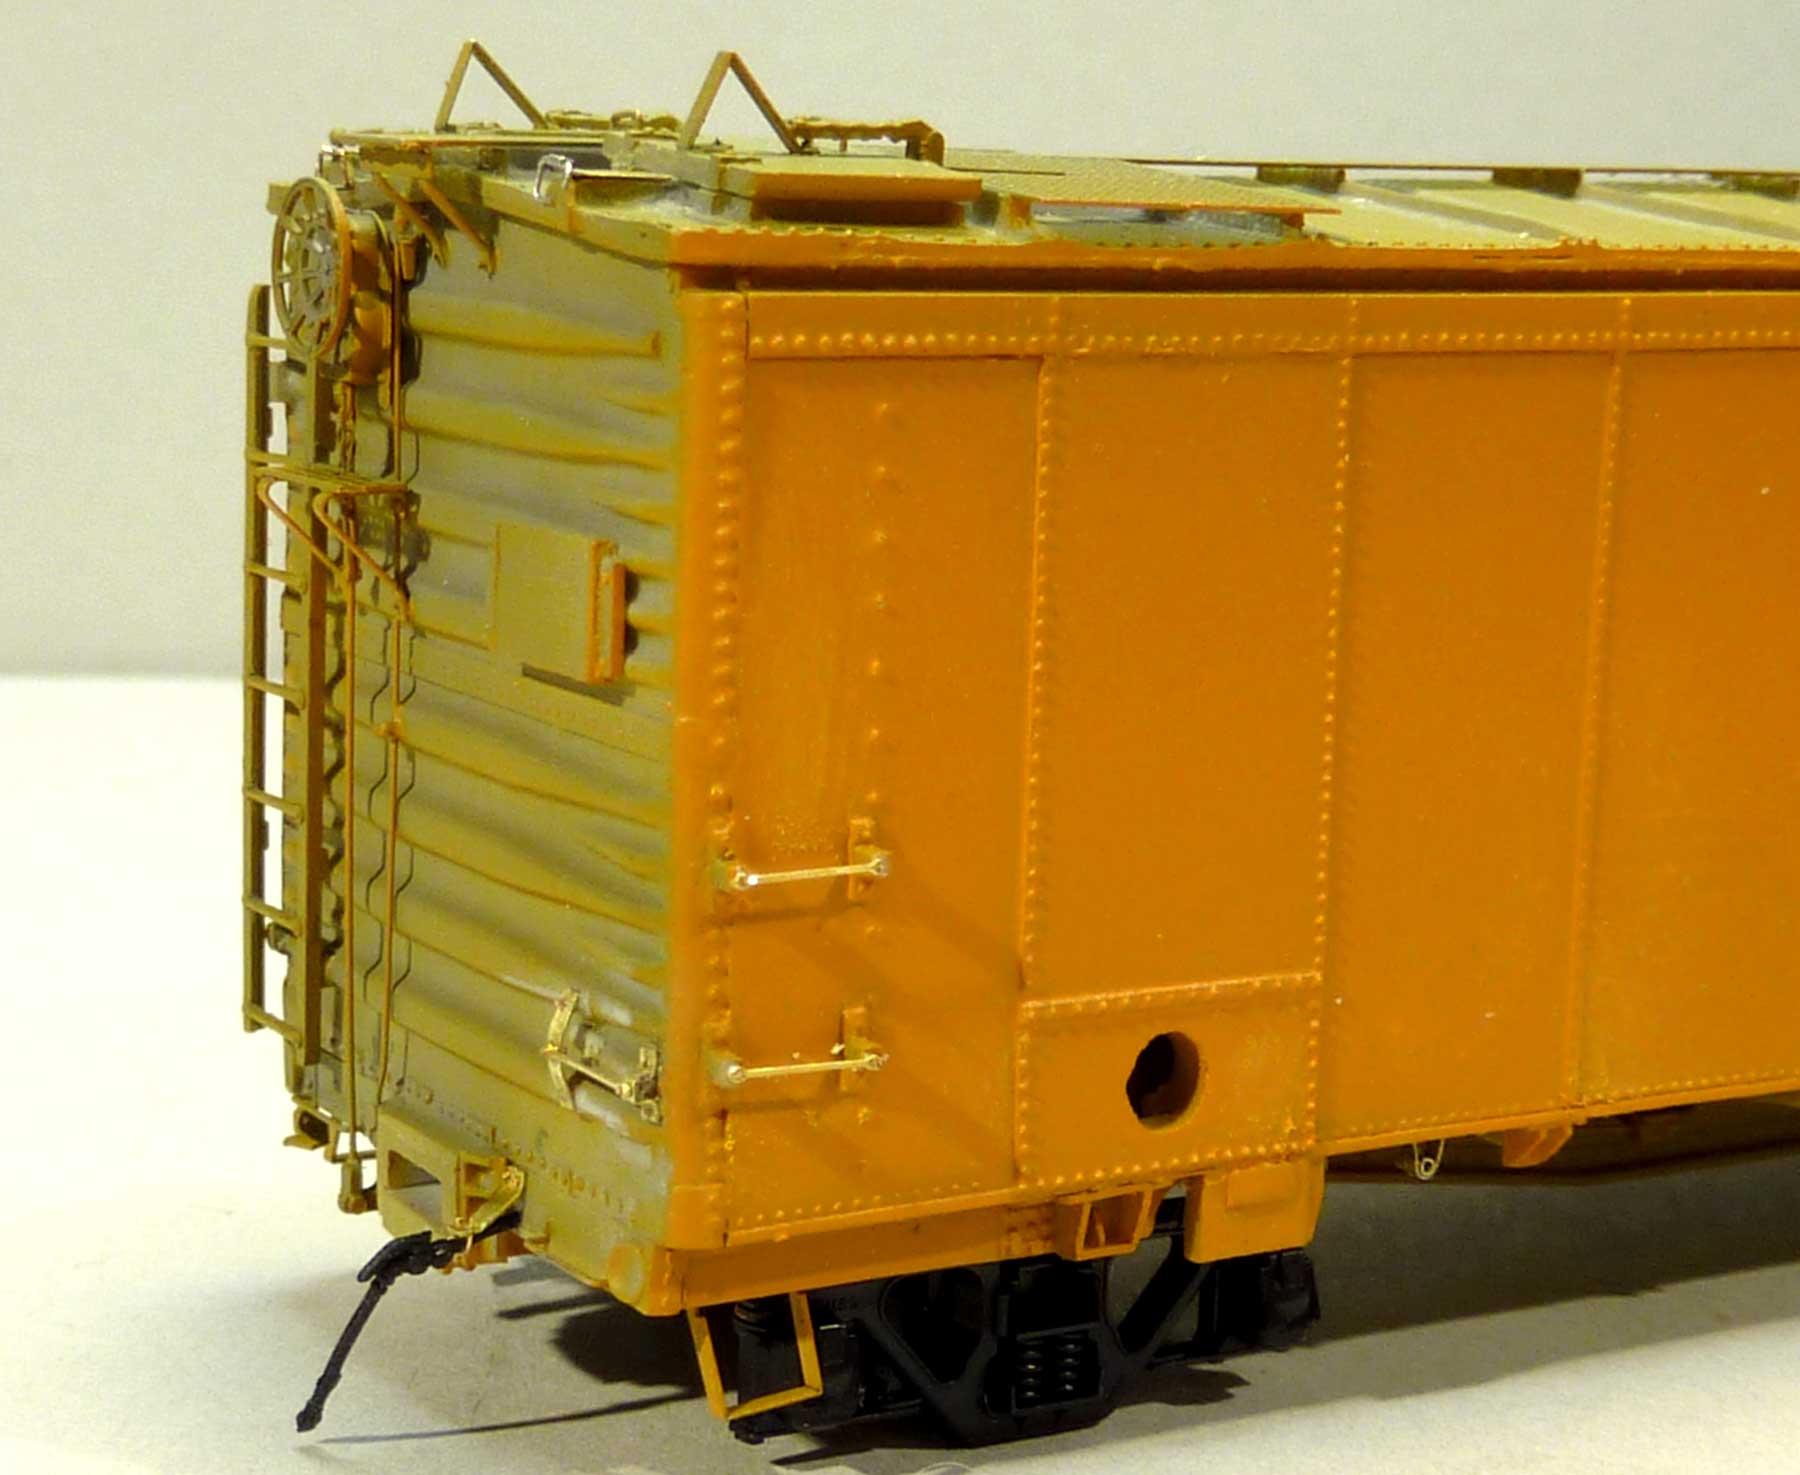
The following details were added in this image.
- Sliding hatch latch was made from 0.003 x 0.030-inch brass and 0.008-inch diameter brass rod
- A Preco V-shaped electric motor mounting bracket for the portable pre-cooling motor was made from 0.005 x 0.030-inch brass and some 0.6-mm micro brass tube
- A Moloco air hose was installed
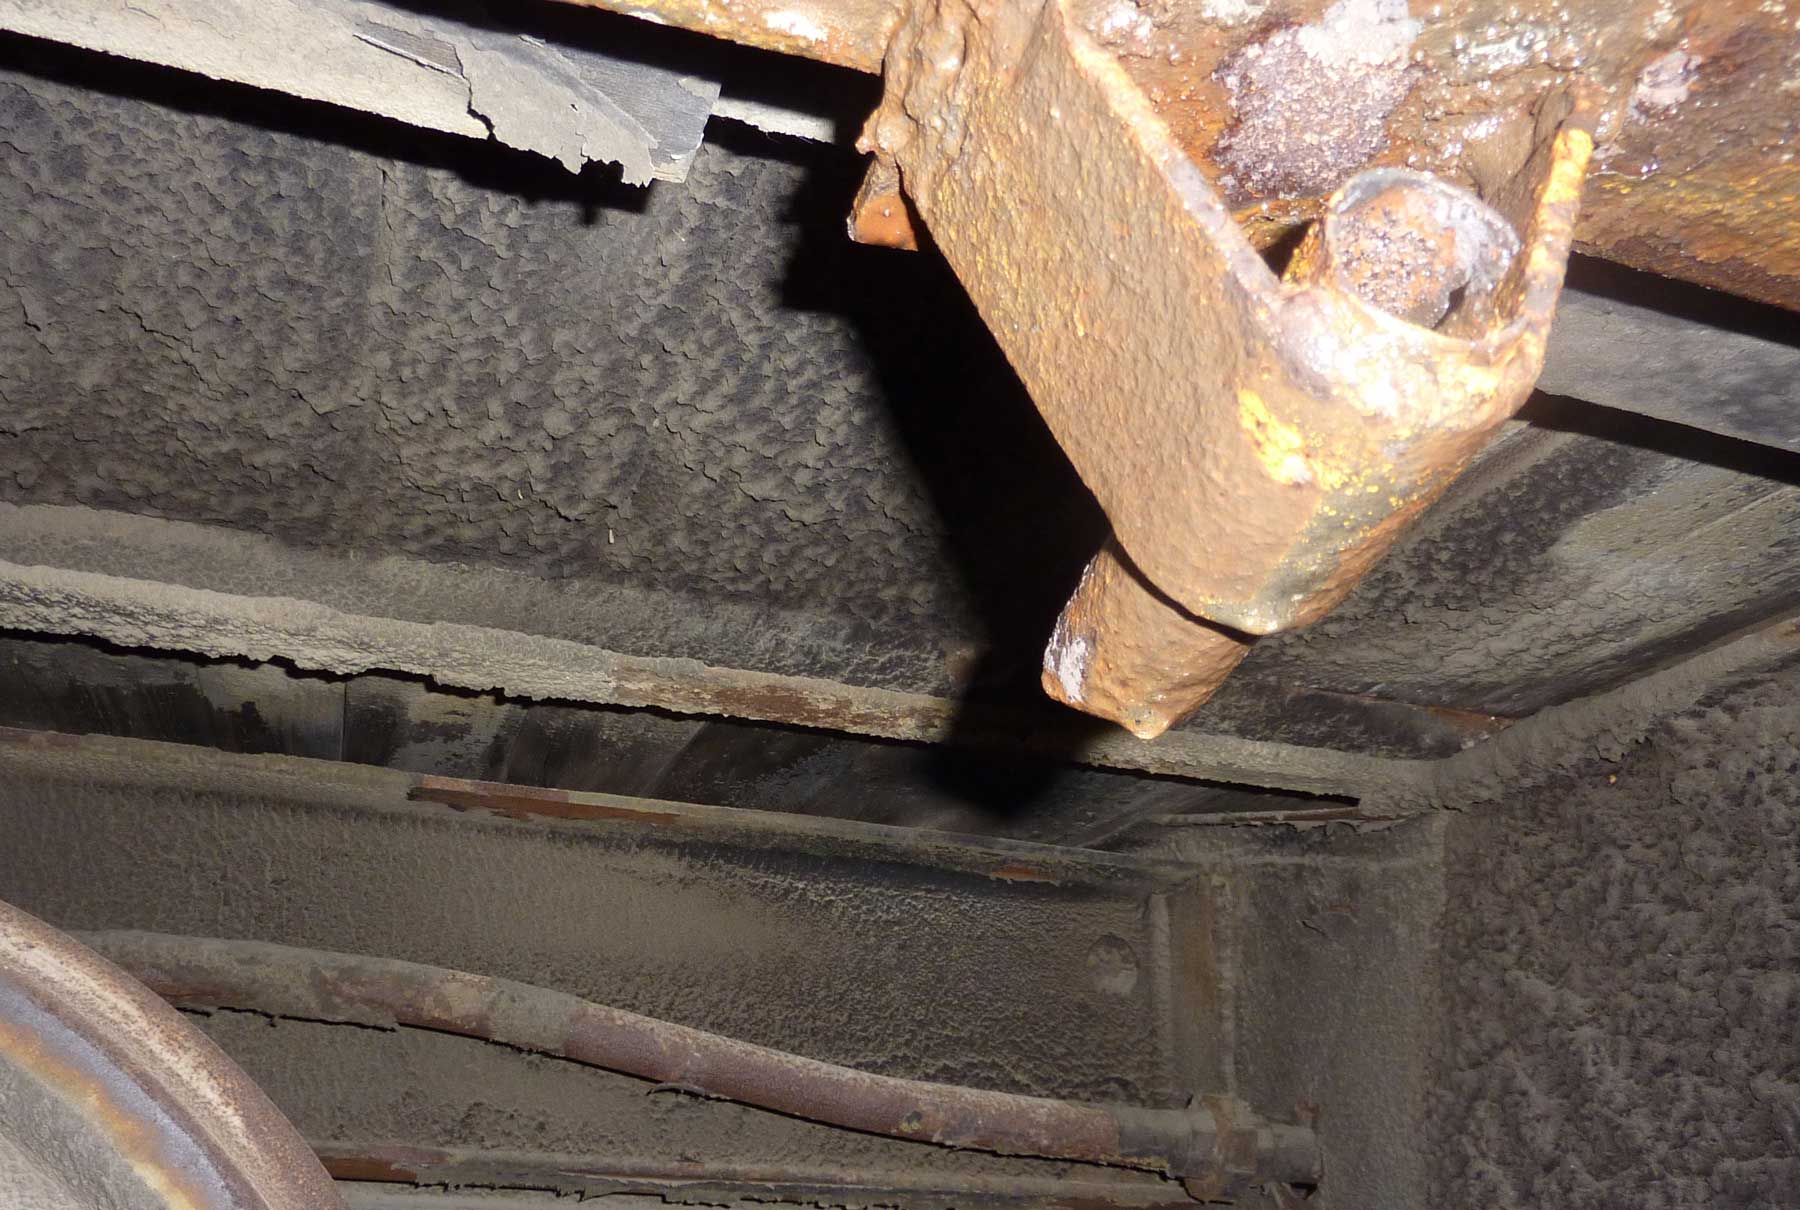
Here’s a look at a prototype electric motor mounting bracket on a Milwaukee Road reefer. The portable pre-cooling motor is hung on this when in use.
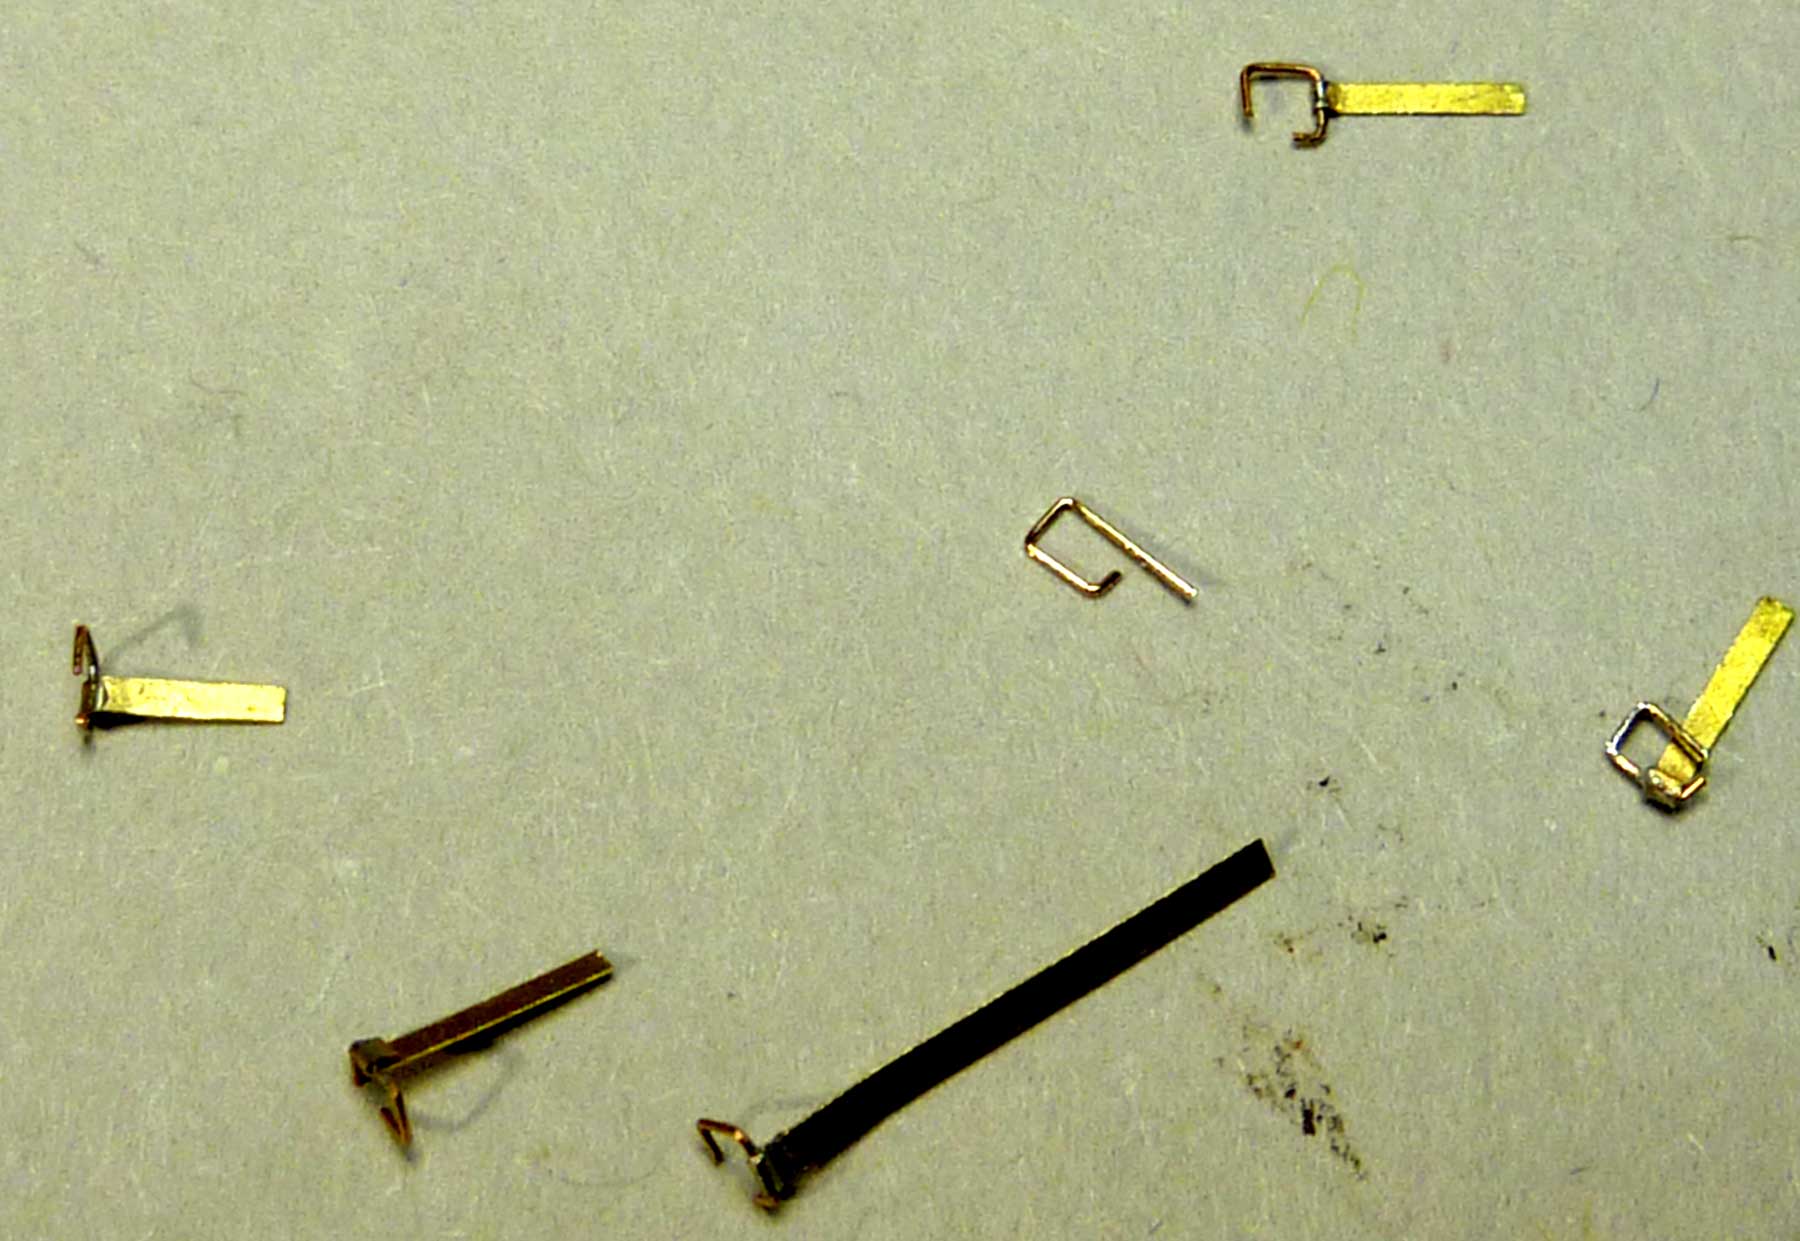
Here are the parts made for the sliding hatch latch. These were made from 0.003 x 0.030-inch brass and 0.008-inch diameter brass rod.
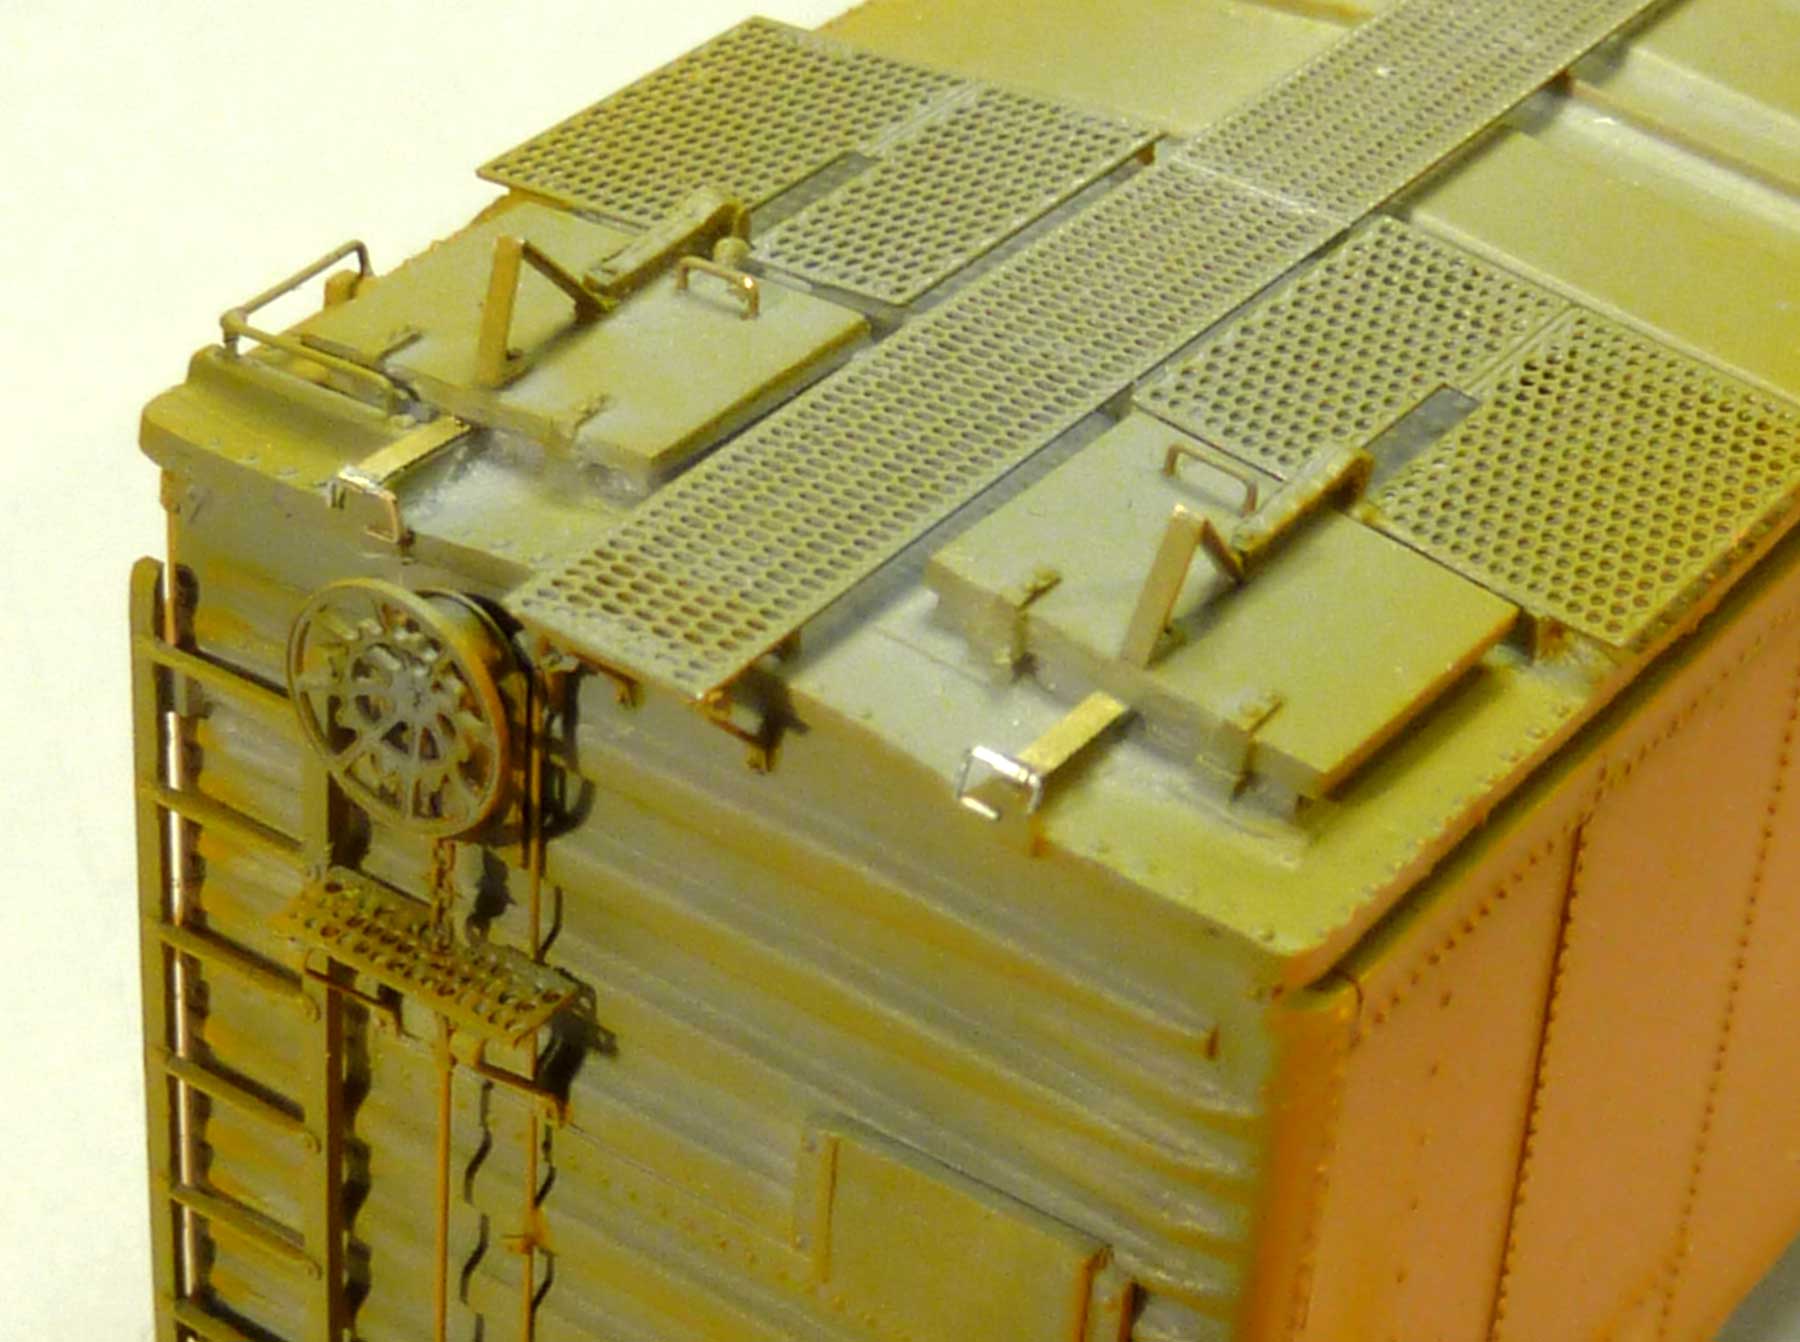
A custom bent eyelet was installed for the corner grab on the roof. This was made from 0.006-inch diameter wire and soldered.
After the new details were installed I mixed up a batch of Vallejo Model Air acrylic paint of Orange (Part 71.083) and Yellow (Part 71.078) in the ratio of eight parts yellow to one part orange. I then top coated the sides with a coat of Future/Pledge and let dry a full day before masking the sides to put on a coat of Vallejo Black (Part 71.251).
I also carefully taped the door hardware to avoid painting by hand except for the hinges. A clear coat was applied to the tape edges before spraying the black. Below are a couple photos of the cars decaled before my weathering.
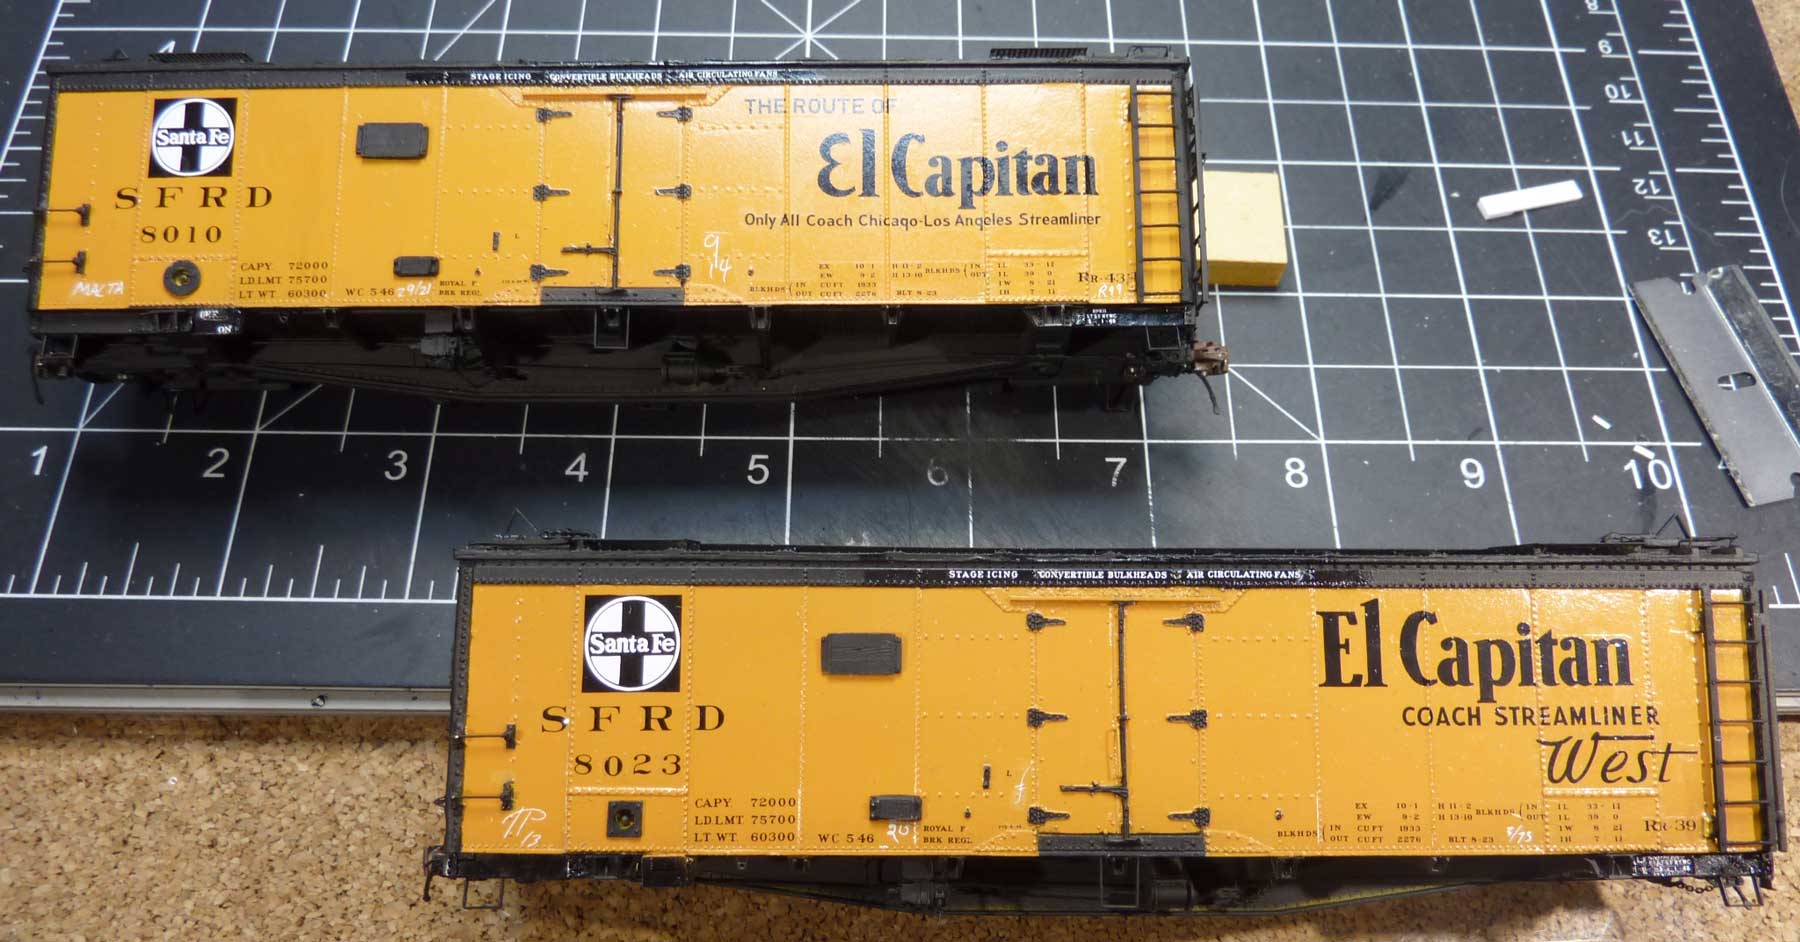
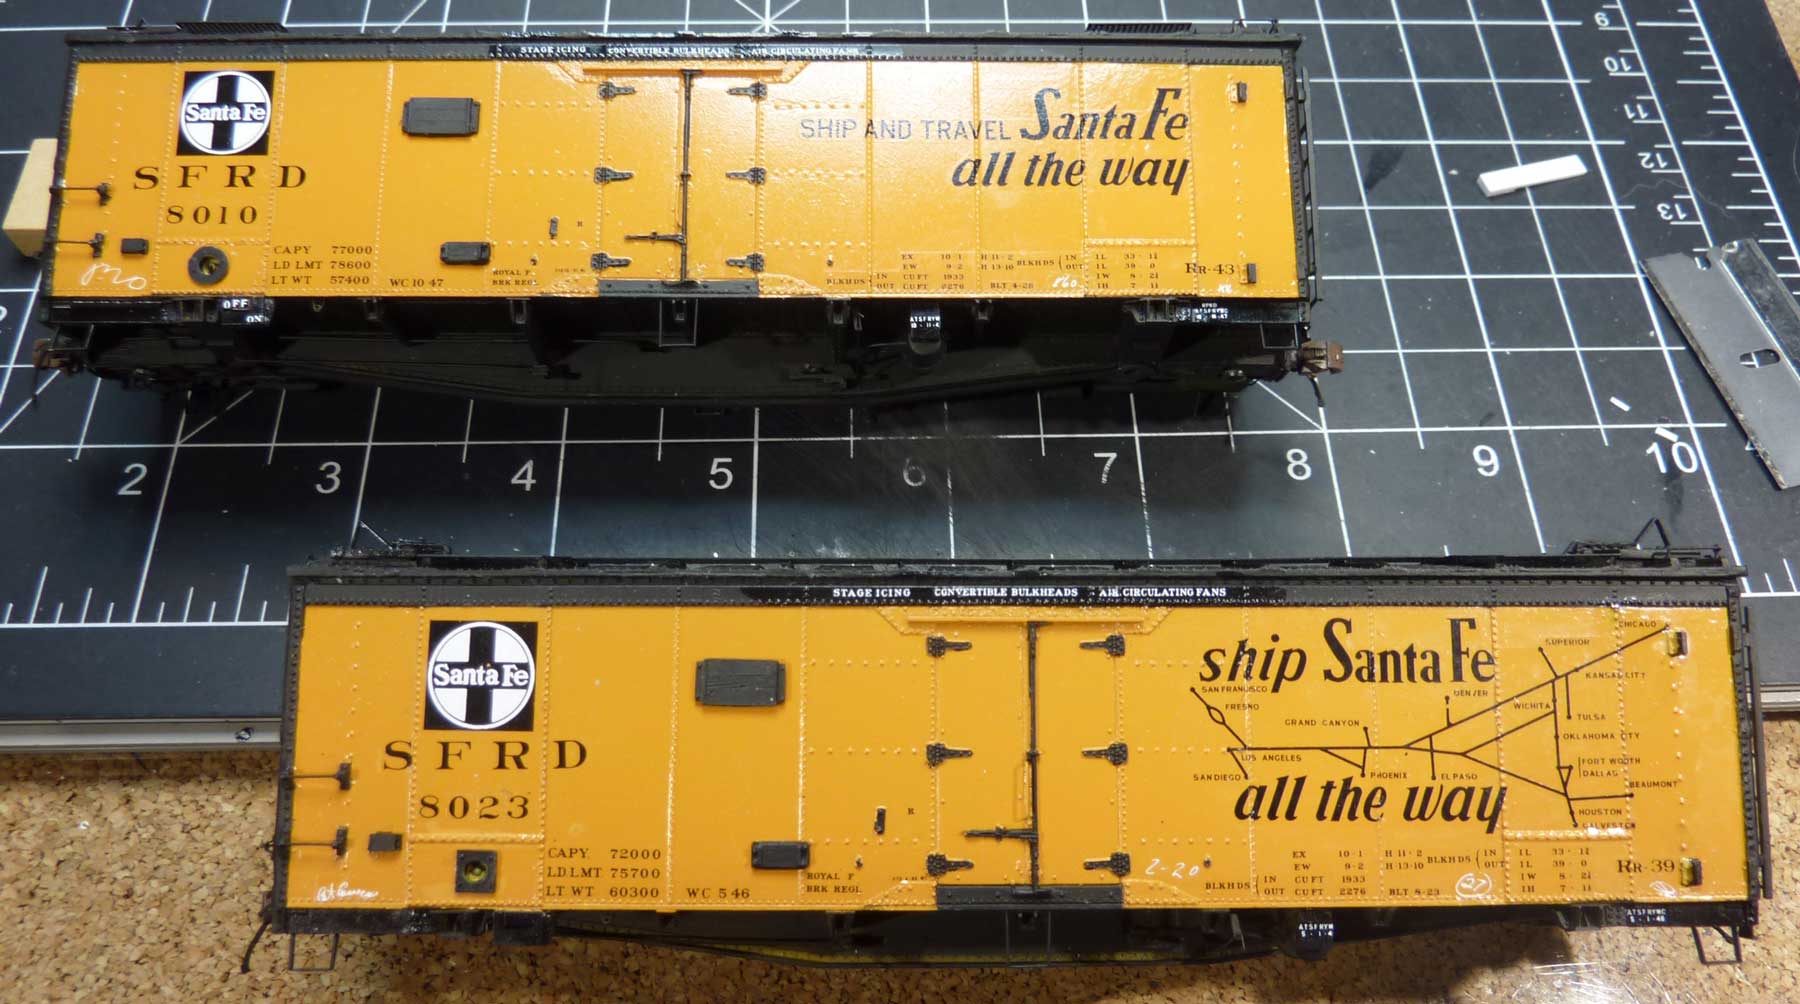
When I was satisfied with the decals I applied a semi-gloss to the sides and ends, and a flat coat to the roof and underframe. After this dried I used some Pan Pastels to give it a bit of weathering.


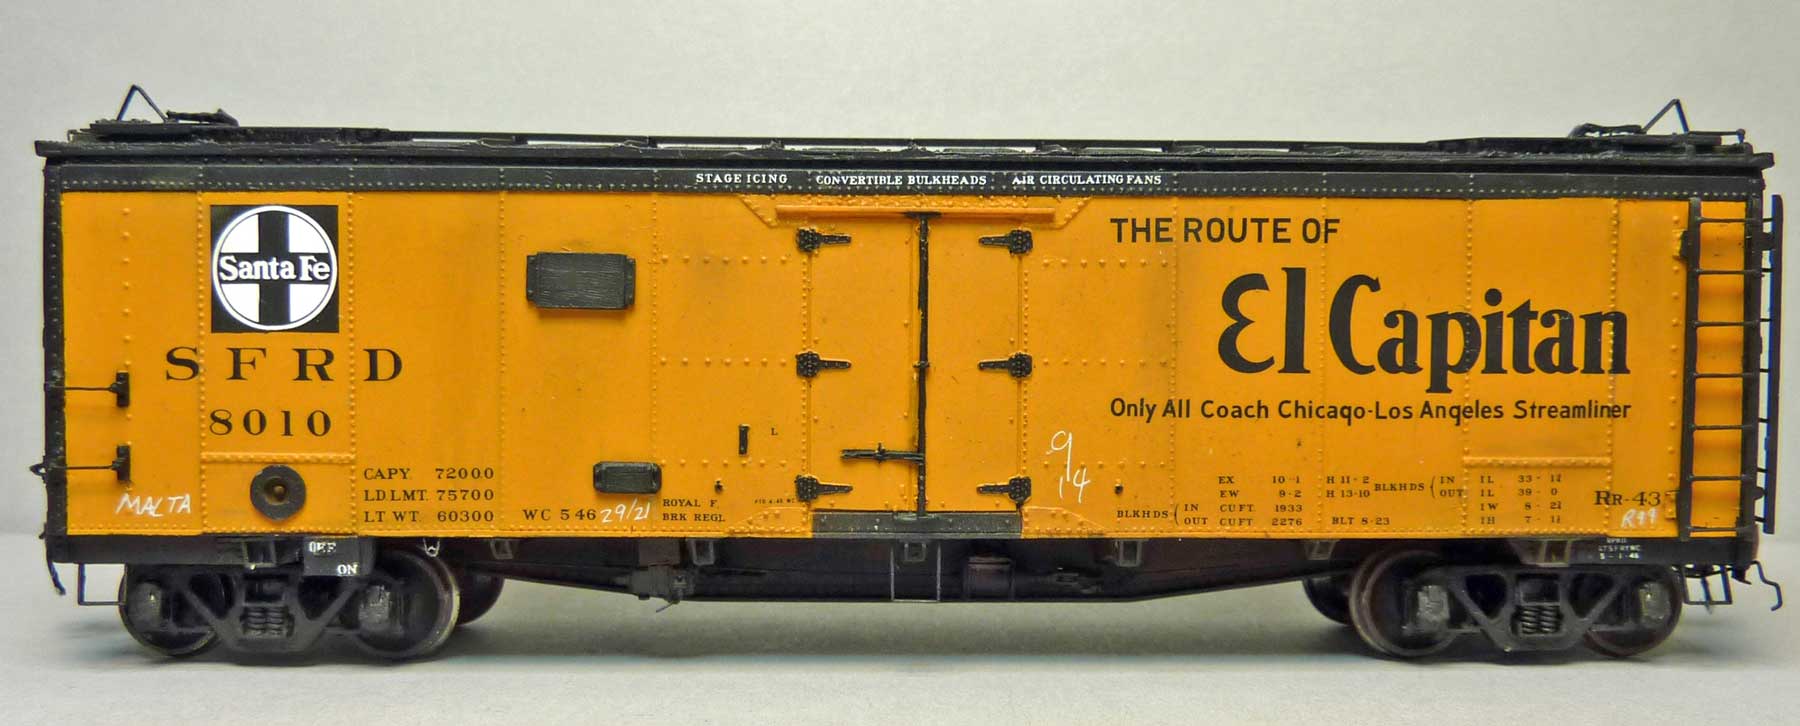
This wraps up my set of two SFRD Reefers. Hopefully Resin Car Works will come out with the plug door version.
George Toman

Wow. Thank you George for the update and great photos. Questions and comments can be posted below. Please follow the instructions so your comment can be posted. All comments are reviewed and approved before they appear. To subscribe to this blog, enter your info for a comment and check the last box to notify of new posts by email. Share the blog link with other model railroaders.
That is a fantastic looking pair of cars. Thanks for showing us how you formed the latch hardware and mounted the grabs. Great work!
Outstanding, Outstandin………………..g build.
Lester Breuer
These look really great! Bracket grabs especially good, and a beautiful paint job! One small question: where did you get the microtube?
Microtube is from Spure Brothers and is from Albion Alloys.
http://store.spruebrothers.com/category_s/2053.htm
Thanks–will be trying it out.