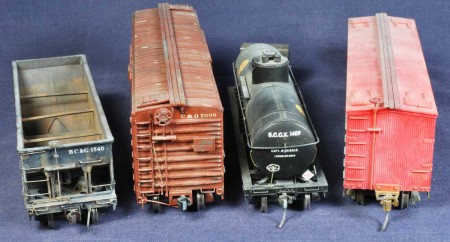
Blog manager Eric Hansmann steps in with some thoughts about details on the end of freight cars.
To snip or not to snip, that is the question. I’ve been installing couplers without trip pins for about a decade. Many modelers notice the missing trip pins and ask why would I do such a thing. In 2005, I realized I was not going to have a layout using magnetic uncoupling and the club layout where much of my equipment was in service also did not use magnetic uncoupling. Building models without trip pins was an easy personal choice. Click on any image here to review a larger size.
Most of my 1926 rolling stock have Accurail Proto:HO scale size couplers and coupler boxes installed. These couplers include trip pins for the builder to install, so it is easy to skip the installation. A small number of my freight cars employ the Kadee #58 semi-scale couplers with the trip pin snipped during installation.
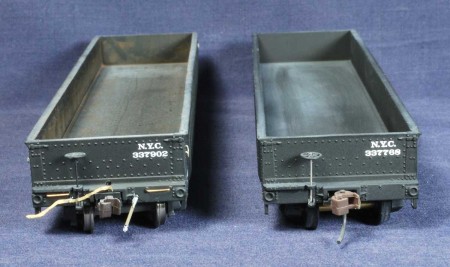
Once the trip pin is removed, there is a void at the end of our models. The prototype has an air hose and angle cock connection to the right of the coupler that are vital components to safe train operations. Several of my freight cars have air hose hardware installed. Intermountain and Red Caboose kits come with air hose details to install. I used Kadee air hoses on a number of other cars but experienced a frequent failure rate in general use. Hi-Tech Details came to the rescue with air hose details cast in rubber that are easy to install and can withstand bumps and nudges from your favorite crew members.
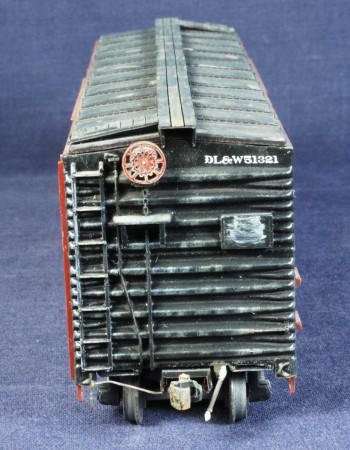
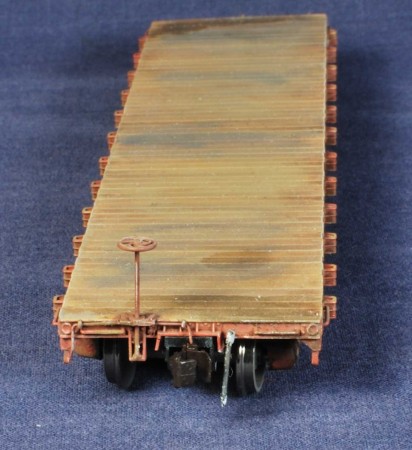
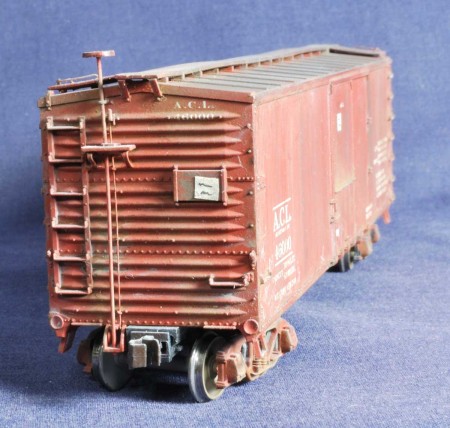
Another detail missing on most model end sills are the uncoupling mechanisms. In many applications for my 1926 fleet, I can use eyebolts and 0.012-inch brass wire to emulate the prototype bent rods used in top-pin pull uncoupling. Combinations of Carmer operating and lift pin levers were also common, especially on Pennsylvania Railroad freight cars. Free State Systems offers etched brass HO scale Carmer hardware in a few operating and lift pin combinations. Careful work with thin brass stock can also produce a detail part with similarities to the prototype. The Carmer hardware on the NYC mill gon in the photo earlier is a home made part.
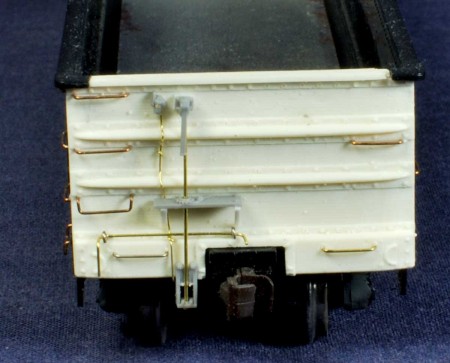
There is more to the freight car end than the sill details. Retainer lines, brake step supports, and running board supports can also be installed. The Accurail model above has a retainer line of 0.008-inch wire that is attached to the car end using small J-hooks made with the same wire to resemble the prototype clips. Pieces of styrene 1×3 were cut to length for the running board support then carefully split in half lengthwise with a single-edge razor blade before being glued into place. I used the same method on brake step supports, but the model above had a different technique that no longer comes to mind.
The prototype for this gondola end had an interesting retainer line that followed the contour of the structural components. The 0.008-inch wire was easy to press into place across the forms and then pin into place with small J-hooks. Air hose detail will be installed after this model is painted and decaled.
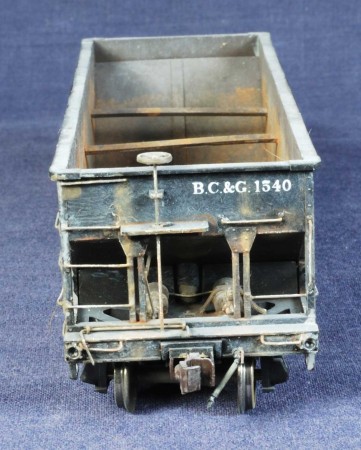
Did I fall down a rabbit hole when I began snipping the coupler trip pins? Or did it just help me understand the prototype details that are common on so many freight cars? Frankly, I don’t have an answer for either question, but I’ve been happy installing air hoses and uncoupling levers on my models so they seem a little more like the prototypes.
Questions and comments can be posted below. Please follow the instructions so your comment can be posted. All comments are reviewed and approved before they appear. To subscribe to this blog, enter your info for a comment and check the last box to notify of new posts by email.
You might consider Magnalock automatic air hoses. They couple and uncouple automatically. https://www.pwrs.ca/announcements/view.php?ID=7440
https://m.youtube.com/watch?v=fv7AbCzuJmg
All my passenger cars and locomotives have couplers with the trip pins removed, because they all have the extra steam and air hoses, plus coupler lift rods, and I have no magnets. All my operations are conducted with bamboo skewer reach-rods. However, I have not removed the trip pins from my freight cars.
Now that extra freight car details are available and durable, and based on the examples in this blog and others, I will be removing the trip pins.
I can always count on Eric to produce a post about a worthwhile topic…
I would like to put in a word for Sergent couplers, if I may. I have applied them to all service trains and locomotives here at Fillmore Avenue Roundhouse. I have yet to have practical success with them for passenger/express cars due to the working diaphragms creating interference (I did try the Sergent passenger car tool, but it is more a matter of being able to see how to manipulate the couplers with the diaphragm covering most of the view). I will pursue a solution for passenger/express cars; a long term project.
For freights and MOW, I am very pleased with their performance. Like most things, one needs to play with them a little until there is a feel for how they really work. I did have trouble sometimes with coupling in that the jaws looked like they were coupled, but were not locked resulting in leaving the trailing car behind when proceeding away. However, I did discover that the opposing couplers need to be co-linear (straight in-line) to lock. So I use the coupling/uncoupling tool to nudge the coupled couplers slightly side-to-side and this often works. Another compromise sometimes, is giving the car a nudge (by finger) from the opposite end coupler to lock up the coupled couplers. Things are getting better with experience though.
I very much like the fact that I often need to open the jaws and align the couplers manually. This is very prototypical. The best part, in my opinion, is the uncoupling. The slack is taken in (again, per prototype), and the blunt end of the tool is simply held above the coupler pair to be released – and uncoupling is effected. Of course, these couplers look fantastic. I have them on my passenger locomotives even though they are Type E.
Anyway, I enjoy this blog very much. Many Thanks to all who make this available to us.
Thanks for sharing your Sergent coupler experiences, Rick! I have not played with these but I know they are gaining in popularity. – Eric