George Toman has been busy working on a neat new model. He shared notes and photos of his work. Here’s George with more.
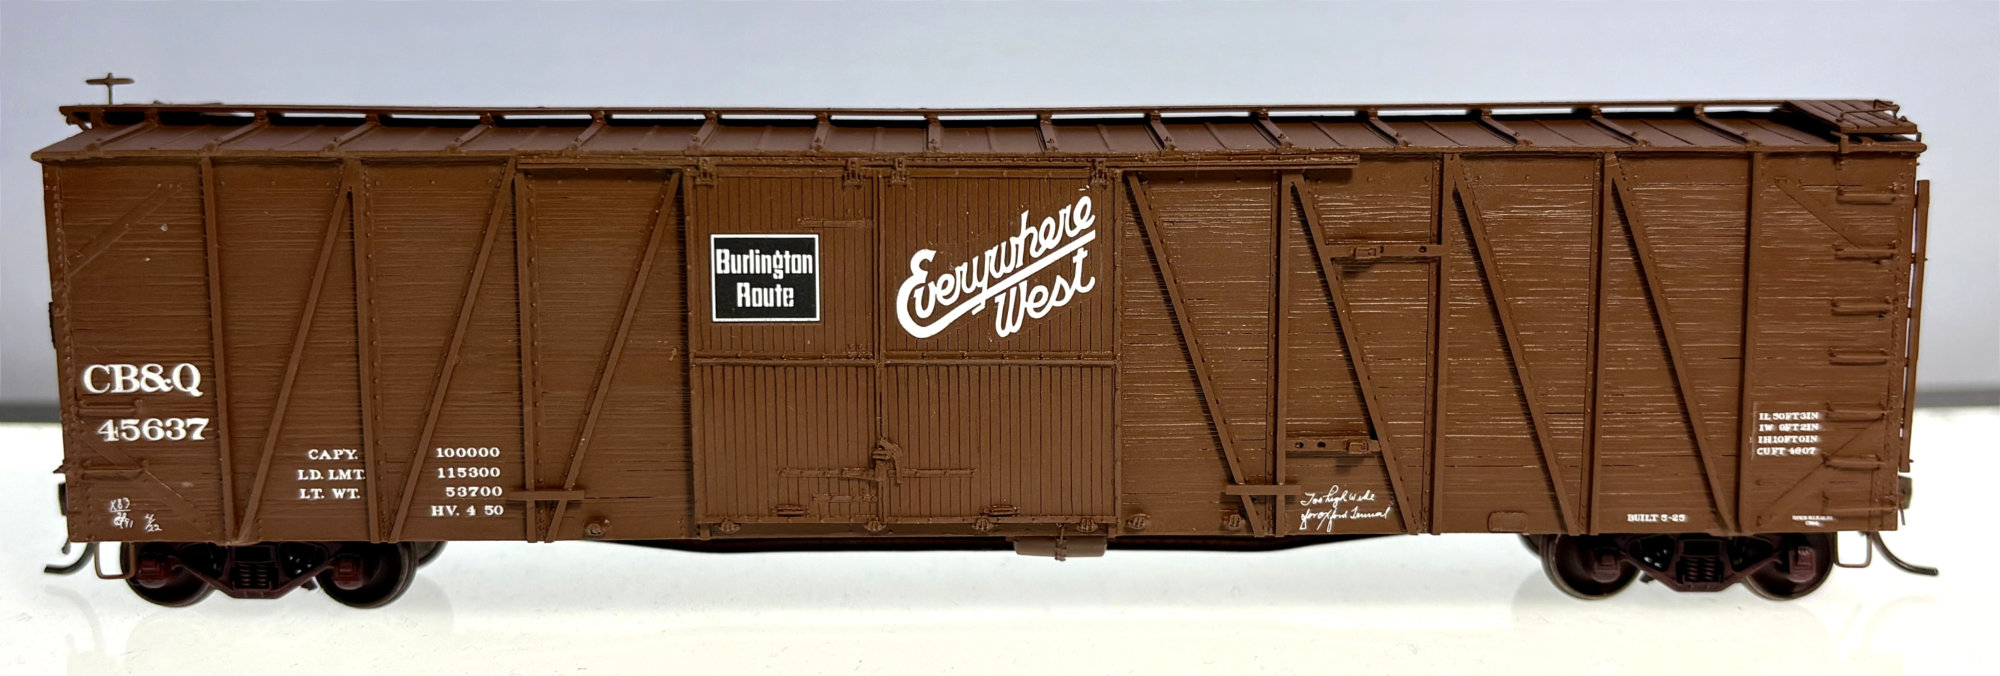
At the October 2025 Naperville RPM, I picked up an HO scale CB&Q resin kit of an XA-9 class automobile box car.
Pullman built 500 of these single-sheathed, 50-foot cars with fishbelly center sills. The build date for Lot# 5388 was June 1925 and numbered 45500-45999. Beginning in 1942, the cars were converted to AB brakes. Many lasted well into the 1950’s with 285 cars listed in service in the January 1958 ORER.
Before I continue with kit construction, it’s appropriate to share a bit about the timeline of this kit. This information was provided by Ed Rethwisch and Jerry Hamsmith.
“Some years ago (8 to 10 years), Ted Culotta and Ed Rethwisch collaborated on creating the patterns for a CB&Q XA-9, a single-sheathed auto car. The master patterns were cast, and Ted went to market with a Speedwitch Models kit. That kit has long been out of production.
About a year ago Ed asked Ted if he minded if Ed and Jerry Hamsmith reissued a slightly modified reworked model of the XA-9. Ted heartily agreed to have Ed and Jerry go ahead. Ed made various adjustments to the patterns, Jerry redid the decals and wrote the instructions. The set of new kit parts were cast by Westerfield. Ed and Jerry have now made the kits available for sale. Contact Jerry if you are interested in one. His email is hammersr@aol.com.”
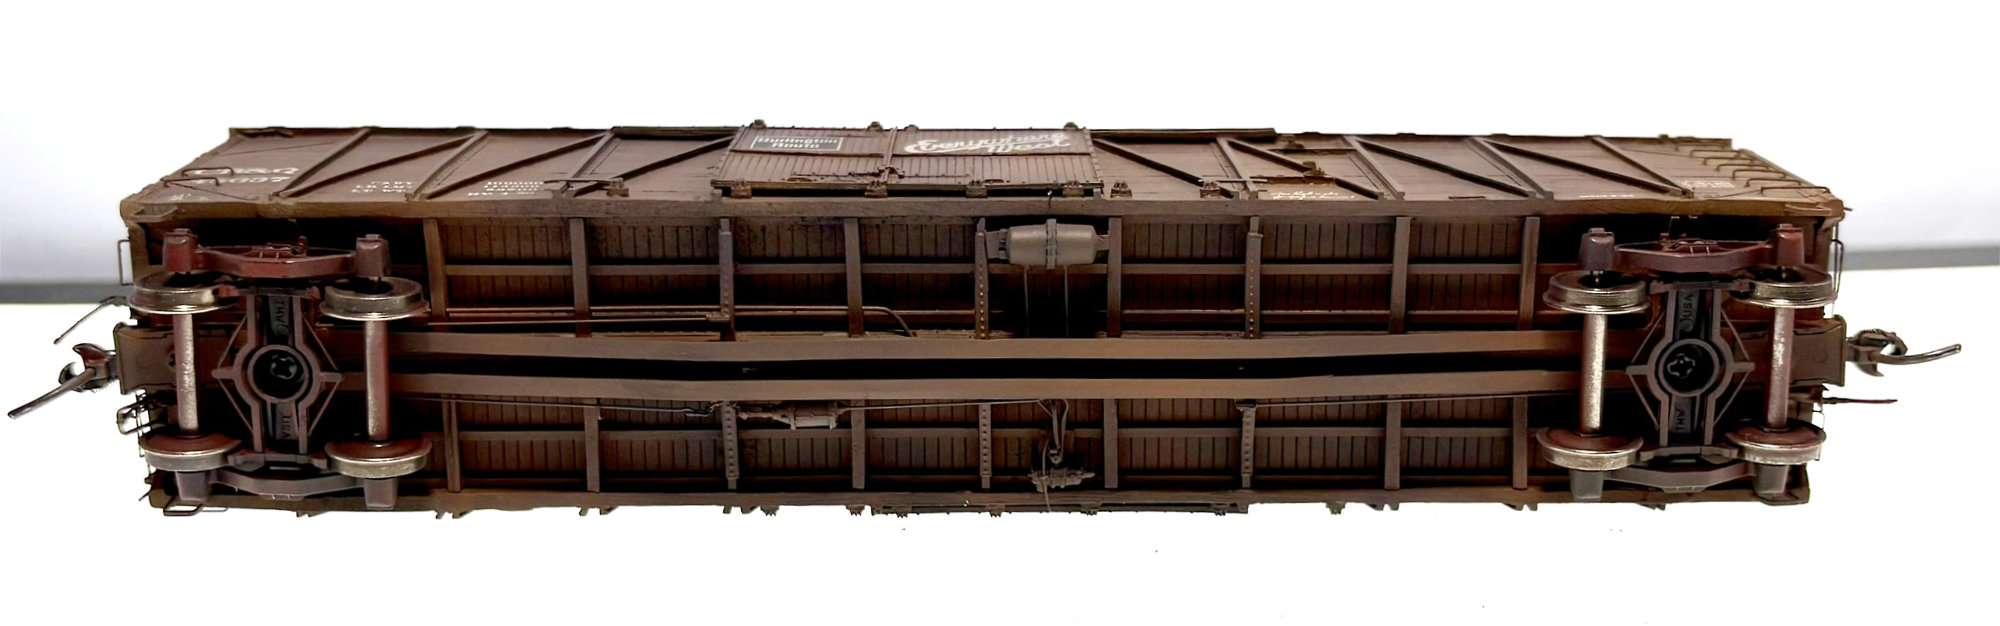
Underframe
The kit is typical of most modern resin kits. It includes a one-piece body and floor along with various resin parts, decals, and the correct Tahoe Trucks. As usual, a list of other parts you will need is included. Jerry has written very complete assembly instructions that he will email to those purchasing the kit. I built the kit following these instructions, but I did modify them a bit. Following are some photos of my build along with some notes.

The photo above shows the underframe with the 0.020-inch diameter train line routed through the center sill, cross ties and cross bearers. A 3D printed Tee has been added in the location of the control valve. The Tee was designed by Tom Madden and currently printed by David Jobe, Sr. at his company Precision Resin Works LLC., info@precisionresinworks.com .
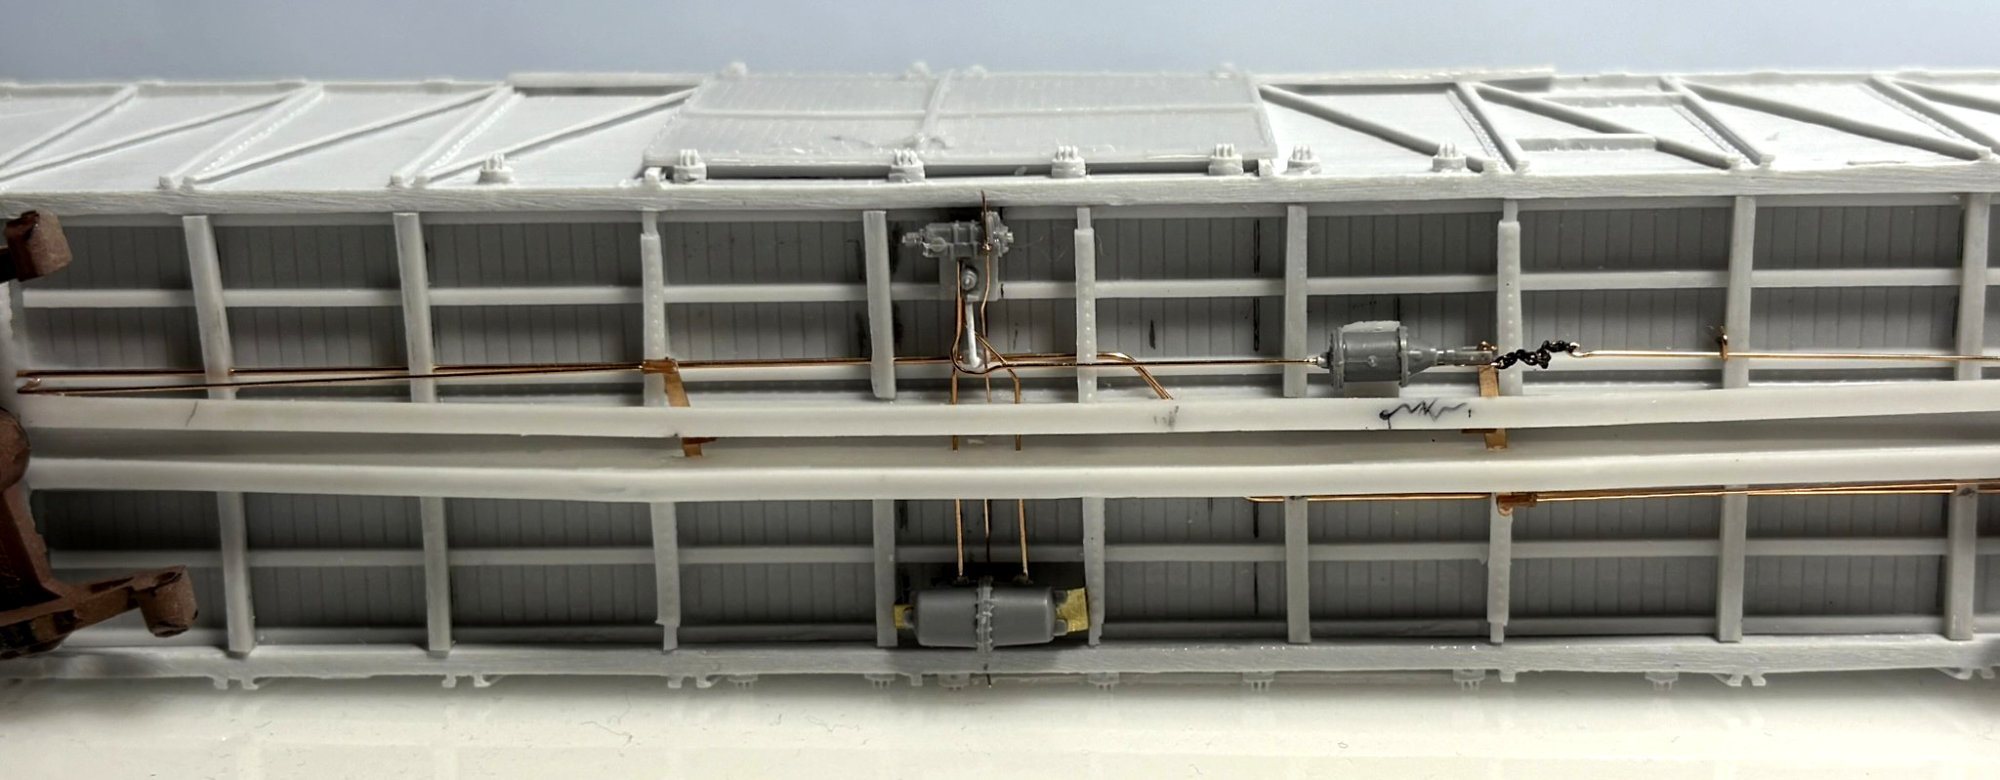
Here’s a look at the Tichy AB brake components and piping that I applied to this car.
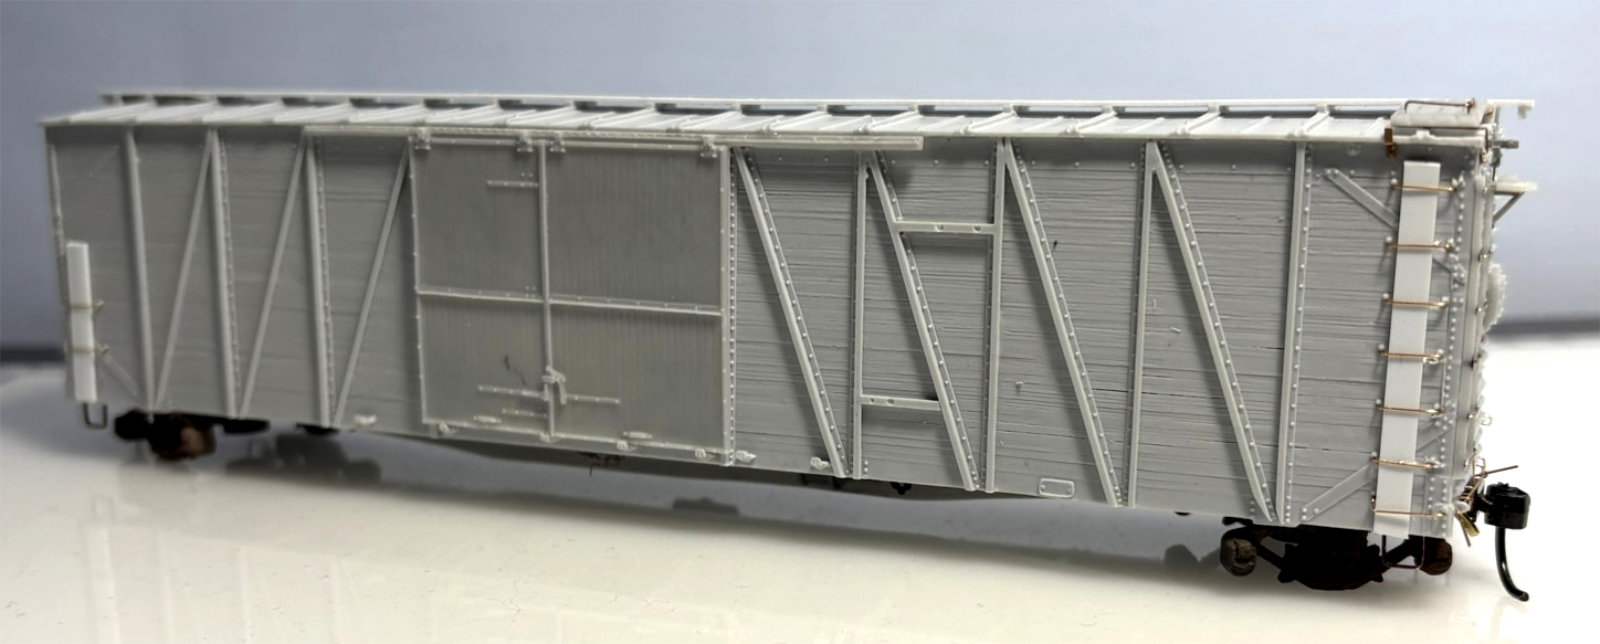
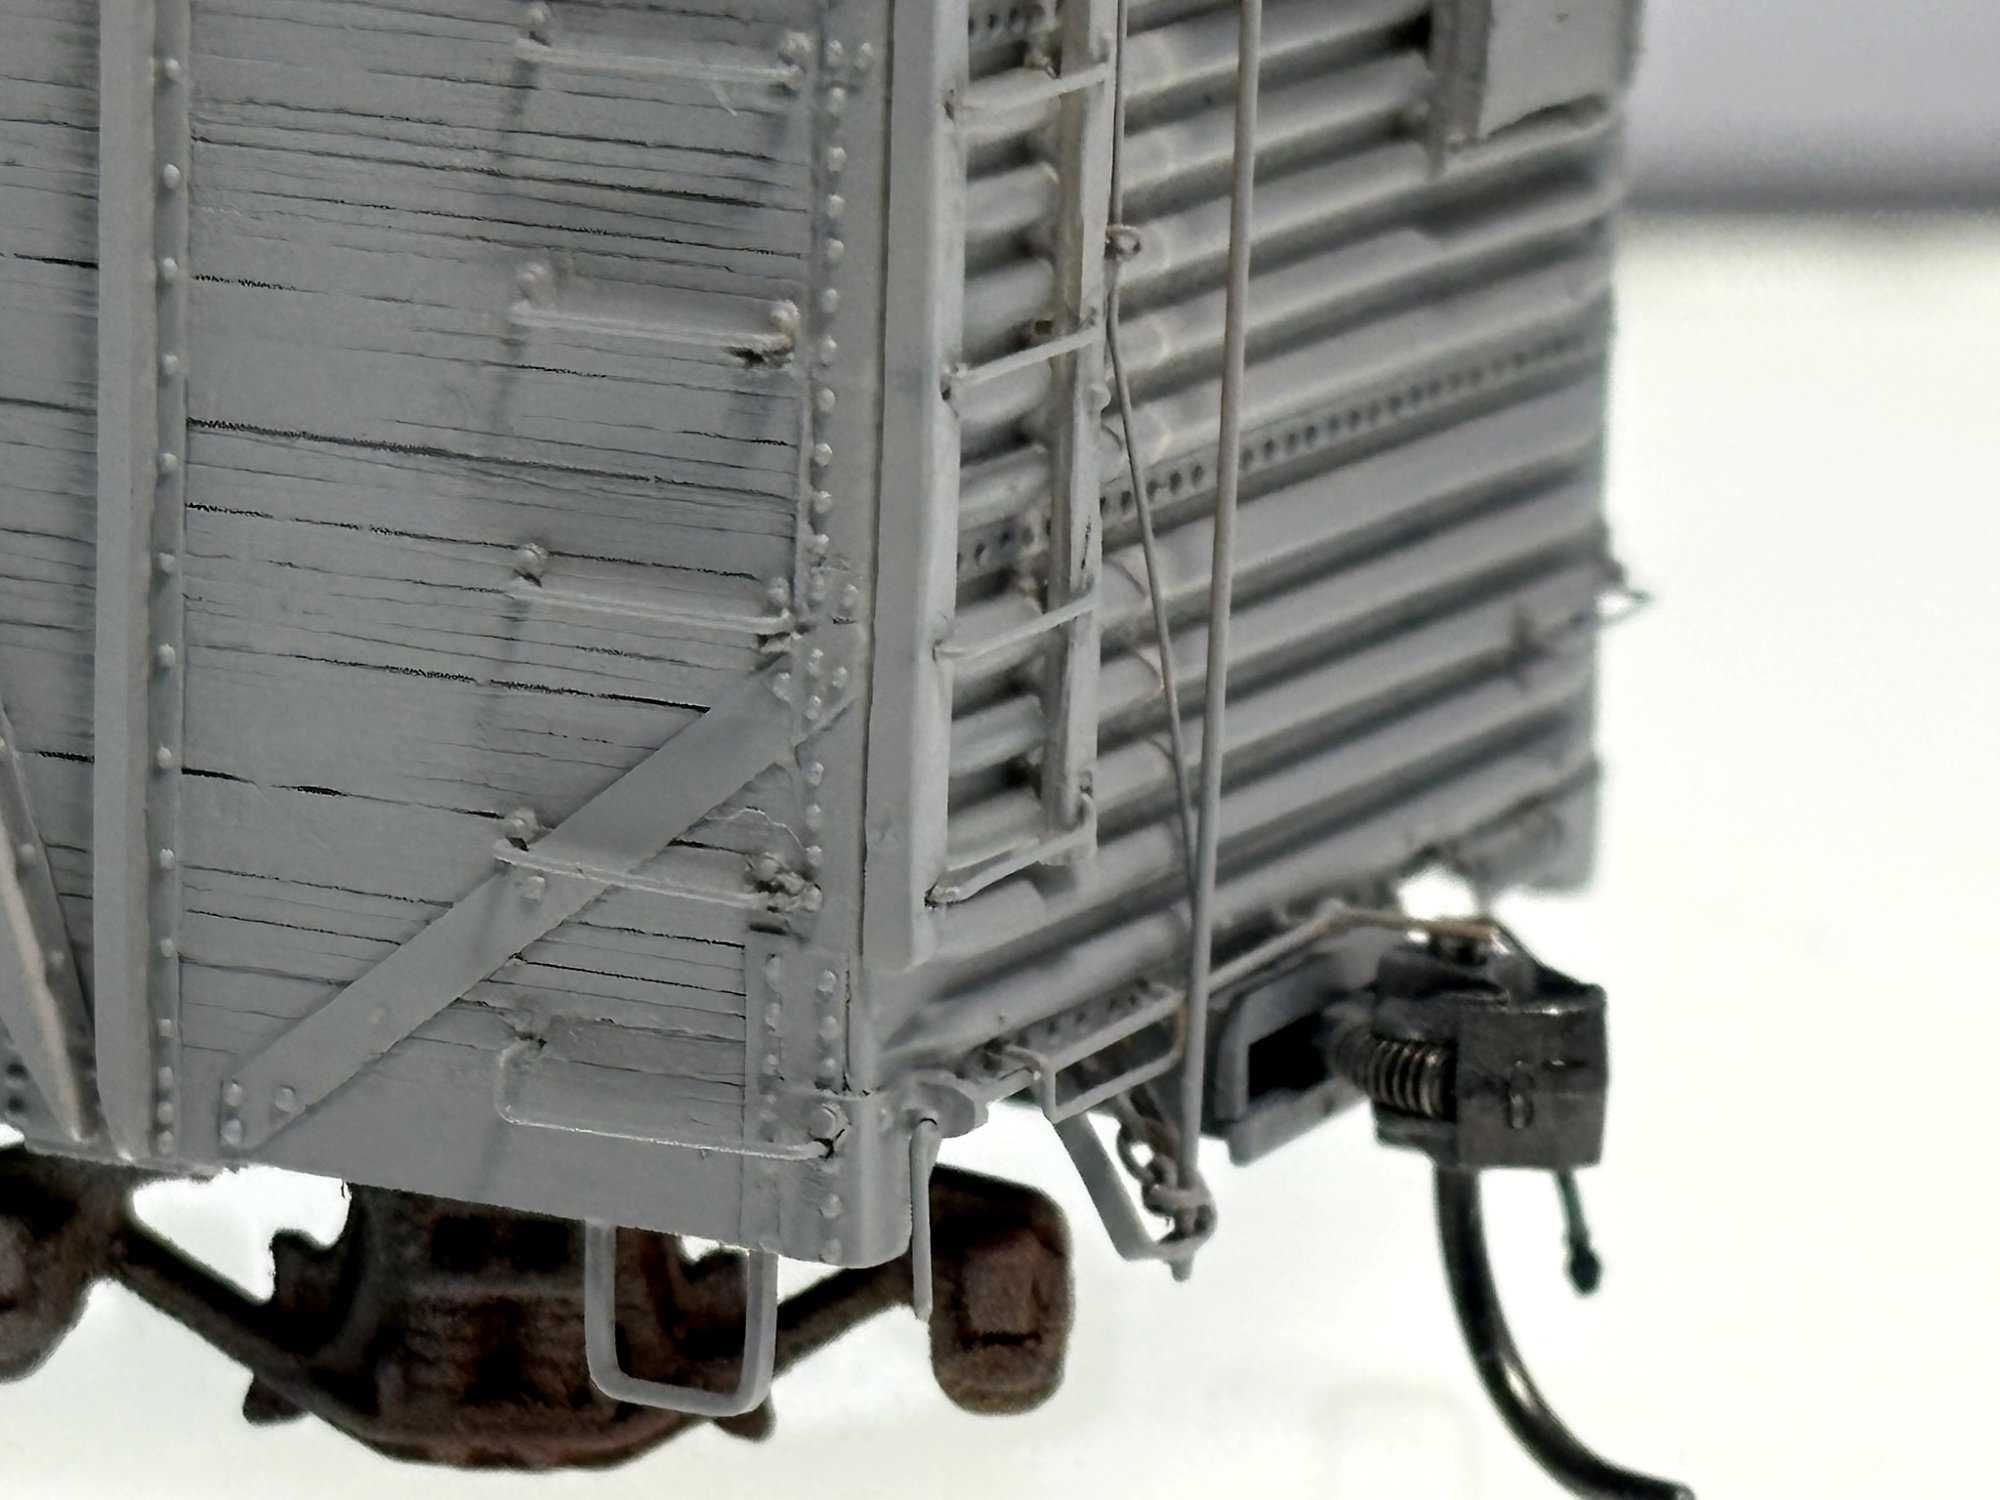
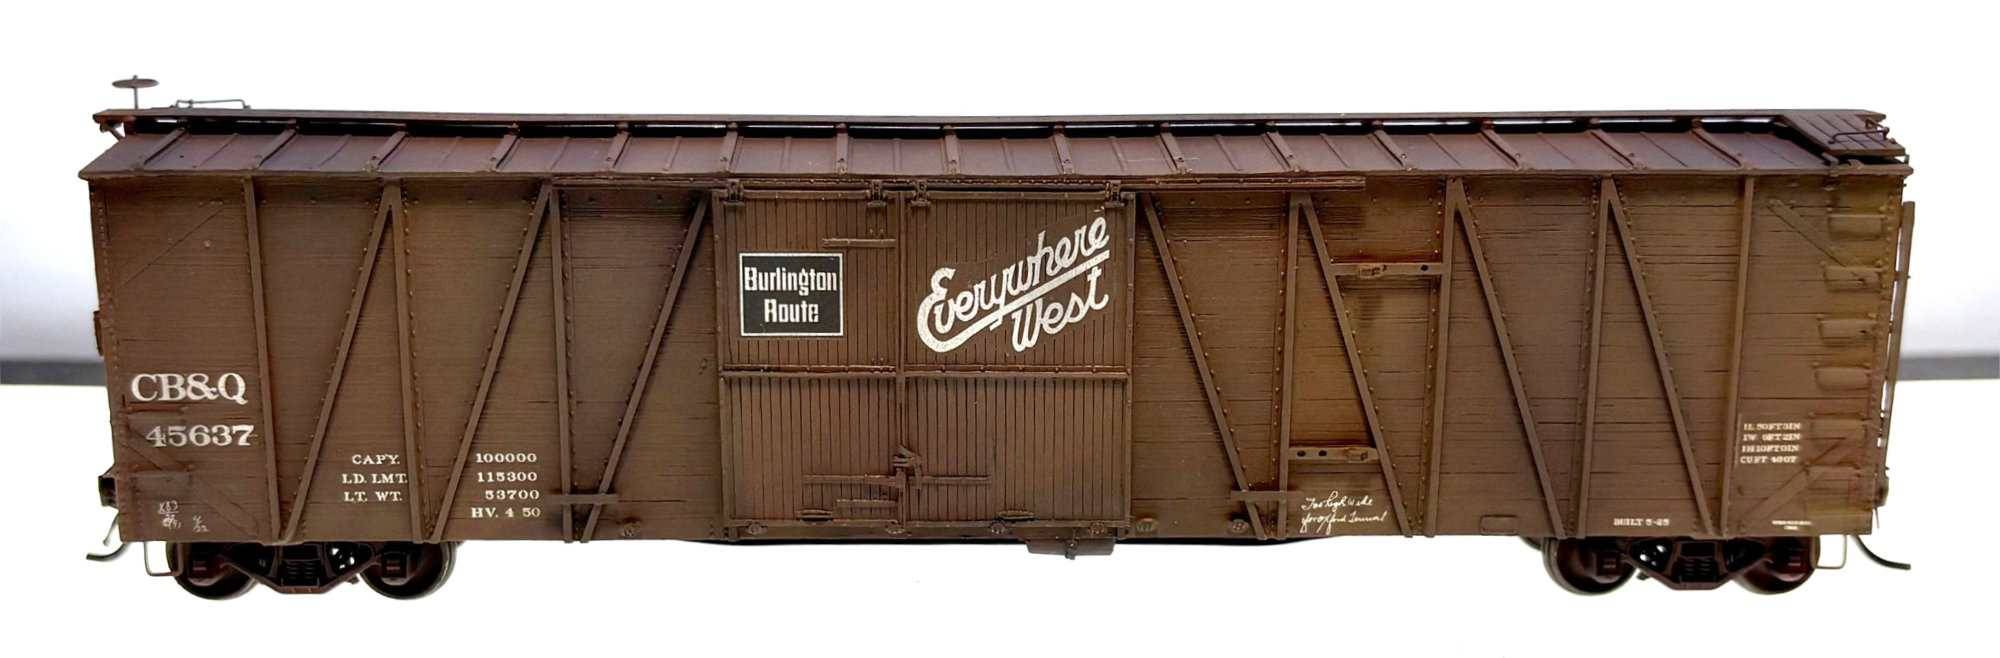
Here’s a mostly completed model. To prevent the grabs from being bent or smashed while I build the model, I install 0.030 x 0.125-inch styrene strips behind the grabs. You can see the white styrene strips on both the right and left side in the above photo.
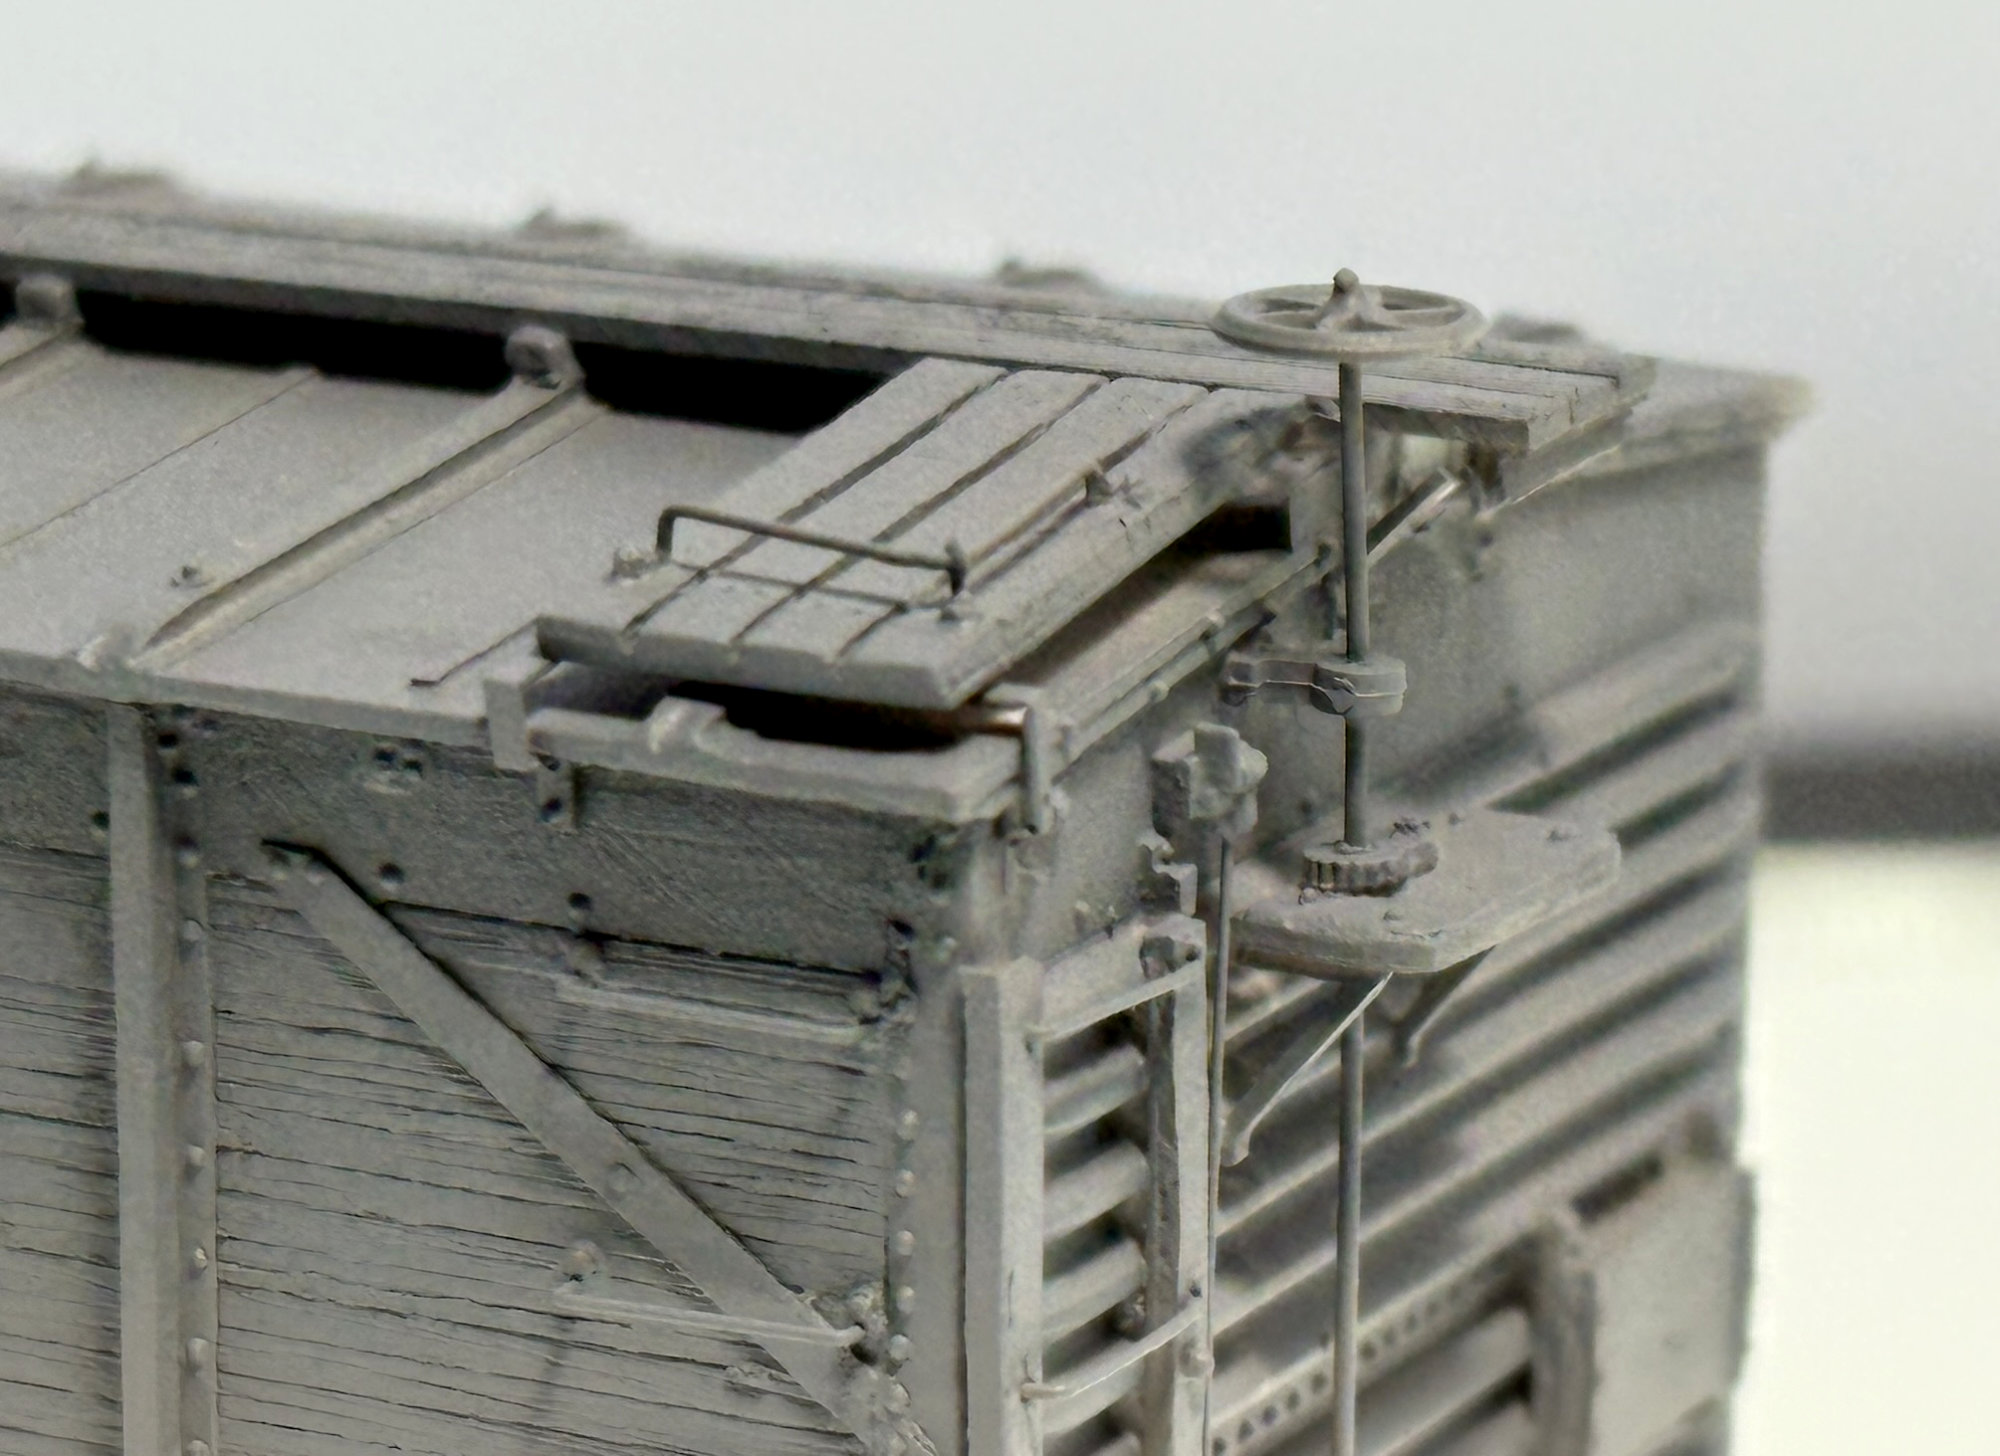
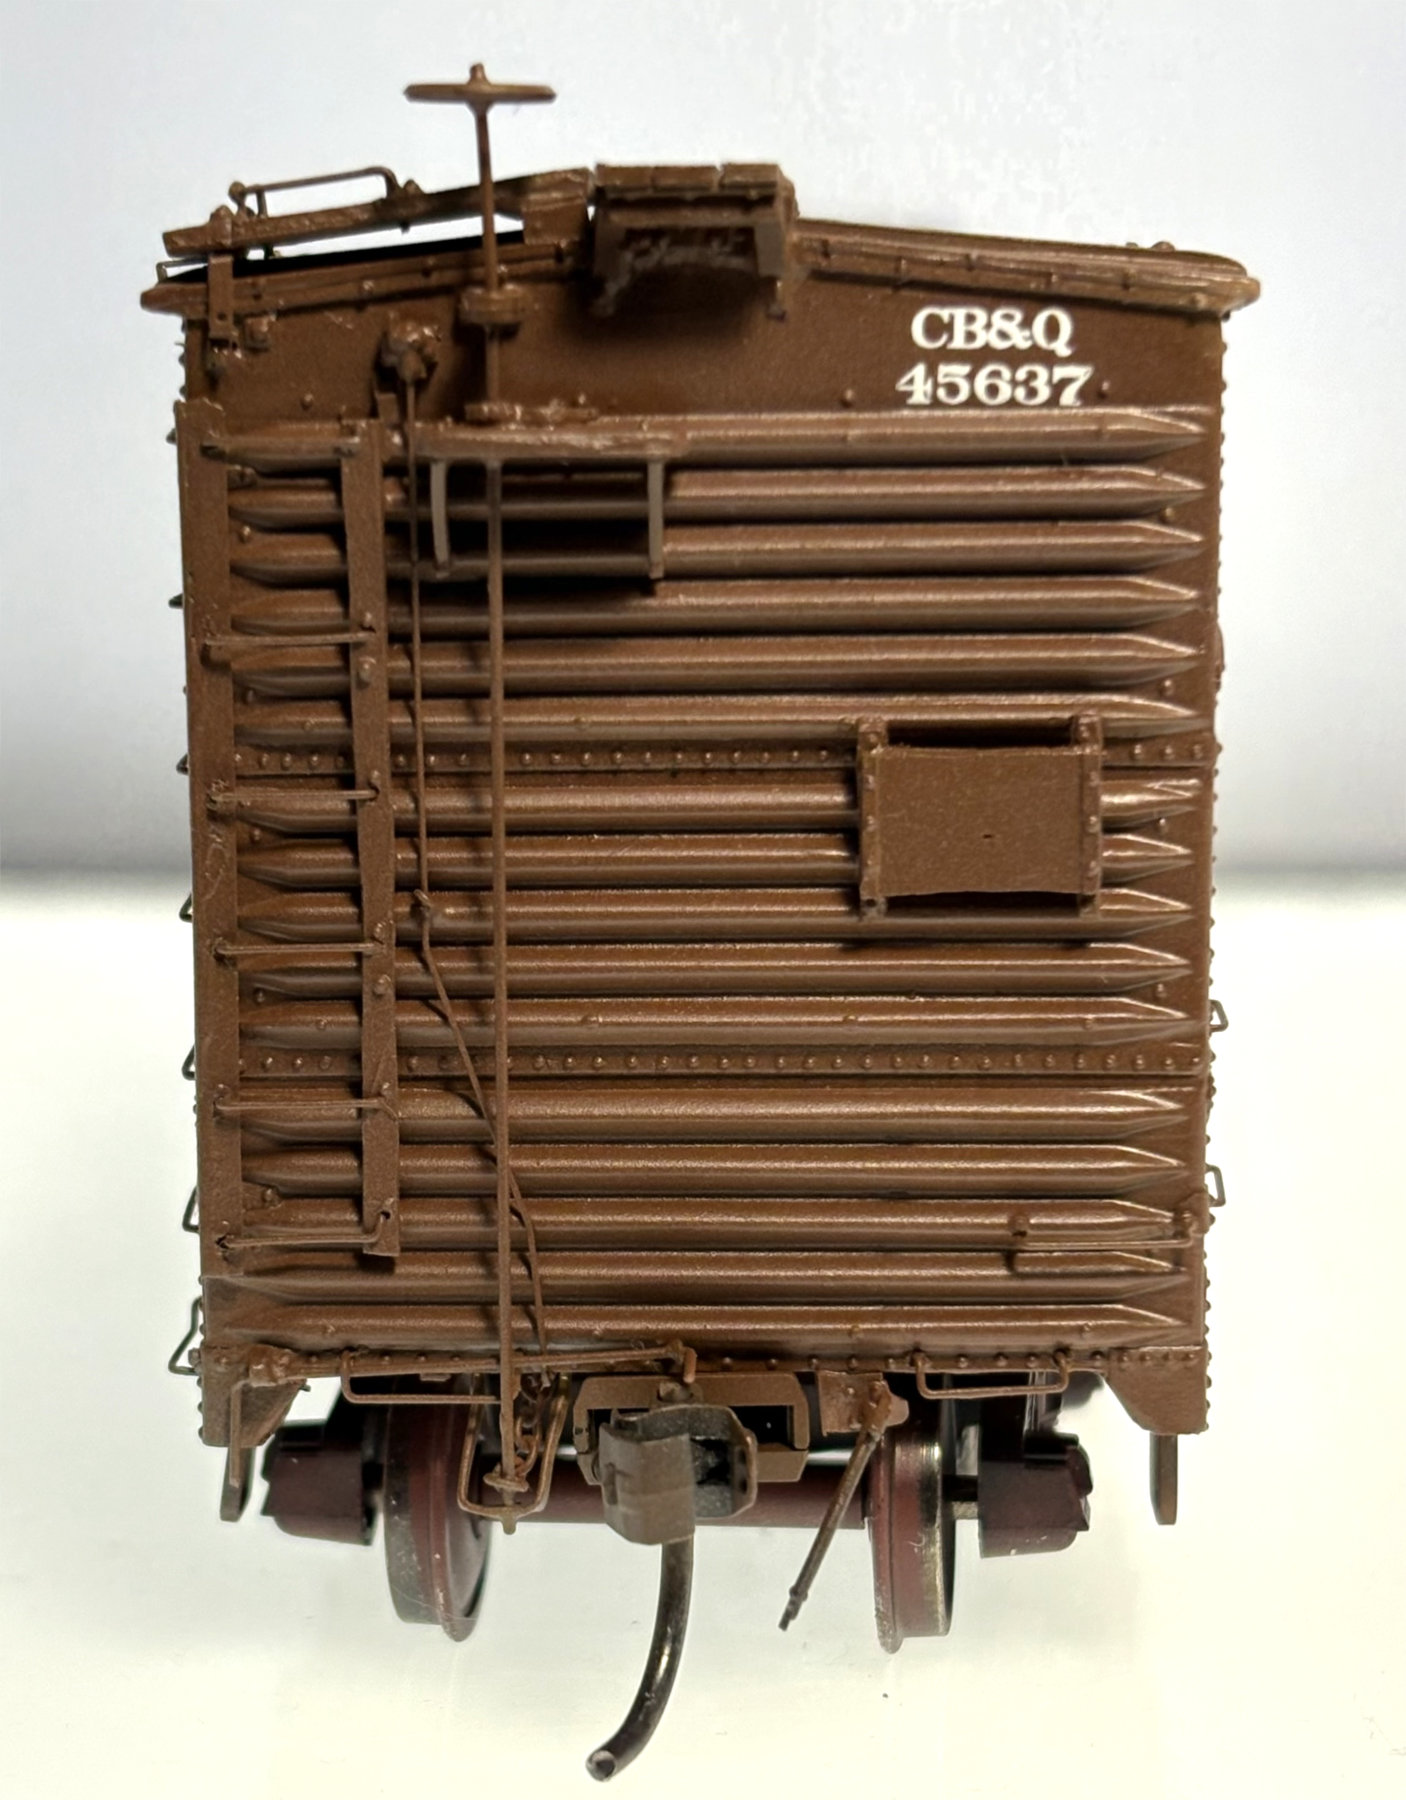
Here’s the B end of the car. I mounted the running board laterals using USRA style supports. I used etched parts once offered by Yarmouth Models. These were not included in the kit. We are lucky that some of the Yarmouth parts are now offered by Speedwitch Media.
Here in the lower portion of the B end are several details. I installed A-Line stirrups at the end of the side sills. I formed the support for the vertical brake staff out of Detail Associates 0.010 x 0.030-inch brass flat stock. A hole was drilled in the flat stock to allow the 0.015-inch diameter vertical brake staff to pass through as well as some chain.
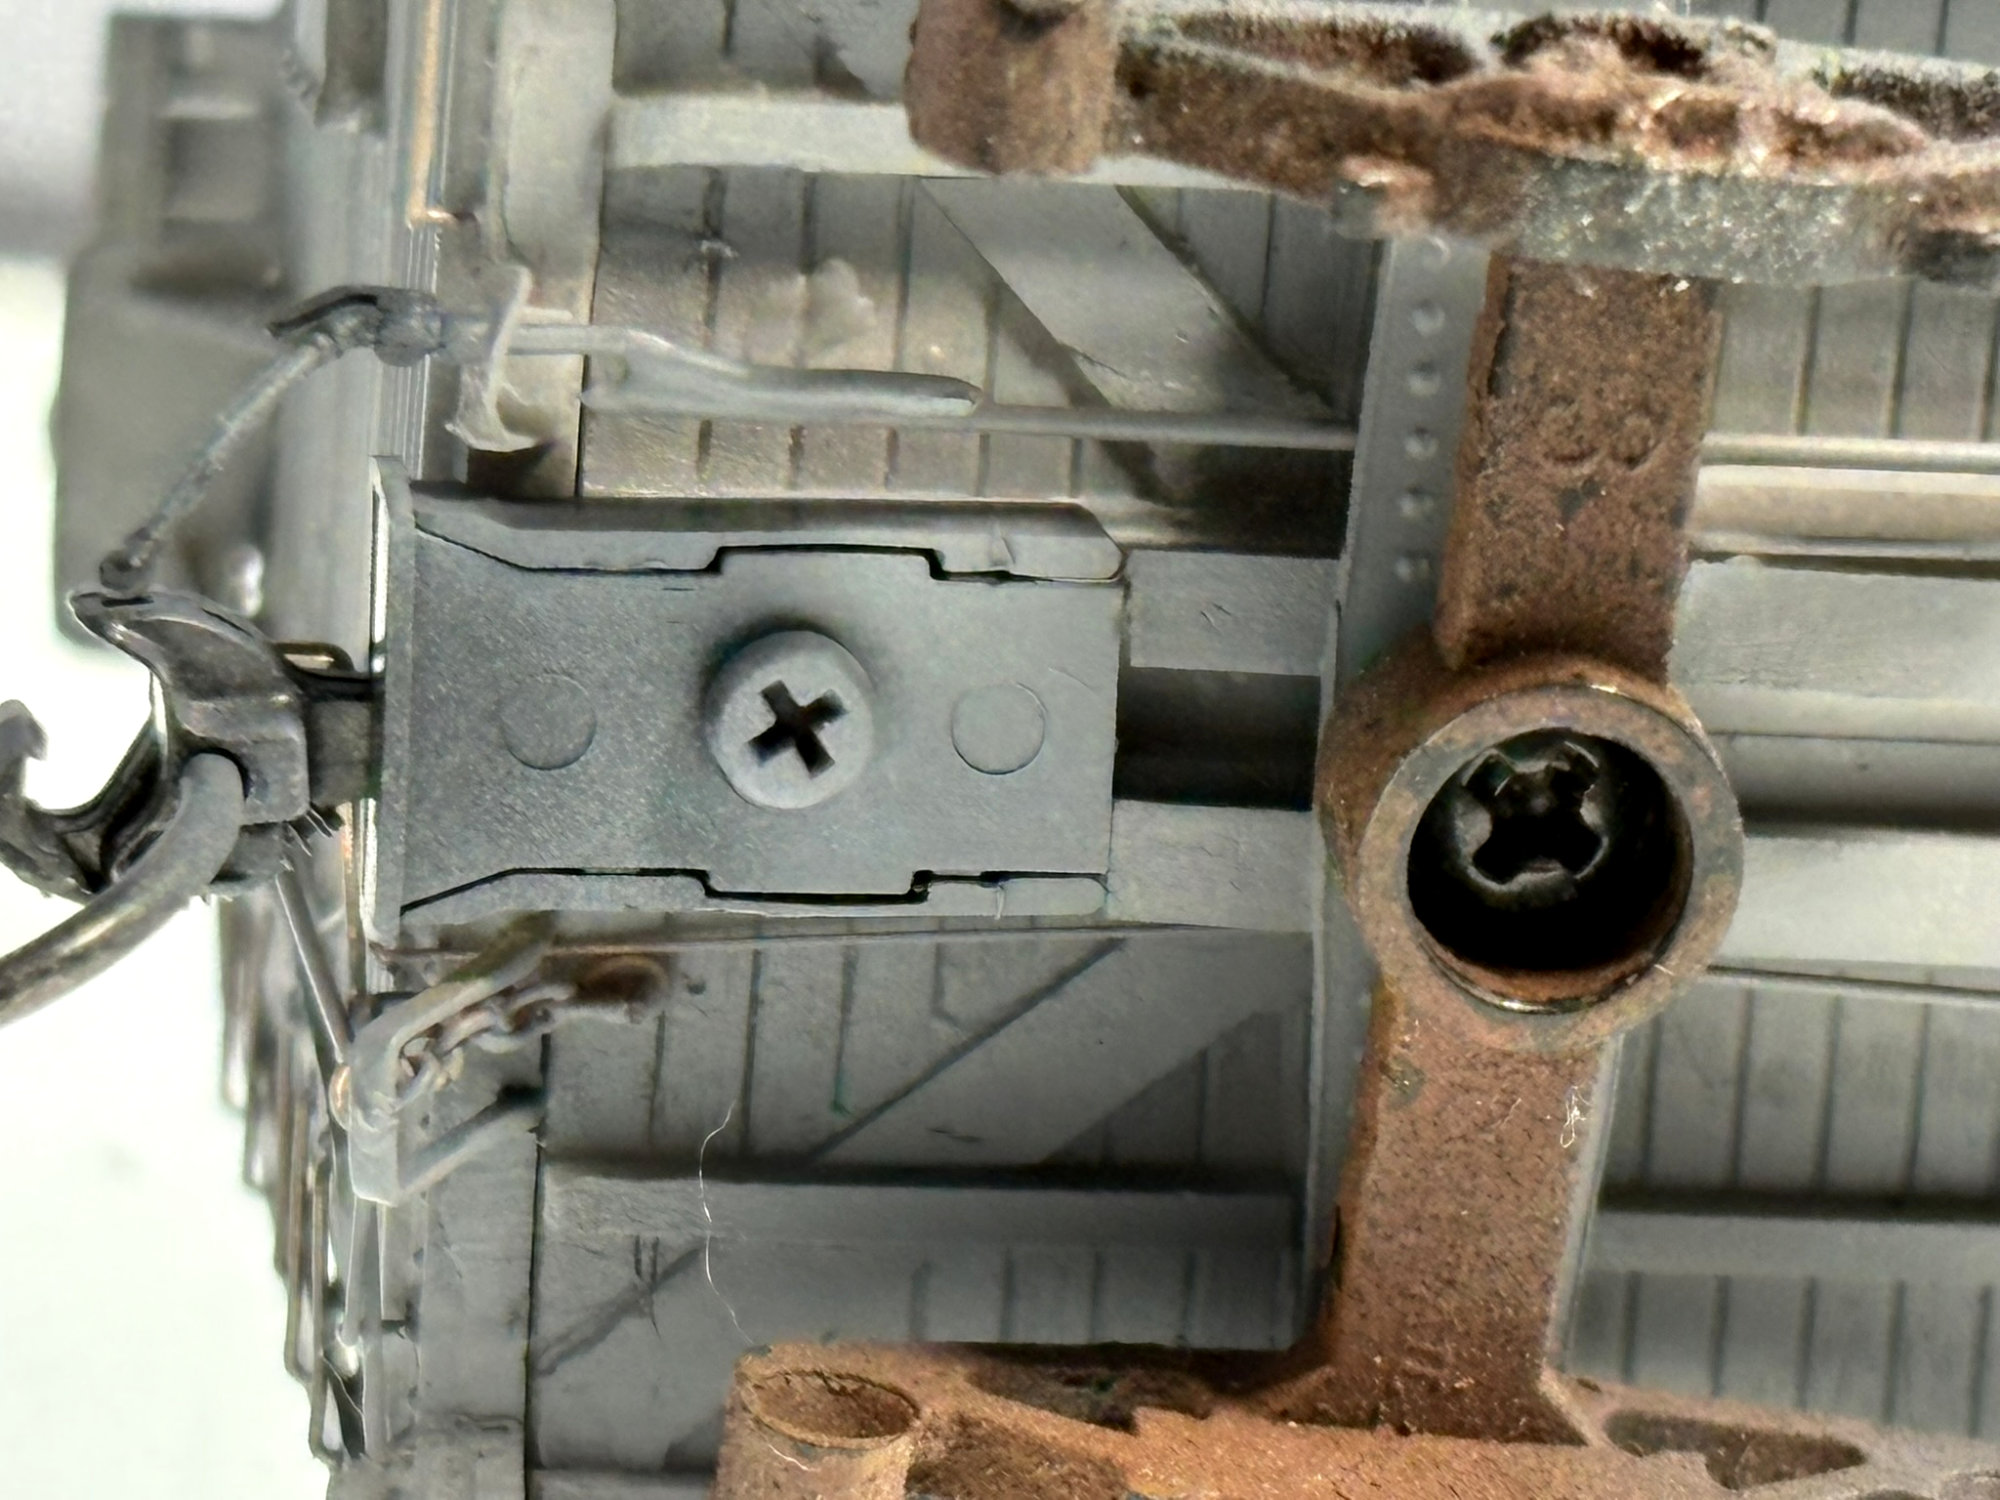
I used a scale size Kadee coupler box (part # 262), as seen above. Bits of Evergreen styrene were installed to fill in the empty space between the rear of the coupler box and the bolster to match the center sill.
Paint and finish
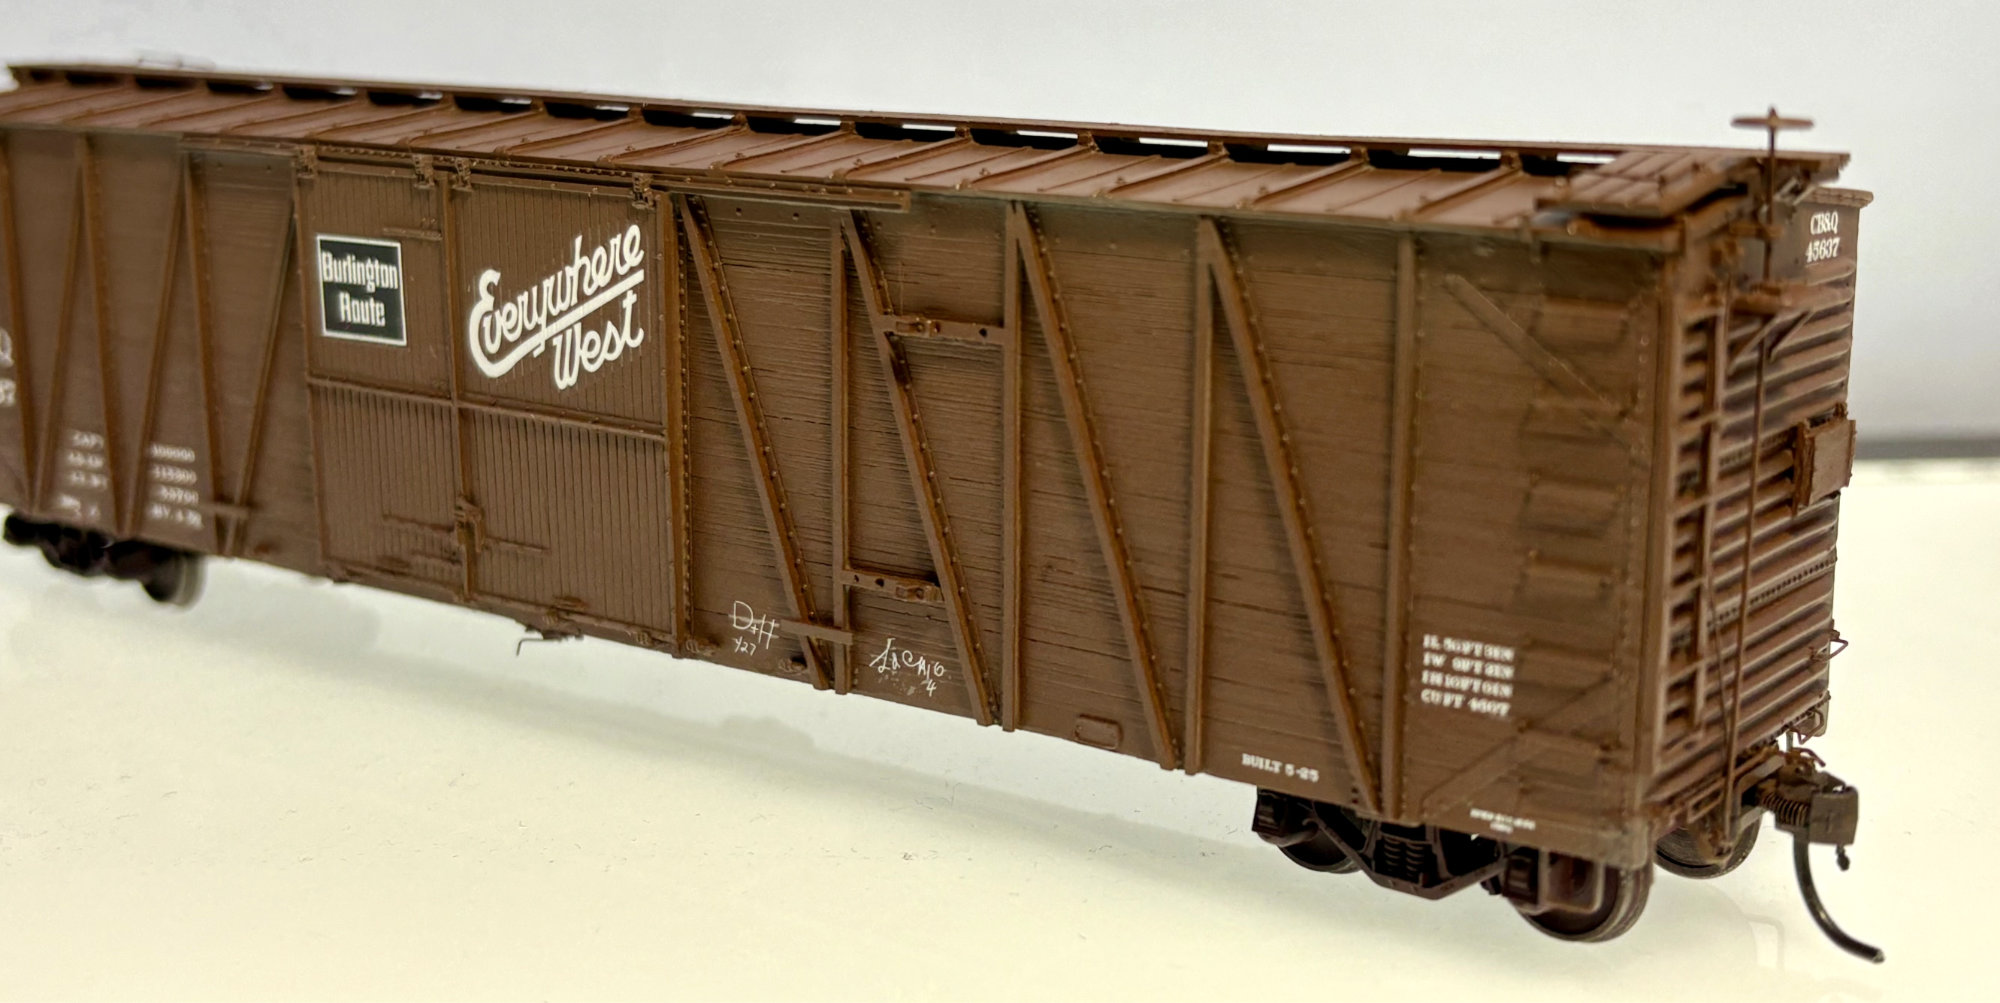
I used Mig Ammo Umber Brown (ATOM-20055) for the car color. This is a newer acrylic paint in the Mig Jimenez product line. It sprays on very smooth and self-levels nicely.
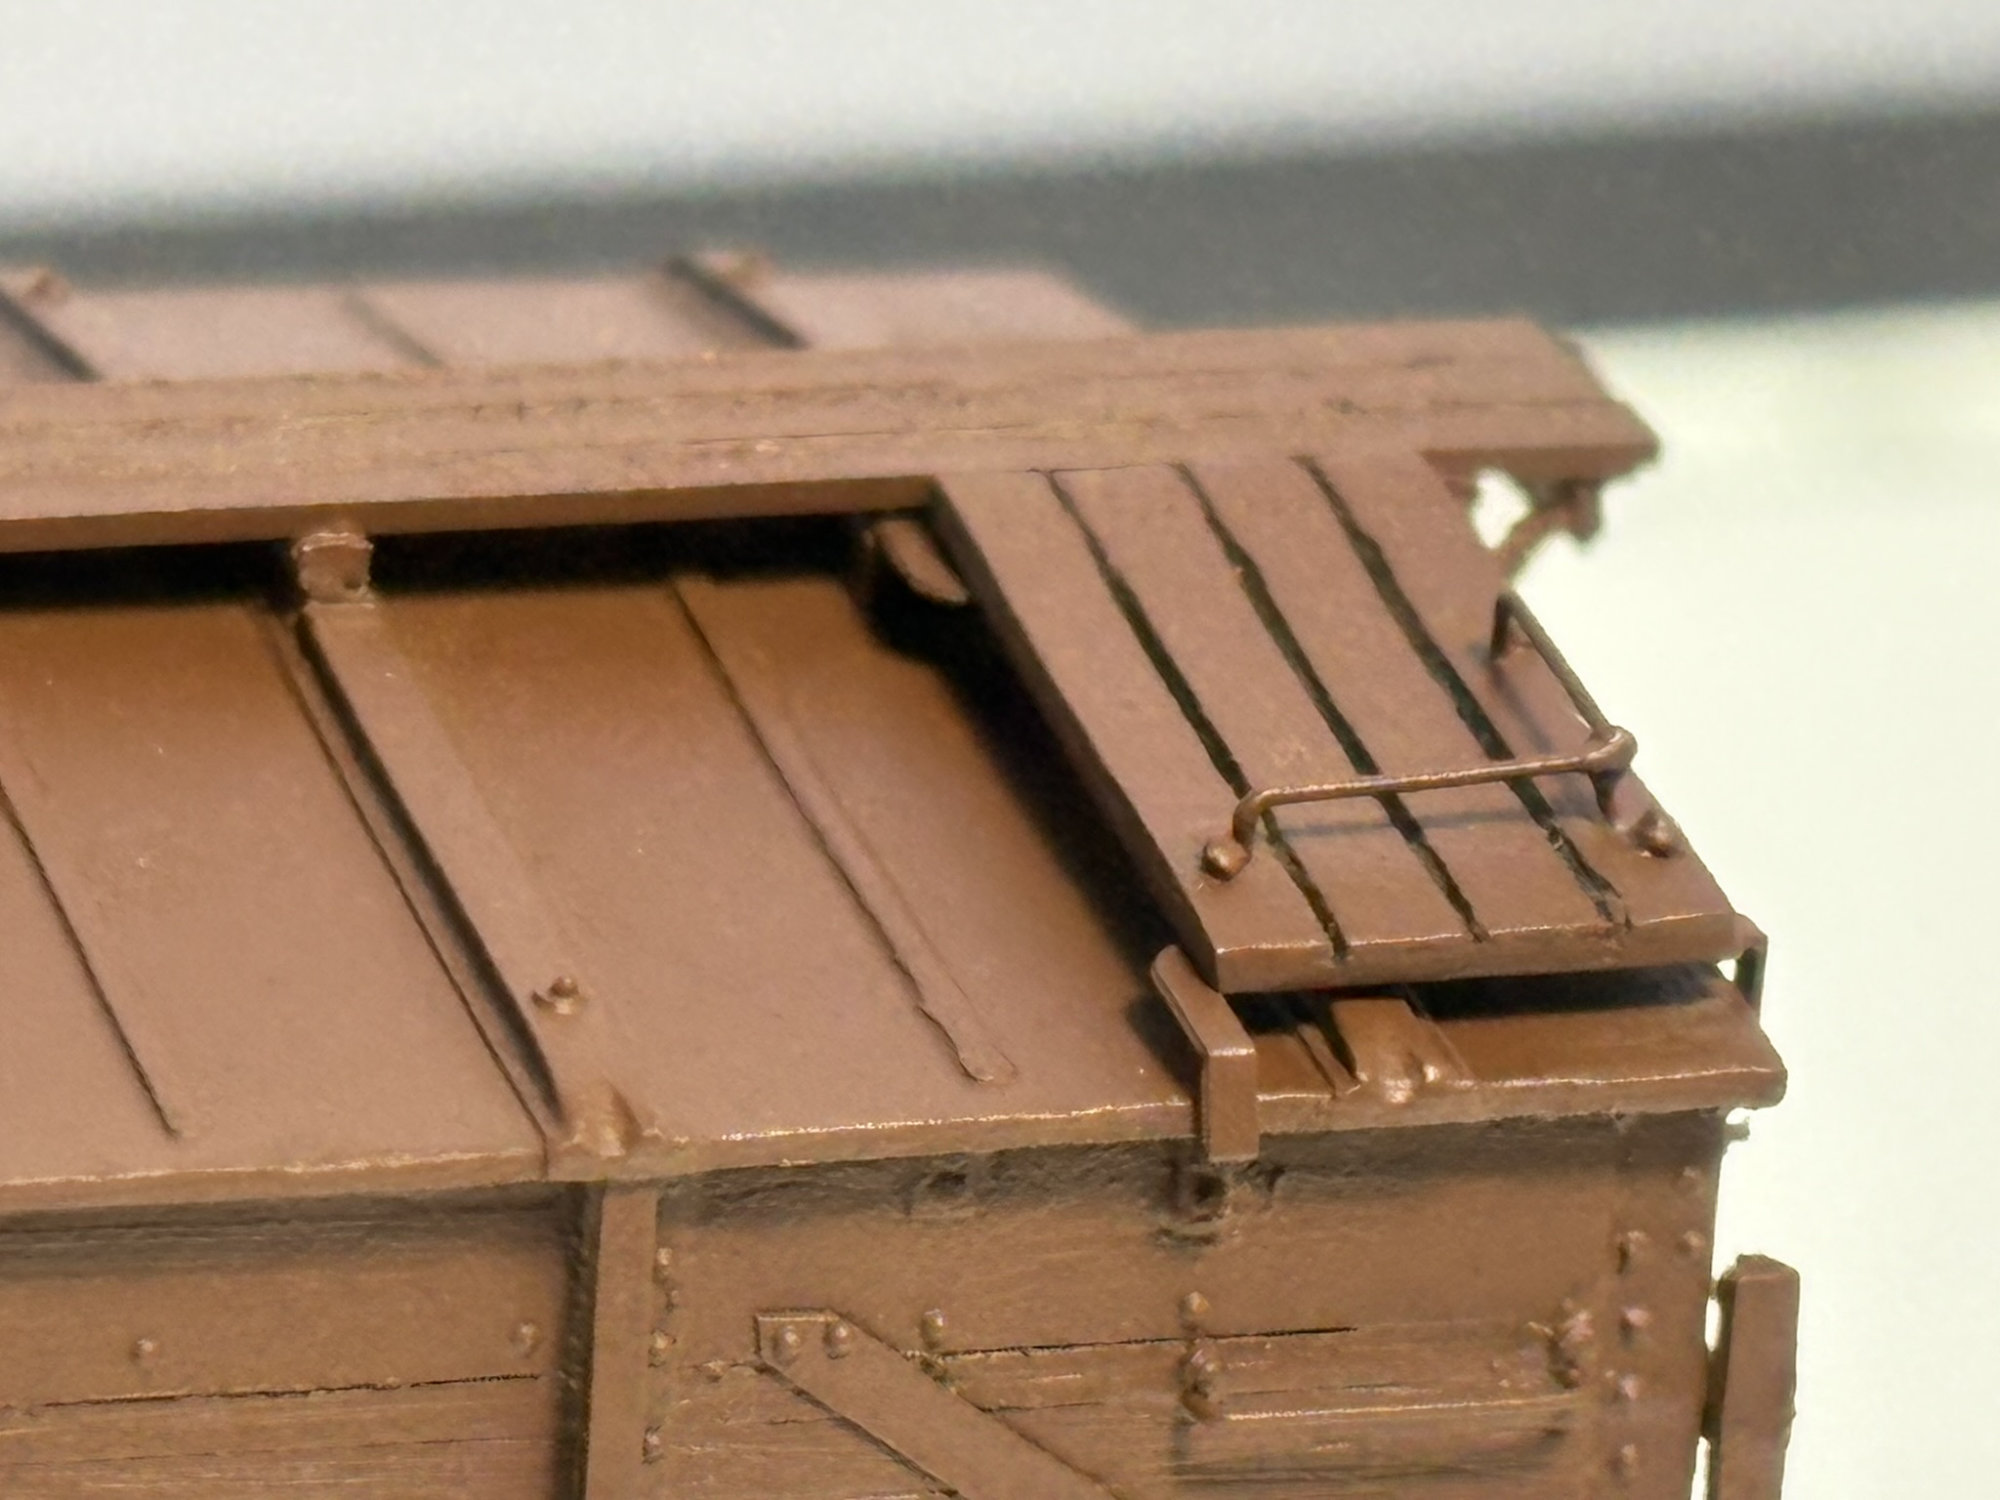
Here’s a closer look at the painted roof detail and the USRA style bracket support for the running board laterals.
I snapped the previous two images after I applied a gloss coat and the decals.
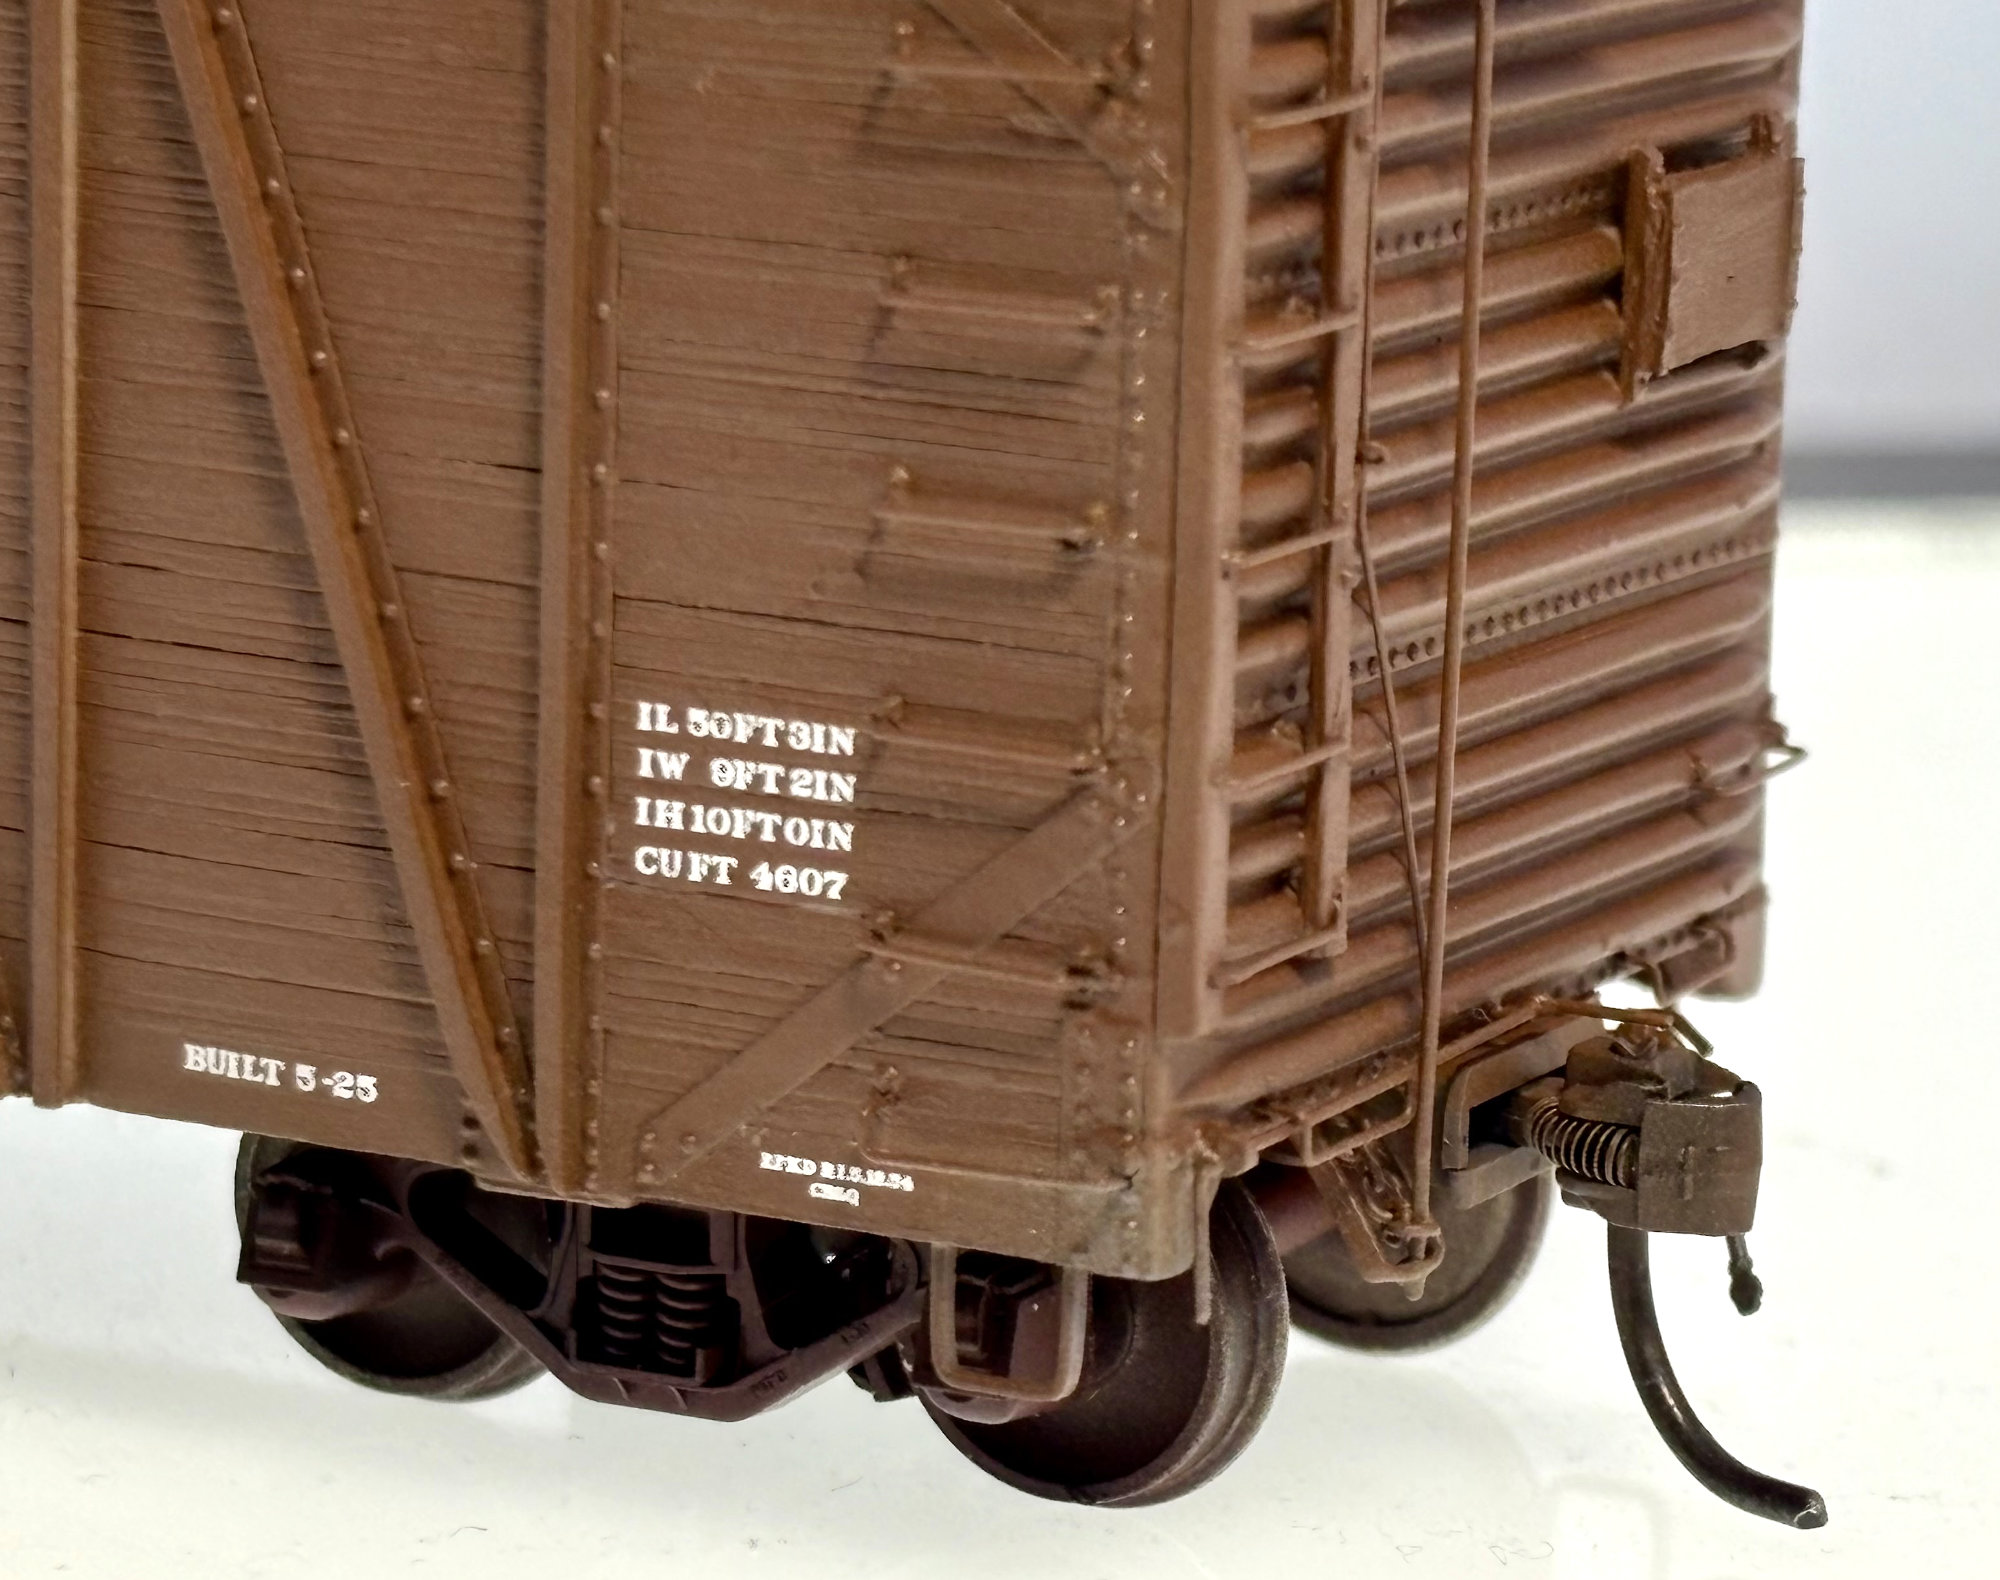
Here’s a closer look at the lower part of the B end and side details.
Weathering
The next step is weathering. Here I have applied a small amount of weathering with an airbrush and Pan Pastels.
I applied bit of weathering to the underframe.
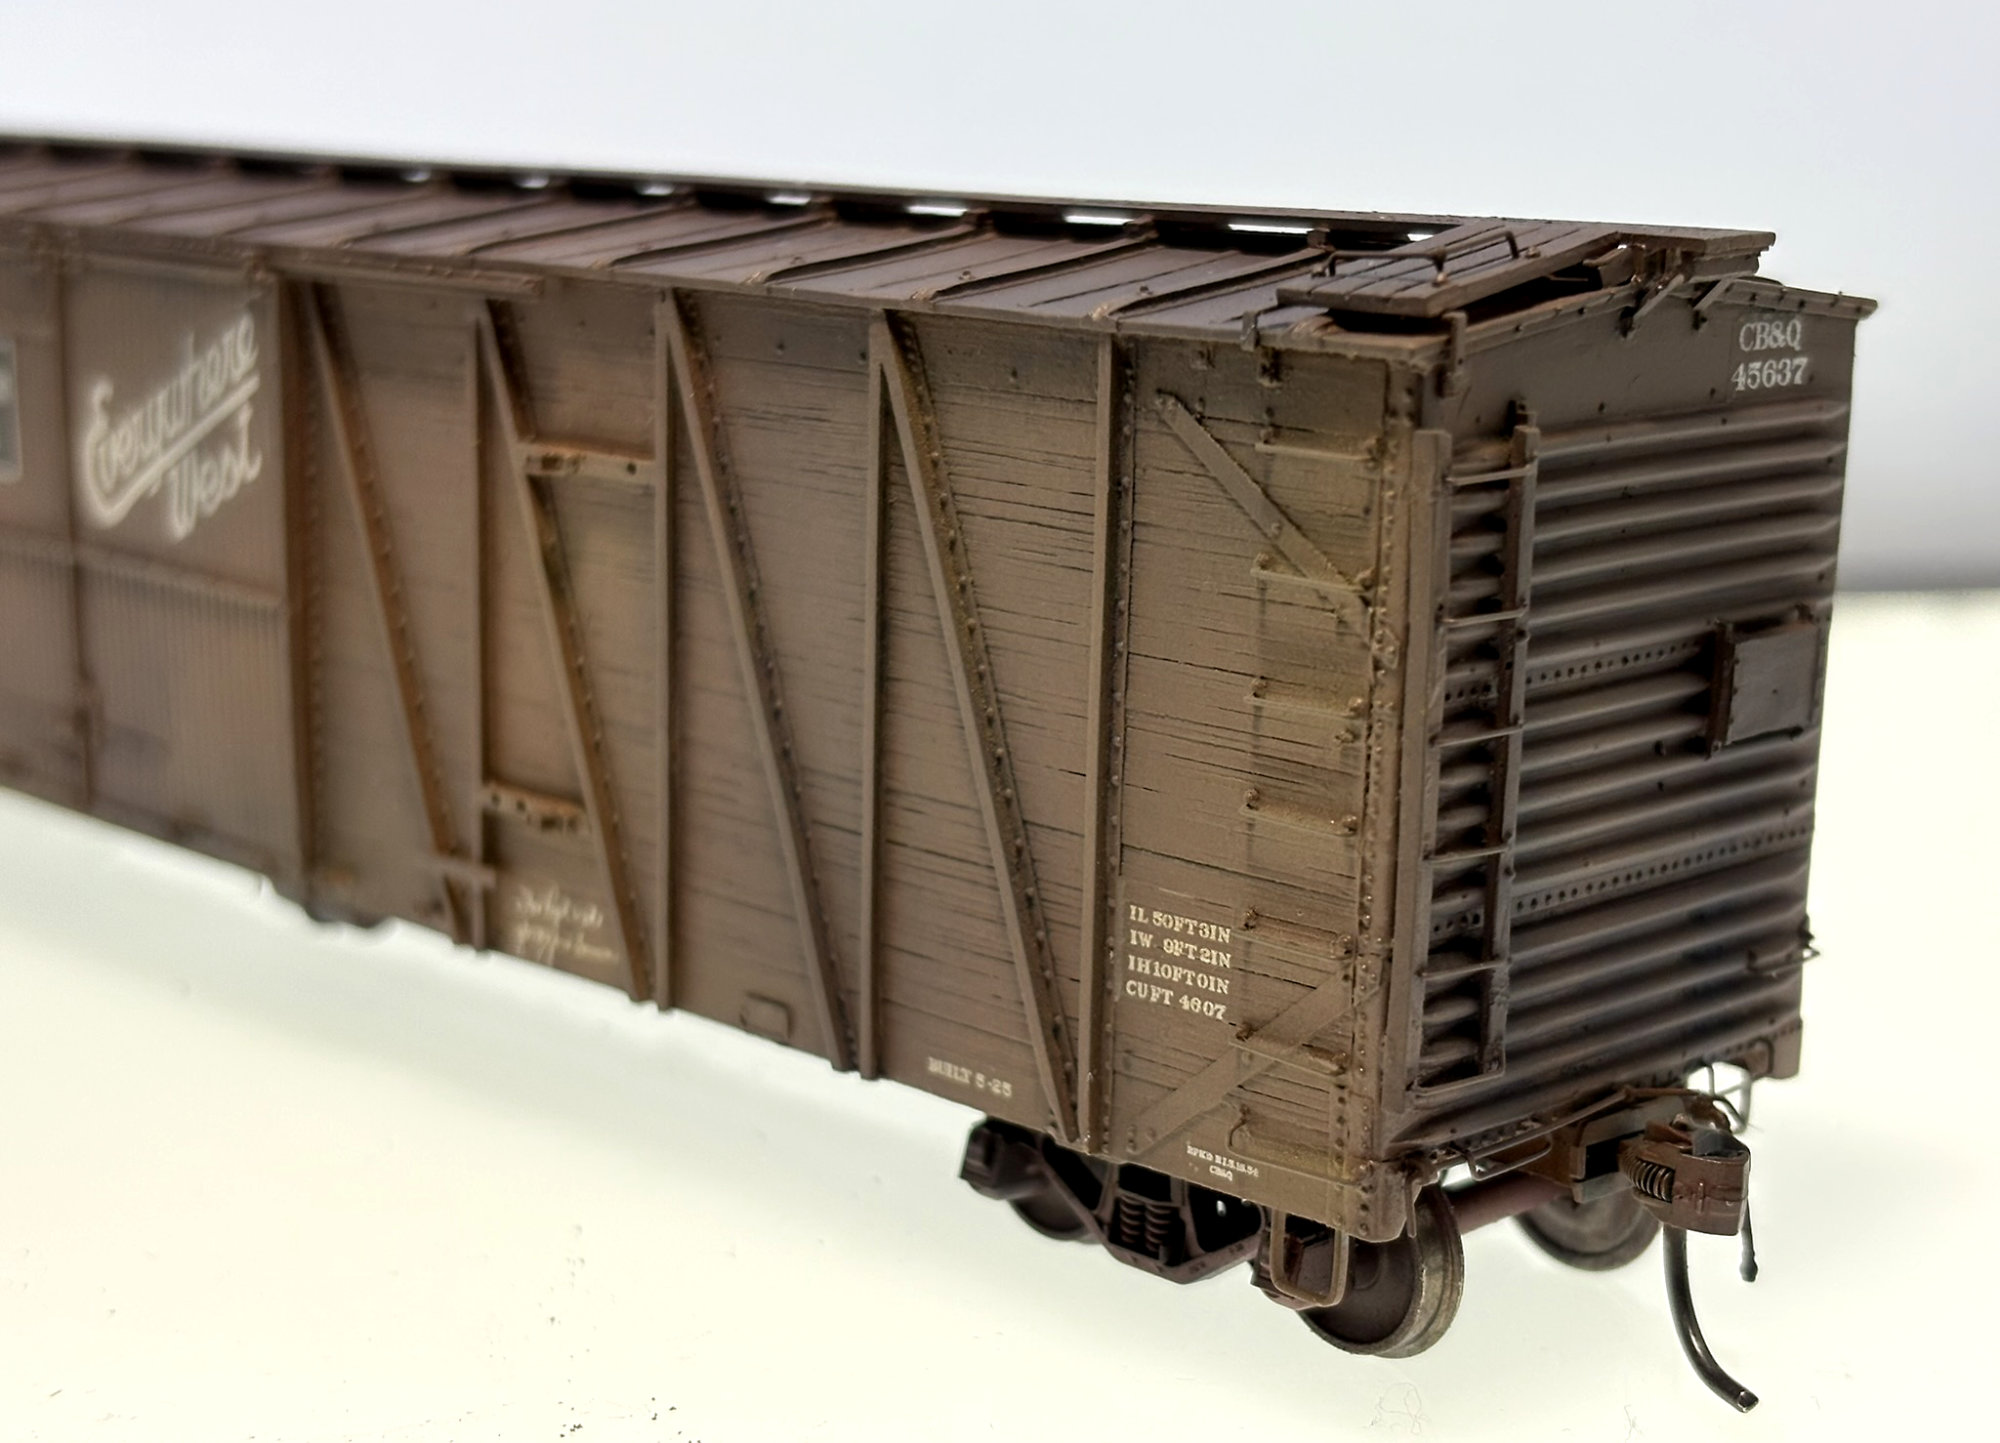
I experimented with Mig Ammo Shaders. I applied some with an airbrush to the Z-bracing and boards to bring out detail. These newly available Mig Ammo Shaders are very thin acrylic colors ready to airbrush. About twenty shades are available in a matte finish.
Update!
After I finished my car, I received two new sets of Matt Shaders. There is another set with rust colors that was back ordered. Colors are also available separately.
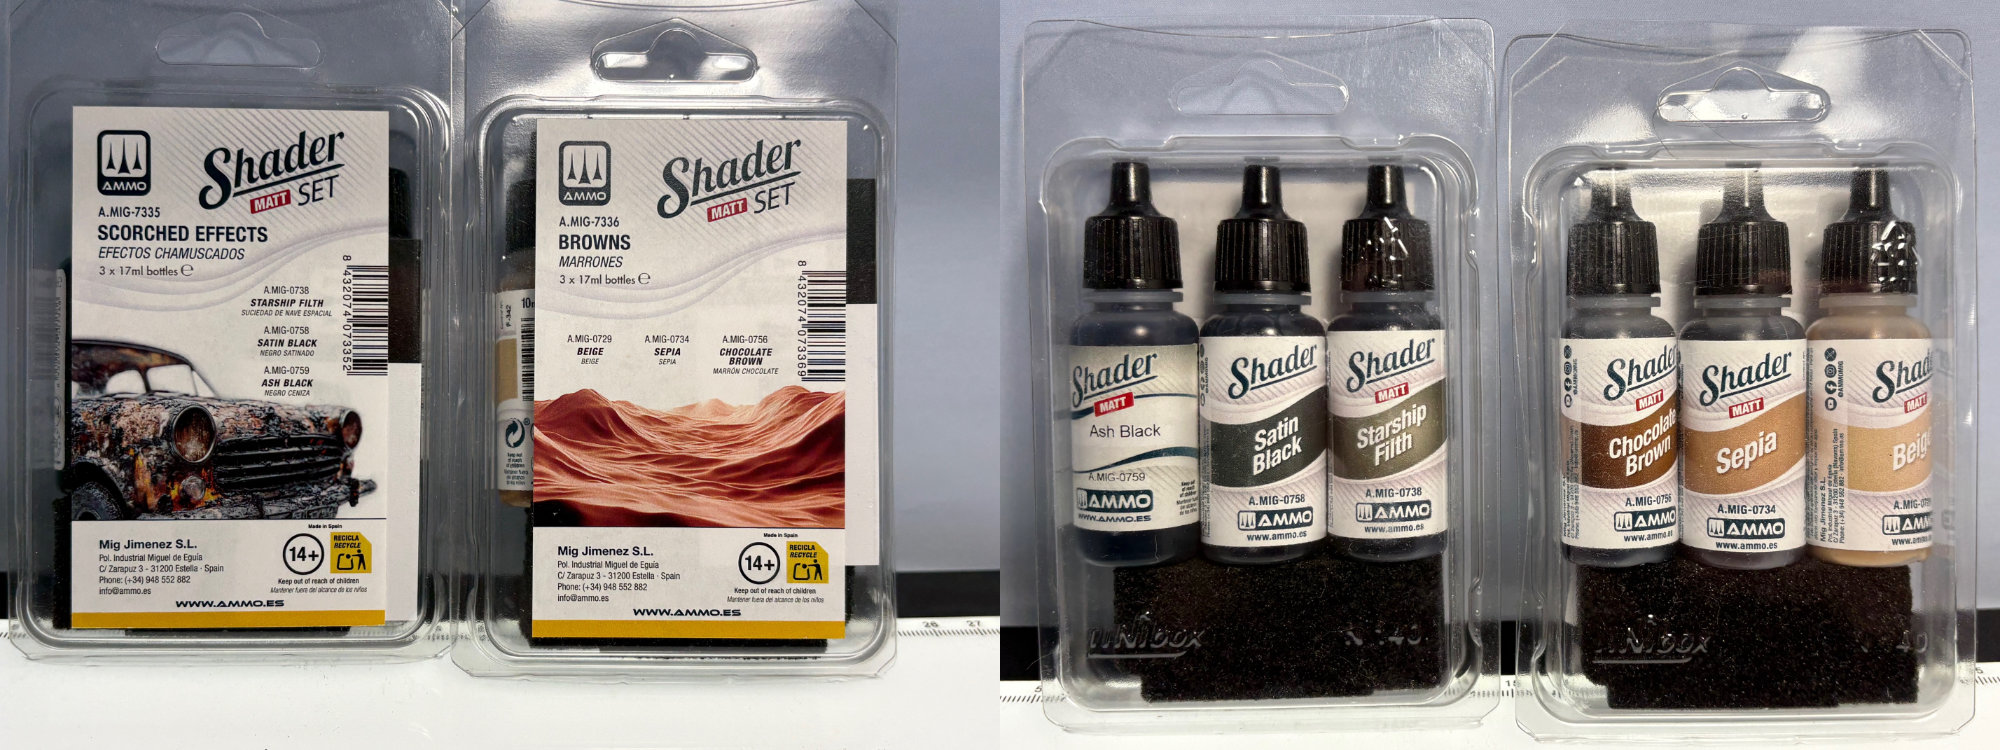
These are ready to spray weathering products. You can apply multiple coats to build up weathering layers.
I have been pleased with them and need more practice in applying with an airbrush. I have been using a 0.3mm tip and will try a 0.2mm for finer control. I welcome the new colors I just received.
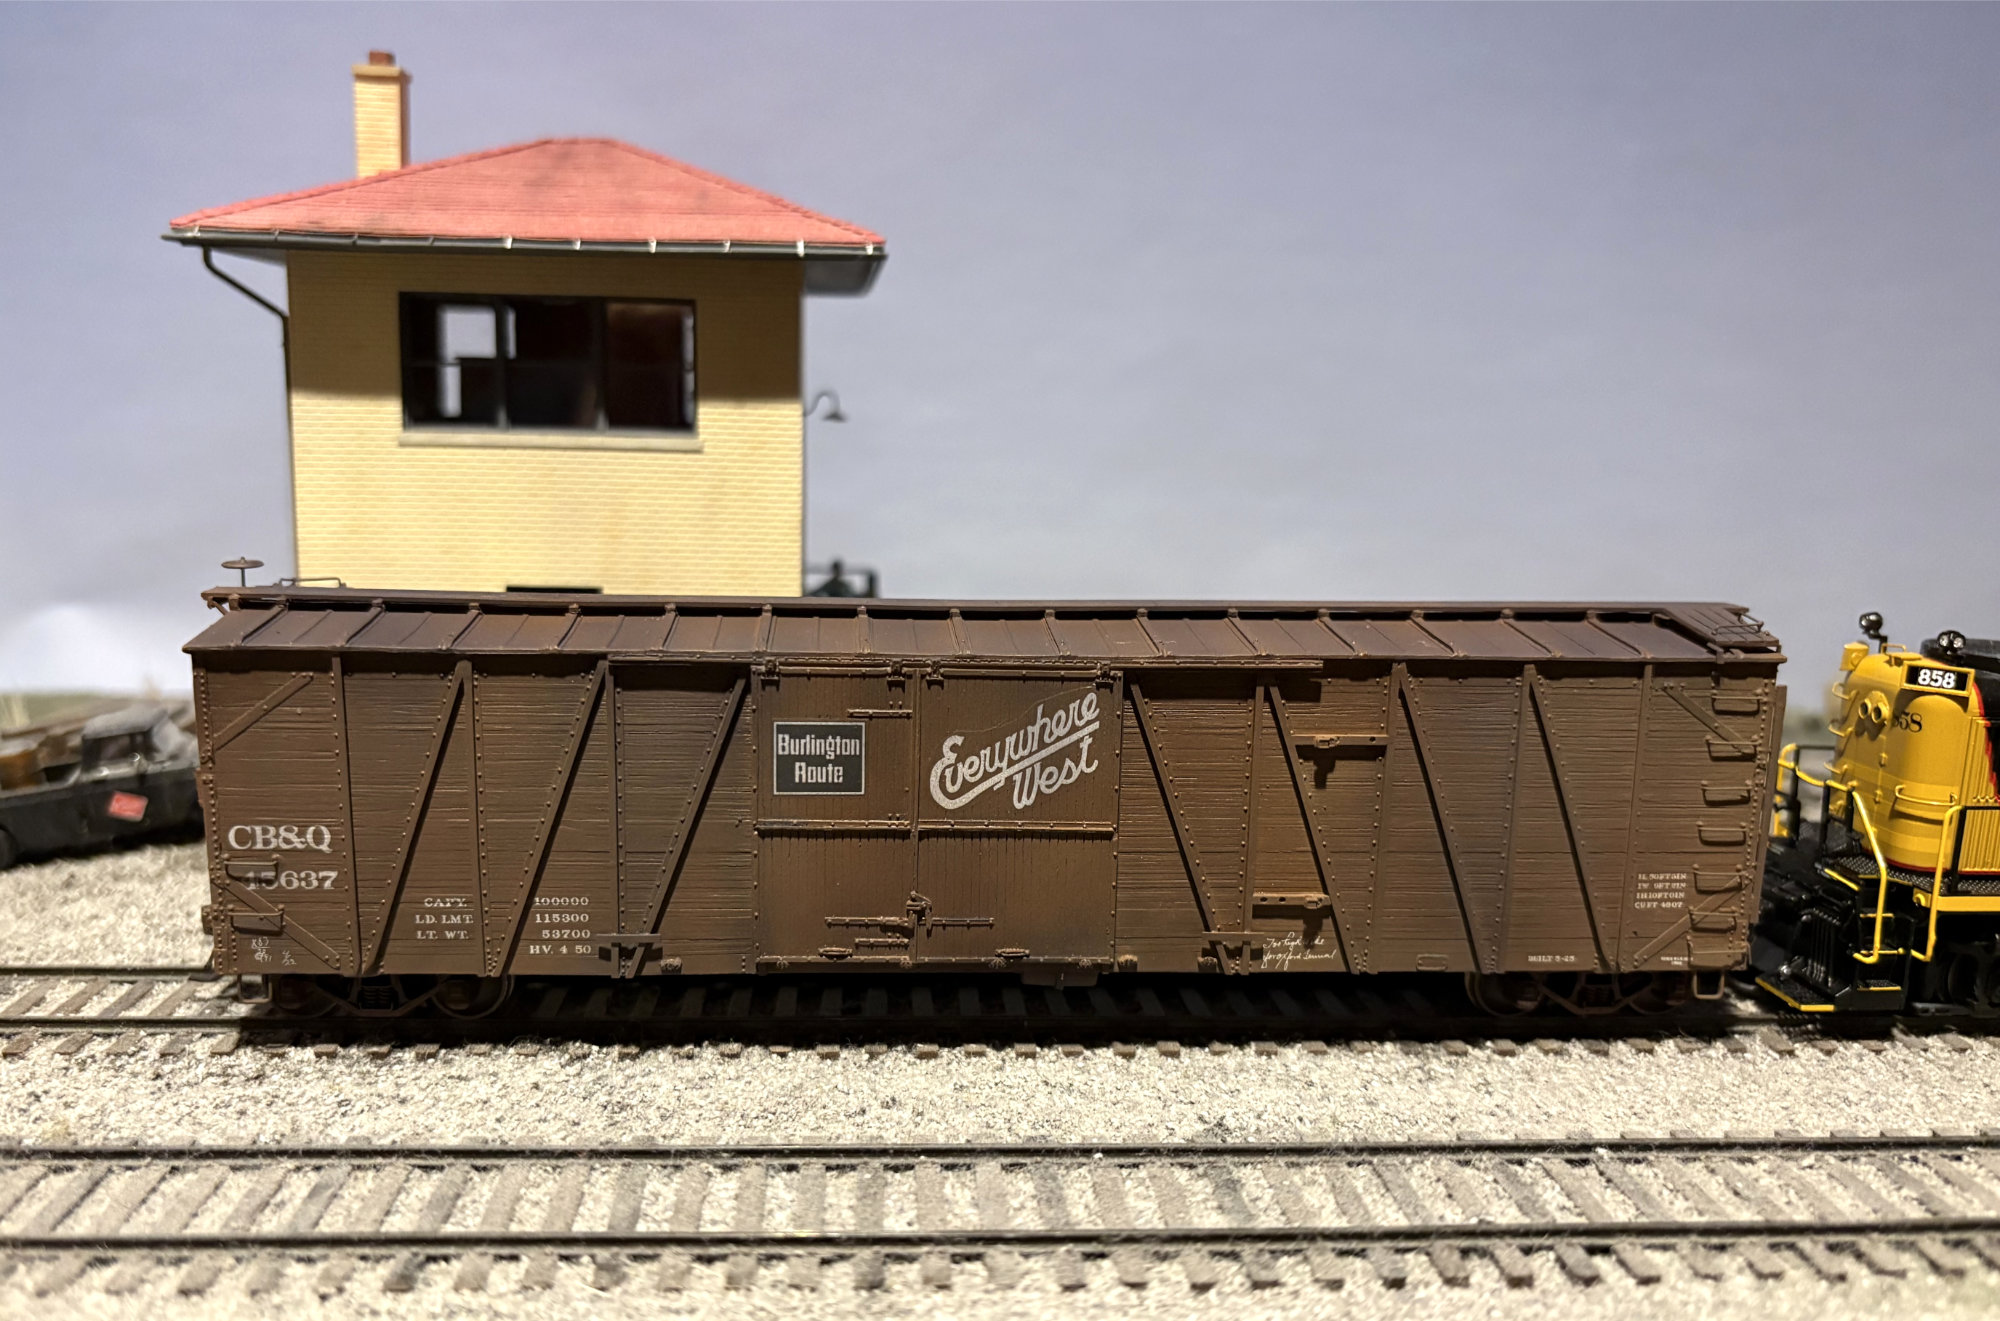
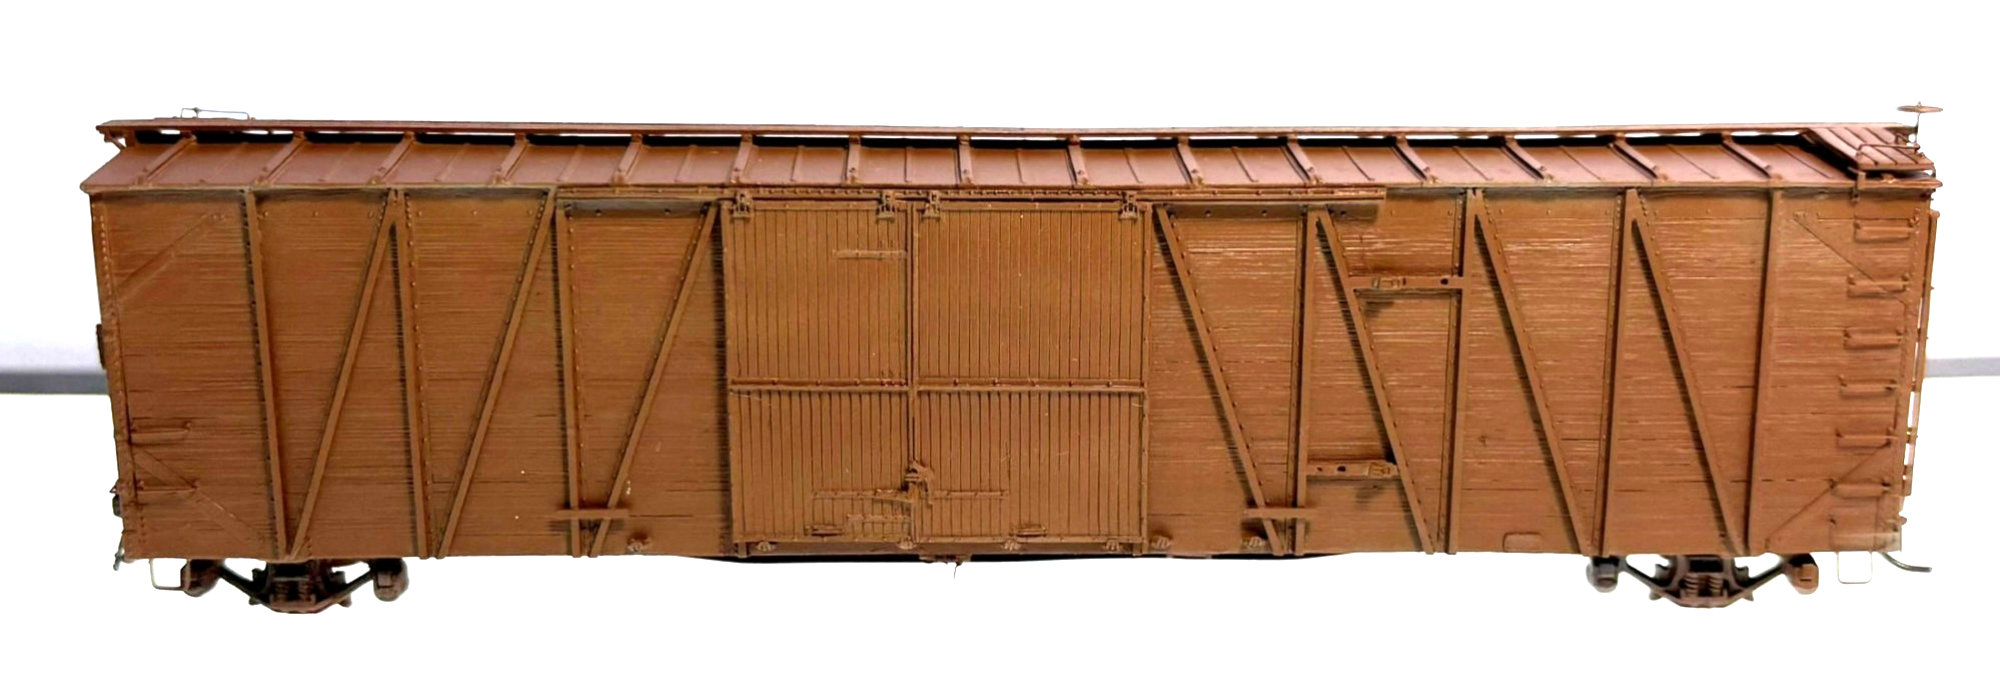
Here’s the final appearance of the model in service. I enjoyed building this fine kit. It needed very few additional details to build an accurate model.
Thanks to Ed and Jerry for reissuing this kit!
George Toman
Thank you, George, for sharing another fine model from your workbench. I always learn something new from your work.
Subscribe to the Resin Car Works blog so you don’t miss a new model announcement. Add your email address to the Subscribe function at the bottom of the page.
Questions and comments can be posted below. Please follow the instructions so your comment can be posted. All comments are reviewed and approved before they appear. Share the blog link with other model railroaders.
Looks great.
Wow that is fantastic work! Thank you for sharing the details of your build.
George, great looking build and weathering nice to see resin kits being built and not filling a shelf.
Ed Rethwisch
What do you use for a gloss coat and for a flat coat?
Charles, I use a product called Quick Shine that is a Multi-surface Gloss Floor Finish made by Holloway House. This is a product much like Future Pledge that is no longer available. For the flat coat, I use Model Masters Flat that is no longer available, but I still have a supply of. I also like a product made by Mig Ammo called Ultra-Matt Lucky Varnish that I plan to use once my supply of Models Masters is used up.
George Toman
George, great modeling as is your norm, I always enjoy your work as a target for my efforts
Keep building George
Fenton