John Golden has wrapped up work on a coal gondola that reflects an interesting prototype. Here’s John with the details.
The Chicago & Illinois Midland Railway was a fascinating 100-mile, heavyweight coal-hauling railroad located in central Illinois. The railroad was assembled in 1905 by industrial giant Commonwealth Edison and was famous for operating long coal drags and overhead freight with second-hand steam engines from NYC, ACL and, DL&W through 1955.
The company collapsed financially after the passage of the Clean Air Act and the opening of the Powder River Basin. It was eventually sold in 1987 to private investors. Today, the road is thriving under new owners Genesee & Western, who operates the old C&IM lines under the name Illinois & Midland Railroad.
Recommended reading is Chicago & Illinois Midland Railway by Wallin, Stringham and Szwaikart (out of print), and Chicago & Illinois Midland Railway by Crawford and Lewnard, published by Morning Sun.
Building the Model
During the steam and transition era, C&IM moved coal in hopper cars and 100-ton flat-bottom gondolas. The road also moved coal in USRA-type drop-bottom gondolas that arrived on the railroad in the 1920s. In 1950, my modeling period, approximately 75 of these cars were still in service in the 5006-5494 number series. This article describes construction of a HO scale model of one of the 5000-series USRA-type gondolas.
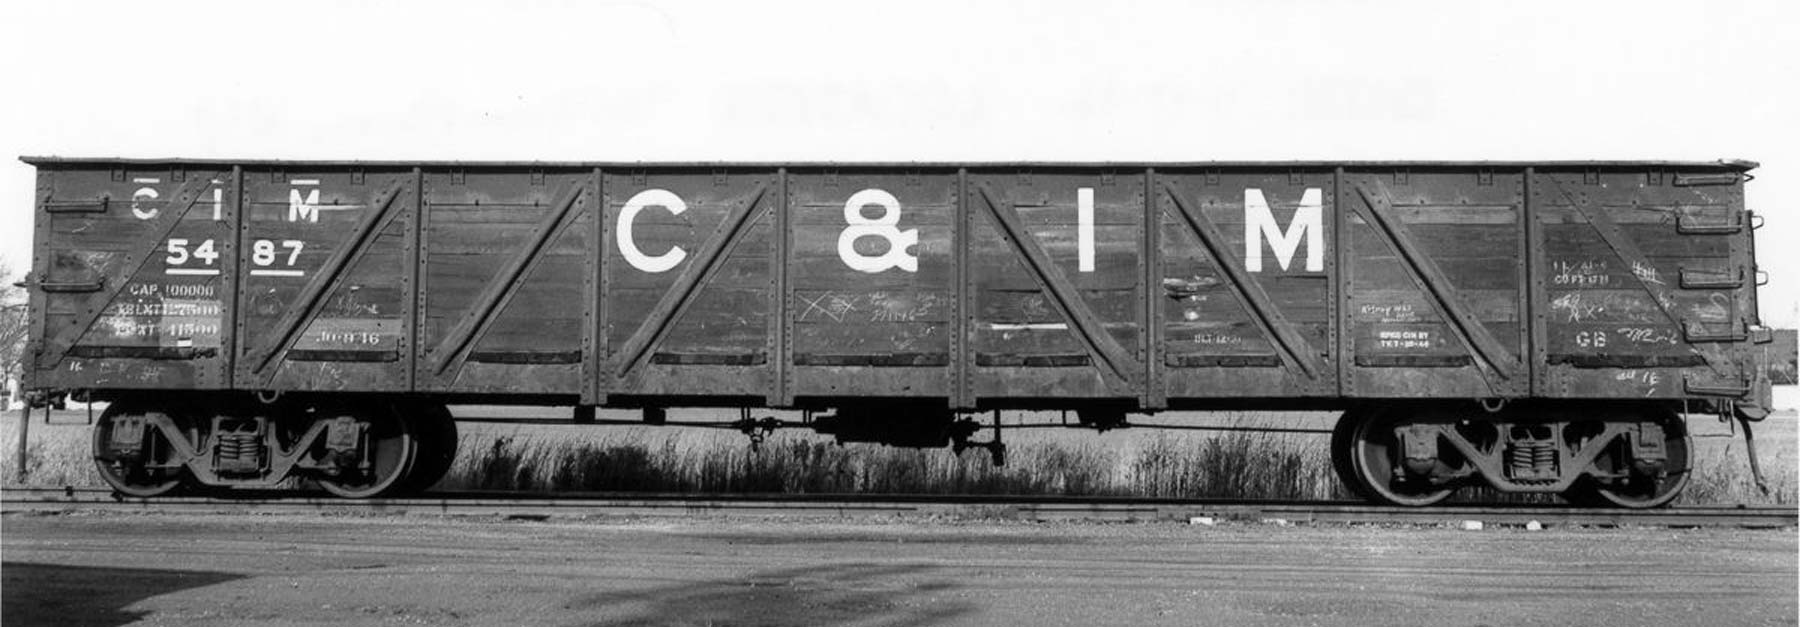
Caption: Williamston, NY, 17 Nov 1946
The gold standard for HO scale USRA-type gondola models is Ted Culotta’s Litchfield and Madison car built for his 2018 St. Louis Railroad Prototype Modeler’s Meet presentation. The model was exquisitely researched and finished. A photo of the model is below. You can read more about the prototype and how Ted built the model on his blog.
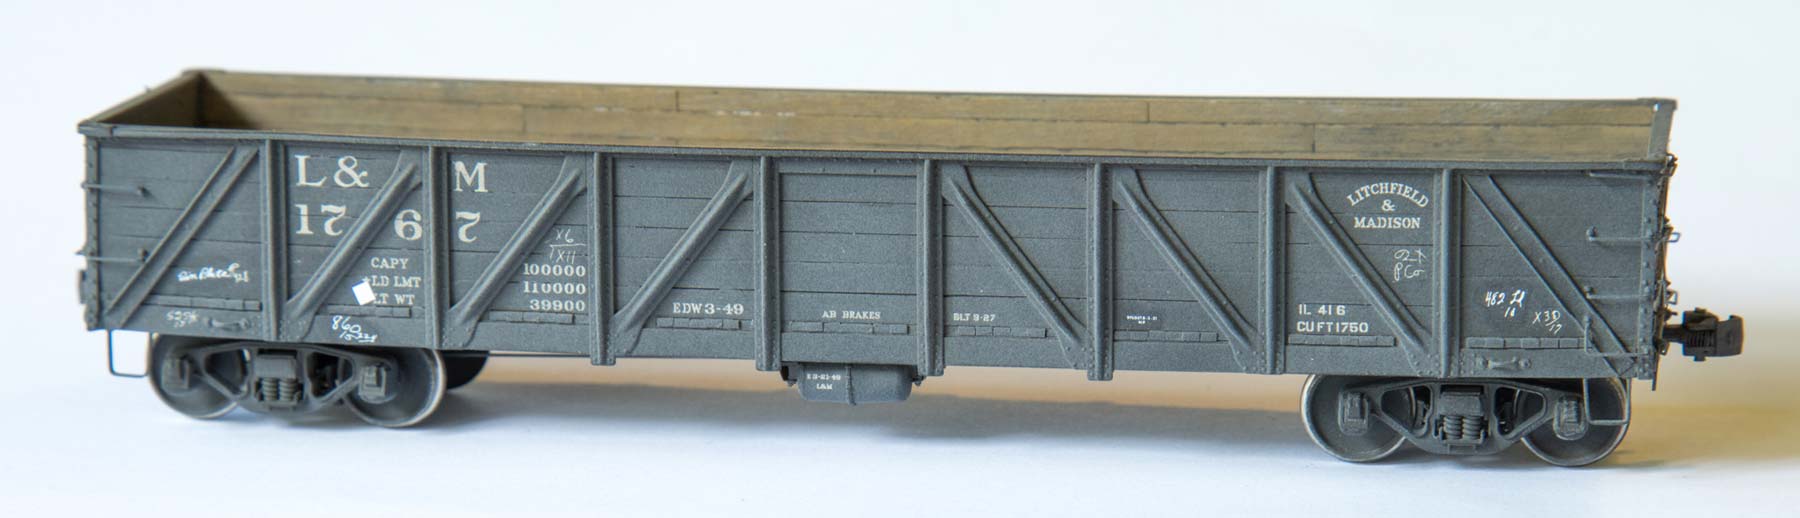
Model and photo by Ted Culotta
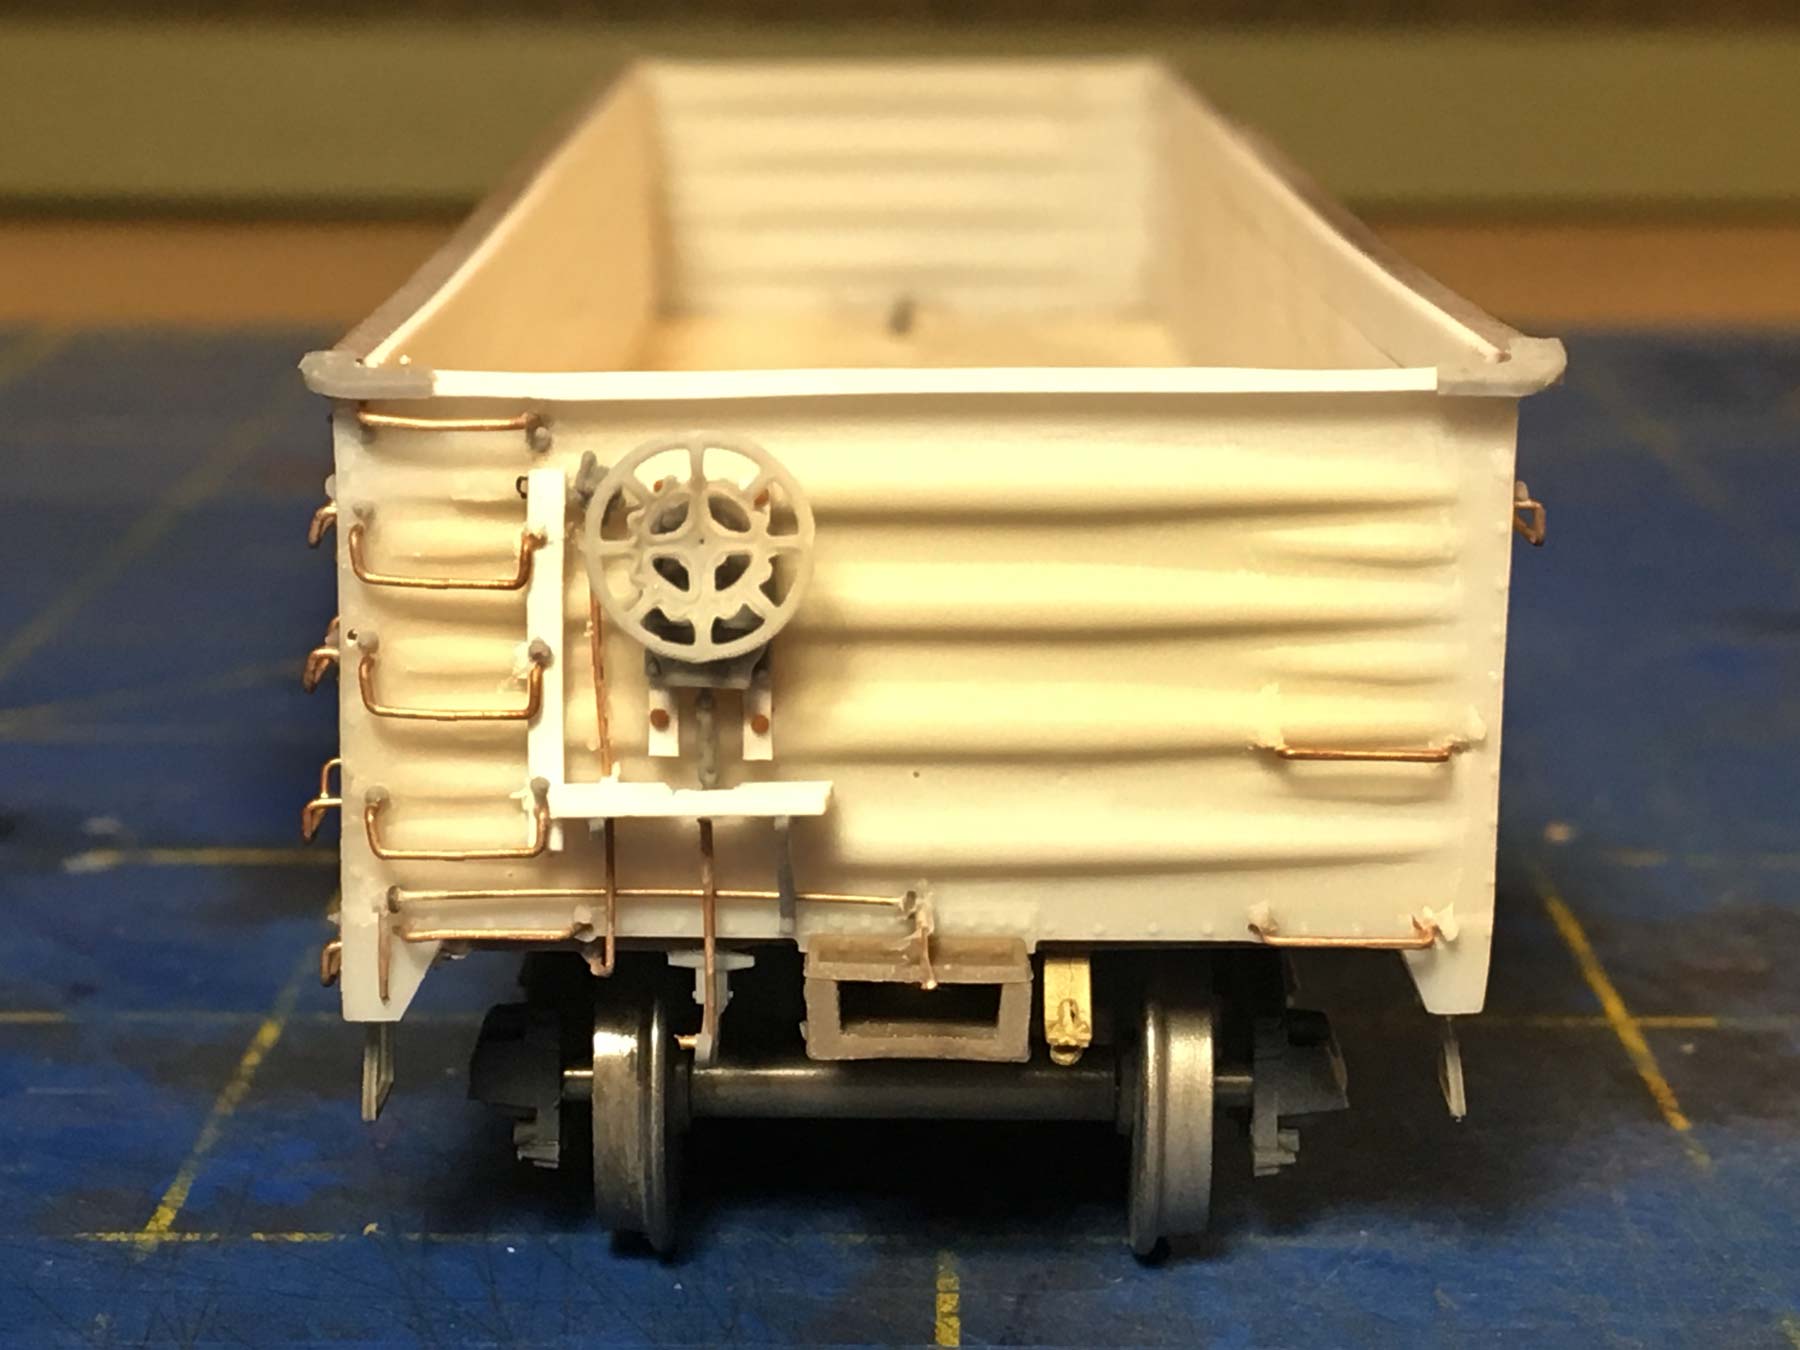
Like Ted’s L&M model, I used the Intermountain HO scale USRA gondola as the starting point for my C&IM car. The most significant work required to change the USRA standard car to a C&IM car is to change the ends. The Intermountain model is equipped with Murphy ends, but the C&IM had stamped Dreadnaught steel ends. Replacement resin-cast ends and decals for the project were provided privately by a friend who also happens to be a C&IM modeler.
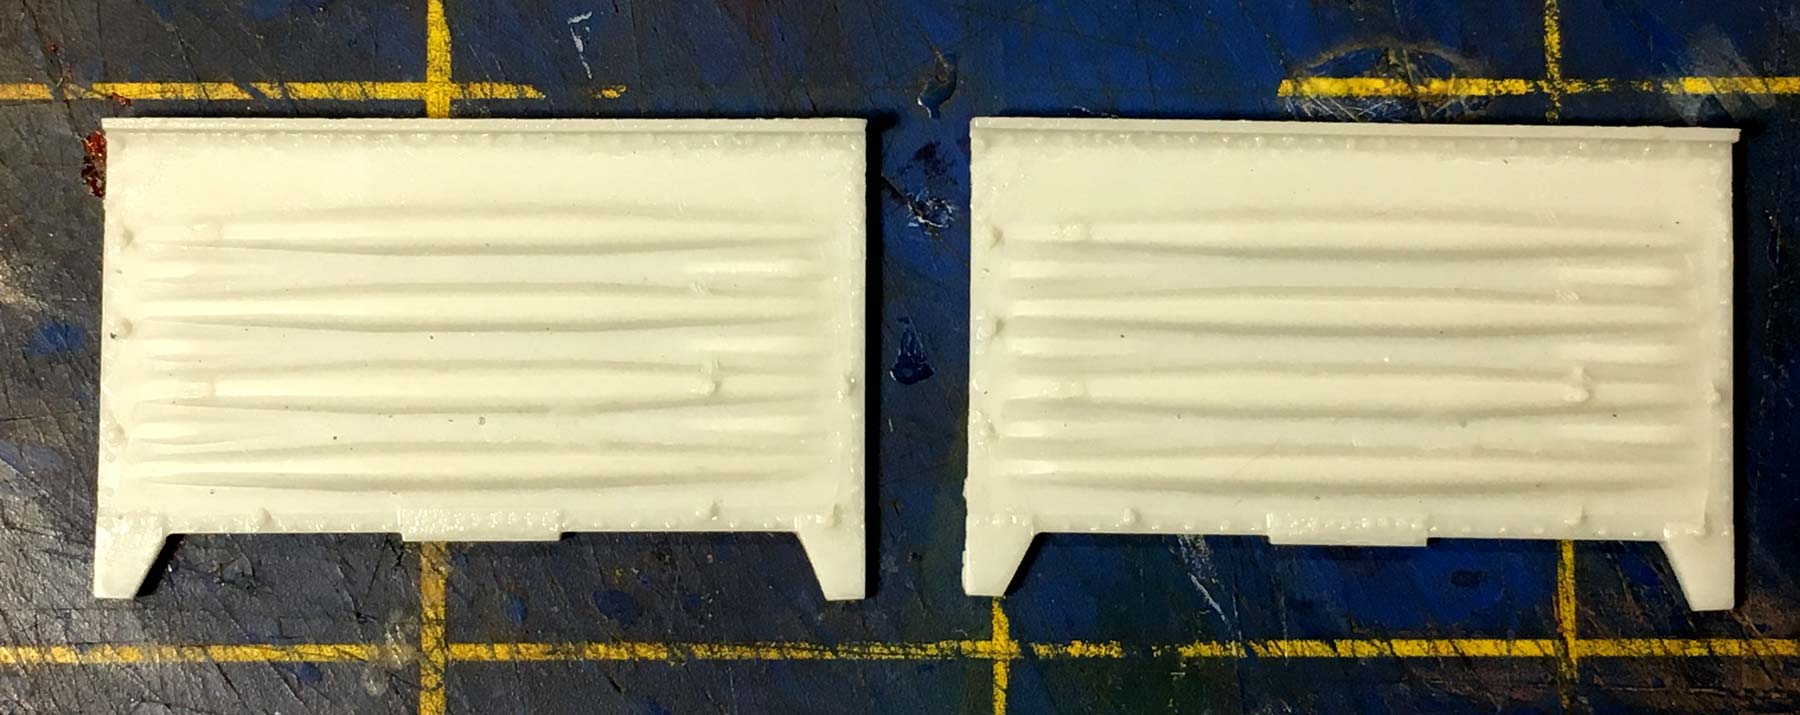
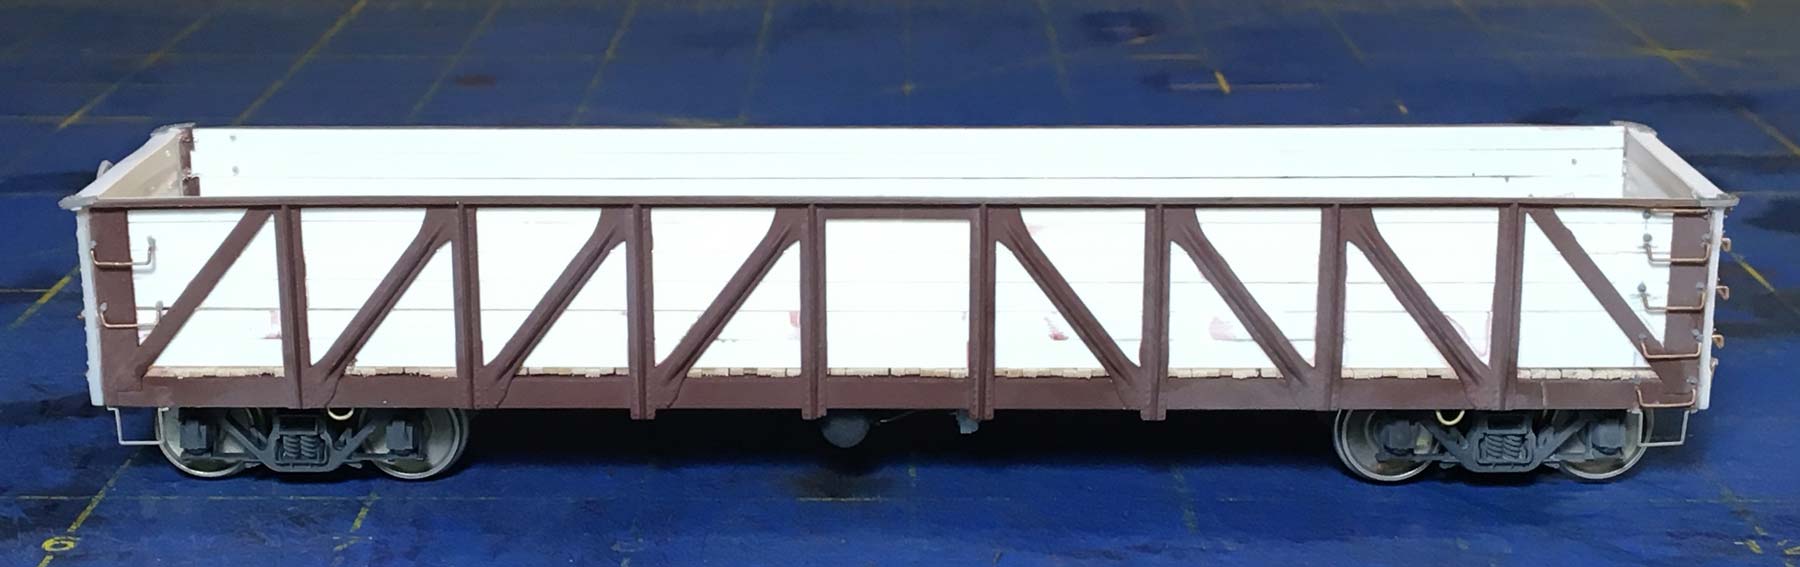
I began work using a built-up, ready-to-run model, but destroyed it attempting to remove the factory-applied sides and ends. I found and ordered an undecorated replacement kit on eBay and was able to easily remove the ends without damaging the rest of the model. I easily fixed the replacement ends but discovered they were about nine inches too tall, so after securing them into position at the bottom sill I sanded off the top chord and added a replacement top chord using Evergreen 0.020-inch strip styrene.
A new floor installation was next. Following World War II, C&IM rebuilt most of these cars and removed the drop doors and mechanisms. Accordingly, I discarded the steel floor included with the kit and replaced it with a floor made from Mt. Albert Scale Lumber Company HO scale 2×4 boards. Most USRA cars used six-inch-wide boards but I didn’t have them on hand. I cut the scale lumber to fit, varying the width slightly to provide a battered, uneven look.
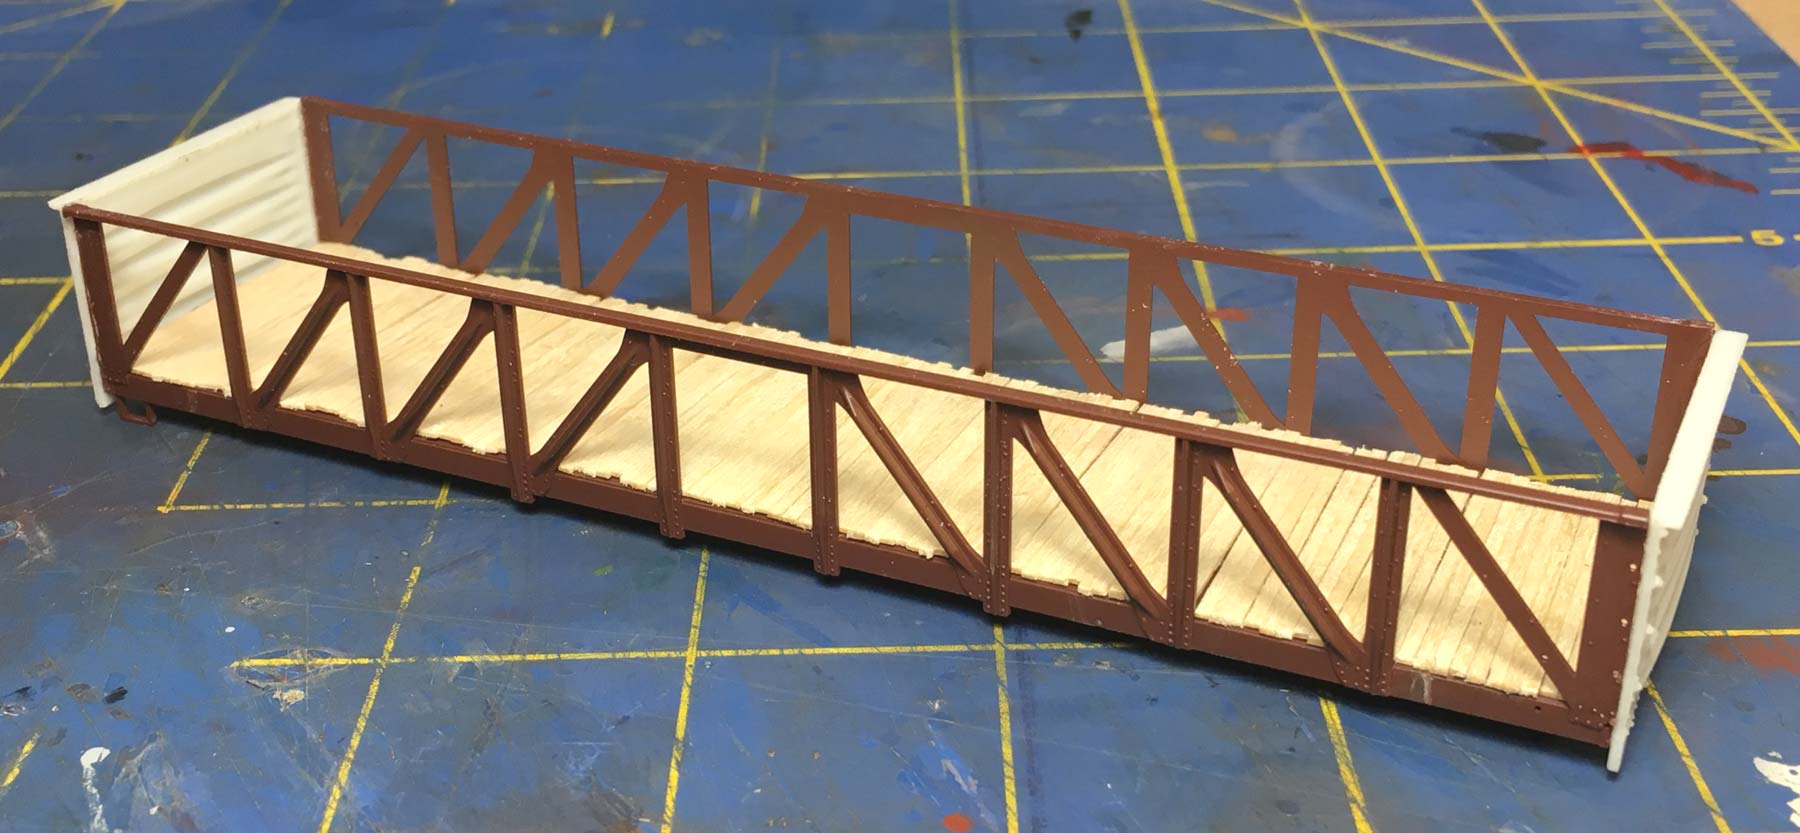
I also replaced the side boards. I discarded the wood sides included with the kit and used Evergreen #125, 0.020 x 0.100-inch styrene strip instead. I cut six boards to fit, lightly scraped them with a wire brush, and installed them from inside the superstructure.

Once the major carbody construction was complete, the fine details were installed starting with the brake gear. Detailed information on gear placement was not available so I consulted Ted Culotta. He didn’t have detailed information for his L&M car either, so I used the few available C&IM photos as my guide. Ted’s blog has a full article on the L&M cars including references to install the major components. Ted and I agreed that the gear would have to be installed in such a manner that it would not interfere with drop doors. I used a Cal Scale #283 AB Brake Gear set and grouped the major components in the center of the car.
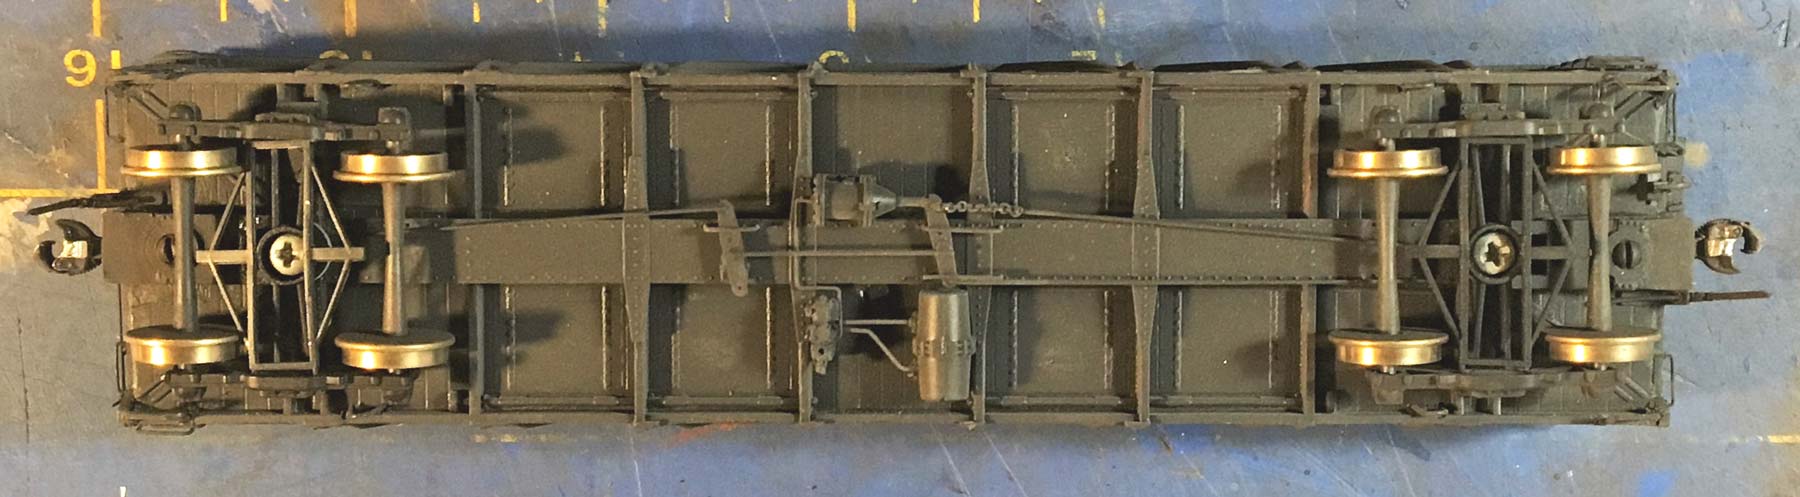
After the brake gear was completely installed I added all the remaining detail parts, including Yarmouth Model Works sill steps and eye bolts (for uncoupling devices), Evergreen styrene strip for end ladder stiles, Precision Scale angle cock brackets, an Intermountain Ajax brake wheel, and Smokey Mountain Model Works draft gear pockets. I used Detail Associates nut-bolt-washer castings to represent the grab iron attachments. I also used several Tichy parts including 18-inch drop grabs, straight grabs, corner gussets, 0.015-inch rivets, and Ajax brake gear housing and hardware. I also fashioned uncoupling devices and towing hooks from 0.015-inch wire.
Finally, I sandblasted the model in my old North Coast sandblasting booth to prep it for painting. After sandblasting I washed the model with warm, soapy water and set it aside for a week to dry thoroughly.
Applying Decals and Finishing the Model
I airbrushed the entire model, including trucks and wheelsets, with Testors Gloss Black, thinned to 50%. Testors isn’t my paint of choice for this kind of project but lacquer is difficult to get in Germany, so I used what I had on hand.
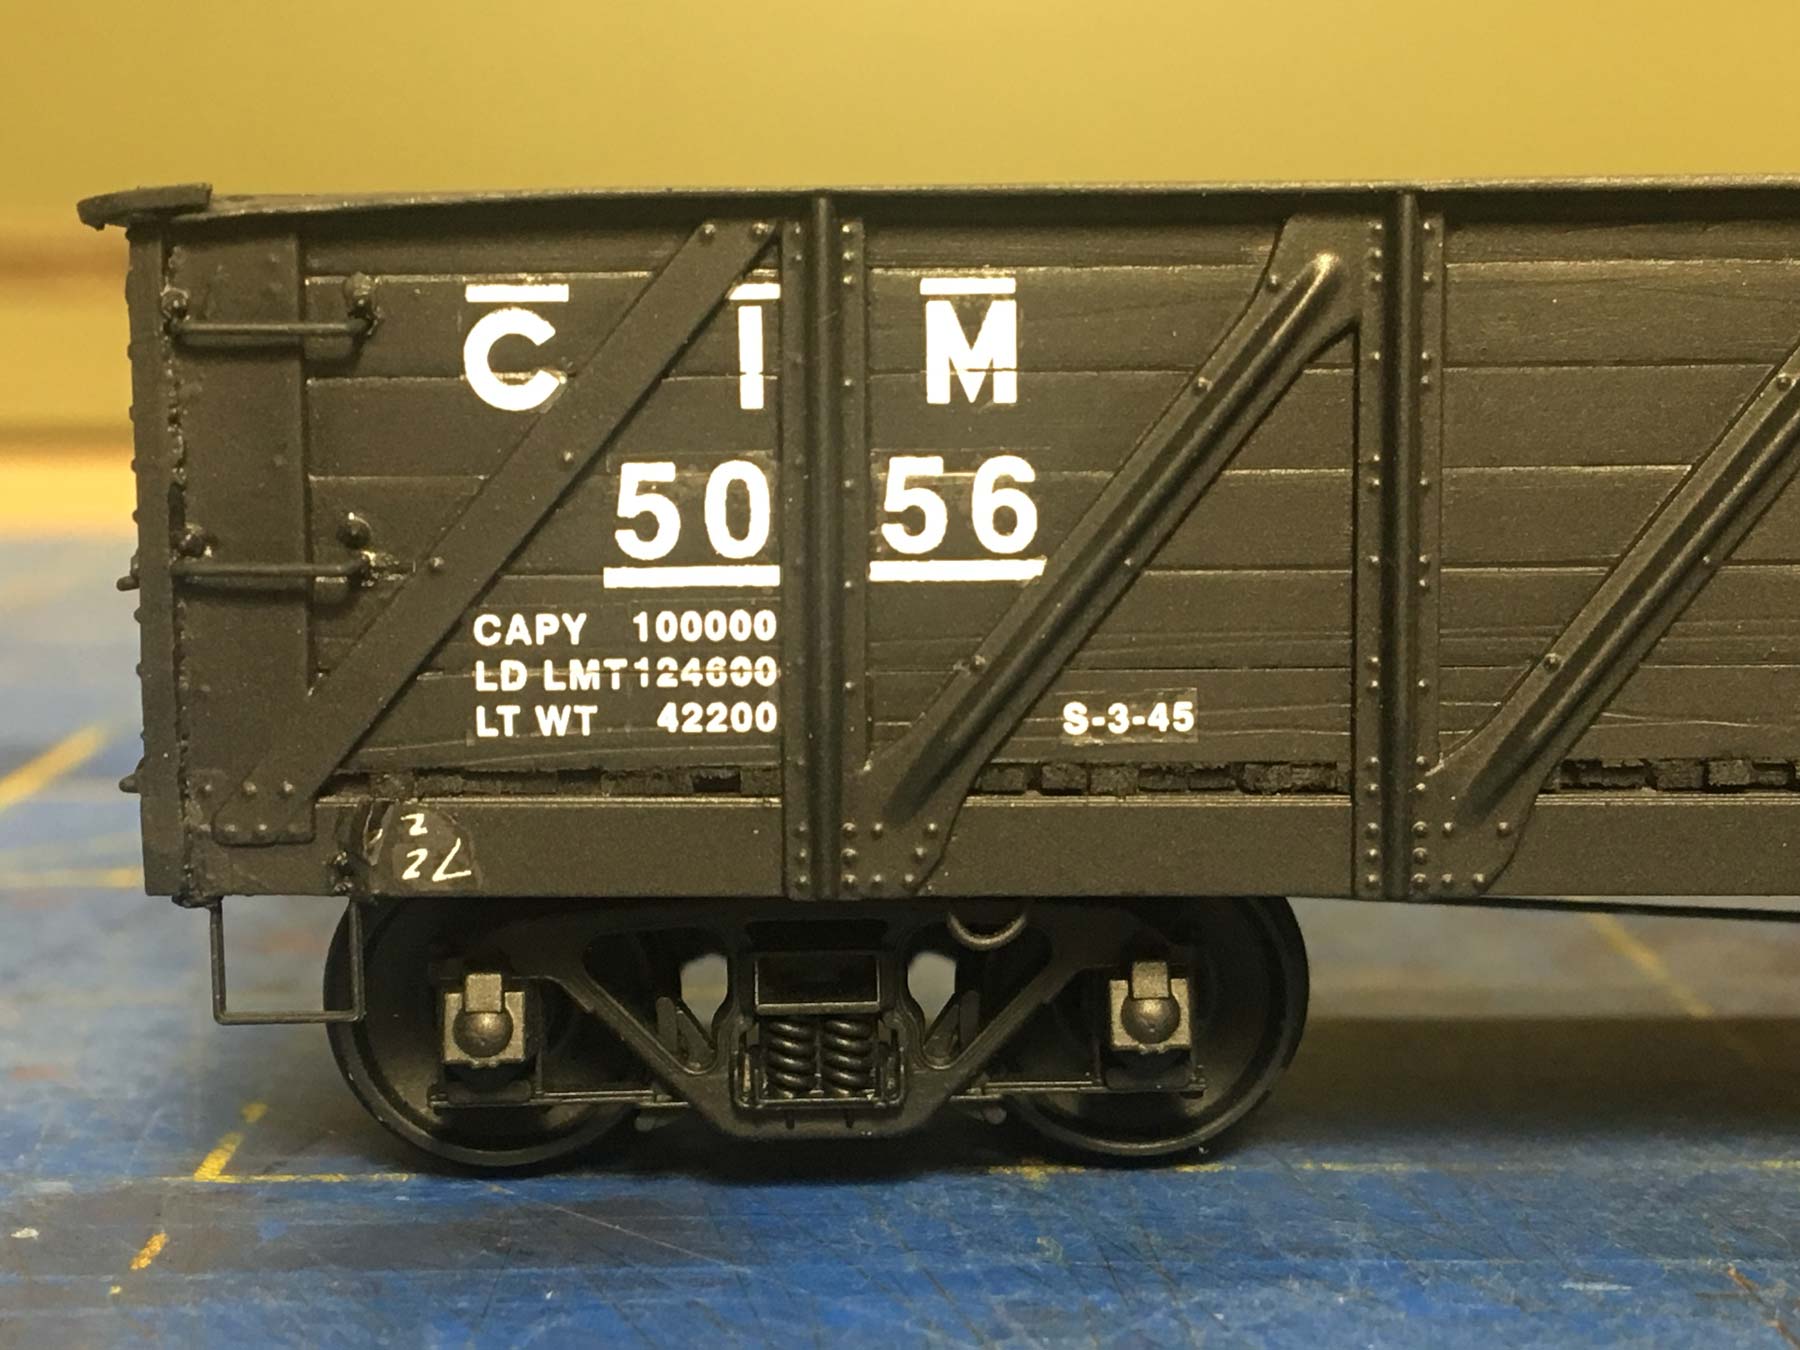
When the paint was dry, I applied an old, out of production Wabash Custom Decals set that I have had for a number of years. The decals were quite thick, and I had difficulty getting them to settle on the car sides even with repeated applications of Microscale decal solvents. Champ and Testors decal solvents are stronger but I didn’t have any on hand. An additional issue is the simulated steel strap and bracing on the car sides is unprototypically thick, and I had difficulty laying decals over these thick parts without distortion. I had the most trouble applying the large C&IM lettering, especially the large M. The thickness of the decals only compounded the problem. I had to cut some of the large letters and apply them in pieces, and filled in the gaps with white paint.

Another issue I encountered with the decal set is that the number jumbles don’t include a suitable 0 (zero). The zeroes in the decal set appear to be represented by the letter O. After applying the reporting marks on one car side I removed the numbers and replaced them with numbers from an old Sunshine ACL box car decal set I had in my decal box. The ACL numbers look better but still aren’t quite prototypically correct. I also added a few Sunshine chalk marks I had in the scrap box.
When decaling was complete, I washed the model again with warm soapy water and set it aside to dry completely. Unfortunately, when the decals were dry, I noticed a little bit of “silvering”. Silvering occurs when humid air becomes trapped underneath a dry decal, giving clear parts of the decal a silver cast. Silvering occurs most often when applying decals to a non-glossy surface, and often when using decals that are thick or heavy. I poked a few holes in the decals and reapplied some decal set, but the silver cast remained on some of the large letters and chalk mark decals.
Two finish coats were applied to complete the model. First, I airbrushed the model with a clear protective coat consisting of 40% Testors Dullcote, 40% Testors Glosscote, and 20% thinner. When this was dry, I applied some hand-written chalk marks with a white Prismacolor pencil.
Then I applied a second finish coat which I call a “softcoat”. The softcoat is the same as the finish coat referenced above with four or five drops of the basic carbody color added. In this case I added a couple of drops of satin black to the dullcote solution and lightly airbrushed it over the entire model. The softcoat blends all the colors together and softens any additional imperfections in paint, decals, and other finishes. The softcoat also tends to provide a very light aging effect.
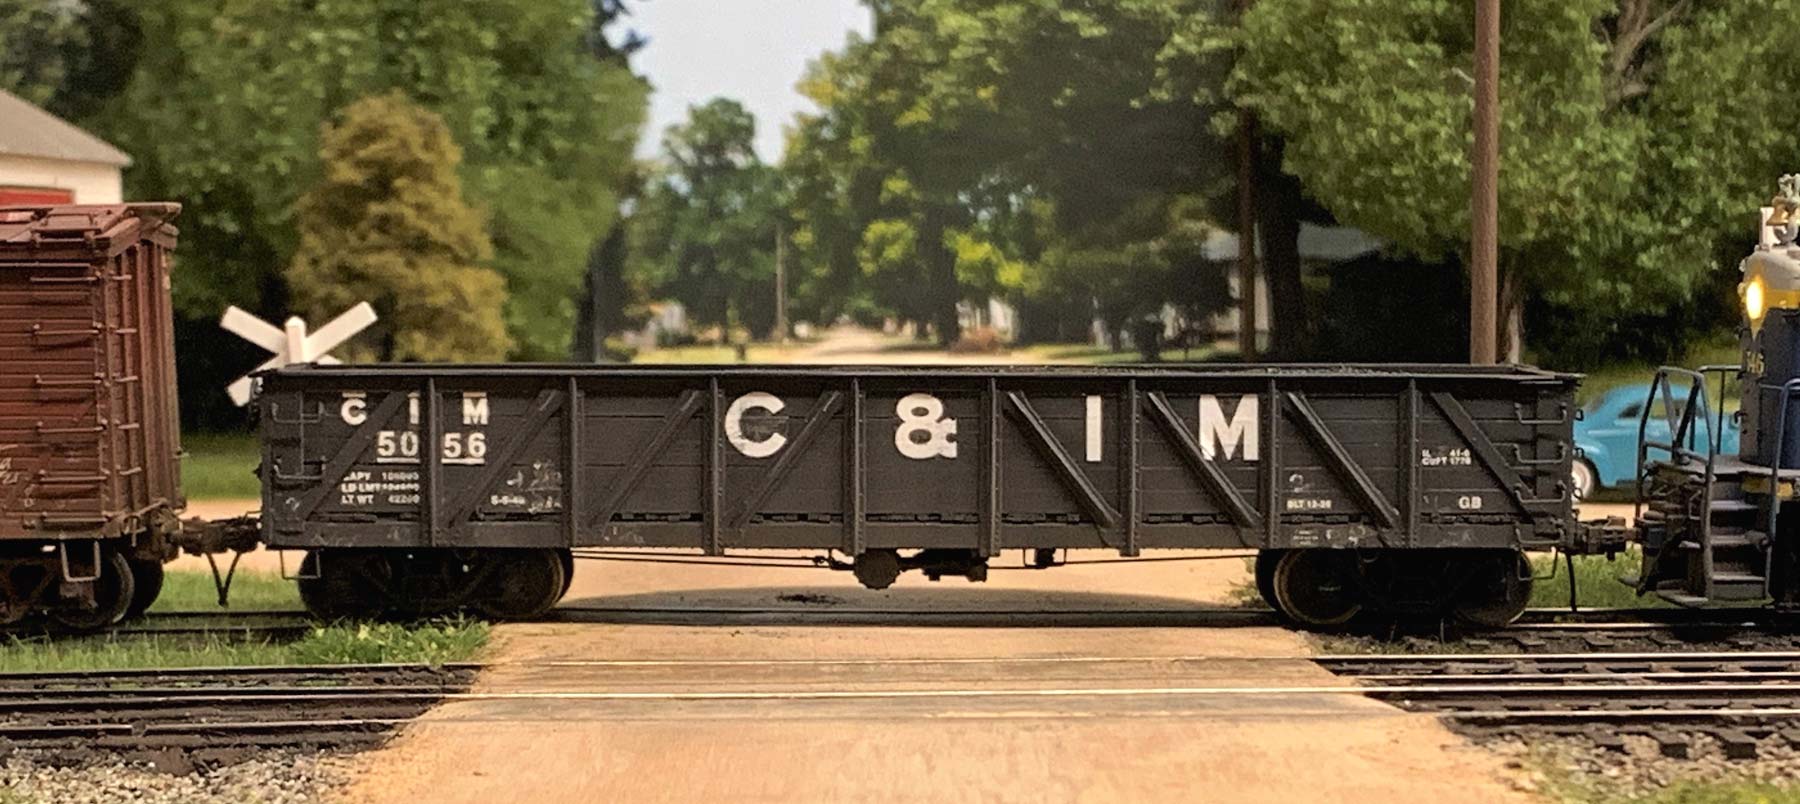
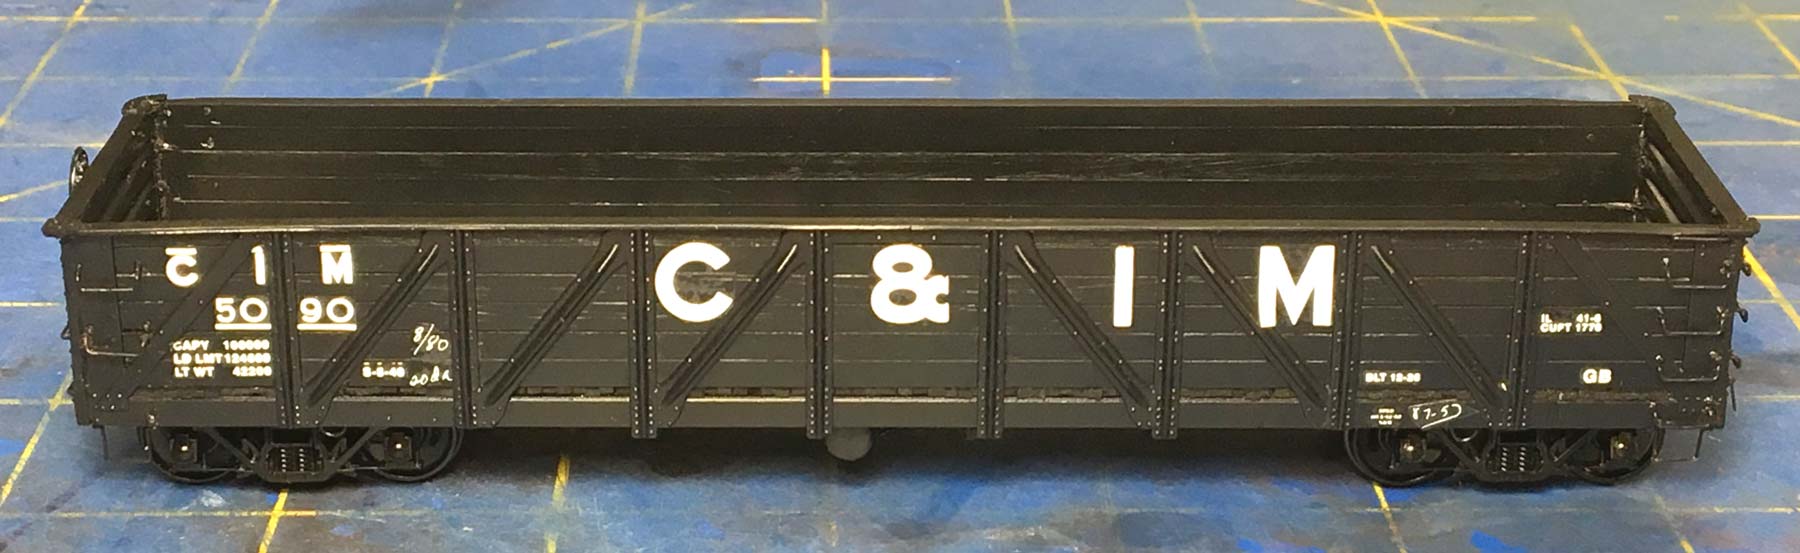
The closeup below shows the model after softcoat and highlighting. A little bit of silvering is still present, but more importantly we now have zeroes!
Finally, I sprayed the car lightly with Testors Russian Earth Brown and then used a technique called “highlighting” made popular by master model maker Francois Verlinden. I dipped a flat brush slightly into flat black paint and then wiped almost all the paint off, and then lightly stroked the car completely from bottom to top and side to side. With light, even strokes, the rivets, corners, and other stand-out details will pick up the color but not the flat surfaces—providing a “highlight”. Generally, I use lighter colors to highlight dark-colored models and dark colors to highlight light-colored models. Highlighting makes the details really stand out without discoloring the rest of the model. I highlighted the entire car, including the interior, trucks, couplers, and all the underframe components.
Once the weathering was complete, I fixed Tahoe Model Works Andrews trucks with semi-scale wheelsets to the model, and then applied the final detail parts, including Hi-Tech Details 18-inch air hoses and Kadee #78 semi-scale couplers. The wheelsets were polished using a Dremel motor tool with a soft wire brush. I tested the coupler height and truck swing, applied a little Kadee graphite lubricant to the coupler box, and gave the car a thorough track check to get it ready for operations.
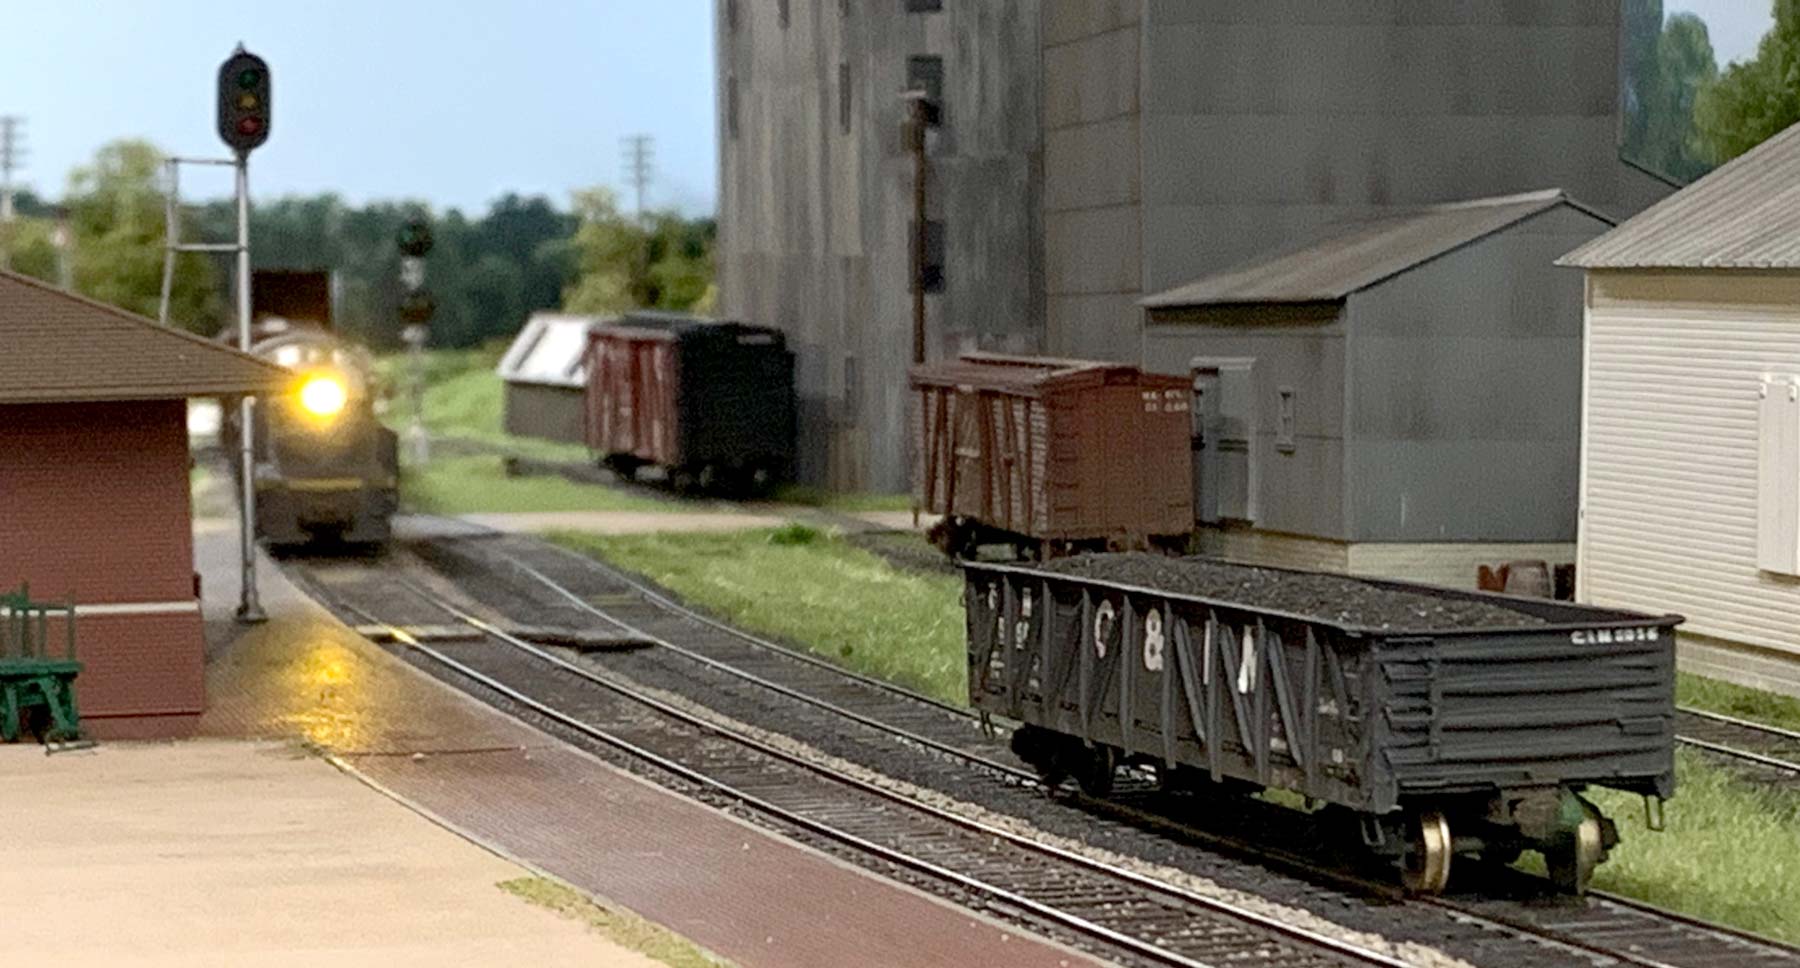
In the last photo, the new car has been set out at Ackley, Iowa, to be spotted by the incoming M&StL local at a nearby coal dealer.
Many thanks to John Golden for sharing his tips and techniques on a fine model build. We hope this inspires you to open a kit and start building something special!
Questions and comments can be posted below. Please follow the instructions so your comment can be posted. All comments are reviewed and approved before they appear. To subscribe to this blog, add your email address to the function at the bottom of the right column on the main page. Share the blog link with other model railroaders.
John an excellent build. The “highlight” technique is a new one for me. I definitely will have to give it a try. Thanks for sharing.
You’ll often see it called dry brushing, and a common method for building up shadows and highlights is to start with a base color, apply a darker shade as a wash, which will settle into the nooks and crannies, and then a lighter shade by dry brushing.
That basic approach is used by fantasy miniature painters extensively. I’ve seen it used on military models as well, but less frequently on railroad models. But it really makes the details “pop.”
Inspiring a very nice kit.
A couple additions & corrections to John’s fine write up. The C&IM’s second hand locomotives also included 10 Wabash 2-10-2’s, one of which was purchased for parts. The current operator of the C&IM/I&M is Genesee & Wyoming.
Nicely done John. Your car turned out great. I enjoyed reading your construction methods and tips. Now I need to get my kit out I received from Ted’s Collinsville clinic and get it built up.
Thanks for posting
Really interesting prototype and model, well done John. I believe the Dreadnaught ends from Accurail’s AAR Gon kit will also fit the IM kit, albeit with some mods. I could not find the 0.015-inch rivets on Tichy’s website. Hopefully someone will do a newer set of decals.